Table of Contents
Advertisement
Advertisement
Table of Contents

Related Manuals for Roland TR-08


Summary of Contents for Roland TR-08
- Page 1 Roland TR-08 A User’s Guide To The Roland TR-08 Rhythm Composer...
-
Page 3: Acknowledgements
So many people have read and re and shall always be free of charge to the read a manual only to still have no reader, and user of the Roland TR-08 idea what the manual was attempting Rhythm Composer, and must never be to suggest. -
Page 4: Table Of Contents
Table of Contents 2 1 Acknowledgements ……………………………………………………. 3 3 Front and Back Panel Layout ………………………………………… 5 4 Basic Connections …………………………………………………….. 6 5 Introductions …………………………………………………………… 7 6 Controls and the Common Section ……..……………………………. 8 7 Rhythm Patterns …………………………………..…………………… 14 8 Rhythm Tracks ………………………………………………………….. 21 9 Menu Mode ……………………………………………………………... -
Page 5: Front And Back Panel Layout
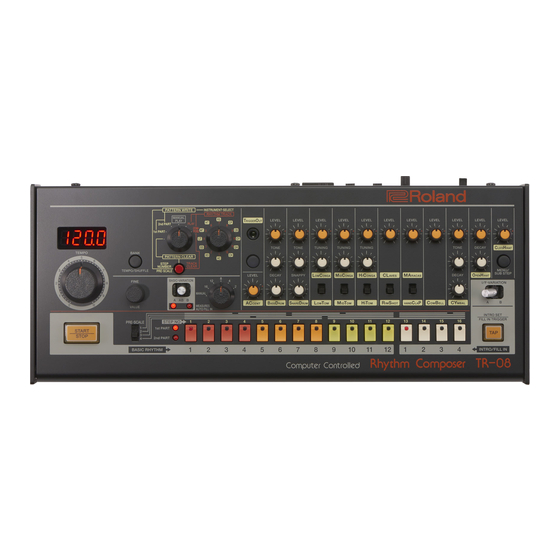
Front and Back Panel Layout... -
Page 6: Basic Connections
Basic Connections 4 ... -
Page 7: Introductions
TR-808 it, and even been the subject of a • Hands-on control including Not only does the TR-08 look and sound feature-length documentary film. tone, level, tuning, and decay the part, but it also has some modern •... - Page 8 General Functions 6 The common section of the TR-09 options, automatic shut off timing, Common Section Rhythm Composer includes everything access to the LED demo settings, a you need to program and play rhythm choice of programming modes, USB patterns, pattern chains, tracks, and audio/midi output assignments, output also access to the system and internal assignment for the physical 3.5mm...
- Page 9 to switch to the decimal point display. Turning this knob while holding down the [BANK] button adjusts the amount of shuffle (rhythmic bounce). Mode switch/ PATTERN CLEAR This mode lets you clear a rhythm Select switch/ pattern. CLEAR button PATTERN WRITE 1st PART This mode lets you write to the 1st part.
- Page 10 Here you can adjust the character of INST edit section each instrument. You can use 11 different instruments (BD–CH) in a pattern. LEVEL knob Adjusts the volume of the instrument. TONE knob In the case of the bass drum and snare drum, this adjusts the tension of the head.
-
Page 11: Rhythm Pattern
[MENU/SUB STEP] button and pressing a [1]–[16] button. The recorded performance data is Playing/ called a “rhythm pattern.” The TR-08 has 256 rhythm patterns, Recording a and two variations (A and B) for each Rhythm Pattern rhythm pattern. Playing a Rhythm Selecting PATTERN PLAY mode ... - Page 12 Playing a rhythm pattern 4. Press the [START/STOP] button. The STEP NO indicators light successively from left to right. 5. Use the [LEVEL] knob of each instrument to adjust the volume balance, and use the rear panel [VOLUME] knob to adjust the overall volume.
- Page 13 5. Press the [TAP] button when you want to insert a fill-in. If the first beat is playing, the fill-in is inserted starting at the second beat; if the second or subsequent beat is playing, the fill-in is inserted starting at the next measure.
-
Page 14: Rhythm Patterns
(PRE-SCALE). The Clear operation automatically sets this to 16 steps. On the TR-08, one measure is divided into subdivisions that are assigned to the STEP NO [1]–[16] buttons, allowing you to write them. These divisions are called steps. - Page 15 5. Set the mode switch to “PATTERN WRITE 1st PART.” 6. Press the [START/STOP] button. 7. Set the [PRE-SCALE] switch to the desired position. PRE SCALE For each setting, the indication (scale) One beat = 3 steps on the panel shows the number of One beat = 6 steps steps in one beat.
- Page 16 11. To write the steps for another instrument or for the accent, repeat steps 9–10 to write the rhythm pattern. 12. When you’ve finished writing the rhythm pattern, press the [START/ STOP] button. Watching the [1]–[16] buttons The [1]–[16] buttons are arranged in the order in which playback time flows (from left to right). ...
- Page 17 After writing, playing these two measures in succession results in the performance shown in the notation above. Recording with the 1st part and 2nd 1. Start by clearing the position. part & “Selecting a position and clearing it” 2.
- Page 18 13. When you’ve finished writing each instrument, press the [START/STOP] button. Using the 2nd part The Clear operation clears both the 1st part and the 2nd part (at this time, the 1st part is set to 16 steps and the 2nd part is set to 0 steps). ...
- Page 19 5. Use the select switch to choose the instrument that you want to use as a metronome (for example, RS: Rim Shot). 6. Press the STEP NO [1]–[16] button that will start the beat (Sounding the Metronome step). 7.
- Page 20 OUT] buttons, and use [2]–[12] to select the instrument that you want to solo. Copying a Pattern * Continue holding down the [TAP] 1. Set the mode switch to either button during the copy operation. “1stPart” or “2ndPart.” The operation is cancelled if you release the [TAP] button.
-
Page 21: Rhythm Tracks
Recording or Playing a Rhythm Track You can compose (assemble) a rhythm track by successively switching between rhythm patterns during About composing playback A track does not store the actual rhythm patterns that are played. Instead, it contains the rhythm select About memory (storage) switch numbers (basic rhythm, intro/ fill-in) that are written in the rhythm... - Page 22 [START/STOP] button before that measure ends. The rhythm stops. Even if the notes are interrupted, they have been stored to the end of the measure. The measure at which you pressed the [START/STOP] button will be the last measure. Editing a portion (measure) of a 1.
- Page 23 button, and select the ending measure of the copy-source. Use the [1]–[10] buttons or the [VALUE] knob to make the selection. Press the [16] button to select the last measure. (Continuing to hold down the [TAP] button) Press the [START/STOP] button to execute the copy operation.
- Page 24 Press one of the [1]–[10] buttons or turn the [FINE] (VALUE) knob to select the last measure that will be deleted. Press the [16] button to move the measure to the last measure. 3. (Continuing to hold down the [TAP] button) Press the [START/STOP] button to execute the delete operation.
-
Page 25: Menu Mode
IN connector or the USB port, the AUTO TR-08’s tempo will automatically synchronize to MIDI clock (Auto). The TR-08 operates at the tempo specified on the unit itself. Choose the “INTERNAL” setting if you don’t want to synchronize to an external device... - Page 26 A.OFF The power does not turn off (AUTO OFF) OFF automatically. The power turns off automatically after 30 minutes. * Auto Off does not occur while USB-connected. DENO Specifies the time until the unit enters (LED DEMO) OFF,1,2,10 LED demo mode. PrGN Lets you record using the same (COMPOSE MODE)
- Page 27 4. Use the [VALUE] knob to edit the value. 5. When you’ve finished making settings, press the [MENU] button to exit MENU. Changing the Tempo 1. Turn the [TEMPO] knob. * Pressing the [BANK/TEMPO/ SHUFFLE] button switches to the fine tempo setting.
- Page 28 2. Press the [TAP] button to execute the factory reset. 3. When all buttons blink, turn the TR-08’s power off, then on again. Data Backup/Restore Backup 1. Connect your computer to the TR-08’s USB port via USB cable.
- Page 29 Restore 1. As described in the procedure for “Backup” Step 1–3, open the “TR-08” drive on your computer. 2. Copy the TR-08 backup files into the “RESTORE” folder of the “TR-08” drive. 3. After copying is completed, eject the USB drive and then press the [TAP] button.
-
Page 32: Pattern Memo
Pattern Memo...