Table of Contents
Advertisement
Your blower/vacuum has been engineered and manufactured to Ryobi's high standard for dependability, ease of opera-
tion, and operator safety. When properly cared for, it will give you years of rugged, trouble-free performance.
WARNING:
To reduce the risk of injury, the user must read and understand the operator's manual before using
this product.
Thank you for buying a Ryobi product.
SAVE THIS MANUAL FOR FUTURE REFERENCE
OPERATOR'S MANUAL
BLOWER / VACUUM
RY08510
Advertisement
Table of Contents

Related Manuals for Ryobi RY08510


Summary of Contents for Ryobi RY08510
- Page 1 Your blower/vacuum has been engineered and manufactured to Ryobi’s high standard for dependability, ease of opera- tion, and operator safety. When properly cared for, it will give you years of rugged, trouble-free performance. WARNING: To reduce the risk of injury, the user must read and understand the operator's manual before using this product.
-
Page 2: Table Of Contents
TABLE OF CONTENTS n Introduction ... 2 n General Safety Rules ... 3 n Specific Safety Rules... 4 n Symbols...5-6 n Features...7-8 n Assembly ...9-10 n Operation...11-14 n Maintenance ...14-15 n Accessories ... 16 n Troubleshooting ... 16 n Warranty ... 17-19 n Parts Ordering / Service ... -
Page 3: General Safety Rules
Check with the federal, state, or local authorities in your area. n Before storing, allow the engine to cool. n Use only Ryobi replacement parts and accessories. Fail- ure to do so may cause poor performance or possible injury. -
Page 4: Specific Safety Rules
Always hold the blower in your right hand. Refer to the Operation Instructions later in this manual for additional information. n To reduce the risk of hearing loss associated with sound level(s), hearing protection is required. n To reduce the risk of injury associated with contacting rotating parts, stop the engine before installing or removing attachments. -
Page 5: Symbols
Some of the following symbols may be used on this tool. Please study them and learn their meaning. Proper interpreta- tion of these symbols will allow you to operate the tool better and safer. SYMBOL Safety Alert Symbol Read the Operator’s Manual Eye and Hearing Protection Vacuum Door Long Hair... -
Page 6: Save These Instructions
The following signal words and meanings are intended to explain the levels of risk associated with this product. SYMBOL SIGNAL DANGER: WARNING: CAUTION: CAUTION: SERVICE Servicing requires extreme care and knowledge and should be performed only by a qualified service technician. For service we suggest you return the product to your nearest AUTHORIZED SERVICE CENTER for repair. -
Page 7: Features
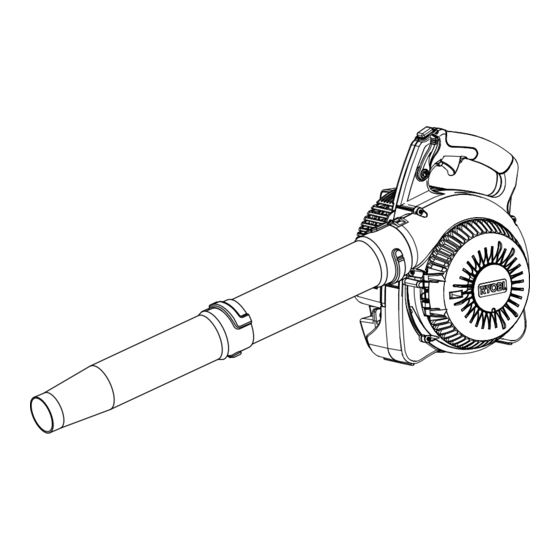
PRODUCT SPECIFICATIONS Weight ... 10.4 lbs. Engine displacement ... 25.4cc Air Velocity: MPH ...205 CFM ...420 LOWER VACUUM TUBE VACUUM TUBE SCREW FEATURES VACUUM BAG SHOULDER STRAP UPPER VACUUM TUBE VACUUM BAG UPPER HANDLE STARTER GRIP AIR CLEANER KNOB PRIMER BULB VACUUM HANDLE CHOKE LEVER Fig. - Page 8 The blower has a powerful 25.4cc engine with sufficient power to handle tough blowing and vacuuming jobs. THROTTLE TRIGGER The blower can be operated at any speed between idle and full throttle. CRUISE CONTROL / THROTTLE LOCK The Cruise Control (throttle lock) feature allows the user to operate the blower without holding the throttle trigger.
-
Page 9: Assembly
Check tightness after initial run and retighten if needed. n To remove the tubes, rotate the tubes to unlock them and remove from the blower housing outlet. ASSEMBLY INSTALLING THE VACUUM HANDLE See Figure 3. - Page 10 INSTALLING THE VACUUM BAG See Figures 4 - 5. n Remove the nozzle and upper blower tube from the blower. n Unzip the vacuum bag and place the adaptor inside as shown. n Align the raised slots on the bag adaptor with the raised locking tabs on the blower housing outlet;...
-
Page 11: Operation
WARNING: Do not allow familiarity with tools to make you care- less. Remember that a careless fraction of a second is sufficient to inflict serious injury. WARNING: Always wear safety goggles or safety glasses with side shields when operating power tools. Failure to do so could result in objects being thrown into your eyes resulting in possible serious injury. -
Page 12: Operating The Blower
OPERATING THE BLOWER See Figures 10 - 11. n Start the blower. Refer to “Starting and Stopping” earlier in this manual. Hold the blower with the upper handle in your right hand. n To keep from scattering debris, blow around the outer edges of a debris pile. - Page 13 Watch out for children, pets, open windows, or freshly washed cars, and blow debris safely away. n Use the full blower nozzle extension so the air stream can work close to the ground. n After using blowers or other equipment, CLEAN UP! Dispose of debris in trash receptacles.
-
Page 14: Maintenance
Only the parts shown on the parts list are intended to be repaired or replaced by the customer. All other parts should be replaced at a Ryobi Authorized Service Center. Fig. 13... - Page 15 Drain all fuel from the tank into a container approved for gasoline. Run engine until it stops. n Clean all foreign material from the blower. Store it in a well-ventilated place that is inaccessible to children. Keep away from corrosive agents such as garden chemicals and de-icing salts.
-
Page 16: Accessories
The following recommended accessories are currently available. ACCESSORIES Air Filter ... Power Care - AP04107 Spark Plug... Champion - RCJ-6Y Fuel Cap ... AP04108 2-Cycle Oil... (2.6 FL. OZ - 76 ml) AR99G01 IF THESE SOLUTIONS DO NOT SOLVE THE PROBLEM, CONTACT YOUR AUTHORIZED SERVICING DEALER. PROBLEM Engine fails to start. -
Page 17: Warranty
Ryobi Technologies, Inc. product. Proof of purchase will be required by the dealer to substantiate any warranty claim. All warranty work must be performed by an authorized Ryobi Technologies, Inc. - Page 18 The non-road engine must be free from defects in materials and workmanship which cause it to fail to conform with U.S. EPA standards for the first two years of engine use from the date of sale to the ultimate purchaser. Ryobi Technologies, Inc. must warrant the emission control system on your non-road or small off-road engine for the period of time listed above provided there has been no abuse, neglect, or improper maintenance of your non-road or small off-road engine.
- Page 19 5 Hours Every 25 Hours or Yearly CALL US FIRST For any questions about operating or maintaining your product, call the Ryobi Your product has been fully tested prior to shipment to ensure your complete satisfaction. Clean Every Replace Every...
-
Page 20: Parts Ordering / Service
Ryobi Authorized Service Center. Be sure to provide all pertinent facts when you call or visit. Please call 1-800-860-4050 for your nearest Ryobi Authorized Service Center. You can also check our web site at www.ryobitools.com for a complete list of Authorized Service Centers.