Russound SMS3 Installation Manual
Smart media server
Hide thumbs
Also See for SMS3:
- User manual (48 pages) ,
- Installation manual (44 pages) ,
- Datasheet (2 pages)
Table of Contents
Advertisement
Advertisement
Table of Contents

Related Manuals for Russound SMS3

Summary of Contents for Russound SMS3
- Page 1 SMS3 Smart Media Server INSTALLATION MANUAL...
-
Page 2: Important Safeguards
(servicing) instructions in the literature accompanying the appliance. If you have any questions please call Russound Inc. at 1-800-638-8055 or 603-659-5170. Safety Instructions: 1. Read Instructions - All the safety and operating instructions should be read before the appliance is operated. - Page 3 This manual Copyright ® 2004 Russound. All rights reserved. This product includes some software components that are licensed under the General Public License (GPL). Source code for GPL components is available upon request. This product includes software developed by GlobeCom GCAB AB. Copyright ® 1999 GlobeCom GCAB AB. All rights reserved.
-
Page 4: Table Of Contents
SMS3 Back Panel...9 Installation Options Ventilation Requirements ...10 SMS3 Installation Quick Look ...10 SMS3 LAN Connection Quick Look ...10 LAN with Cable or Dial-up Modem...11 Video Display ...12 CAV6.6 with Distributed Video Signal ...12-13 CAi with RF Modulated Distributed Video Signal ...14 A-BUS Hub with RF Modulated Distributed Video Signal ...15... - Page 5 Backup...26 Restore ...27 Configure...27 Encoding Format...28 WAV ...28 OGG ...28 MP3 ...29 Remote Control...29 Installer Options Stream Names...30 RNET Source Numbers ...30 Online Update ...31 Network Settings ...32 Before You Go Final Checklist...33 Technical Specifications ...34 Warranty...35 TABLE OF CONTENTS...
-
Page 6: Before You Begin
- to allow the SMS3 to retrieve updated artist/album/track name information from the Gracenote CDDB Music Recognition Service - to allow the SMS3 to retrieve album cover art from MUZE Entertainment Information Service - to connect to and play internet radio streams on the SMS3 Video display device (i.e., TV) wired to the CAV6.6 or connected directly to the SMS3... -
Page 7: Product Introduction
IR connection on the rear panel, in addition to the IR receiver on the front panel. There is one IR connection on the SMS3. You will need an IR link cable (Russound PN 09-0508 or equivalent) for this connection. -
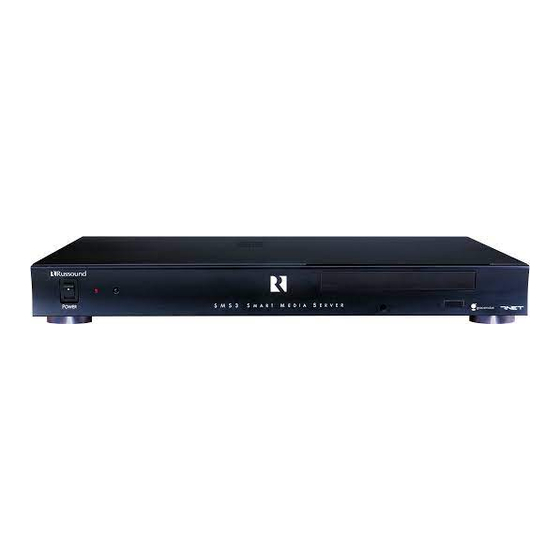
Page 8: Component Guide
MAIN POWER SWITCH - Turns power on and off (toggle up) POWER ON/OFF LED - Indicates power on or off IR RECEIVER - Receives IR signal from SMS3-RC remote control INTERNAL CD DRIVE - Single CD drive for acquiring files... -
Page 9: Sms3 Back Panel
1394 UDIO UTPUTS RNET LINK IN/LINK OUT - Links to other Russound components that are RNET compatible such as the CAV6.6 and CAM6.6 STREAM AUDIO OUTPUTS - Three line level audio signal outputs (RCA Cable) 1394 DATA TRANSFER PORT - Input/output connection for 1394A standard data transfers... -
Page 10: Installation Options
If a thermal shut down occurs, the unit will emit a warbled beep for five seconds, then will power off. If this occurs, do not re-power the SMS3 until sufficient cooling time (at least 10 minutes) has passed. If the unit is powered while temperatures are still above threshold, the SMS3 will repeat the beep and shut down again. -
Page 11: Lan With Cable Or Dial-Up Modem
This diagram shows a typical LAN connection for homes using a Cable or DSL modem to connect to the internet. The SMS3 connects to the router. SMS3 Smart Media Server OWER LINK IR I +12VDC 1394 6A MAX UDIO UTPUTS... -
Page 12: Video Display
SMS3 if necessary. 2. Connect a CAT-5 patch cable from the CAV6.6 RNET Link Out port to the SMS3 RNET Link In port. For non-video distribution systems such as the CAi or A-BUS, an RF modulator and RF distribu- tion amplifier may be used as an alternate means of distributing video to each room in the system. -
Page 13: Cav6.6 With Distributed Video Signal
(2 recommended) Composite Video Cable (1 included) RCA Cable (3 included) CAV6.6 RCA Composite Video Cable and Jumpers RS232 OMPOSITE CRT VGA IDEO IDEO NTERFACE USB 2.0/1.1 ASSEMBLED IN THE USA NEWMARKET, NH SMS3 Media Server Ethernet CAT-5 RJ-45 patch cable... -
Page 14: Cai With Rf Modulated Distributed Video Signal
CAi WITH RF MODULATED DISTRIBUTED VIDEO SIGNAL In multi-source, non-video distribution systems such as the CAi or A-BUS, the SMS3’s three streams are con- figured as three sources. To distribute the video sig- nal, an RF modulator and RF distribution amplifier may be used as an alternate means of distributing video to each room in the system. -
Page 15: A-Bus Hub With Rf Modulated Distributed Video Signal
A-BUS hub’s source inputs. 2. Using an IR link cable (P/N 09-0508), connect the A-BUS hub’s common IR port to the SMS3 IR In port. 3. Using a straight-through Ethernet RJ-45 CAT-5 patch cable, connect from the SMS3 LAN port to an open port on the network router. -
Page 16: Controlling The Sms3
CONTROLLING THE SMS3 SMS3 REMOTE CONTROL Genre Theme Artist EXIT - Backs out of current menu (same as left arrow) MENU RIGHT - Navigates to the right within a menu MENU HOME - Returns to the home page (What’s Playing) -
Page 17: Uno-S2
STOP - Exits any menu SEARCH THEMES - Scrolls through list of themes PAUSE - Pause/unpause audio of active stream DISPLAY - Shows name of song, theme, stream, etc. CONTROLLING THE SMS3 UNO-S2... -
Page 18: Uno-S1
CONTROLLING THE SMS3 UNO-S1 SOURCE SELECT - Select stream to control VOLUME - Adjust volume up/down in room NEXT SONG - Advances to the next song in the theme (press) NEXT THEME - Advances to the next theme in the Themes list (press and hold) -
Page 19: Uno-Lrc1 Remote Control
CONTROLLING THE SMS3 UNO SOURCE BUTTON - Selects UNO keypad for con- trol by UNO-LRC1 LAST - Returns to last theme played on the current stream CHANNEL UP/DOWN - Scrolls through Themes list EXIT - Returns to home page, exits out of any name... -
Page 20: Start Up
POWER UP Attach the external power supply connector to the SMS3’s power jack. Plug the power supply into a powered outlet. To power the SMS3, toggle the front panel power switch up; the red power LED will light up. START UP It will take a few minutes for the SMS3 to complete its boot-up procedure. -
Page 21: Lan Connection
START UP TEST OPERATIONS LAN CONNECTION To check the SMS3 LAN connection using the video display, choose Options & Status from the home page, and select Network from the list of options. This brings up the Network page. NETWORK IP ADDRESS The Network page provides the SMS3’s IP (Internet Protocol) address as assigned by the router. -
Page 22: Test Cd Cataloging Function
TEST OPERATIONS TEST SMS3 CD CATALOGING FUNCTION To test the SMS3’s CD cataloging function, load a music CD into the CD drive and close the drawer. The amber LED on the front panel blinks while the CD is cataloged. Make sure the CD is clean and free of scratches. Dirty or damaged CDs can cause system lockups, which require a reboot of the media server. -
Page 23: Internet Radio Handler
INTERNET RADIO HANDLER INTERNET RADIO HANDLER The SMS3 uses an Internet Radio Handler application to add Internet streams to the SMS3 hard drive via a Windows-based PC interface. For Macintosh computers, a file-sharing procedure is used. Refer to the SMS3 User Manual for more information. - Page 24 After choosing “Forward to Media Server” a naming dialog box appears. Enter a name for the stream and click “OK.” The named stream will now appear in the Internet Radio list on the SMS3. It may take a few minutes before these are available. To test, select the internet radio station and you should hear it play on the selected stream.
-
Page 25: Options & Status Configuration
SETUP SCHEDULES Schedules are used to automatically select Themes to play at specific times of specific days. More information on Schedules and how to set them is found in the SMS3 User Manual . System Time (under Setup Schedules) It is important to set the correct system time on the media server, as many behind-the scenes func- tions such as internet stream imports are governed by this setting. -
Page 26: Review Music
The external hard drive must be dedicated to the SMS3, as backups reformat the drive. The drive should be left with and connected to the SMS3 to be available for incremental backups as music and media are added. Do not connect the formatted backup drive to a computer. -
Page 27: Restore
After selecting Backup/Restore, make sure the external hard drive is connected to the USB or FireWire port on the back of the SMS3. Select Restore. The media server will display “Backup/Restore in progress” on the screen. Once the Restore procedure is complete, the SMS3 will restart. -
Page 28: Encoding Format
START UP OPTIONS & STATUS CONFIGURATION ENCODING FORMAT The encoding format for CDs must be set before cataloging music. When the media server reads an audio CD and stores the tracks as files on its internal hard drive, the encoding format tells it how to convert and store that file. -
Page 29: Mp3
If you want different encoding quality settings for different types of music, you must choose the desired settings for each music type. REMOTE CONTROL On the SMS3-RC remote con- trol, the Favorite buttons can be assigned to specific themes. -
Page 30: Installer Options
INSTALLER OPTIONS STREAM NAMES The SMS3’s three streams are pre-named Stream 1, Stream 2 and Stream 3. These names can be edited from this page. Select the window next to the stream name # and enter the new name using the name entry field. -
Page 31: Online Update
The SMS3 firmware can be updated via an online process from the Online Update page. During the online update, the media server must be connected to an active internet feed. Select Online Update, and when ready, select Initiate Update. -
Page 32: Network Settings
SMS3 for easy access from a computer’s browser. The cur- rent IP address of the SMS3 is shown at the top of the window. If a static IP address is desired, enter the IP address in the window next to Static IP and select Apply IP. The new IP address will show at the top of the window. -
Page 33: Before You Go Final Checklist
BEFORE YOU GO FINAL CHECKLIST FINAL CHECKLIST Here are a few things to check before you leave the SMS3 and the installation site. 1. SMS3 has IP address on LAN 2. SMS3 graphical interface appears on video display 3. CDs can be loaded, cataloged and ejected 4. -
Page 34: Technical Specifications
TECHNICAL SPECIFICATIONS SMS3 Smart Media Server Dimensions: Power Requirements: Frequency Response: Signal to Noise Ratio: Audio Source Outputs: Line Audio Output: Video Output Formats: Communication Ports: Hard Drive: Music File Formats: Image File Formats: System Requirements for Internet Radio Handler: Web Browser Requirements: 17"W x 12.9"D x 1.75"H (43 x 32.8 x 4.4 cm) -
Page 35: Warranty
In these cases, repairs will be made on the basis of the retail value of the parts and labor. To return for repairs, the unit must be shipped to Russound at the owner's expense, along with a note explaining the nature of service required. Be sure to pack the unit in a corrugated container with at least three (3) inches of resilient material to protect the unit from damage in transit. - Page 36 Russound 5 Forbes Road, Newmarket, NH 03857 tel 603.659.5170 • fax 603.659.5388 28-0113 10/29/04 e-mail: tech@russound.com www.russound.com Copyright © 2004 Russound ® All rights reserved. E. & O.E.