
Related Manuals for Runco Reflection DR-300c


Summary of Contents for Runco Reflection DR-300c
- Page 1 ’ WNER PERATING ANUAL DR-300c Projector & PFP Controller Digital Light Processing™ Projector & Pixel For Pixel™ Controller with Vivix™ Technology www.htrgroup.com...
-
Page 3: Table Of Contents
Feature and Benefits ... 8 Projector Description ... 9 LED View ... 9 Side View ... 9 Projector Placement and Offset Information ... 10 Ceiling Mount Configuration... 10 Floor Mount Configuration ... 10 PFP Controller Description ... 11 Front Panel ... 11 Rear Panel ... -
Page 5: Introduction
Runco's second generation in the award winning Reflection series of DLP™ projectors. With a native resolution of 1024 x 768, the DR-300c is fully DTV compati- ble, and will accept and display all ATSC HDTV formats including 720p and 1080i. With an incredible 1000 ANSI lumen light output capability, the DR-300c can deliver the big screen home theater experience. -
Page 6: Warnings And Safety Precautions
Warnings and Safety Precautions CAUTION: To turn off main power, be sure to remove the plugs from power outlets. The power outlet socket should be installed as near to the equipment as possible, and should be easily accessible. REMARQUE: Pour mettre l’appareil hors circut, s’assurer de retirer la fiche de la prise d’alimentation. La prise d’alimentation doit être installé... -
Page 7: Warning
· If the power cord is damaged or frayed in any way, electrical shock and/or fire may result. Please do not place objects on the power cord, and keep the cord away from heat-emitting devices. Should the power cord become damaged in any way, please contact your Runco dealer for a replacement cord. -
Page 8: Limited Warranty
SONNEL. RIGHTS, LIMITS AND EXCLUSIONS: Runco limits its obligations under any implied warranties under state laws to a period not to exceed the warranty period. There are no express warranties. Runco also excludes any obligation on its part for incidental or consequential damages related to the failure of this product to function properly. - Page 9 IMPORTANT: WARRANTY REGISTRATION: Please fill out and mail your warranty registration card. It is imperative that Runco knows how to reach you promptly if we should discover a safety problem or product update for which you must be notified.
-
Page 10: Feature And Benefits
Features and Benefits The DR-300c system is a very unique system and has many important features, including: • Full control of the Projector via the PFP Controller. This control includes all image quality adjustments as well as Projector adjustments such as image configuration. -
Page 11: Projector Description
Projector, including any faults. See page 26 for fault indications. Status Power IR Receiver: Receives infrared commands from the Projector’s remote (not used in the DR-300c system). Power Indication: Green = Operation Blinking = Warming up/cooling down Orange = Standby... -
Page 12: Projector Placement And Offset Information
Projector Placement and Offset Information Ceiling Mount Configuration 6.090 1.895 3.398 Screen __________ (H) x __________ (W) B) THROW DISTANCE FOR 4 x 3 or 16 x 9 SCREENS: Minimum: = (screen width x 2.0) = __________ inches Maximum: = (screen width x 2.3) = __________ inches... -
Page 13: Pfp Controller Description
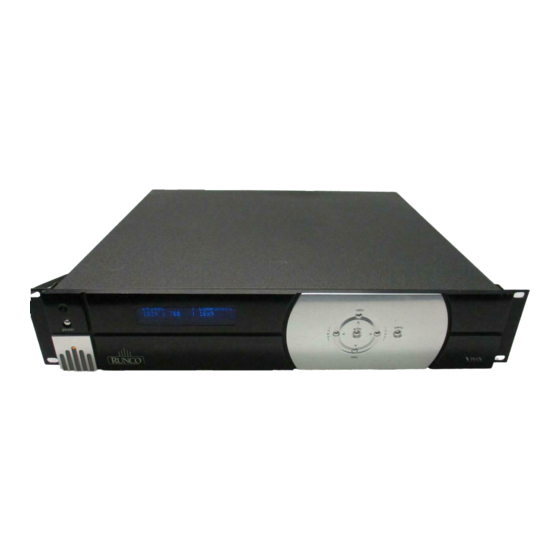
PFP Controller Description Front Panel IR RECEIVER Receives the infrared signal from the remote control. POWER BUTTON Turns the unit ON or OFF. The Main Power switch on the rear of the unit must be on first for this button to be active. POWER INDICATOR When the PFP Controller is ON, this LED will illuminate GREEN. -
Page 14: Rear Panel
COMLINK OUT The output of this jack must be connected to the ComLink input of the DR-300c. If this is not connected, neither the PFP Controller or the Projector can operate and the power indicator on the front panel will stay yellow. -
Page 15: Remote Control Description
Remote Control Description A. IR OUTPUT INDICATOR Illuminates when a button is pressed, indicating that an IR signal is being transmitted. B. POWER BUTTON Toggles the power on and off. For a discrete on or off command, you can use the direct access buttons (see 'J'). Note: When the main AC power switch is first turned ON, the PFP Controller will go through an initiation cycle for approximately 15 seconds. -
Page 16: Quick Set-Up Guide
VIDEO INPUTS RGB/COMPONENT S-VIDEO DVD Player Sattelite receiver or SVHS player CAUTION RUNCO INTERNATIONAL RISK OF ELECTRIC SHOCK HAYWARD, CA DO NOT OPEN MADE IN USA AVIS: RISQUE DE CHOC ELECTRIQUE-NE PAS OUVRIR CAUTION: TO REDUCE THE RISK OF ELECTRIC SHOCK, DO NOT REMOVE COVER. -
Page 17: Overall Functional Description
Besides being the system's control center, the PFP Controller is also a high-quality scaler, which outputs all signals in the native resolution of the DR-300c Projector. The Composite, S- video and Component (non-progressive) signals are sent through the PFP Controller's 10-bit decoder, de-interlaced, then scaled to the native resolution of the Projector. -
Page 18: Menu Description And Navigation
Aspect Ratio Select Installer Adjust The menu tree above is an overall glance at the menu system in the DR-300c. This menu is shown with the installation mode enabled. * These menu items will only appear if the installation mode is enabled (pg. 21). - Page 19 ‘16:9 position’ sets the position of the image on the DMD to top, center, or bottom for installation flexibility (pg. 22). This is only applicable if ‘16:9 screen’ is selected. Also, the age of the lamp in the Projector (lamp hours) may be checked in the Installation Menu.
-
Page 20: Picture Quality Adjustments
Picture Quality Adjustments Main Menu > COMPOSITE S-VIDEO COMPONENT RGB/COMPONENT ASPECT RATIO SELECT INSTALLER ADJUST Picture quality adjustments (also known as "Front Panel Controls") are the controls that change differ- ent parameters of the image such as the amount of color, black level, etc. While these adjustments can be set to suit the needs of the user, there is a way to set these properly. - Page 21 CONTRAST adjusts the white level of the image.Adjust contrast until there is a distinct defini- tion between the two brightest bars. NOTE: For best results, Runco recommends that CONTRAST be set to '0' or very close to it. BRIGHTNESS adjusts the black level of the image. To adjust this properly, adjust BRIGHT- NESS until the 'below black' bar JUST disappears, but the 'above black' bar is still barely visible.
- Page 22 SHARPNESS adjusts the amount of high-frequency detail in the image. This can be adjusted to the preference of the user. Keep in mind that when SHARPNESS is decreased, fine details in the image will become 'soft'; when it is increased, fine details will become sharper but will also make the picture appear 'noisy' if adjusted too high.
-
Page 23: Installation Menu
4:3 screen. 16:9 screen with an anamorphic lens: This setting is only applicable if you are using the projector with an outboard anamorphic lens. The aspect ratios created by the PFP Controller will appear the same as on the "16:9 screen"... -
Page 24: 16:9 Position
An image with Keystone error A correctly adjusted image This may occur in installations where the projector needed to be angled as a result of a larger vertical offset. This keystone feature will correct for trapezoidal distortion for as much as a 15° projector... -
Page 25: Picture Orientation
‘straight-shot’ rear-screen applications, select floor rear or ceiling rear as appropriate. Lamp Hours Lamp Hours displays the number of hours the lamp has been on. With the DR-300c, the lamp life is around 1000 hours. This should be checked periodically to keep track of the lamp's age, and when the lamp is around 1000 hours old, a new one should be installed to prevent lamp failure, including implosion. -
Page 26: Quick Menu
Quick Menu The 'Quick Menu' allows you to position and blank any signal sent through the RGB/Component input. This can be done without having to go through the standard menu, as the Quick Menu is done com- pletely from the front panel. The Quick Menu is only available when you are in the RGB/Component source, and the instal- lation mode is active (pg. -
Page 27: Basic Troubleshooting Tips
The following is a basic troubleshooting guide that can assist you in resolving typical prob- lems may result in normal operation. If you have encountered problems that are not listed in this guide, please contact your Runco dealer for assistance. PROBLEM The projector does not turn on after initial installation. - Page 28 If the Projector was turned on and off too quickly, this may hap- pen. Allow the Projector to settle for 5 minutes, and try again. If the same fault is reported, contact your Runco dealer. · Turn down the BRIGHTNESS level on the Controller.
-
Page 29: Rs-232 Communications
RS-232 Communications General Information Baud rate: 9600 (fixed) Bits: 8 No Parity All protocol in ASCII format RS-232 input connector pin numbers: TxD= Pin# 2, RxD= Pin# 3, GnD= Pin# 5 Command format (single command): command value (i.e. brightness 30). NOTE: A space (not an underscore) or comma may be used between the command and its value. -
Page 30: Rs-232 Commands
Sets a value for sharpness Sets a value for high-frequency chroma edge enhancement Sets a value for low-frequency chroma edge enhancement Sets a value for high-frequency luminance edge enhancement Sets a value for low-frequency luminance edge enhancement Selects the Projector’s color temperature... - Page 31 COMMAND PARAMETER !STORE !RESTORE !FACTORY !STATUS !RESTART !ECHO !NOECHO !INSTALLMODEOFF !INSTALLMODEON !SERVICEMODEON !SERVICEMODEOFF RGAIN -64/64 GGAIN -64/64 BGAIN -64/64 ROFFSET -64/64 GOFFSET -64/64 BOFFSET -64/64 Value stored? (min/max) DESCRIPTION Stores the current set of values (all values) into non-volatile memory Restores the stored values Restores all values to factory default levels...
- Page 32 DR-300c Projector Dimensions Top View 16.186 Front View Side View 13.211 Status Power 3.398 4.028...
- Page 33 OR ELECTRIC SHOCK, DO NOT EXPOSE THIS APPLIANCE TO RAIN OR MOISTURE. RGB/COMPONENT S-VIDEO COMPOSITE 17" 17.45" 16" P I X E L F O R P I X E L RUNCO INTERNATIONAL HAYWARD, CA MADE IN USA AC 120V 60Hz, 15W MADE IN USA...
-
Page 34: Dimensions
32-104° F (0-40° C) Humidity: 40-80%, non-condensing Warranty: Service Labor and Parts (except lamp): Runco warrants the product for two (2) years from the date of delivery to the end user. Lamp: 6 months or 1000 hours (which ever comes first). - Page 35 115VAC 60 Hz, (90-240V auto-switching power supply International version) Safety Regulations: Complies with FCC Class 'B', CE, C-Tick Warranty: Service Labor and Parts: Runco warrants the product for two (2) years from the date of delivery to the end user. Supplied Accessories •...
- Page 37 RUMA-008100 rev 10-01 • • • • • Runco International 2463 Tripaldi Way Hayward, CA 94545 ph (510) 293-9154 fax (510) 293-0201 www.runco.com...