Table of Contents
Advertisement
OWNER'S MANUAL
Thank you, and congratulations on your choice of the Roland JV-1010 64 Voice Synthesizer
Module.
In order to get a good understanding of the JV-1010's many outstanding features and ensure
many years of trouble-free use, please be sure to read through this manual in its entirety.
Before using this unit, carefully read the sections entitled: "USING THE UNIT
SAFELY" (p. 2–4) and "IMPORTANT NOTES" (p. 5, 6). These sections provide
important information concerning the proper operation of the unit. Additionally,
in order to feel assured that you have gained a good grasp of every feature
provided by your new unit, Owner's manual should be read in its entirety. The
manual should be saved and kept on hand as a convenient reference.
* Apple is a registered trademark of Apple Computer, Inc.
* Macintosh is a registered trademark of Apple Computer, Inc.
* Emagic and SoundDiver are registered trademarks of Emagic GmbH.
Copyright © 1999 ROLAND CORPORATION
All rights reserved. No part of this publication may be reproduced in any form without
the written permission of ROLAND CORPORATION.
Advertisement
Table of Contents

Related Manuals for Roland JV-1010


Summary of Contents for Roland JV-1010
- Page 1 Thank you, and congratulations on your choice of the Roland JV-1010 64 Voice Synthesizer Module. In order to get a good understanding of the JV-1010’s many outstanding features and ensure many years of trouble-free use, please be sure to read through this manual in its entirety.
- Page 2 • Subject to high levels of vibration. that is recommended by Roland. mended by Roland, the rack or stand must be carefully placed so it is level and sure to remain stable. If not using a rack or stand, you still need to...
- Page 3 012c • Immediately turn the power off, remove the AC adaptor from the outlet, and request servicing by your retailer, the nearest Roland Service Center, or an authorized Roland distributor, as listed on the “Information” page when: • The AC adaptor or the power-supply cord has been damaged;...
-
Page 4: Using The Unit Safely
USING THE UNIT SAFELY 101b • The unit and the AC adaptor should be located so their location or position does not interfere with their proper ventilation. 102d • Always grasp only the plug or the body of the AC adaptor when plugging into, or unplugging from, an outlet or this unit. -
Page 5: Important Notes
(when possible). During repairs, due care is taken to avoid the loss of data. However, in certain cases (such as when circuitry related to memory itself is out of order), we regret that it may not be possible to restore the data, and Roland assumes no liability concerning such loss of data. - Page 6 • Unfortunately, it may be impossible to restore the contents of data that was stored in the unit’s memory or another MIDI device (e.g., a sequencer) once it has been lost. Roland Corporation assumes no liability concerning such loss of data.
-
Page 7: Quick Start
This owner’s manual is organized as follows. Quick Start This section is intended for those using the JV-1010 for the first time, and explains how to use various functions in a simple way. Please read Quick Start and follow along by actually operating the JV- 1010. -
Page 8: Table Of Contents
Choosing Patches by Bank... 27 Choosing Patches by Category... 28 Playing Percussion Sounds ... 29 Using the JV-1010 as the GM Sound Module ...31 Entering GM Mode... 31 Changing Sounds from an External MIDI Device...32 Note on Using an External MIDI Device to Switch Sounds ... 32 Changing Patches ... - Page 9 Contents Appendices... 51 Troubleshooting...52 Error Messages ...53 Patch List...54 Patch Category List ...58 Rhythm Set List...64 Performance List...67 MIDI Implementation...68 Specifications...89 Computer Cable Wiring Diagrams...90 Index...91...
-
Page 10: Main Features
Main Features Incorporates the JV-1080 Sound Module The JV-1010 is a 16-part multitimbral internal sound generator that can generate up to 64 voices simultaneously, and is equipped with a multi-effects processor (EFX) offering a total of 40 different effects. The Preset patches are compatible not only with the JV-1080 and the XP-30/50/60/80, but with the JV-2080 as well. -
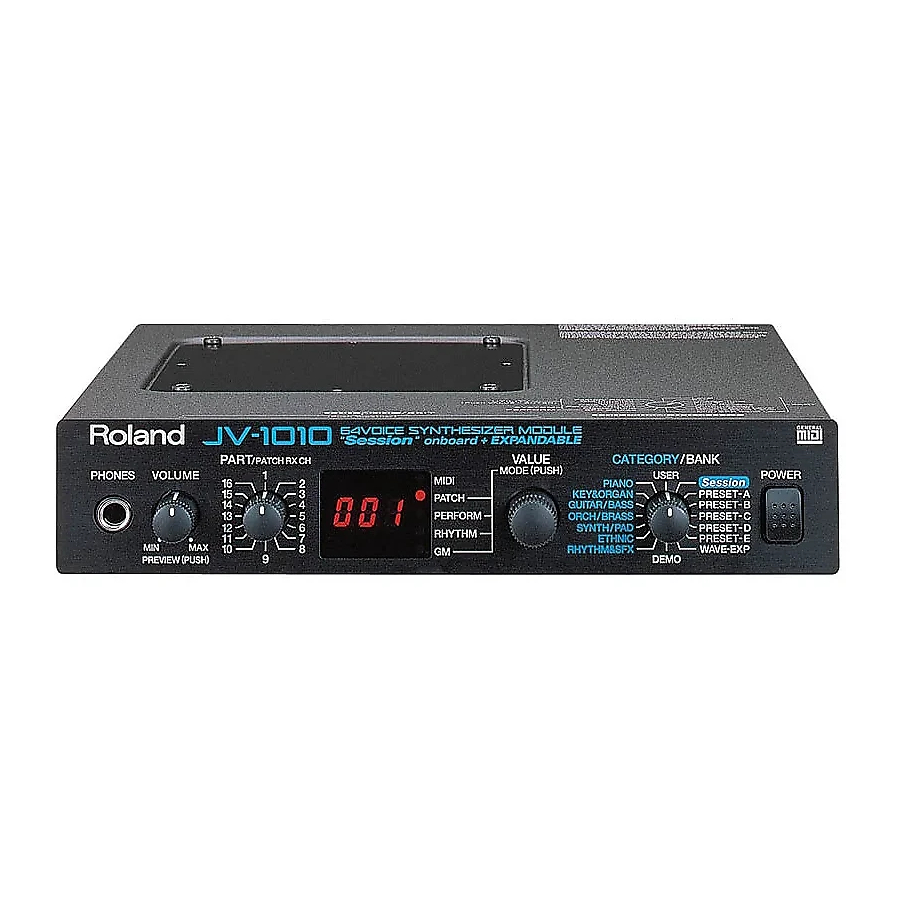
Page 11: Front And Rear Panel
This adjusts the volume level for the OUTPUT jack and the PHONES jack. You can also check out a sound using the JV-1010 alone by pressing the VOLUME knob (Phrase Preview, p. 25). When in a mode other than the Patch mode, pressing the VALUE knob while holding down the VOLUME knob switches you to the Edit mode. -
Page 12: Rear Panel
* Turn off the power before changing this switch’s setting. 5. COMPUTER Connector This is for connecting a computer to the JV-1010 using a computer cable (sold separately) (p. 38). Set the COMPUTER switch to Mac or PC-2. 6. OUTPUT Jacks (L (MONO), R) These are for stereo (L/R) output of audio signals to an amp or a mixer. -
Page 13: Quick Start
Quick Start... -
Page 14: Getting Ready To Play
Attaching the Rubber Feet If you will not be using the separately available RAD-50 rack-mount adaptor, attach the rubber feet that were supplied with the JV-1010, as shown in the figure. Use the small holes on the bottom as a guide for positioning the rubber feet when attaching them. -
Page 15: Installing A Wave Expansion Board
Installing a Wave Expansion Board One Wave Expansion Board (SR-JV80 series; sold separately) can be installed in the JV-1010. Waveform data, patches and rhythm sets are stored on the Wave Expansion Board, so you can increase the number of available sounds by installing the board in the JV-1010. - Page 16 Follow the steps below to install the Wave Expansion Board. Before installing the Wave Expansion Board, switch off the power to the JV-1010 and any connected equipment. Detach the cover on the upper portion of the JV-1010. Loosen the four screws on the upper portion of the cover. fig.1-03a.e Screwdriver Position the board holders so they are oriented.
- Page 17 This completes the installation of the Wave Expansion Board. Next, make sure the board is installed correctly. Switch on the power to the JV-1010 (p. 20). Press the VALUE knob to choose the Patch mode ( fig.1-04 Pressing the VALUE knob makes the mode change sequentially. Press the knob several times, until the PATCH indicator lights up.
-
Page 18: Making The Connections
Getting Ready to Play Making the Connections The JV-1010 does not have a built-in amp or speakers. In order to produce sound, you need to hook up audio equipment such as a monitor speaker or a stereo set, or use headphones. - Page 19 OUT, THRU) Use a MIDI cable (sold separately) to connect the MIDI OUT connector on the MIDI keyboard or sequencer to the MIDI IN connector on the JV-1010. Using headphones: the PHONES jack Plug the headphones (sold separately) into the PHONES jack on the front panel.
-
Page 20: Switching The Power On And Off
Press the POWER switch on the JV-1010 to switch on the power. After roland Jv-1010 is displayed, the unit starts up in the same state it was in when the power was last turned off. -
Page 21: Reset To Default Factory Settings (Factory Reset)
Reset to Default Factory Settings (Factory Reset) When using the JV-1010 for the first time, start by returning the settings to their factory defaults so that the JV-1010 operates as described in the procedures in the owner’s manual. This returns all settings stored in memory in the JV-1010 to the values they had when the unit was shipped from the factory. -
Page 22: Listening To Demo Songs (Demo Play)
Listening to Demo Songs (Demo Play) The JV-1010 comes with four demonstration songs. Here’s how to start Demo Play, and listen to the outstanding sounds of the JV-1010. Song Name Composer/Copyright All In Good Time Scott Wilkie © 1999 Scott Wilkie Media (ASCAP) Guitars Forever Gundy Keller ©... -
Page 23: Composer Profiles
Scott Wilkie is a contemporary jazz recording artist, based in southern California. He tours frequently with his own band, and also appears as an artist for Roland in the U.S., Japan, Europe and South America. His debut solo album, Boundless, was released worldwide in 1999 on Narada/Virgin Records. -
Page 24: Choosing And Playing Patches
Choosing and Playing Patches The JV-1010 comes with a large number of onboard sounds. On the JV-1010, the sounds used for an ordinary performance are called Patches. With the JV-1010, you can use seven groups—User, Preset A through E, and Session—and when a Wave Expansion Board (separately available) is... -
Page 25: Auditioning Patches (Phrase Preview)
Auditioning Patches (Phrase Preview) On the JV-1010, you can check out patches easily, since phrases are provided for each type of patch. Thanks to this, you don’t need to have a MIDI keyboard or sequencer connected. In this section, we’ll listen to patch sounds in the Patch mode. -
Page 26: Playing Notes From A Midi Keyboard
Choosing and Playing Patches Playing Notes from a MIDI Keyboard The JV-1010 receives and plays MIDI data from other instruments. When doing this, the transmitting instrument (the MIDI keyboard or the like) and the JV-1010 must be set to the same MIDI channel. -
Page 27: Choosing Patches
Choosing Patches When you’ve selected the Patch mode or the Performance mode, after changing the Category and Bank with the CATEGORY/BANK knob, you can choose a patch by turning the VALUE knob. You can use either of two methods to choose a patch: choosing by bank (display with white text) or choosing by category (display in blue text). -
Page 28: Choosing Patches By Category
Choosing and Playing Patches Choosing Patches by Category Here, let’s choose No. 008 Bright Piano from PIANO (the Piano category). fig.1-17 Press the VALUE knob to choose the Patch mode (PATCH). Pressing the VALUE knob makes the mode change sequentially. Press the knob several times, until the PATCH indicator lights up. -
Page 29: Playing Percussion Sounds
The JV-1010 has Rhythm Sets that contain a variety of percussion instruments and special effects sounds. With the JV-1010, you can use seven groups—User, Preset A through E, and Session—and when a Wave Expansion Board (separately available) is installed, you can also use the Wave Expansion Board’s onboard rhythm sets. - Page 30 Choosing and Playing Patches To play rhythm sets using a MIDI keyboard, set the MIDI transmit channel for the MIDI keyboard to 10. Here’s how you can play percussion instruments using rhythm sets: fig.1-19 Set the transmit channel for the MIDI keyboard (the transmitting instrument) to 10.
-
Page 31: Using The Jv-1010 As The Gm Sound Module
Using the JV-1010 as the GM Sound Module The JV-1010 features a GM mode—a convenient way to play back or create GM score data (music files for GM sound module). You’re able to play back commercial GM score data releases and even modify various parameter settings for enhanced musical expression. -
Page 32: Changing Sounds From An External Midi Device
You can change patches, performances, and rhythm sets by transmitting Bank Select messages (Controller numbers 0 and 32) and Program Change messages to the JV-1010 from an external MIDI device. That is, selecting sounds on an external MIDI keyboard transmits messages corresponding to the specified sounds to the JV-1010, thus changing the patch or the like on the JV-1010. - Page 33 Transmit a Program Change 10 from the external MIDI device to the JV-1010. The display on the JV-1010 shows 010 to indicate the switch to the PRESET- B patch No. 010 Hip Bass. The correspondences between MIDI messages transmitted from external MIDI devices and Patch Numbers are as shown below.
-
Page 34: Changing A Performance
When changing a performance, set the transmit channel of the external MIDI device and the Performance Control Channel (Perform Ctrl CH) of the JV-1010 to the same channel, then transmit the Bank Select and Program Change messages. Now let’s set the transmit channel on the external MIDI device and the Performance Control Channel (Perform Ctrl CH) on the JV-1010 to the same channel and try changing the performance. - Page 35 (refer to the following table) from the external MIDI device to the JV-1010. Transmit a Program Change message from the external MIDI device to the JV-1010 (refer to the following table). The correspondences between MIDI messages transmitted from external MIDI devices and Performance Numbers are as shown below.
-
Page 36: Changing A Rhythm Set
Changing a Rhythm Set When changing a rhythm set, set the transmit channel of the external MIDI device and the receive channel of part 10 of the performance on the JV-1010 to the same channel, then transmit the Bank Select and Program Change messages. - Page 37 Transmit a Program Change message from the external MIDI device to the JV-1010 (refer to the following table). The correspondences between MIDI messages transmitted from external MIDI devices and Rhythm Set Numbers are as shown below. Rhythm Set Rhythm Set...
-
Page 38: Trying Out Desktop Music
Connecting to a Computer Two Ways to Connect There are two methods that can be used to connect the JV-1010 to a computer, connecting to the COMPUTER connector and connecting with MIDI connectors. When connecting to the COMPUTER connector, a computer cable is used to connect the JV-1010 to your computer’s serial port (RS-232C). - Page 39 Set the COMPUTER switch on the JV-1010’s rear panel to match the type of computer to be connected as described below. For Apple Macintosh computers: Mac For PCs: PC-2 fig.1-24.e Apple Macintosh The connection method described in the following step varies according to the type of computer;...
- Page 40 Trying Out Desktop Music Connect the other end of the computer cable to the JV-1010’s COMPUTER connector. fig.1-25.e Apple Macintosh Modem Port or Printer Port Serial port (|O|O|) Optional computer cable RSC-15APL Optional computer cable RSC-15AT JV-1010 rear panel Playing back sounds from...
-
Page 41: Connecting With Midi Connectors
Connecting with MIDI Connectors If you have a MIDI interface (such as Roland’s Super MPU64) connected to your computer or are connecting to a MIDI interface adaptor, you can then connect using the MIDI connectors. Switch off the power to the JV-1010, the computer, and any connected equipment. -
Page 42: Performing Multiple Parts (Performance Mode)
In other words, using performances allows you to control sixteen separate sounds with one JV-1010. A sound generator of this type which can control multiple sounds using one device is referred to as a multitimbral sound generator. - Page 43 (the transmitting device). Additionally, remember that PART 10 is used exclusively by the rhythm set. Turning off the JV-1010’s power without saving the created data results in the loss of that data. Save any important data that you wish to preserve to an external MIDI device (p.
-
Page 44: Editing Using Only The Jv-1010
Editing Using Only the JV-1010 Making Part Settings (PART) fig.1-30 Now try changing the level setting (Level) for PART 2 in Performance mode. fig.1-30a Press the VALUE knob to choose the Performance mode (PERFORM). Pressing the VALUE knob makes the mode change sequentially. Press the knob several times, until the PERFORM indicator lights up. -
Page 45: Memory-Related Operations (Utility)
Restoring the Factory Settings (Factory Reset) This operation restores all settings stored in the JV-1010 to their condition at the time the unit was shipped from the factory. For more detailed information and instructions for this procedure, refer to the “Reset to Default Factory Settings (Factory Reset)”... -
Page 46: Initializing Gm Mode (Gm Initialize)
Editing Using Only the JV-1010 Initializing GM Mode (GM Initialize) Using a computer or sequencer connected to the JV-1010 to play music data bearing the GM logo requires the system be initialized for GM. Carrying out this initialization restores the basic GM settings. -
Page 47: Initializing The Settings (Initialize)
Sur flashes in the display; this is a prompt for you to confirm whether or not you want to execute Initialize. fig.Sur Press the VALUE knob. Initialize is executed, and the JV-1010 exits Edit mode. Editing Using Only the JV-1010 1,4,5 The GM Initialize operation affects only the currently selected data;... -
Page 48: Transmitting Settings To An External Midi Device (Data Transfer)
MIDI instrument ahead of time. Connect the JV-1010’s MIDI OUT connector to the MIDI IN connector of the external MIDI device with a MIDI cable. Then, after putting the external MIDI device in the mode where it is ready to receive data, start the procedure. -
Page 49: Making System Settings (System)
Making System Settings (SYSTEM) This sets the tuning and other parameters of the JV-1010’s operating environment. fig.1-35 Selecting the Receive Channel (Perform Ctrl CH) This selects the receive channel when MIDI messages are used to switch performances. fig.1-35a Press the VALUE knob and choose the Performance mode (PERFORM) or the Rhythm Set mode (RHYTHM). -
Page 50: Tuning (Master Tune)
Editing Using Only the JV-1010 Tuning (Master Tune) Allows the sound generator to be tuned. The value indicated is the frequency of Note Number 69 (the A4 key). fig.1-36 Press the VALUE knob to switch to a mode other than the Patch mode (PATCH), that is, to the PERFORM, RHYTHM, or GM mode. -
Page 51: Appendices
Appendices... -
Page 52: Troubleshooting
No sound is produced. - Is all other equipment, such as external amps and speakers, properly connected? - Is the power to the JV-1010 and all connected external devices turned on? - Is the JV-1010’s VOLUME knob turned to MIN? -
Page 53: Error Messages
(MIDI Communication Error) fig.coE There is a problem with the MIDI cable Situation: connected to the JV-1010’s MIDI IN connector or with an external device. However, this message is also displayed when the power for the external device is turned off. -
Page 54: Patch List
Patch List USER (User Group) No. Name Voice Key Assign No. Name 001 Tremendously 4 POLY 065 Steel Away 002 St.Concert POLY 066 D-50 Stack 003 CyberTrance2 4 POLY 067 Solo Strat 004 SessionNyln2 POLY 068 Soap Opera 005 ViennaStrgs3 POLY 069 Sop.Sax mf 006 R&R Brass... - Page 55 PR-B (Preset B Group) No. Name Voice Key Assign No. Name 001 Dist Gtr 1 POLY 065 Analog Seq 002 Dist Gtr 2 POLY 066 Impact Vox 003 R&R Chunk POLY 067 TeknoSoloVox 2 004 Phripphuzz SOLO 068 X-Mod Man 005 Grungeroni POLY 069 Paz <==>...
- Page 56 Patch List PR-D (GM Group) No. Name Voice Key Assign No. Name 001 Piano 1 POLY 065 Soprano Sax 002 Piano 2 POLY 066 Alto Sax 003 Piano 3 POLY 067 Tenor Sax 004 Honky-tonk POLY 068 Baritone Sax 005 E.Piano 1 POLY 069 Oboe 006 E.Piano 2...
- Page 57 XP-A (Session) Name Voice St.Concert 9ft.Grand 1 9ft.Grand 2 Euro Classic St.Pno & Str Compress Pno LA Session Water Piano Vibra Rhodes Stack Rhodes ArcoEnsemble Vienna Strgs Str Adagio Oct Strings Silky Filter Soft Strings SlowStr.Sect GiantStrings Str+Choir 1 Str+Choir 2 Str+Choir 3 Breathy Humz Dream Voices...
-
Page 58: Patch Category List
Patch Category List PIANO KEY&ORGAN (Piano Group) (Keyboard & Organ Group) PNO (AC.PIANO) KEY (KEYBOARDS) Acoustic Piano Other Keyboards (Clav, Harpsichord etc.) No. Name Voice Preset No. No. Name 001 St.Concert XP-A:001 002 9ft.Grand 1 XP-A:002 001 Comp Clav 003 9ft.Grand 2 XP-A:003 002 Clav. - Page 59 GUITAR/BASS (Guitar/Bass Group) AGT (AC.GUITAR) DGT (DIST.GUITAR) Acoustic Guitar Distortion Guitar No. Name Voice Preset No. No. Name 001 SessionNylon XP-A:067 049 Big Hair Ld 002 Nylon Gtr PR-A:108 050 Metal Solo 003 Nylon-str.Gt PR-D:025 051 Feed Me! 004 DEMO Nylon XP-A:244 052 DEMO DistGt1 4 005 Solo Nylon 1...
- Page 60 Patch Category List ORCH/BRASS (Orchestra/Brass Group) STR (STRINGS) HIT (HIT&STAB) Strings Orchestra Hit, Hit No. Name Voice Preset No. No. Name 001 Str Adagio XP-A:013 045 OrchestraHit 002 ArcoEnsemble 2 XP-A:011 046 Impact 003 Vienna Strgs XP-A:012 047 Phase Hit 004 Oct Strings XP-A:014 048 Reverse Hit...
- Page 61 SYNTH/PAD (Synth/Pad Group) HLD (HARD LEAD) TEK (TECHNO SYNTH) Hard Synth Lead Techno Synth No. Name Voice Preset No. No. Name 001 Pulse Lead 1 PR-B:089 046 Raver Circus 002 Little Devil PR-B:091 047 Eurotek Brs 003 Square Wave PR-D:081 048 DanceStack 1 004 Sawteeth PR-B:085...
- Page 62 Patch Category List SYNTH/PAD (Synth/Pad Group) SYN (OTHER SYNTH) BPD (BRIGHT PAD) Poly Synth Bright Pad Synth No. Name Voice Preset No. No. Name 186 Poly Key PR-A:062 236 Phazeslopad 187 Poly Saws PR-A:063 237 Jet Stack 188 Polysynth PR-D:091 238 Combing Slow 3 189 Poly Pulse PR-A:064...
- Page 63 ETHNIC (Ethnic Group) PLK (PLUCKED) ETH (ETHNIC) Plucked (Harp etc.) Other Ethnic No. Name Voice Preset No. No. Name 001 Sitar PR-A:101 018 Shakuhachi 002 Drone Split PR-A:102 019 Taj Mahal 003 Sitar PR-D:105 020 Raya Shaku 004 Dulcimer PR-A:105 021 Shanai 005 Santur PR-D:016...
-
Page 64: Rhythm Set List
Rhythm Set List USER (User) Note No. HouseDrumSet 1 JazzDrumSet1 Scratch 1 Hybrid Kick2 808 SN Hybrid Kick1 Dry Stick Side Stick 808 SN Ballad SN 808 Claps Brush Slap 808 SN Brush Swish 808 Kick Verb Tom Lo 606 HiHat Cl Cl HiHat 1 808 SN Verb Tom Lo... - Page 65 PR-C (Preset C Group) Note No. JazzDrumSet2 OrchDrumSet Round Kick Old Kick Old Kick Round Kick Side Stick Side Stick Ballad SN Ballad SN Hand Claps 808 Claps SN Roll SN Roll Verb Tom Lo Timpani Cl HiHat 2 Timpani Dry Tom Lo Timpani Pedal HiHat...
- Page 66 Rhythm Set List XP-A (Session) Note No. SessionSet 1 SessionSet 2 Deep Kick 3 Mix Kick Mix Kick Deep Kick 3 Side Stick Side Stick Solo Snr Loose Snr HC2 Claps 1 HC2 Claps 1 90’s Snare Ring Snr Verb Tom Lo Verb Tom Lo Cl HiHat 1 Cl HiHat 1...
-
Page 67: Performance List
Performance List USER (User Group) Name Key Mode EasternSplit LAYER Opening Orch LAYER Feedback EP LAYER Humming Vox LAYER Tekno Loop 1 LAYER Fr.Horn Sect LAYER SpaceCarrier LAYER Orchestral LAYER Nebular Vox LAYER Terminator LAYER Flying Jazz LAYER Sweeper LAYER Rave Split LAYER Multi Sax... -
Page 68: Midi Implementation
MIDI Implementation Model: JV-1010 (64 Voice Synthesizer Module) Version: 1.00 Date: Jan. 28 1999 1. Data Reception Channel Voice Messages Note Off status 2nd byte 3rd byte n=MIDI channel number: 0H - FH (ch.1 - ch.16) kk=note number: 00H - 7FH (0 - 127) - Page 69 Panpot (Controller number 10) status 2nd byte 3rd byte n=MIDI channel number: 0H - FH (ch.1 - ch.16) vv=Panpot: 00H - 40H - 7FH (left - center - right) * Adjust the stereo location over 128 steps, where 0 is far left, 64 is center, and 127 is far right.
-
Page 70: Channel Aftertouch
MIDI Implementation Effect 3 (Chorus Send Level) (Controller number 93) status 2nd byte 3rd byte n=MIDI channel number: 0H - FH (ch.1 - ch.16) vv=Chorus Send Level: 00H - 7FH (0 - 127) * In Performance mode, the Chorus Send Level parameter of each Part will change. RPN MSB/LSB (Controller number 100,101) status 2nd byte... -
Page 71: Timing Clock
= ID number: This is the ID number (manufacturer ID) that specifies the manufacturer whose exclusive message this is. Roland's manufacturer ID is 41H.ID numbers 7EH and 7FH are defined in an expansion of the MIDI standard as Universal Non-realtime messages (7EH) and Universal Realtime Messages (7FH). -
Page 72: Data Transmission
41H, dev, 6AH, 11H, aaH, bbH, ccH, ddH, ssH, ttH, uuH, vvH, sum Byte Remarks Exclusive status ID number (Roland) device ID (dev: 10H) model ID (JV-1010) command ID (RQ1) address MSB address address address LSB size MSB size size... -
Page 73: System Exclusive Messages
... ffH, sum Byte Remarks Exclusive status ID number (Roland) device ID (dev: 10H) model ID (JV-1010) command ID (DT1) address MSB address address address LSB data: The actual data to be transmitted. Multi-byte data is transmitted in the address order. - Page 74 * For addresses marked by a #, the data must be divided into 2 parts for transmission. For example, data with the hexadecimal value ABH would be divided into 0AH and 0BH, and transmitted in that order. * Parameter values enclosed in < > are for the JV-1080 / JV-2080 / XP-30 / XP-50 / XP-60 / XP-80, and will be ignored if received by the JV-1010. +——————————————————————————————————————————————————————————————————————————————+...
- Page 75 00 33 | 0000 000a | Pedal(1) Polarity 00 34 | 0aaa aaaa | Pedal2 Assign 00 35 | 0000 00aa | Pedal2 Output Mode 00 36 | 0000 000a | Pedal2 Polarity 00 37 | 0aaa aaaa | C1 Assign 00 38 | 0000 00aa | C1 Output Mode 00 39 | 0aaa aaaa | C2 Assign 00 3A | 0000 00aa | C2 Output Mode...
- Page 76 MIDI Implementation 1-2.Performance +——————————————————————————————————————————————————————————————————————————————+ | Offset Address | |—————————————+————————————————————————————————————————————————————————————————| 00 00 | Performance Common 10 00 | Performance Part 1 11 00 | Performance Part 2 1F 00 | Performance Part 16 +——————————————————————————————————————————————————————————————————————————————+ 1-2-1.Performance Common +——————————————————————————————————————————————————————————————————————————————+ | Offset Address | Size | Description |—————————————+————————————————————————————————————————————————————————————————| 00 00 | 0aaa aaaa | Performance Name 1...
- Page 77 1-2-2.Performance Part +——————————————————————————————————————————————————————————————————————————————+ | Offset Address | Size | Description |—————————————+————————————————————————————————————————————————————————————————| 00 00 | 0000 000a | Receive Switch 00 01 | 0000 aaaa | MIDI Channel |—————————————+———————————+————————————————————————————————————————————————————| 00 02 | 0000 00aa | Patch Group Type 00 03 | 0aaa aaaa | Patch Group ID 00 04 | 0000 aaaa | Patch Number | 0000 bbbb | 00 06 | 0aaa aaaa | Part Level...
- Page 78 MIDI Implementation |—————————————+———————————+————————————————————————————————————————————————————| 00 2C | 0000 aaaa | Patch Tempo | 0000 bbbb | 00 2E | 0aaa aaaa | Patch Level 00 2F | 0aaa aaaa | Patch Pan 00 30 | 0aaa aaaa | Analog Feel 00 31 | 0000 aaaa | Bend Range Up 00 32 | 00aa aaaa | Bend Range Down 00 33 | 0000 000a | Key Assign Mode 00 34 | 0000 000a | Solo Legato...
- Page 79 |—————————————+———————————+————————————————————————————————————————————————————| 00 2D | 0000 0aaa | LFO1 Waveform 00 2E | 0000 000a | LFO1 Key Sync 00 2F | 0aaa aaaa | LFO1 Rate 00 30 | 0000 0aaa | LFO1 Offset 00 31 | 0aaa aaaa | LFO1 Delay Time 00 32 | 0000 00aa | LFO1 Fade Mode 00 33 | 0aaa aaaa | LFO1 Fade Time 00 34 | 0000 00aa | LFO1 External Sync...
- Page 80 MIDI Implementation *16 -100–+150 *17 -100, -70, -50, -40, -30, -20, -10, 0, +10, +20, +30, +40, +50, +70, +100 *18 OFF, LPF, BPF, HPF, PKG *19 LOWER, UPPER, LOWER&UPPER, ALL *20 MIX, EFX, <DIRECT-1>, <DIRECT-2> 1-4.Rhythm Setup +——————————————————————————————————————————————————————————————————————————————+ | Offset Address | |—————————————+————————————————————————————————————————————————————————————————| 00 00 | Rhythm Common...
- Page 81 INT, <PCM>, EXP -6, 0, +6, +12 NO-SUS, SUSTAIN OFF, CONTINUOUS, KEY-ON 0, 1, 2, 3, 4, 5, 6, 7, 8, 9, 10, 20, 30, 40, 50, 60, 70, 80, 90, 100, 200, 300, 400, 500, 600, 700, 800, 900, 1000, 1100, 1200 -100–+150 -100, -70, -50, -40, -30, -20, -10, 0, +10, +20, +30, +40, +50, +70, +100 OFF, LPF, BPF, HPF, PKG...
- Page 82 | 00 00 0C +—————————————————————————————————————————————————————————————————————————————+ * In order for a GS Exclusive message to be correctly received by the JV-1010, the starting address of the message must be the Start address of each Part (the address of Scale Tune C, i.e., offset 40).
- Page 83 4. Supplementary Material Correspondence of the EFX algorithm and Exclusive Address (EFX Parameter 1–12) | Parameter | Value ———————+————————————————————————————————+——————————————————————— Type01: STEREO-EQ ———————+————————————————————————————————+——————————————————————— prm1 | Low Frequency | 0 - 1 prm2 | Low Gain | 0 - 30 prm3 | High Frequency | 0 - 1 prm4 | Hi Gain...
- Page 84 MIDI Implementation Type17: STEREO-DELAY ———————+————————————————————————————————+——————————————————————— prm1 | Feedback Mode | 0 - 1 prm2 | Delay Time Left | 0 - 126 prm3 | Delay Time Right | 0 - 126 prm4 | Feedback Phase Left | 0 - 1 prm5 | Feedback Phase Right | 0 - 1...
- Page 85 Type33: ENHANCER FLANGER (serial) ———————+————————————————————————————————+——————————————————————— prm1 | Enhancer Sens | 0 - 127 prm2 | Enhancer Mix Level | 0 - 127 prm3 | Flanger Pre Delay Time | 0 - 125 prm4 | Flanger Rate | 0 - 125 prm5 | Flanger Depth | 0 - 127...
- Page 86 Examples of Exclusive Messages and Calculating the Checksum Roland exclusive messages (RQ1, DT1) are transmitted with a checksum at the end of the data (before F7) to check that the data was received correctly. The value of the checksum is determined by the address and data (or size) of the exclusive message.
- Page 87 F0 41 10 42 12 40 11 40 3A 6D 3E 34 0D 38 6B 3C 6F 40 36 0F 76 F7 ASCII Code Table On the JV-1010, the following ASCII code set is used for processing data such as the Patch Name and the Performance Name.
-
Page 88: Midi Implementation Chart
64 Voice Synthesizer Module Model JV-1010 Function... Basic Default Channel Changed Default Mode Messages Altered Note Number : True Voice Note On Velocity Note Off After Key's Touch Channel's Pitch Bend 0, 32 6, 38 Control Change 1–5, 7–31, 64–95 *3 1–5, 7–31, 64–95 *3... -
Page 89: Specifications
Specifications JV-1010: 64 Voice Synthesizer Module (Conforms to General MIDI System) Number of Parts 16 (Part 10 is Rhythm Part) Maximum Polyphony 64 voices Effects EFX: 40 sets Reverb: 1 set (8 types) Chorus: 1 set Preset Memory Patches: 895 (640 same as the JV-2080 + 255 from “Session”) Performances: 64 Rhythm Sets: 18 (10 same as the JV-2080 + 8 from “Session”) -
Page 90: Computer Cable Wiring Diagrams
Computer Cable Wiring Diagrams For Apple Macintosh (Sold separately: RSC-15APL) mini DIN, 8-pin, male 6 7 8 3 4 5 For PC (9-pin) (Sold separately: RSC-15AT) mini DIN, 8-pin, male 6 7 8 3 4 5 For PC (25-pin) mini DIN, 8-pin, male 6 7 8 3 4 5 mini DIN, 8-pin, male... -
Page 91: Index
Index AC adaptor jack ...12, 19 CATEGORY/BANK knob ...11 Computer cable ...40 COMPUTER connector ...12, 19, 40 COMPUTER switch ...12, 39 Mac ...39 MIDI ...41 PC-2 ...39 Connection ...18 Connecting to the COMPUTER connector ...38 Connecting with MIDI connectors ...41 Cord hook ...12 DEMO ...22 Demo song... - Page 92 Index Rack-mount adaptor ...14 Receive channel ...49 RHYTHM ...30 Rhythm set ...29 Changing a rhythm set from an external MIDI device ...36 PRESET-A–C, E ...29 PRESET-D ...29 Rhythm set mode ...30 Session ...29 USER ...29 WAVE-EXP ...29 Rubber feet ...14 SYSTEM Master Tune ...50 Perform Ctrl CH ...34, 49...
- Page 93 Apparatus containing Lithium batteries ADVARSEL! Lithiumbatteri - Eksplosionsfare ved fejlagtig håndtering. Udskiftning må kun ske med batteri af samme fabrikat og type. Levér det brugte batteri tilbage til leverandøren. ADVARSEL Eksplosjonsfare ved feilaktig skifte av batteri. Benytt samme batteritype eller en tilsvarende type anbefalt av apparatfabrikanten.
-
Page 94: North America
Information When you need repair service, call your nearest Roland Service Center or authorized Roland distributor in your country as shown below. SINGAPORE AFRICA AFRICA Swee Lee Company 150 Sims Drive, EGYPT SINGAPORE 387381 TEL: 846-3676 Al Fanny Trading Office... - Page 96 01891601 ’02-2-AE2-61N...