
Related Manuals for BTX ECM630


Summary of Contents for BTX ECM630
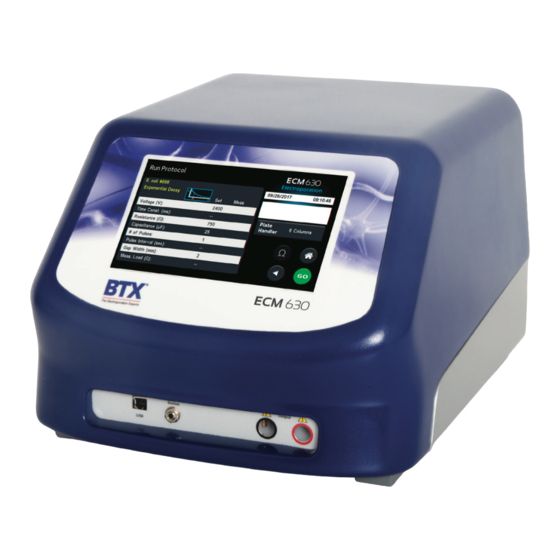
- Page 1 Exponential Decay Wave Electroporation System USER’S MANUAL Publication 5423-020-REV 1.0...
-
Page 2: Warranty Information
BTX technicians. BTX warranties the ECM 630 Electroporation Systems for a period of two years from the date of purchase. At its option, BTX Repair Facilities and Parts will repair or replace the unit if it is found to be defective as to workmanship or materials. -
Page 3: Safety Information
If there are any questions about the operation of this instrument, Make Proper Connections call BTX Customer service at 1-800-272-2775, or 1-508-893-8999. Make sure all connections are made properly and securely. Any Caution Notice signal wire connections to the unit must be no longer than three meters. -
Page 4: Introduction
A Message from BTX Thank you for investing in a ECM 630 System. Since its founding in 1983, the main focus of BTX has been in the area of applying controlled electric fields for genetic engineering applications. Because of this, we quickly established a reputation as the technological leader in the fields of electroporation and electrofusion. -
Page 5: Table Of Contents
Table of Contents SUBJECT PAGE # Warranty Information Safety Information Introduction Table of Contents 5 – 6 Product Overview Unpacking the System Touchscreen Button Reference Software Setup 10 – 11 Setting Time/Date Setting Audible Alarm Preferences Setting Backlight Preferences Displaying Device Information Preset Protocols 12 –... -
Page 6: Table Of Contents
Table of Contents SUBJECT PAGE # General Optimization Guide for Electroporation 36 – 38 DNA Delivery into Cells Using Electroporation Wave Forms Field Strength Pulse Length Number of Pulses Electroporation Buffer DNA/RNA Concentrations Applications 39 – 41 Bacteria and Yeast Transformation Plant and Insect Transfection Electroporation Buffers Ordering Information... -
Page 7: Product Overview
Flexibility is important to a researcher, so BTX has designed the parameters. Once optimized, samples are rapidly processed ECM 630 to be a plug-and-play system that easily transitions increasing yields and saving valuable time and money. -
Page 8: Unpacking The System
Power up the system by pushing the rocker switch located on the back panel at the bottom left. The display will flash the BTX logo. Once the software initializes, the Main Menu screen will appear. You are now ready to begin your work. -
Page 9: Touchscreen Button Reference
Touchscreen Icons Reference Accept Stop Protocol Used to accept the parameters/settings on a screen and Used during the pulse delivery sequence to stop the advance to the next screen in the menu, also used in progress of the protocol. place of a double tap on various icons. Back Protocol Locked Used to go back one screen. -
Page 10: Software Setup
Software Setup Setting Time/Date Setting Audible Alarm Preferences After initializing, the home screen will appear. On the home screen, tap the Gear icon. Tap the Gear icon. Tap Audible Alarms icon. 1 Tap Time/Date icon. 1 Select preferred audible alarms by tapping the icons to activate 4 ... -
Page 11: Setting Backlight Preferences
Software Setup Displaying Device Information Setting Backlight Preferences On the home screen, tap the Gear icon. On the home screen, tap the Gear icon. Tap Backlight icon. Tap Device Information icon. 1 1 Select preferred brightness by tapping the icon indicating View device information. -
Page 12: Preset Protocols
Preset Protocols Using Preset Protocols Using Preset Protocols (continued) On the home screen, tap the Preset Protocols icon. Review parameters. Tap Omega icon to measure pre-pulse load resistance. Double tap desired cell type. 10 With load measurement OK, press the Green ‘Go’ icon to run protocol. -
Page 13: Customizing A Preset Protocol
Preset Protocols Customizing a Preset Protocol (continued) Customizing a Preset Protocol Use keyboard to name copy of protocol. On the home screen, tap the Preset Protocols icon. Tap the Green Check icon to save. Double tap desired cell type. 10 Tap the Home icon. -
Page 14: Preset Protocols
Preset Protocols Customizing a Preset Protocol (continued) Scroll through user protocols to locate the newly saved method. Double tap the newly saved method. Tap the parameter(s) requiring customization. Proceed to modify selected parameters. Tap the Green Check icon to proceed to the run screen. Publication 5423-020-REV 1.0 •... -
Page 15: Performing Experiments
Performing Experiments Creating New Protocols Creating New Protocols On the home screen, tap User Protocols icon. On the home screen, tap User Protocols icon. Tap your newly saved protocol. 17 Double tap New Protocol. 17 Tap the Voltage icon. Use keyboard to name protocol. - Page 16 Performing Experiments Creating New Protocols (continued) Tap the Number of Pulses / Pulse Interval icon. Tap the Resistance / Capacitance icon. Use the numeric keypad to set the number of pulses. Use the numeric keypad to set resistance. Tap the Pulse Interval (sec) icon. 29 ...
- Page 17 Performing Experiments Creating New Protocols (continued) View your protocol. To run, tap the Omega icon. Tap the Electrode Gap icon. With load measurement OK, press the Green ‘Go’ icon to run Use the numeric keypad to set the gap between electrodes. protocol.
-
Page 18: Using Specialty Protocols
Using Specialty Protocols Using an HT Plate Handler Plug the HT Plate Handler into the front ports of the ECM 630 unit. Select desired protocol (preset protocol or user protocol) Double tap desired cells. Review parameters. 52 Set the HT plate handler with the correct number of pre-pulse resistance measurement and DC pulses. - Page 19 Using Specialty Electrodes 79 Plug the specialty electrodes into the front ports of the BTX ECM 630. Scroll through available protocols. Double tap desired selection (Preset Protocol or User Protocol). While the pulse is being delivered, the Red ‘x’ icon can be used to stop the protocol at any time.
-
Page 20: Using Specialty Electrodes
Using Specialty Protocols Using Specialty Electrodes Once protocol is complete, data regarding your pulse is displayed and stored in the systems logs for future use. You may continue pulsing, go back to the settings screen or the protocol select screen, or to the home screen. 82 ... -
Page 21: Creating New Protocols
Managing Protocols Renaming a Protocol All preset and user protocols are stored in the protocol list for ongoing use. Over time, you may want to manage previously Follow these instructions to rename a previously saved user created protocols to keep your protocol list easy to navigate. In protocol: addition, the ecm 630 allows you to export protocol information to an externally connected generator or to a computer that... -
Page 22: Deleting A Protocol
Managing Protocols Deleting a Protocol Confirm delete by tapping the Delete icon again. NOTE: Preset protocols cannot be deleted. On the home screen, tap the User Protocols icon. Protocol has been removed from the menu. Tap the protocol you wish to delete. 17 ... -
Page 23: Password Protecting A Protocol
Managing Protocols Password Protecting a User Protocol Confirm password protection by tapping the Open Lock icon again. On the home screen, tap the User Protocols icon. Use the numeric keypad to set the password. Double tap protocol you wish to password protect. 17 ... -
Page 24: Protocol Manager Software
Protocol Manager Software Installation Upload from Generator to PC Download the software from BTX website www.btxonline.com. 1. Select Protocol(s). Click on Technical Resources drop-down menu and select 2. Click ‘Save Protocol’. Downloads. Download and install file named Protocol Manager. NOTE: Hit ‘Refresh’ to update the list after creating or editing protocols on the ECM 630 generator. -
Page 25: Download From Pc To Generator
Protocol Manager Software NOTE: If a protocol already exists on the ECM 630 generator, Protocol Manager will not overwrite the file if you attempt to re-download it. 4. Protocol name being downloaded is shown. Publication 5423-020-REV 1.0 • www.btxonline.com... -
Page 26: Upload Log Files
Protocol Manager Software Upload Log Files NOTE: Log Files are saved as a tab delimited text file. They can 1. On the main screen, click ‘Pulse Data’. be opened with any common text editor like Notepad or by using spreadsheet software such as Excel. 2. -
Page 27: Remote Control Software
Once the COM port is known, open the Remote Screen Interface application. Choose the correct COM port and click ‘Connect’. Download the software from the BTX website www.btxonline.com. Click on Technical Resources drop-down menu and select Downloads. Download and install file named Remote Screen Interface. -
Page 28: Generator Specifications
Generator Specifications ECM 630 Exponential Decay Wave Pulse Ranges Other Specifications Voltage Range Interlock Switches LV Mode 5 to 500 in 1 V steps Pre-Pulse Sample resistance check HV Mode 505 to 3000 in 5 V steps Pulse Over Current Voltage Accuracy Protection LV Mode... -
Page 29: Maintenance
Maintenance Battery Replacement The ECM 630 generator requires no special maintenance other than keeping it clean. (Underside of Instrument) To clean the exterior surfaces, use a lint-free cloth to remove loose 1. Disconnect from mains power supply. dust. Use care to avoid scratching the clear display window. For more efficient cleaning, use a soft cloth dampened (not soaked) 2. -
Page 30: Upgrading Gemini Series Software
Upgrading ECM 630 Series Software USB Virtual CommPort Driver 2. Two Flash update applications will be displayed in the device manager, under Other Devices. Right click on either Installation of the flash update applications and select Update Driver Software. When you connect the ECM 630 to a computer via USB for the first time, Windows®... - Page 31 USB Virtual CommPort Driver 6. Click Close after the software has been successfully installed. Installation (continued) 4. Download the software from BTX website www.btxonline.com. Click on the Technical Resources drop-down menu and select Downloads. Download and install file named Firmware Updater.
-
Page 32: Device Updater Program
Click on the Technical Resources drop-down menu and select Downloads. Download and install file named Firmware Updater. 5. Click Open Update File and browse to the BTX Gemini 7 vx.x.x.srec’. file that was previously saved to the desktop. 6. Click Start Update. -
Page 33: Error Messages & Troubleshooting
Error Messages & Troubleshooting Display Error Message Error Description User Troubleshooting Power Loss Error Power loss during pulsing. Power lost while protocol was running. PFC Over Temp PFC module over temperature. Hardware error. Please contact the manufacturer. Interlock Open Electrode interlock open. Connect electrode connectors to the front of the generator and make sure the cuvette safety dome cover is closed. -
Page 34: Troubleshooting
Troubleshooting Low Battery Indication NOTE: It is recommended that you save your protocols periodically by Time/Date area will flash between Date and Time and LOW uploading them to a PC. BATTERY message will display. Out of Range A value was entered or encountered in a protocol that was beyond the generator’s limits. - Page 35 Experiment Troubleshooting Arcing Verify electrical component functionality. Verify properties of cell sample. (Do cells need to be washed? Is the buffer appropriate for application?) Verify properties of transfectant molecule (Is the DNA well purified?) Try reducing the voltage or increase sample volume until arcing is no longer a problem.
-
Page 36: General Optimization Guide For Electroporation
The effects of heating result is irreversible damage to the cell or cell lysis. Because can be reduced by using a low conductivity medium such as BTX’s the mechanism of electroporation is not well understood, Cytoporation Medium to resuspend cells prior to electroporation. -
Page 37: Waveforms
General Optimization Guide for Electroporation As described, electroporation is the application of controlled Cell Type Field Strength Ranges direct current (DC) electrical pulses which are applied to living Bacteria/Yeast: 3 – 24 kV/cm cells and tissues for a short duration of time. The pulse induces a Mammalian: 0.25 –... -
Page 38: Pulse Length
Adjusting this parameter is dependent on the BTX offers BTXpress High Performance Electroporation Solution, pulse waveform. The pulse length in a square wave system can be a low conductance buffer that achieves higher transfection inputted directly. -
Page 39: Applications
The ability to introduce genes or molecules is essential to researchers working with either of these two species. This is why researchers consistently turn to BTX for all of their electroporation needs. Publication 5423-020-REV 1.0 • www.btxonline.com... -
Page 40: Electroporation Buffers
3.45 ms/cm to reduce heating of solution during electroporation. considered “hard to transfect” by chemical and other non-viral methods. This solution, in combination with BTX electroporators, provides researchers with the versatility needed for success across a broad range of cell types while maintaining critical cell viability. -
Page 41: Ordering Information
Ordering Information Order No. Description Qty. Order No. Description Qty. Electroporation Systems Accessories 45-2051 ECM 630, System with Safety Dome 1 ea 45-0110 Flatpack Chambers, 0.56 mm gap, Pkg of Includes ECM 630 Generator, Safety Dome, 80 μl volume, pkg. of 50 Cuvettes 1 mm, 2 mm, 4 mm pkg.