Advertisement
Quick Links
Download this manual
See also:
User Manual
Part No. HW2R1
Part No. HWABN2
Start
Here
IMPORTANT!
This Quick Installation Guide provides the quick and easy
way to set up the HWABN2 in Access Point or Bridge modes. If you need
to use the other modes, please refer to the manual located on the CD.
Setup the Device
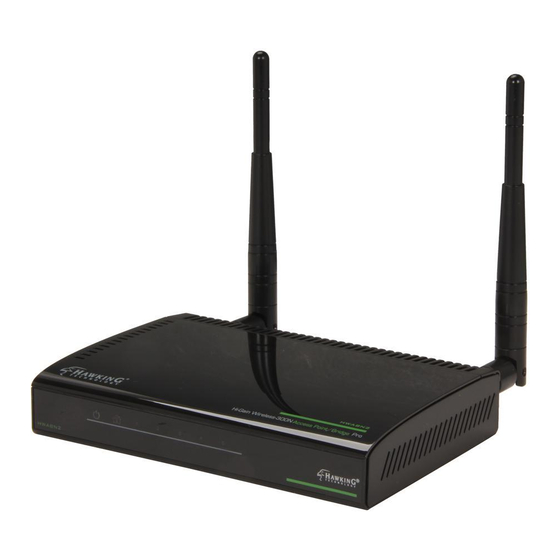
A. Attach
the Antennas
Locate the 2 antennas from your
packaging and attach them to the
Hi-Gain Wireless 300N Access
Point/Bridge Pro.
B. Plug in the Power Adapter
When you have completed the
antenna setup, plug in the included
power adapter into the nearest power
outlet.
Configuring your Access Point/Bridge Pro using a Wireless Connection
Using a computer or a wireless device with wireless access,
connect to the HWABN2 by searching for the wireless network named:
For Mac Users
Click on the Wi-Fi icon
in the "apple" toolbar.
Click on the
Hawking_HWABN2
"
_AP_Pro
" network
from the drop-down
menu. Then Continue
to Step 3.
Login into the the HWABN2
Using the same computer/device, open a web browser and type in the following
web address in the web address bar:
Once the page loads, enter the following login information:
Login:
admin
Password:
1234
Click
Login
to continue.
If the page doesn't load, please check if
yourJavaScript is enabled. Generally,
this should be enabled by default.
However, if it's not, please go to your
your Browser Settings and enable
JavaScript.
Technical Support
|
Toll free US & Canada: 1.888.202.3344
HW2R1 rev 1 I QIG v.20101118
Hi-Gain™ Wireless 300N Access Point/Bridge Pro
Package Contents
• 1x HWABN2 Access Point/Bridge Pro
• 1x 12V/1A Power Adapter
• 1x Ethernet Cable
• 1x Setup CD-ROM
• 2x 3dBi Omni-Directional Antennas
Requirements
• Wired or Wireless Internet Connection
• A Network Enabled Device (Computer,
Smart Phone, or Tablet)
• Power Outlet
For Windows Users
When the "Wireless Net-
work" Icon pops up on the
lower right of the Windows
taskbar, Click on the Icon
and choose the
Hawking_HWABN2_
"
AP_Pro
Continue on to Step 3.
http://192.168.1.241
QUICK INSTALLATION GUIDE
Power
LED is on, when the power adapter is connected
and plugged into an outlet
Wireless Connection
LED is on when Wireless Connection is activated. Blinking
when transmitting/receiving wireless data
Wired Connection
LED is on, when an ethernet cable is plugged into the ethernet port
Antennas
Two RP-SMA Connectors + Two 3dBi Omni-
Directional Antennas (Upgradable)
Wireless Radio On/Off Switch
Turns off the wireless functions
Reset Switch / WPS (WiFi Protected Setup)
Resets your router to its default settings / initiates WPS Setup
Wired (5 LAN Ports)
LAN port connects your wired network devices and computers to your network
Power
12V1A Power Adapter Plug
C. Access the HWABN2
You must access the HWABN2 to run the initial configuration.
Hawking_HWABN2_AP_Pro.
" Network. Then
Choosing your Mode
In the drop down box, please
select your mode of operation
for the HWABN2. This quick
installation guide will outline
the basic Access Point and
Station Infrastructure (Bridge)
modes.
For other modes and features
please refer to the manual on
your CD.
|
Email: techsupport@hawkingtech.com
Front / LED Description
Back Panel Description
tup)
tes WPS Setup
nd computers to your network
Wireless:
If you have a wireless enabled device,
please proceed to Step 2
Wired:
If you don't have a wireless enabled
device, use an ethernet cable and connect your
laptop or through one of the five LAN ports
located on the back, Then, proceed to Step 3.
For Tablet or
Smartphone Users
Go to your wireless
setting, select the
Hawking_HWABN2
"
_AP_Pro
" Network.
Then, go to Step 3.
www.hawkingtech.com
Technical Support: 1.888.202.3344
www.hawkingtech.com
© 2011 Hawking Technologies, Inc. All rights reserved.
Hawking_HWABN2_AP_Pro
HWABN2- QIG 12202011
Advertisement

Related Manuals for Hawking HWABN2


Summary of Contents for Hawking HWABN2
-
Page 1: Quick Installation Guide
This Quick Installation Guide provides the quick and easy Wired Connection way to set up the HWABN2 in Access Point or Bridge modes. If you need LED is on, when an ethernet cable is plugged into the ethernet port to use the other modes, please refer to the manual located on the CD. - Page 2 STATION - INFRASTRUCTURE (BRIDGE MODE) In this mode, the HWABN2 Bridge allows you to connect wired devices to an existing wireless router or access point. Note: Using this mode, the HWABN2 Bridge does not broadcast any WiFi signal. It can only link directly to the wireless source (see the overview diagram below).