Table of Contents
Advertisement
Quick Links
Advertisement
Table of Contents

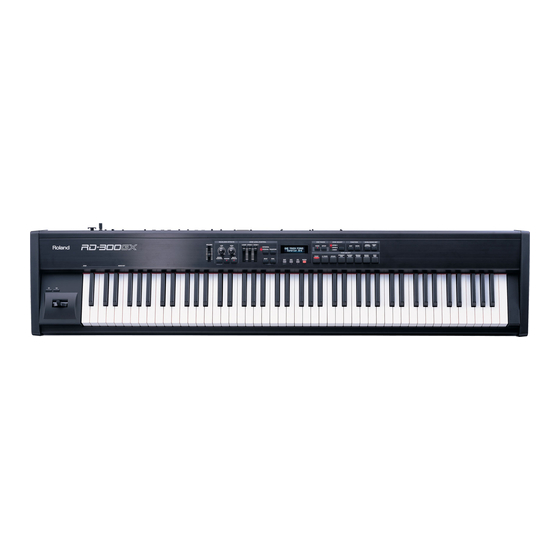
Related Manuals for Roland RD-300GX


Summary of Contents for Roland RD-300GX
-
Page 3: Introduction
Introduction Thank you, and congratulations on your choice of the RD-300GX. To ensure that you obtain the maximum enjoyment and take full advantage of the RD-300GX’s functionality, please read this owner’s manual carefully. About the Manual You should first read the “Getting Ready” (p. 15) section of the owner’s manual (this document). -
Page 4: Using The Unit Safely
Do not place in an unstable location When using the unit with a stand recommended by Roland, the stand must be carefully placed so it is level and sure to remain stable. If not using a stand, you still need to make sure that any location... -
Page 5: Using The Unit Safely
Use only the specified stands 101C This (RD-300GX) for use only with Roland stand KS- 12 or KS-18Z. Use with other stand is capable of resulting in instability causing possible injury. -
Page 6: Important Notes
Important Notes Power Supply • Do not connect this device to the same electrical outlet as an inverter-controlled device such as a refrigerator, microwave oven, or air conditioner, or a device that contains an electric motor. Depending on how the other device is used, power supply noise could cause this device to malfunction or produce noise. - Page 7 * GS ( ) is a registered trademark of Roland Corporation. * All product names mentioned in this document are trademarks or registered trademarks of their respective owners.
-
Page 8: Table Of Contents
Rear Panel ...14 Getting Ready... 15 Placing the RD-300GX on a Stand...15 Connecting the AC Adaptor ...16 Connecting the External Equipment to RD-300GX ...17 Connecting Pedals ...18 Turning the Power On and Off ...19 Turning On the Power...19 Turning Off the Power...20 Adjusting the Volume ...20... - Page 9 Fast-forwarding or Rewinding a Song ...41 Performing with Audio Files ([AUDIO KEY] Button)...42 Performing with Audio Files from USB Memory ...42 Performing with Audio Files that are Built Into the RD-300GX ...45 Adjusting the Volume of Audio Key ...45 Changing Audio File Settings ...46 Applying Effects to the Sound ([MULTI EFFECTS] Button) ...47...
- Page 10 Changing the Key Touch (Key Touch/Ofst)...62 Setting a Constant Volume Level in Response to the Playing Force (Velocity) ...62 Changing the Timing of Sounds in Response to the Velocity (Velo Delay Sens)...62 Changing How Volume Responds to the Velocity (Key Touch Mode)...62 Detailed Settings for Each Function ([EDIT] Button)...
- Page 11 Performing Along with a Audio File (Center Cancel) ...76 Utility Settings (Utility) ...77 Transferring the RD-300GX’s Settings to an External MIDI Device (Bulk Dump) ...77 Restoring the Settings to the Factory Condition (Factory Reset) ...77 Connecting External MIDI Devices ... 78 Recording RD-300GX Performances to an External MIDI Sequencer...78...
-
Page 12: Panel Descriptions
If the “EXTERNAL” indicator is lit, these sliders control the volume of an external MIDI sound module (p. 57). [EXTERNAL/INTERNAL] Button Puts the RD-300GX in control of the external MIDI sound generator (p. 55). [TRANSPOSE] Button Sets the range of the keyboard to transposed (p. 32). - Page 13 DISPLAY This shows the Tone names and the values of various settings, etc. [EXIT/SHIFT] Button Pressed to return to a previous screen or to cancel a procedure that is in progress. Additionally, this is pressed simultaneously with other buttons to execute various functions. [DEC] Button, [INC] Button These are used to modify values.
-
Page 14: Rear Panel
PEDAL Jacks (DAMPER, CONTROL) Connecting the pedal switch (DP series) provided with the RD-300GX to the DAMPER jack allows you to use the switch as a damper pedal. (p. 18) With a pedal connected to the CONTROL jack, you can then assign a variety of functions to the pedal (p. -
Page 15: Getting Ready
Getting Ready Placing the RD-300GX on a Stand If you place the RD-300GX on a stand, you must use the KS-12 or KS-18Z (sold separately). When placing the RD-300GX on the KS-12 or KS-18Z, place it in the position shown below. -
Page 16: Connecting The Ac Adaptor
The indicator will light when you plug the AC adaptor into an AC outlet. Connect the AC adaptor to the RD-300GX’s DC IN jack, and plug the power cord into an AC outlet. Loop the AC adaptor cord around the cord hook to fasten it in place. -
Page 17: Connecting The External Equipment To Rd-300Gx
Connecting the External Equipment to RD-300GX The RD-300GX is not equipped with an amplifier or speakers. In order to produce sound, you need to hook up audio equipment such as a monitor speaker or a stereo set, or use headphones. -
Page 18: Connecting Pedals
Is the volume level of the RD-300GX or connected amp turned all the way down? Is the power to the RD-300GX or connected amp turned off? Connect supplied AC adaptor to the DC IN of the RD-300GX, and plug the other end into an AC outlet. -
Page 19: Turning The Power On And Off
Also completely turn down the volume of any connected audio device and other equipment. fig.00-09 Press the [POWER] switch on the back of the RD-300GX to turn on the power. The unit is powered up, and the display’s backlighting comes on. -
Page 20: Turning Off The Power
Also completely turn down the volume of any connected audio device and other equipment. Turn off the power to connected external devices. Press the [POWER] switch on the back of the RD-300GX. The power is switched off. If you need to turn off the power completely, first turn off the [POWER] switch, then unplug the NOTE power cord from the power outlet. -
Page 21: Using A Usb Memory
Carefully insert the USB memory all the way in—until it is firmly in place. If you’re using new USB memory, you must first initialize (format) it on the RD-300GX. For details, refer to “Formatting Memory (Format)” (p. 76). -
Page 22: Overview Of The Rd-300Gx
OUTPUT and PHONES jacks. Units of Sound When using the RD-300GX, you will notice that a variety of different categories come into play when working with sounds. What follows is a simple explanation of each sound category. -
Page 23: Basic Operation
Basic Operation Main Screens ONE TOUCH Screen When the ONE TOUCH [PIANO] button is pressed, setting the RD-300GX to the optimal status for Piano performances, this screen is displayed. fig.gisp Tone Screen (Basic Screen) The names of the Tones currently selected for the Internal Zone are displayed. -
Page 24: About The Function Buttons
Overview of the RD-300GX External Screen When the [EXTERNAL/INTERNAL] button is pressed, the EXTERNAL indicator lights up, and the RD-300GX switches to the mode enabling it to control an external MIDI sound generator. The status of this button determines whether the RD- 300GX’s buttons are used to control the Internal Zone... -
Page 25: Listening To The Demo (Demo Play)
Listening to the Demo (DEMO PLAY) Here’s how to listen to these songs. The RD-300GX features the internal demo songs that exhibit the special capabilities of the instrument. Song Name Macho Blues Fond Farewell Superior Grand All rights reserved. Unauthorized use of this material for purposes other than private, NOTE personal enjoyment is a violation of applicable laws. -
Page 26: Performance
Stop when You Press a ONE TOUCH Button (Song Stop Mode)” (p. 67). With the RD-300GX, you can also make more detailed settings to make the sound even better match your favorite piano performances. You can store the settings configurations to the ONE TOUCH [PIANO] button. -
Page 27: Performing With A Variety Of Tones (Tone Select Buttons)
Performing with a Variety of Tones (TONE SELECT Buttons) The RD-300GX comes with a many built-in Tones. Each one of these individual sounds is called a “Tone.” Tones are assigned to the TONE SELECT buttons according to the Tone category selected. -
Page 28: Playing Multiple Tones With The Keyboard
Performance Playing Multiple Tones with the Keyboard The RD-300GX features three Internal Zones (UPPER 1, UPPER 2, and LOWER), and one Tone can be assigned to each of these Zones. You can perform using combinations of Tones by turning each Zone on or off. You can have multiple Tones layered together at the same time, and even have different Tones played in the left and right parts of the keyboard. -
Page 29: Playing Different Tones In Two Different Sections Of The Keyboard ([Split] Button)
Pressing Two TONE SELECT buttons Simultaneously You can layer two Tones by pressing two TONE SELECT buttons simultaneously. For example, if you want to layer a piano sound with strings, together press both the [PIANO] button and the [STRINGS] button. The [DUAL] button’s indicator starts to flash, and when you begin playing the keyboard, the piano and strings sounds are layered together. - Page 30 Performance Press the [SPLIT] button, getting the indicator to light. The ZONE SELECT “LOWER” indicator lights. Try fingering the keyboard. fig.disp The UPPER Tone plays in the right-hand section of the keyboard, and the LOWER Tone plays in the left-hand section. fig.Q1-17sp LOWER To exit Split mode, press the [SPLIT] button once more, and the indicator light goes out.
-
Page 31: Changing The Tone For A Zone (Zone Select Button)
Zones to which Tones from external sound modules are assigned are called External Zones. With the RD-300GX, you can control both the External and Internal Zones in the same manner. For more on the control of External Zone, refer to “Adjusting the Volume of Each Zone (External Zone)”... -
Page 32: Transposing The Key Of The Keyboard ([Transpose] Button)
Performance Transposing the Key of the Keyboard ([TRANSPOSE] Button) You can transpose performances without changing the keys you are playing, as well as change the pitch by an octave. This feature is called “Transpose.” This is a convenient feature to use when you want to match the pitch of the keyboard performance to a vocalist’s pitch, or perform using the printed music for trumpets or other transposed instruments. -
Page 33: Adding Reverberation To The Sound ([Reverb] Button)
Adding Reverberation to the Sound ([REVERB] Button) The RD-300GX can apply a reverb effect to the notes you play on the keyboard. Applying reverb adds pleasing reverberation to what you play, so it sounds almost as if you were playing in a concert hall. -
Page 34: Changing The Depth Of Reverb Effect
Performance Changing the Depth of Reverb Effect You can select from 127 levels of depth for the reverb effect. Hold down the [REVERB] button and use the [DEC] [INC] buttons to change the depth of the reverb effect. fig.disp When you release the [REVERB] button, the previous display will reappear. Reverb depth settings can be made independently for each Zone (p. -
Page 35: Adding Liveliness To The Sound ([Sound Control] Button)
Adding Liveliness to the Sound ([SOUND CONTROL] Button) Switching on the Sound Control function suppresses differences in volume for a more consistent sound. This is set to OFF when the power is turned on. fig.Q1-27sctrl Press the [SOUND CONTROL] button, getting its indicator to light. Sounds may become distorted with certain Tones. -
Page 36: Adjusting The Levels Of Each Frequency Range (Equalizer Knobs)
Performance Adjusting the Levels of Each Frequency Range (EQUALIZER Knobs) The RD-300GX is equipped with a two-band equalizer. You can use the EQUALIZER [LOW] knob, and [HIGH] knob to adjust the level of each frequency range. Equalization is applied to the overall sound output from the OUTPUT jacks. -
Page 37: Using The Convenient Functions In Performances
Using the Convenient Functions in Performances Playing Rhythm ([SONG/RHYTHM] Button) The RD-300GX features internal drum patterns complementing Jazz, Rock, and other various musical genres. These drum patterns are referred to as “Rhythms.” fig.02-05p Press the [SONG/RHYTHM] button. While continuing to hold down the [EXIT/SHIFT] button, use the [DEC] [INC] buttons to move the cursor to the upper left of the screen. -
Page 38: Changing Rhythm Pattern
Using the Convenient Functions in Performances Changing Rhythm Pattern You can select the way a Rhythm is played (the pattern) to match a variety of different musical genres. Access the Rhythm screen. While continuing to hold down the [EXIT/SHIFT] button, use the [DEC] [INC] buttons to move the cursor to the lower left of the screen. -
Page 39: Changing Rhythm Volume
Changing Rhythm Volume While holding down the [SONG/RHYTHM] button, move any of the ZONE LEVEL sliders. The volume of the Rhythm changes. You won’t be able to change the Rhythm volume if Rhythm is not set to play. If the NOTE audio file is set to play, this operation will change the audio volume. -
Page 40: Playing Songs ([Song/Rhythm] Button)
• Transpose the song playback • Minimize sounds located in the center, such as the melody For details, refer to “Settings Related to Song Playback (Song Function)” (p. 76). Song Name Composer Macho Blues John Maul Copyright © 2008 Roland Corporation... -
Page 41: Changing Song Tempos
Changing Song Tempos You can change the tempo for songs. In the Song screen, hold down the [EXIT/SHIFT] button and use the [DEC] [INC] buttons to move the cursor to the tempo indication. Use the [DEC] [INC] buttons to change the tempo. Here’s how to change the playback speed of audio files (WAV, MP3). -
Page 42: Performing With Audio Files ([Audio Key] Button)
Using the Convenient Functions in Performances Performing with Audio Files ([AUDIO KEY] Button) The RD-300GX lets you play audio files saved on USB memory (sold separately) while you perform. This is called the “Audio Key” function. The Audio Key function lets you assign an audio file to each key B 0–B1, and play those audio files by pressing the corresponding key. - Page 43 When you take your finger off the button, a screen like the following will appear. Play a key B 0–B1. The audio file assigned to the respective key will play. B 0–B1 If you play the B0 key, a screen like the following will appear. The Audio Key function will be activated, allowing you to play audio files by pressing a key.
- Page 44 Playing back an MP3 file or changing the playback tempo of an audio file places a significant processing burden on the RD-300GX, and in some cases may cause it to be unable to completely process all of the performance data from the keyboard.
-
Page 45: Performing With Audio Files That Are Built Into The Rd-300Gx
RD-300GX. Even if you’re using the audio file set that’s built into the RD-300GX, you can change the settings of the audio files assigned to the keys, and change the settings that specify how the audio files will be repeated (p. -
Page 46: Changing Audio File Settings
If you don’t want to store the settings, press the [EXIT/SHIFT] button. The operation will be cancelled. Press the [ENTER] button to overwrite the settings of the audio file set. If you’re using an audio file that’s built into the RD-300GX, you can’t save your changes NOTE... -
Page 47: Applying Effects To The Sound ([Multi Effects] Button)
Applying Effects to the Sound ([MULTI EFFECTS] Button) In addition to reverb (p. 33), the RD-300GX also allows you to apply “multi effects” to sounds. Multi effects provides a collection of 78 different effects, such as distortion and rotary, from which you can choose. -
Page 48: Changing The Multi-Effects Type
Choosing the Zone to which the multi-effect will apply On the RD-300GX, only one type of multi-effect can be used at a time. For this reason, there’s a “MFX Zone” setting that lets you choose the Zone to which the multi-effect is to be applied. -
Page 49: Disabling The Buttons (Panel Lock)
Disabling the Buttons (Panel Lock) Once Panel Lock is engaged, all buttons (except for the VOLUME slider, [DISPLAY CONTRAST] knob, Pitch Bend/Modulation lever, Pedals, ONE TOUCH [PIANO] button, and [EXIT/SHIFT] button) will not function. This prevents settings from being changed inadvertently on stage or in other such situations. -
Page 50: Selecting Stored Settings ([Setup] Button)
Using the Convenient Functions in Performances Selecting Stored Settings ([SETUP] Button) The RD-300GX’s Internal Zone (p. 22) and External Zone (p. 22) Tone settings, effect settings, and other such settings are collectively referred to as a “Setup.” Once you’ve stored your preferred settings, and settings for the songs to be performed as a Setup, you can then switch whole groups of settings during a performance just by switching Setups. -
Page 51: Storing Settings To Setups ([Write] Button)
If you want to use the changed content as a new Setup, use the following procedure to save the settings to a Setup. You can also change the name of a Setup. You can store 32 Setups on the RD-300GX. fig.Q2-19p Press the [WRITE] button, getting the indicator to light. - Page 52 Using the Convenient Functions in Performances When you have finished determining the save destination and the name for the new Setup, press the [ENTER] button. The [ENTER] and [EXIT/SHIFT] buttons’ indicators are flashing, and the confirmation message appears. If you do not want to save the Setup, press the [EXIT/SHIFT] button or [WRITE] button. The operation is cancelled.
-
Page 53: Using The Rd-300Gx As A Master Keyboard
Using the RD-300GX As a Master Keyboard By connecting an external MIDI device to the MIDI OUT connector on the RD-300GX’s rear panel, you can then control the external MIDI device with the RD-300GX. Normally, the RD-300GX will transmit note messages from the MIDI OUT connector, but if you press the [EXTERNAL/INTERNAL] button so the “EXTERNAL”... -
Page 54: Connecting To External Midi Sound Generators
Using the RD-300GX As a Master Keyboard Connecting to External MIDI Sound Generators MIDI sound module etc. MIDI IN connector MIDI OUT connector Use a USB Cable no longer than 5 meters. NOTE Computer connector connector RD-300GX... -
Page 55: Setting The Midi Transmit Channel (Midi Out Channel)
Transmit channel and the Receive channel for each of the external MIDI sound generator’s Parts. Sounds is produced when the MIDI channels for the sending device (the RD-300GX) and the receiving device (the external MIDI sound generator) are set to the same MIDI channel. -
Page 56: Selecting Sounds On An External Midi Device (Msb/Lsb/Pc)
Selecting Sounds on an External MIDI Device (MSB/LSB/PC) To switch the tones of an external MIDI device, the program number and the MSB/LSB of the Bank Select message are entered as numerical values on the RD-300GX. fig.Q3-06p Press the [EXTERNAL/INTERNAL] button so the “EXTERNAL” indicator is lit. -
Page 57: Adjusting The Volume Of Each Zone (External Zone)
When the EXTERNAL indicator is lit, you can use the ZONE LEVEL sliders to control the External Zone in the same way as with the Internal Zone (p. 31). Using the RD-300GX As a Master Keyboard EXTERNAL indicator is lit... -
Page 58: Detailed Settings For Transmitted Parts ([External/Internal] Button)
How to Make Settings Press the [EXTERNAL/INTERNAL] button so the “EXTERNAL” indicator is lit. The RD-300GX is set to control the external MIDI devices. The External screen shown will not appear if “Rec Mode” is “ON” in Utility edit. Turn the Rec Mode NOTE setting “OFF”... -
Page 59: Setting The Key Range (Krl/Kru)
NOTE below the lower limit. If you don’t want MIDI note data to be transmitted, set the Zone’s MIDI OUT Ch to “OFF.” (p. 55) Using the RD-300GX As a Master Keyboard Value... -
Page 60: Making Detailed Settings For The One Touch Tones
Piano Designer settings are switched to their status at the time the NOTE RD-300GX’s power was turned on. Store any arrangements of settings that you want to keep in Setup (p. 51). Making the Settings... -
Page 61: Adjusting The Resonance Of The Aliquot Strings (Duplex Scale)
Adjusting the Resonance of the Aliquot Strings (Duplex Scale) This adjusts the sound of the sympathetically vibrating aliquot strings on an acoustic piano. Parameter Value Higher values will increase Duplex Scale 0–127 the volume of the sympathetic vibration. What are Duplex Scale? The Duplex Scale is a system of sympathetically vibrating strings sometimes included in grand pianos. -
Page 62: Changing The Key Touch (Key Touch/Ofst)
Making Detailed Settings for the ONE TOUCH Tones Changing the Key Touch (Key Touch/Ofst) Use “Key Touch” to adjust the touch sensitivity of the keyboard. You can use the “Key Touch Offset” setting to adjust the sensitivity in greater detail. fig.disp Key Touch value Parameter... -
Page 63: Detailed Settings For Each Function ([Edit] Button)
“editing.” When the [EDIT] button is pressed and the indicator is lit, the RD-300GX switches to “Edit mode.” You can save edited settings to Setups. Edited settings are discarded when the RD-300GX’s power is turned off, so be sure that any settings you want to keep are saved to a Setup (p. -
Page 64: Making System Settings (System)
70 Making System Settings p. 70 p. 71 (System) p. 71 p. 71 Functions that affect the RD-300GX’s overall operating p. 71 environment are called “System functions.” p. 71 p. 71 p. 71 Tuning to Other Instrument’s Pitches p. 72 (Master Tune) p. -
Page 65: Using Program Change Messages To Switch Setups (Setup Ctrl Ch.)
If your pedal has an effect opposite of what you expect, set this parameter to REVERSE. If you are using a Roland pedal (that has no polarity switch), set this parameter to STANDARD. Damper Polarity... -
Page 66: Selecting The Number Of Parts (Part Mode)
When set to “16PART+PERF,” the performance on the keyboard is not affected by MIDI messages from the MIDI IN connector or song data played by the RD-300GX. This is useful when you want to perform on the keyboard while playing song data with the RD-300GX. -
Page 67: Switching Between Reception Of Gm/Gm2 System On And Gs Reset (Rx Gm Sys On, Rx Gs Reset)
Switching Between Reception of GM/ GM2 System On and GS Reset (Rx GM Sys ON, Rx GS Reset) Specifies whether General MIDI System On, General MIDI 2 System On, or GS Reset messages from external MIDI devices will be received (ON) or not (OFF). Parameter Rx. -
Page 68: Setup-Related Settings (Common)
Detailed Settings for Each Function ([EDIT] Button) Setup-Related Settings (Common) Setting the Zone to which Multi Effects are Added (MFX Zone) This specifies the Zone to which the multi-effect will be applied when you’re playing in Dual mode (p. 28) or Split mode (p. 29). Parameter Value The effect will be applied to the... -
Page 69: Tone Settings (Tone Parameter)
Function/Parameter Setting Parameter Value When you play the keyboard, notes a fifth COUPLE +5TH (seven semitones) above will also sound at the same time. When you play the keyboard, notes a fourth COUPLE -4TH (five semitones) below will also sound at the same time. Each button press raises the OCTAVE UP key range in octave steps (up... -
Page 70: Changing The Pitch (Coarse Tune/Fine Tune)
Detailed Settings for Each Function ([EDIT] Button) Changing the Pitch (Coarse Tune/Fine Tune) This sets the pitch of the Tone. Parameter Value -48–+48 Coarse Tune (+/- 4 octaves) -50–+50 Fine Tune (+/- 50 cents) 1 cent = 1/100 semitone With some Tones, there may be ranges in which NOTE the pitch does not change as intended. -
Page 71: Turning The Controllers In Each Zone On And Off
When you have finished making the settings, press the [EDIT] button, extinguishing its indicator. On the RD-300GX, UPPER 1 is fixed as Part 1 (Ch 1), UPPER 2 is fixed as Part 2 (Ch 2), while NOTE LOWER is fixed as Part 3 (Ch 3). Note that the keyboard won’t produce sound if Parts 1, 2 and 3... -
Page 72: File Management (File)
Detailed Settings for Each Function ([EDIT] Button) File Management (File) The RD-300GX lets you store Setup data in internal memory or in USB memory connected to the USB MEMORY connector on the rear panel. Saving a Setup File (Save SETUP) A single, individual file containing a collection of 32 Setups registered to the RD-300GX is called a “Setup file.”... -
Page 73: Deleting A Setup File (Delete Setup)
Use the [DEC] [INC] buttons to select the memory into which you want to load the data. Value Description The data in the RD-300GX’s internal memory will be loaded. The data on USB memory connected to the USB MEMORY connector on the rear panel will be loaded. -
Page 74: Copying A Setup File (Copy Setup)
Detailed Settings for Each Function ([EDIT] Button) Copying a Setup File (Copy SETUP) You can copy a Setup file from the RD-300GX’s internal memory to USB memory (sold separately). You can also copy a Setup file from USB memory to the RD- 300GX’s internal memory. -
Page 75: Deleting A Song (Delete Song)
Use the [DEC] [INC] buttons to select the memory containing the file you want to delete. Value Description The data in the RD-300GX’s internal memory will be deleted. The data on USB memory connected to the USB MEMORY connector on the rear panel will be deleted. -
Page 76: Formatting Memory (Format)
USB memory for use with RD-300GX. USB memory cannot be used with the RD-300GX unless it is formatted suitably for the RD-300GX. If you’re using newly purchased USB memory, you must first format it on the RD-300GX. -
Page 77: Utility Settings (Utility)
Detailed Settings for Each Function ([EDIT] Button) Restoring the Settings to the Factory Condition (Factory Reset) The settings stored in the RD-300GX can be returned to their factory settings. Executing “Factory Reset All” results in deletion of the Setups (p. 50). If you want to keep the... -
Page 78: Connecting External Midi Devices
“Rec Mode” and “Local Control” are convenient features to use when recording to an external sequencer. When using the functions, you can get the most suitable settings for recording the RD-300GX’s data to an external sequencer, without having to make all the Part and channel settings. -
Page 79: Recording The Performance
Using the Utility “Bulk Dump” in Edit mode, transmit the contents of the selected Setup to the external sequencer. For instructions on carrying out this operation, refer to “Transferring the RD-300GX’s Settings to an External MIDI Device (Bulk Dump)” (p. 77). Perform on the RD-300GX. -
Page 80: Playing The Rd-300Gx's Internal Sound Generator From An External Midi Device
Program Change messages from the external MIDI device to the RD-300GX allows you to switch Setups and Tones. Switching Setups The MIDI messages transmitted by the external MIDI device will be received by the RD-300GX to select Setups as shown in the following table. Setup Number MIDI OUT 1–32... -
Page 81: Connecting To Your Computer
USB MIDI connector located on the RD-300GX’s rear panel to the USB connector of your computer, you’ll be able to do the following things. • Use the RD-300GX to play SMF music files played back by MIDI-compatible software. • By transferring MIDI data between the RD-300GX and your sequencer software, you’ll be able to enjoy a wide... -
Page 82: About V-Link
Connecting to Your Computer About V-LINK Connecting the RD-300GX to a V-LINK compatible image device allows you to control the images with the RD-300GX. To prevent malfunction and/or damage to speakers NOTE or other devices, always turn down the volume, and turn off the power on all devices before making any connections. -
Page 83: Appendices
Appendices Troubleshooting If the RD-300GX does not function in the way you expect, first check the following points. If this does not resolve the problem, consult your dealer or a nearby Roland Service Station. * If certain messages appear in the display during operation, please refer to “Error Messages/Other Messages” (p. 86). - Page 84 Effects Not Applied/ Effects Sound Wrong On the RD-300GX, only one type of multi-effect can be used at a time. For this reason, there’s a “MFX Zone” setting that lets you choose the Zone to which the multi-effect is to be applied.
- Page 85 • Set the System Rx GM System On or System Rx GM2 System On to ON in Edit mode. Are you playing back GS Format song data? • Once the RD-300GX receives a GS Reset message, it then is enabled for GS Format. This permits playback of music files bearing the GS logo (GS music files). However, data created exclusively for the Sound Canvas Series may not play back properly on the RD- 300GX.
-
Page 86: Error Messages/Other Messages
File Error The external media may be corrupted. Error 15 The file is unreadable. The data format is File Error not compatible with the RD-300GX. Error 16 Data was not called up in time for playback File Error of the song. -
Page 87: Effect List
Effect List Indicated MFX Type number THRU Amplifies the low and high ends for a EQUALIZER noticeably striking tone. Cuts the midrange for a clean, refreshing tone. MID CUT Reduces the volume of the low end. LOW CUT Boosts the volume of the lower range, creating LOW BOOST powerful lows. - Page 88 Effect List Indicated MFX Type number This is a flanger in which the flanger pitch STEP FLANGER changes in steps. Uses a six-phase chorus to give richness and HEXA- spatial spread to the sound. CHORUS This is a chorus effect with added Tremolo TREMOLO (cyclic modulation of volume).
- Page 89 Indicated MFX Type number Produces three delay sounds; center, left and 3TAP PAN right. DELAY This effect has four delays. 4TAP PAN DELAY This effect provides four delays with feedback. MULTI TAP DELAY This is a reverse delay that adds a reversed REVERSE and delayed sound to the input sound.
- Page 90 Effect List Indicated MFX Type number This effect connects an overdrive and a delay OVERDRIVE in series. →DELAY This effect connects a distortion and a chorus DISTORTION in series. →CHORUS This effect connects a distortion and a flanger DISTORTION in series. →FLANGER This effect connects a distortion and a delay in DISTORTION...
-
Page 91: Tone List
Tone List MSB: Bank Select MSB (Control Number: 0) LSB: Bank Select LSB (Control Number: 32) PC: Program Change PIANO No. Tone Name MSB LSB Superior Grd Ultimate Pno Grand RD Pure Grand Mellow Piano Pure Mellow Superior Str Superior Pad Rock Piano 10 Honky-tonk 11 SuperiorMono... - Page 92 Tone List RHY/GM2 No. Tone Name MSB LSB RD Pop Kit RD Rock Kit RD Jazz Kit RD R&B Kit RD House Kit GM2 STANDARD 120 0 GM2 ROOM 120 0 GM2 POWER 120 0 GM2 ELECTRIC 120 0 10 GM2 ANALOG 120 0 11 GM2 JAZZ 120 0...
- Page 93 No. Tone Name MSB LSB 190 Space Voice 121 0 191 Itopia 121 1 192 Bowed Glass 121 0 193 Metal Pad 121 0 194 Halo Pad 121 0 195 Sweep Pad 121 0 196 Ice Rain 121 0 197 Soundtrack 121 0 198 Crystal 121 0...
-
Page 94: Rhythm Set List
Rhythm Set List * [EXC]: will not sound simultaneously with other percussion instruments of the same number. RD Pop Kit RD Rock Kit Rock Kick Old Kick Pop Kick Pop Kick Analog Kick 1 Analog Kick 1 Hush Kick Rock Kick Pop CHH 1 [EXC1] Rock CHH1... - Page 95 * - - - - -: No sound. * [EXC]: will not sound simultaneously with other percussion instruments of the same number. GM2 STANDARD ----- ----- ----- ----- ----- ----- High-Q Slap ScratchPush [EXC7] ScratchPull [EXC7] Sticks SquareClick Mtrnm.Click Mtrnm. Bell Jazz Kick 1 Mix Kick Side Stick...
- Page 96 Rhythm Set List * - - - - -: No sound. * [EXC]: will not sound simultaneously with other percussion instruments of the same number. GM2 ANALOG GM2 JAZZ ----- ----- ----- ----- ----- ----- ----- ----- ----- ----- ----- ----- High-Q High-Q...
-
Page 97: Rhythm Pattern List
Rhythm Pattern List Rhythm Pattern Piano R&B 1 Piano R&B 2 8-Beat Funk 16-BeatFunk 8-BtShuffle 16BtShuffle Latin Dance LatinFusion Fast Jazz Afro-Cuban Pop Ballad Ballad 1 StraightRck PowerfulRck Slow Beat Back Beat 1 Hip'n'Hop ElecDance 1 Pop 1 Pop 2 Pop 3 Pop 4 8-Beat Pop1... -
Page 98: Setup List
Setup List → Selecting Stored Settings ([SETUP] Button) (p. 50) “R.”: These Setups let you enjoy performing with a session-like feel while playing a Rhythm. Be sure to check it out. For more on Rhythms, refer to the “Playing Rhythm ([SONG/RHYTHM] Button)” (p. 37). [Piano] Piano&Choir Piano&Winds... -
Page 99: Midi Implementation Chart
DIGITAL PIANO Model RD-300GX Function... Basic Default Channel Changed Default Mode Messages Altered Note True Voice Number : Note ON Velocity Note OFF After Key’s Touch Ch’s Pitch Bend 0, 32 6, 38 Control Change 98, 99 100, 101 Prog... -
Page 100: Main Specifications
Main Specifications RD-300GX: Digital Piano Keyboard Section Keyboard 88 keys (PHA alpha II Keyboard) Sound Generator Section Conforms to General MIDI 2 System, 88-key Stereo Multi-sampled Piano Sound Part 16 Parts Maximum Polyphony 128 voices Wave Memory 128 MB (16-bit linear equivalent) -
Page 101: Index
Index ... 16 AC Adaptor ... 69 Attack Time ... 45 Audio File ... 42 Audio Key ... 42 Audio Key ... 45 Volume ... 13, 42 [AUDIO KEY] Button ... 67 Audio Volume ... 56 Bank Select LSB ... 56 Bank Select MSB ... - Page 102 ... 28 Layer ... 60 ... 72 Load SETUP ... 78 Local Control ... 79 Local Switch ... 12, 36 [LOW] Knob ... 30 LOWER ... 55 LOWER (External Zone) ... 29 Lower Tone ... 56 ... 64 Master Tune ...
- Page 103 SMF Music File ... 40 Playback ... 40 Song ... 74 Copy ... 75 Delete ... 41 Fast-forward ... 41 Rewind ... 41 Tempo ... 76 Song Function ... 67 Song Stop Mode ... 13, 37, 40 [SONG/RHYTHM] Button ... 35 Sound Control ...
- Page 104 Information When you need repair service, call your nearest Roland Service Center or authorized Roland distributor in your country as shown below. PHILIPPINES AFRICA G.A. Yupangco & Co. Inc. 339 Gil J. Puyat Avenue EGYPT Makati, Metro Manila 1200, Al Fanny Trading Office...
- Page 105 For EU Countries For China...
- Page 106 Cet appareil numérique de la classe B respecte toutes les exigences du Règlement sur le matériel brouilleur du Canada. Compliance Information Statement Model Name : RD-300GX Type of Equipment : Digital Piano Responsible Party : Roland Corporation U.S. Address : 5100 S. Eastern Avenue, Los Angeles, CA 90040-2938 (323) 890-3700 Telephone : NOTICE AVIS...
- Page 108 04899590 08-02-2N...