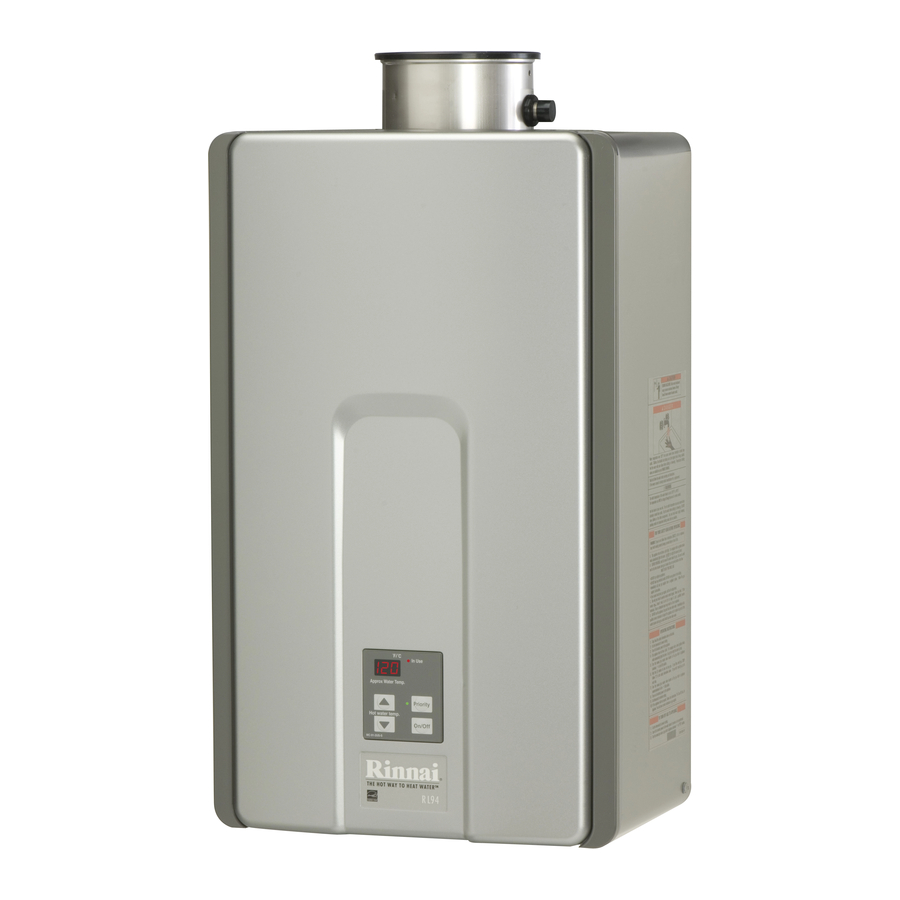
Rinnai RL75I Operation And Installation Manual
Direct vent tankless water heater
Hide thumbs
Also See for RL75I:
- Installation and operation manual (94 pages) ,
- Brochure & specs (6 pages) ,
- Manual (12 pages)
Table of Contents
Advertisement
Available languages
Available languages
The VB series (RL75i, and RL94i) are certified for
installation in manufactured (mobile) homes.
Register your product at www.rinnairegistration.com or
call 1-866-RINNAI1 (746-6241)
ANS Z21.10.3
●
CSA 4.3
INSTALLER: Leave this manual with the appliance.
CONSUMER: Retain this manual for future reference.
WARNING
result causing property damage, personal injury or death.
- Do not store or use gasoline or other flammable vapors and
liquids in the vicinity of this or any other appliance.
- WHAT TO DO IF YOU SMELL GAS
Do not try to light any appliance.
•
Do not touch any electrical switch; do not use any phone in
•
your building.
Immediately call your gas supplier from a neighbor's phone.
•
Follow the gas supplier's instructions.
If you cannot reach your gas supplier, call the fire
•
department.
- Installation and service must be performed by a qualified
installer, service agency or the gas supplier.
Direct Vent Tankless Water Heater
Operation and Installation Manual
RL75i .................. REU-VB2528FFUD-US
RL94i .................. REU-VB2735FFUD-US
R98LSi ................ REU-VA3237FFU-US
R98LSi-ASME .... REU-VA3237FFU-ASME
FOR INDOOR APPLICATIONS ONLY
Table of Contents ..................... 2
Operating Instructions ............... 6
Maintenance ........................... 11
Error Codes ............................ 12
Installation Instructions ........... 16
Consumer Support .................. 44
French Version ....................... 47
If the information in these instructions is not
followed exactly, a fire or explosion may
Advertisement
Chapters
Table of Contents

Related Manuals for Rinnai RL75I


Summary of Contents for Rinnai RL75I
-
Page 1: Table Of Contents
The VB series (RL75i, and RL94i) are certified for installation in manufactured (mobile) homes. Register your product at www.rinnairegistration.com or call 1-866-RINNAI1 (746-6241) — Do not store or use gasoline or other flammable vapors and — WHAT TO DO IF YOU SMELL GAS ANS Z21.10.3... -
Page 2: Table Of Contents
General Instructions ... 16 Clearances from Appliance ... 17 Attachment of the Water Heater ... 17 Electrical Connection ... 18 Error Indication or Air Handler Control Switch ... (RL75i, RL94i only) ... 18 R98LSi-ASME Table of Contents Gas Piping Water Piping Freeze Protection Piping ... -
Page 3: Specifications
* Minimum flow may vary slightly depending on the temperature setting and the inlet water temperature. ** for commercial and hydronic applications requiring higher temperatures Rinnai is continually updating and improving products. Therefore, specifications are subject to change without prior notice. -
Page 4: Consumer Safety Information
• Power Failure: The appliance will cut off the gas if it loses electrical power. The Rinnai water heater is one of the most advanced water heaters available. It provides a continuous supply of hot water at a preset temperature. This... -
Page 5: Temperature Controller
Dimensions (inches): 3.5 W x 4.75 H x 0.75 D The MC-91 controller is the standard temperature controller that is supplied with the water heater. On indoor models it is integrated into the front panel. The MCC-91 controller is for commercial and hydronic applications requiring higher temperatures. -
Page 6: Operating Instructions
Used on this model to set the clock or sound volume. Indicates that hot water is being supplied (i.e. a hot water tap is open). Used to turn the water heater ON or OFF. Allows the temperature controller to be in an energy saving mode. -
Page 7: How To Set The Temperature
Temp in Celsius ºC An older controller, MC-45, can be installed with the RL75i and RL94i by moving switch No. 6 in the bank of 6 switches to ON. Some of the temperature settings will be slightly different from the above table. -
Page 8: Temperature Controller Settings
Water temperatures over 125º F (52º C) can cause severe burns or scalding. Refer to the Danger Alert on water temperatures. Rinnai shall not, in any event, be liable for damages resulting from such misuse or misapplication. Suggested temperatures are •... -
Page 9: Using The Water Smart / Bath Fill Function
The green Priority light will glow indicating that this controller is controlling the temperature and that the Rinnai water heater is ready to supply hot water. 2. Press the “Water Smart Bath Fill” button to set the water volume and temperature. -
Page 10: Filling The Tub
Bath Fill button.” 4. Turn off the bath hot water tap and push the Bath Fill button. The water heater will not allow hot water to flow from any source until the “Water Smart / Bath Fill” button is pushed. -
Page 11: Maintenance
Maintenance WARNING Turn off the electrical power supply, the manual gas valve and the manual water control valve whenever servicing the unit. Repairs and maintenance should be performed by a qualified service technician. The appliance should be inspected annually by a qualified service technician. Verify proper operation after servicing. -
Page 12: Error Codes
The Rinnai water heater has the ability to check its own operation continuously. If a fault occurs, an error code will flash on the display of the temperature controller. This assists with diagnosing the fault and may enable you to overcome a problem without a service call. Please identify the code displayed when inquiring about service. - Page 13 Code Fault Thermal Fuse Over Temperature Warning Burner Sensor Error Outgoing Water Temperature Sensor Fault Heat Exchanger Outgoing Temperature Sensor Fault Combustion Air Temperature Sensor Fault Modulating Solenoid Valve Signal Abnormal Combustion Fan Failure Water Flow Control Fault Solenoid Valve Circuit Fault Flame Sensing Device Fault...
-
Page 14: Trouble Shooting For Common Issues
Off” button press the ▲ button. The last 9 error codes will flash one after the other. To exit this mode press the “On/Off” and ▲ button as before. To display the water flow through the water heater press and hold the ▲ button for 2 seconds and without releasing the ▲ button press the “On/Off” button. -
Page 15: Flushing The Heat Exchanger (Error Code: Lc Or 00)
Open both service valves (V1 and V2) on the hot water and cold water lines. Operate the pump and allow the cleaning solution to circulate through the water heater for 1 hour at a rate of 4 gallons per minute (15.1 liters per minute). -
Page 16: Installation Instructions
RL94i ... REU-VB2735FFUD-US R98LSi ... REU-VA3237FFU-US R98LSi-ASME ... REU-VA3237FFU-ASME The VB series (RL75i, and RL94i) are certified for installation in manufactured (mobile) homes. • The appliance must be isolated from the gas supply piping system by closing its individual manual... -
Page 17: Clearances From Appliance
Ensure that the attachment strength is sufficient to support the weight. Refer to the weight of the water heater in the Specifications section. NOTE: Rinnai water heaters should be installed in an upright position. Do not install upside down or on its side. to Non-... -
Page 18: Electrical Connection
Error Indication or Air Handler Control Switch (RL75i, and RL94i only) When using the Rinnai water heater with an Error Indication Switch, switch No. 4 in the bank of 8 switches should be in the off position. This is the default position. -
Page 19: Pipe Sizing Procedure - Example
Gas Piping Pipe Sizing Procedure - Example The gas supply must be capable of handling the entire gas load at the location. Gas line sizing is based on gas type, the pressure drop in the system, the gas pressure supplied, and gas line type. For gas pipe sizing in the United States, refer to the National Fuel Gas Code, NFPA 54. -
Page 20: Water Piping
Water Piping Isolation Valves and Pressure Relief Valve (RL75i and RL94i) The isolation valves provide the ability to isolate the water heater from the structure’s plumbing and allow quick access to flush the heat exchanger. Check with local codes to determine if a pressure and temperature relief valve is required. -
Page 21: Piping Requirements
• Ensure that the water filter on the Rinnai water heater is clean and installed. • The relief valve should be added to the hot water outlet line and near the hot water outlet according to the manufacturer’s instructions. -
Page 22: Freeze Protection
If the water heater is not going to be used during a period of possible freezing weather, it is recommended that the water inside the water heater be drained. -
Page 23: Freeze Protection Piping
In the event of a power failure at temperatures below freezing the water heater should be drained of all water to prevent freezing damage. The unit may be drained manually. However, Rinnai highly recommends that drain down solenoid valves be installed that will automatically drain the unit if power is lost. -
Page 24: Recommended Piping For Basic Installation
3/4" Ball Valve 3/4" Union Check Valve Pressure Relief Valve Rinnai Water Heater This is not an engineered drawing. It is intended only as a guide and not as a replacement for professionally engineered project drawings. This drawing is not intended to describe a complete system. It is up to the... -
Page 25: Recommended Piping For Circulation Systems
Pump to be of bronze or stainless construction. IMPORTANT: Connect the building return line to the hot water supply line as close as possible to the Rinnai Water Heater. 3/4" Ball Valve 3/4" Union Check Valve Pressure Relief Valve... -
Page 26: Venting Instructions Intake / Exhaust Guidelines
• Vertical terminations must incorporate a condensate drain and trap as close as possible to the appliance. • RL75i, and RL94i water heaters have an integrated condensate collector. • Rinnai offers a condensate trap. • Regions of cold climate will create more condensate in the vent system. -
Page 27: Maximum Vent Length
1. Determine the number of 90 degree elbows in the vent system. (Two 45 degree elbows count as one 90 degree elbow. On the R98 models each one foot of semi rigid flex duct used in the air intake length is equivalent to one 90 degree elbow.) 2. -
Page 28: Vent Products
Systems Metal-Fab Corr/Guard * When ordering from Rinnai, ask for these part numbers or kits: FSAAU4 - ask for FSAAU4SP (single pack) FSRC4 - ask for FSVPK4 Variable Pitch Roof Flashing Kit (includes rain cap FSRC4, storm collar, roof jack,... -
Page 29: Flue Terminal Clearances (Ans Z21.10.3, Csa 4.3 )
Flue Terminal Clearances ( Description Clearance above grade, veranda, porch, deck, or balcony Clearance to window or door that may be opened Clearance to permanently closed window Vertical clearance to ventilated soffit, located above the terminal within a horizontal distance of 2 feet (61 cm) from the center line of the terminal Clearance to unventilated soffit Clearance to outside corner... -
Page 30: Additional Clearances - Vent Terminal
For VA3237 air intake position, follow the ANS Z21.10.3 ● CSA 4.3 requirements on the previous page. Vent terminal (represents concentric vent terminal or VA3237 exhaust only vent terminal) 12" (0.30 m ) to an inside corner (0.30 m) between Rinnai terminals at same level INSIDE CORNER (1.52 m) between 60"... -
Page 31: Flue Installation - Concentric Venting (Rl75I, Rl94I)
Flue Installation - Concentric Venting (RL75i, RL94i) Horizontal Termination without using the Condensate Collector WARNING If the condensate collector is not used, the drain pipe must be capped to prevent exhaust gases and condensate from entering the building. The cap is supplied on the appliance. -
Page 32: Flue Installation (R98Lsi, R98Lsi-Asme)
Flue Installation (R98LSi, R98LSi-ASME) Air Intake Assembly The air intake system consists of a field supplied 4 inch diameter stainless steel, Schedule 40 PVC, ABS or CPVC pipe. A maximum 6 feet of semi-rigid flexible aluminum ducting can also be used. Foil wrapped dryer vent and cell core products are not authorized. -
Page 33: Vertical Terminations
Flue Installation (R98LSi, R98LSi-ASME) Horizontal with Concentric Termination SLOPE INTAKE AND EXHAUST TOWARD OUTSIDE TERMINATION MINIMUM 1/4" PER FOOT Vertical Terminations The air intake requires a return bend or two 90º elbows to prevent entry of rain. The vent termination and air intake must be in the same pressure zone. VB Series Indoor LS Manual... -
Page 34: Connecting Multiple Water Heaters
Connecting Multiple Water Heaters The EZConnect™ cable is an optional accessory that connects 2 water heaters and allows them to function as one hot water source. The MSA-2M and MSA-2S packs are optional accessories that connect 2 to 5 water heaters and allow them to function as one hot water source. -
Page 35: High Altitude Installations
1. Turn off the power source and gas supply to the water heater / Coupez l`alimentation de gaz et électrique. 2. Remove the front cover from the water heater/ Enlever la couverture de devant du chauffe-eau. -
Page 36: Temperature Controller Installation
Configurations A maximum of 4 temperature controllers, including wired and wireless, can be installed for a water heater or bank of water heaters. Controllers can only be wired in parallel. Controllers cannot be wired in series. -
Page 37: Mounting The Controller
2. 7. Disconnect the power from the Rinnai water heater. 8. Remove the cover of the Rinnai water heater. 9. Remove the plastic cover from the PCB and electrical connections. 10. Thread the cable through the access hole at... -
Page 38: Operating Instructions
Operating Instructions FOR YOUR SAFETY READ BEFORE OPERATING WARNING A. This appliance does not have a pilot. It is equipped with an ignition device which automatically lights the burner. Do not try to light the burner by hand. B. BEFORE OPERATING smell all around the appliance area for gas. -
Page 39: Technical Data
Pressure Drop Curve Outlet Flow Data RL94i RL75i Technical Data Water Flow (gpm) R98LSi R98LSi-ASME delta T - Temperature Rise (ºF) VB Series Indoor LS Manual... -
Page 40: Space Heating
Iron Components Do not use Rinnai water heaters directly for space heating applications involving iron radiators or applications with any iron components. Iron components may oxidize creating rust that will clog the inlet filter of the Rinnai water heater. VB Series Indoor LS Manual... -
Page 41: Dimensions
Dimensions RL75i, RL94i DESCRIPTION Width Depth * Height - Unit Height - with brackets Hot Water Outlet - from wall * Hot Water Outlet - from center Cold Water Inlet - from wall * Cold Water Inlet - from center... -
Page 42: Ladder Diagrams
Ladder Diagram (for RL75i and RL94i) 5A (FUSE) For the R98LSi and R98LSiASME models see the next page. VB Series Indoor LS Manual... -
Page 43: Ladder Diagrams
Ladder Diagram (for R98LSi and R98LSi-ASME) 3A(FUSE) ARRESTER VARISTOR WATERFLOW SENSOR WATERFLOW CONTROL DEVICE BY-PASSFLOW CONTROL DEVICE BY-PASS SERVO MODEL ONLY THERMAL FUSE OVERHEAT SWITCH OUTGOING WATER THERMISTOR AIR TEMPERATURE THERMISTOR INDOOR MODEL ONLY FROST SENSING SWITCH VARISTOR RELAY 1 SWITCHING POWER SUPPLY DC12V... -
Page 44: Consumer Support
(except when an MCC-91 is used with a Rinnai Hydronic Air Handler). The integrated controller on indoor models has a 1 year warranty on parts. † Note: Period of coverage is reduced to 5 years from date of purchase if the Rinnai water heater temperature setting exceeds 160º F (71º C). -
Page 45: Limited Warranty
Replacement of the product may be authorized by Rinnai only. Rinnai does not authorize any person or company to assume for it any obligation or liability in connection with the replacement of the product. If Rinnai determines that repair of a product is not possible, Rinnai will replace the product with a comparable product at Rinnai’s discretion. -
Page 46: State Regulations
NOTICE BEFORE INSTALLATION Rinnai direct-vent appliance must be installed by a state qualified or licensed contractor and a properly trained Rinnai Installer. If you are not properly trained, you must not install this unit. IMPORTANT: In the State of Massachusetts (248 CMR 4.00 & 5.00) -
Page 47: French Version
Instructions de ventilation Espacements pour terminaison de cheminée (ANSI Z21.10.3, CSA 4.3 ... 60 Installation de conduit de cheminée (RL75i, RL94i) ... 61 Installation de conduit de cheminée (R98LSi, R98LSi-ASME) ... 62, 63 Instructions d'utilisation ... 64 Diagramme en escalier ... 65, 66 Support à... -
Page 48: Instructions D'utilisation
Rinnai est prêt à fournir de l'eau chaude. La préséance d'un contrôleur sur les autres ne peut se modifier que s'il n'y a pas d'eau chaude qui coule. -
Page 49: Plages De Température Avec Un Contrôleur De Température
Temp in Celsius ºC Un contrôleur plus ancien, MC-45, peut être installé avec le RL75i et le RL94i en déplaçant le commutateur no 6 dans la Banque de 6 commutateurs à ON. Certains paramètres de la température sera légèrement différente de la table ci-dessus. -
Page 50: Entretien
Entretien AVERTISSEMENT Coupez l'alimentation électrique, et fermez l'arrivée de gaz et d'eau à leur vanne de coupure manuelle avant toute intervention sur l'unité. Les réparations ne doivent être effectuées que par un technicien de service qualifié. Cet appareil doit être inspecté annuellement par un technicien de service qualifié. -
Page 51: Instructions Générales
RL75i ... REU-VB2528FFUD-US RL94i ... REU-VB2735FFUD-US R98LSi ... REU-VA3237FFU-US R98LSi-ASME ... REU-VA3237FFU-ASME La série VB (RL75i et RL94i) est certifiée pour l'installation à domicile (mobile) fabriqués. • L'appareil doit être isolé du système de conduite d'alimentation en gaz en fermant sa vanne individuelle de coupure durant les essais du système en pression... -
Page 52: Écartements Par Rapport À L'appareil
Écartements par rapport à l'appareil Jusqu'à matières combustibles RL75i R98LSi RL94i Dessus du 6 pouces ** 12 pouces chauffe-eau (152 mm) (305 mm) Arrière du 0 (zero) 0 (zero) chauffe-eau Avant du 6 pouces 6 pouces chauffe-eau (152 mm) (152 mm) Côtés du... -
Page 53: Installation À Altitude Élevée
Une vanne manuelle de coupure de gaz doit être placée sur la conduite d'alimentation en gaz en amont du chauffe -eau Rinnai. Un raccord union peut être utilisé sur la connexion au-dessus de la vanne de coupure pour pouvoir ultérieurement intervenir sur l'unité en la déconnectant. -
Page 54: Tuyauterie D'eau
Tuyauterie d'eau Valve à Bille / Valve de dégagement de pression (RL75i, RL94i) Les soupapes d'isolement offrent la possibilité d'isoler le chauffe-eau de la structure plomberie et de permettre un accès rapide à vider l'échangeur de chaleur. Vérifiez auprès des codes locaux pour déterminer si une soupape de pression et de température est nécessaire. -
Page 55: Qualité De L'eau
être connecté à un appareil utilisé auparavant comme chauffage et fourniture d’eau non potable. • Le filtre d’eau du chauffage Rinnai dout être propre et installé. • La soupape de sûreté doit être actionnée manuellement au moins une fois par an pour vérifier qu'elle est toujours fonctionnelle. -
Page 56: Tuyauterie Recommandée Pour Installation De Base
Électrovanne with local building officials before installation. Manuel – Chauffe-eau d’intérieur série VB LS Liste d'équipement Rinnai Rinnai Equipment List Chauffe-eau Rinnai Rinnai Water Heaters Kit RIK (optionnel) (raccords 3/4 po (19 mm) RIK-KIT (Optional) comprenant : (3/4" Fittings Include: 2 unions, 2 vannes à... -
Page 57: Instructions De Ventilation Consignes Pour Aspiration/Évacuation
Les terminaisons verticales doivent incorporer un drainage de condensat et un piège aussi près que possible de l'appareil. • Le chauffage de l'eau RL75i et RL94i a un collecteur de condensat intégré. • Rinnai offre un piège de condensats. •... -
Page 58: Longueur Maximum De Ventilation
Déterminez le nombre de coudes à 90° dans le système de ventilation (deux coudes à 45° comptent pour un coude à 90°. Sur les modèles R98 chaque pied de conduite semi flexible utilisée dans la longueur d'inspiration d'air équivaut à un coude à... -
Page 59: Produits De Ventilation
Systems Metal-Fab Corr/Guard * En commandant chez Rinnai, demandez ces numéros de pièces et de kits : FSAAU4 - demandez le FSAAU4SP (monobloc) FSRC4 - demandez le kit FSVPK4 de solin de toit à pas variable (inclut chapeau contre la pluie FSRC4, mitre,... -
Page 60: Espacements Pour Terminaison De Cheminée
Espacements pour terminaison de cheminée (ANS Z21.10.3, CSA 4.3) Réf. Description Espace au dessus de niveau du sol, véranda, porche, plate-forme ou balcon Écartement par rapport à fenêtre ou porte qui peut s'ouvrir Écartement par rapport à fenêtre toujours fermée Espacement vertical par rapport à... -
Page 61: Installation De Conduit De Cheminée (Rl75I, Rl94I)
Installation de conduit de cheminée (RL75i, RL94i) Horizontal Termination without using the Condensate Collector AVERTISSEMENT Si un collecteur de condensat n'est pas utilisé, le tuyau de drainage doit être capuchonnée pour éviter que gaz d'échappement et condensat n'entrent dans le bâtiment. -
Page 62: Installation De Conduit De Cheminée (R98Lsi, R98Lsi-Asme)
Installation de conduit de cheminée (R98LSi, R98LSi-ASME) Ensemble de prise d'air Le système d'admission d'air consiste en un tuyau de fourniture locale de 4 pouces de diamètre en acier inox, en PVC, ABS ou CPVC catégorie 40. Un maximum de 6 pieds de conduite semi flexible en aluminium peut être utilisée. - Page 63 Installation de conduit de cheminée (R98LSi, R98LSi-ASME) Terminaison horizontale concentrique Terminaisons verticales L'admission d'air nécessite un coude en U ou deux couses à 90° pour éviter l'entrée de la pluie. La terminaison de ventilation et l’entrée d’air doivent être dans la même zone de pression. TUYAU D'AIR DE COMBUSTION SLOPE INTAKE AND EXHAUST...
-
Page 64: Instructions D'utilisation
Instructions d'utilisation À LIRE AVANT LA MISE EN SERVICE POUR VOTRE SÉCURITÉ AVERTISSEMENT Cet appareil ne comporte pas de veilleuse. Il est muni d’un dispositif d’allumage qui allume automatiquement le brûleur. Ne tentez pas d’allumer la veilleuse manuellement. AVANT DE FAIRE FONCTIONNER, reniflez tout autour de l’appareil pour déceler une odeur de gaz. - Page 65 Diagramme en escalier (RL75i, RL94i) ANTI-FOUDRE TERRE DÉTECTEUR D'ÉCOULEMENT DISPOSITIF DE CON- TRÔLE D'ÉCOULEMENT CIRCUIT DE CONTRÔLE D'ÉCOULEMENT DE DÉRIVATION RL94 S FUS THER. INTERRUPTEUR MODÈLE D'INTÉRIEUR UNIQUEMENT PHASE CONTACT DE DÉTECTION DE GEL VARISTOR VARISTOR RELAIS 1 ALIMENTATION À...
-
Page 66: Diagramme En Escalier
Diagramme en escalier (R98LSi, R98LSiASME) 3A(FUSE) ANTI-FOUDRE ARRESTER TERRE DÉTECTEUR WATERFLOW D'ÉCOULEMENT SENSOR DISPOSITIF DE WATERFLOW CONTRÔLE D'É- CONTROL DEVICE COULEMENT CIRCUIT DE CONTRÔLE BY-PASSFLOW D'ÉCOULEMENT DE CONTROL DEVICE DÉRIVATION MODÈLE DE DÉVIATION SEULEMENT BY-PASS SERVOMODEL ONLY FUS THER. THERMAL FUSE INDOOR MODEL ONLY MODÈLE D'INTÉRIEUR UNIQUEMENT PHASE... -
Page 67: Support À La Clientele / Garantie Limitée
L'utilisation d'un contrôleur MCC-91 dans une habitation résidentielle réduira la couverture de garantie au niveau de la garantie pour une application commerciale † Note : La période de garantie est réduite à 5 ans à partir de la date d'achat si le réglage de température du chauffe-eau Rinnai dépasse 160°F (71 °C). - Page 68 Rinnai le remplacera par un produit comparable, à sa discrétion. Si un composant ou un produit retourné à Rinnai est trouvé sans défaut du aux matériaux ou à la main d'œuvre, ou qu'il est déterminé qu'il a été...
- Page 69 Notes VB Series Indoor LS Manual...
- Page 70 Notes VB Series Indoor LS Manual...
- Page 71 Notes VB Series Indoor LS Manual...
- Page 72 VB2528FFU VB2735FFU VA3237FFU U287-1930 (00) Printed in Japan 060 00012 32191 3...