Advertisement
Quick Links
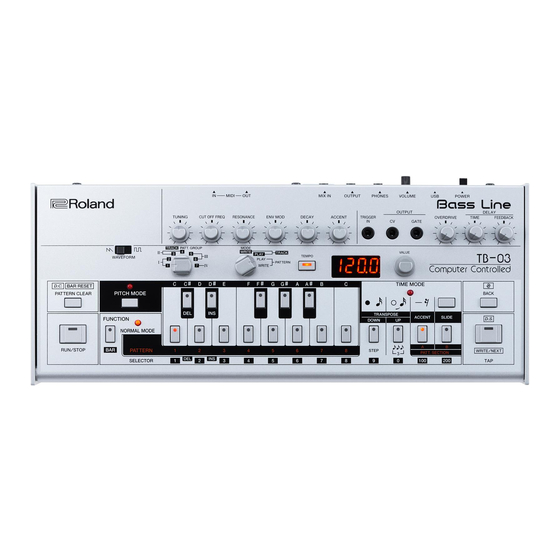
TB-03
Bass Line
Introduction
The TB-03 is a sound module that uses cutting-edge modeling technology to faithfully model the Roland
TB-303 which went on sale in 1982. In addition to its compact size, it allows battery-powered operation and
contains a small speaker. You'll be able to enjoy full-fledged TB-303 sound anywhere.
* The TB-03 can operate on batteries or on USB bus power. If you are using batteries, insert four AA batteries,
making sure that the batteries are oriented correctly.
* If you handle batteries improperly, you risk explosion and fluid leakage. Make sure that you carefully
observe all of the items related to batteries that are listed in "USING THE UNIT SAFELY" and "IMPORTANT
NOTES" (leaflet "USING THE UNIT SAFELY").
* When turning the unit over, be careful so as to protect the buttons and knobs from damage. Also, handle
the unit carefully; do not drop it.
* When the batteries run low, the "Bt.Lo" blinks in the display. Replace the battery as soon as possible.
Using the TB-03 in conjunction with the DK-01 Boutique Dock (accessory)
& For installation/removal/angle adjustment, refer to the DK-01's Owner's Manual.
Playing the TB-03 via MIDI or USB
You can also play the TB-03 via MIDI or USB. For details, refer to "Connecting Your Equipment. "
Connecting Your Equipment
* To prevent malfunction and equipment failure, always turn down the volume, and turn off all the units
before making any connections.
A
B
C
D
E
F
J
G
H
I
A
Micro USB (O) port
Use a commercially available USB 2.0 cable (A-microB) to connect this
port to your computer.
It can be used to transfer USB MIDI and USB audio data. You must install
the USB driver when connecting the TB-03 to your computer. Download the USB driver from the Roland
website. For details, refer to Readme.htm which is included in the download.
& http://www.roland.com/support/
* Do not use a micro USB cable that is designed only for charging a device. Charge-only cables cannot
transmit data.
B
[VOLUME] knob
Adjusts the volume.
C
PHONES jack
Connect headphones (sold separately) here.
D
OUTPUT jack
Connect this jack to your amp or monitor speakers.
E
MIX IN jack
This is the audio input jack. Sound from the connected device is output
MIDI OUT
from the OUTPUT jack and PHONES jack.
F
MIDI connectors
You can synchronize the TB-03 with other MIDI device by using a
commercially available MIDI cable to make connections.
MIDI device
G
TRIGGER IN jack *1
You can use a mini-plug (mono) cable to connect this to a device that's equipped with a TRIGGER OUT jack
(such as the TR-09). If a plug is inserted into this jack, the TB-03 is disconnected from its internal clock, so that its
steps advance each time a trigger pulse is received at this jack.
H
CV OUTPUT jack *1
You can use a mini-plug (mono) cable to connect this jack to an analog synthesizer that's equipped with CV/
GATE input jacks.
The pitch that is played by the TB-03 is output from this jack without change. The pitch is output in the range of
-1 V–+7 V. This supports OCT/V (Hz/V is not supported).
I
GATE OUTPUT jack *1
This jack outputs note-on/off signals. During note-on, +12 V is output.
*1 Do not use a "stereo mini-plug" cable; it won't work correctly.
Turning the Power On
J
[POWER] switch
This turns the power on/off.
* After you've made connections correctly, be sure to turn on the power in the order of the TB-03 first, and
then the connected system. Powering-on in the incorrect order may cause malfunctions or damage. When
turning the power off, power-off the connected system first, and then the TB-03.
* Before turning the unit on/off, always be sure to turn the volume down. Even with the volume turned down,
you might hear some sound when switching the unit on/off. However, this is normal and does not indicate
a malfunction.
Playing/Editing a Track
2
3
4
5
6
7
1
11
12
14
13
15
18
19
16
21
22
23
17
You can arrange patterns to create a track for a song.
Track Playback
Selecting TRACK PLAY mode
1.
12
Turn the
[MODE] knob to set to "TRACK PLAY."
Selecting a track
1.
11
Use the
[TRACK] knob to select a track (1–7).
The display shows the measure number.
Playing a track
1.
15
Use the
[BAR RESET] button to return to measure 1.
2.
16
Press the
[RUN/STOP] button to play/stop a track.
Playing tracks consecutively
11
If you use the
[TRACK] knob to select a track (1–7) while a track is playing, the next track is played
consecutively after the last measure (D.C. measure) of the track has played.
Functions in Track Mode
You can use the following functions in either track play or write mode.
Recalling a measure number
1.
14
Turn the
[VALUE] knob to specify the measure number.
Using the [FUNCTION] button to recall a measure number
1.
17
Hold down the
[FUNCTION] button and use the numeric buttons ([1]–[9], [0], [100], [200]) to specify
the measure number.
Example setting:
Measure
Order to press
Display *1
number
numeric buttons
[100] 0 [3] 0 [1]
Lit: [100], [3], Blink: [1]
131
[5] 0 [5]
55
Lit/Blink: [5]
[100] 0 [1]
101
Lit: [100], Blink: [1]
*1 When you press the [FUNCTION] button, the lit or blinking state of the numeric buttons indicates the
current measure number.
5 The 10s and 100s places are lit, and the 1s place is blinking.
5 If the measure number consists of repeated digits such as 55 or 33, the lit and blinking states alternate at
each beat.
Setting the tempo
13
In track play/write mode, the display shows the measure number, but you can press the
make the tempo appear for three seconds.
13
While the tempo is shown, you can press the
[TEMPO] button to see the two digits of the tempo value
below the decimal point.
14
While the tempo is shown, you can use the
[VALUE] knob to adjust the tempo.
Setting the shuffle
& Refer to "Pattern Playback"–"Setting the shuffle. "
Indication of D.C. (Da Capo/last measure)
What is D.C. (Da Capo)?
1
When playback reaches the end of the measure that is
specified as D.C., playback returns to the first measure of the
track.
1.
17
15
Hold down the
[FUNCTION] button and press the
[D.C.] button.
The number of the measure specified as D.C. is displayed.
(Segno) indication
What are D.S. (Dal Segno) and
(Segno)?
26
If you press the
[D.S.] (Dal Segno) button during playback,
the playback jumps to the measure that is specified as (Segno).
1.
25
Hold down the [FUNCTION] button and press the
[
]
(Segno) button.
The number of the measure specified as
(Segno) is displayed.
Viewing the transpose setting
18
Regardless of whether you are playing back or stopped, pressing the
[PITCH MODE] button makes a
keyboard button light to indicate the transpose setting of the current measure.
Owner's Manual
Playing/Recording a Pattern
2
3
4
5
6
1
11
12
13
15
18
19
16
17
Adjusting the Sound
Controller
Explanation
1
[WAVEFORM] switch
: Saw wave,
: Square wave
2
[TUNING] knob
Tuning
3
[CUT OFF FREQ] knob
Filter cutoff (brightness of the sound)
4
[RESONANCE] knob
Filter resonance (distinctive character)
5
[ENV MOD] knob
Envelope modulation (tonal change)
6
[DECAY] knob
Decay (duration of the sound)
7
[ACCENT] knob
Strength of accents you've input in the pattern
Adjusts the overdrive.
8
[OVERDRIVE] knob
Turning this knob fully left turns it off.
The overdrive type can be selected in the system settings.
Sets the delay time and feedback.
Turning the [FEEDBACK] knob fully left turns it off.
9
DELAY [TIME]/
The delay type can be selected in the system settings.
[FEEDBACK] knob
10
* When reverb is selected, these knobs adjust the "reverb time" and "dry:
wet. " Turning the [FEEDBACK] knob fully left turns it off.
Pattern Playback
What are patterns and tracks?
A "pattern" is performance data that divides a measure into 16 steps.
The TB-03 has 96 "patterns" and seven "tracks" in which patterns can be arranged.
Selecting PATTERN PLAY mode
1.
12
Turn the
[MODE] knob to set to "PATTERN PLAY."
Selecting a pattern
1.
11
Use the
[PATT. GROUP] knob to select a pattern group (I–IV).
Pattern group "I" is selected regardless of whether you select numbers 1 or 2.
2.
23 24
Use the
PATT. SECTION [A][B] buttons to select a pattern section (A,
B, C).
You can press the [A] and [B] buttons simultaneously to select C (both [A] and
MIDI IN
[B] are lit).
3.
19
Use the
PATTERN [1]–[8] buttons to select a pattern.
Playing patterns consecutively
TB-03
When selecting a pattern, you can select multiple patterns by pressing two buttons at the same time. The
patterns you've selected will play consecutively. The currently-playing pattern blinks.
Playing a pattern
1.
16
Press the
[RUN/STOP] button to play/stop a pattern.
Pattern transpose
1.
18
Hold down the
[PITCH MODE] button and then press the
Setting the tempo
In pattern play mode, the display shows the tempo.
13
You can press the
[TEMPO] button to see the two digits of the tempo value below the decimal point.
14
You can use the
[VALUE] knob to adjust the tempo.
Setting the shuffle
13
If you long-press the
[TEMPO] button, the shuffle value is displayed.
13
You can set the shuffle setting by holding down the
[TEMPO] button and turning the
(-50–0–50, 0=Shuffle off ).
Temporarily changing the number of steps in a pattern
20
14
Hold down the
[TIME MODE] button and turn the
[VALUE] knob to change the number of steps in the
pattern (1–16).
* This change in the number of steps is temporary; it is not saved. If you want to save the change, change the
number of steps in "pattern write" mode.
What is "step"?
Each pattern is divided into 16 grid locations called "steps. " One step is a 16th note long ( ).
Track Write
8
9
10
Selecting TRACK WRITE mode
1.
12
Turn the
[MODE] knob to set to "TRACK WRITE."
Selecting a track
20
25
1.
11
Use the
[TRACK] knob to select a track (1–7).
26
24
The display shows the measure number.
The pattern group that can be written to a track
The pattern group that can be written to a track is the group that is selected
by the [TRACK] knob. For example in the case of tracks 1 and 2, the pattern
group is "I. "
Writing a track
1.
15
Use the
[BAR RESET] button to return to measure 1.
2.
16
Press the
[RUN/STOP] button.
Loop-playback occurs during track write. The pattern that plays at this time is the pattern that was written
into measure 1.
3.
23 24
19
Use the
PATT. SECTION [A][B] buttons and the
PATTERN [1]–[8] buttons to select the pattern
that is entered at measure 1.
18
If you want to write with transposition, hold down the
[PITCH MODE] button and press a
button to specify the transposition key.
4.
26
Press the
[WRITE/NEXT] button.
The pattern is entered, and you proceed to measure 2.
5.
Repeat steps 3–4 to enter up to one measure before the last measure.
6.
Select the pattern for the last measure.
7.
15
26
Press the
[D.C.] button, and then press the
[WRITE / NEXT] button.
D.C. (Da Capo) is entered.
8.
16
Press the
[RUN/STOP] button to exit the track write.
Making Corrections
If you entered something by mistake, you can correct it as follows.
1.
12
Turn the
[MODE] knob to set to "TRACK WRITE."
2.
Recall the measure number as described in "Recalling a measure number."
3.
16
Press the
[RUN/STOP] button.
4.
23 24
19
Use the
PATT. SECTION [A][B] buttons and the
PATTERN [1]–[8] buttons to re-select the pattern.
Entering D.C. (Da Capo)
15
Pressing the
[D.C.] button enters D.C. (Da Capo) at the current measure.
Entering
(Segno)
25
Pressing the
[
] (Segno) button enters (Segno) at the current measure.
5.
26
Press the
[WRITE/NEXT] button.
6.
16
Press the
[RUN/STOP] button.
Delete
Here's how to delete one measure from the patterns in the track.
1.
12
Turn the
[MODE] knob to set to "TRACK WRITE."
2.
As described in "Recalling a measure number," move to the
measure that you want to delete.
3.
17
19
Hold down the
[FUNCTION] button and press the
[DELETE] (C #) button.
[TEMPO] button to
Insert
You can insert patterns into the track.
1.
12
Turn the
[MODE] knob to set to "TRACK WRITE."
2.
As described in "Recalling a measure number," move to
the measure at which you want to insert.
Example: If you select measure 4, the pattern is inserted
between measure 3 and measure 4.
3.
17
19
Hold down the
[FUNCTION] button and press the
[INS] (D#) button.
4.
16
Press the
[RUN/STOP] button.
D.C.
5.
23 24
19
Use the
PATT. SECTION [A][B] buttons and
PATTERN [1]–[8] buttons to select the pattern that
you want to insert.
6.
26
Press the
[WRITE/NEXT] button.
7.
16
Press the
[RUN/STOP] button.
19
English
In order to use this device correctly, please carefully read "USING THE UNIT SAFELY" and "IMPORTANT NOTES" (the "USING THE UNIT SAFELY" leaflet) before use.
After reading, keep these instructions at hand for immediate reference.
Pattern Write (TB-303 Original Mode)
7
8
9
10
Original mode and step recording mode
The TB-03 has two pattern write modes.
14
"Original mode" reproduces the pattern write operation of the TB-303, and "step recording mode" is newly
added on the TB-03. You can use the system setting "Step Recording Mode" to switch between these modes.
20
25
Selecting PATTERN WRITE mode
1.
12
26
Turn the
[MODE] knob to set to "PATTERN WRITE."
21
22
23
24
Selecting a pattern
& Refer to "Pattern Playback"–"Selecting a pattern"
Setting the tempo
In pattern write mode, the display shows the step number, but you can press the
the tempo appear for three seconds.
While the tempo is shown, you can press the
below the decimal point.
While the tempo is shown, you can use the
Setting the shuffle
& Refer to "Pattern Playback"–"Setting the shuffle"
Clearing a pattern
1.
19
Hold down the
PATTERN [1]–[8] button that you want to clear, and press the
button.
To use a triplet grid
By default, each step is a 16th note, but by holding down the
button you can use a triplet grid (each step is an 8th note triplet).
Changing the number of steps in a pattern
1.
Hold down the [FUNCTION] button and press the
to specify.
Example: If you want there to be eight steps, press the button eight times.
The display shows the number of steps.
* You can also change the number of steps in the pattern by holding down the
14
turning the
[VALUE] knob (1–16).
Entering the pitches
In TB-303 original mode, you enter the notes of a pattern using separate operations to specify the pitch and the
timing. Enter the pitches first.
1.
18
Press the
[PITCH MODE] button so it's lit.
You're in pitch entry mode.
2.
19
Use the
keyboard buttons to enter the pitches.
Example: In the case of the following notes, enter pitches in the order "C, C, D#, C..."
C
C
D
C
The display shows a number (1, 2, 3...) in the order of the notes that you enter; you can use the
knob to select a number.
3.
17
Press the
[FUNCTION] button.
Entering octave-up or octave-down pitches
Shift the octave up or down by pressing (or holding down)
19
then press a
keyboard button (Lit: ± 1 octave, Blink: ± 2 octaves).
Checking the pitches
19
1.
keyboard button.
18
Press the
[PITCH MODE] button so it's lit.
2.
26
Press the
[TAP] button to check the pitch of each note.
3.
17
Press the
[FUNCTION] button.
If the pitches were not entered as you intended, re-enter them starting with step 1 of "Entering the pitches. "
* Note that when you re-enter the pitches, the accent and slide data you entered are lost.
Entering the timing
1.
20
Press the
[TIME MODE] button so it's lit.
14
You're in time entry mode.
[VALUE] knob
2.
21
Use the note selector
[7](note),
Example: In the case of the following notes, enter "7, 6, 7, 6..." in that order.
1 2 3 4 5 6 7 8 9 10 11 12 13 14 15 16
The display shows the step number; you can use the
When you've finished entering all of the steps (16 steps by default), the
Checking the time
1.
20
Press the
[TIME MODE] button so it's lit.
2.
26
Press the
[TAP] button to check the data of each note.
19
keyboard
Main Specifications
Roland TB-03: Bass Line
Power Supply
Rechargeable Ni-MH battery (AA, HR6) x 4, Alkaline battery (AA, LR6) x 4, USB bus power
Current Draw
500 mA (USB bus power)
Dimensions
308 (W) x 130 (D) x 52 (H) mm
940 g (including batteries, excluding
Weight
Boutique Dock)
Boutique Dock: DK-01, Owner's Manual, DK-01 Owner's Manual, Leaflet "USING THE UNIT
Accessories
SAFELY, " Alkaline battery (AA, LR6) x 4
* This document explains the specifications of the product at the time that the document was issued. For the
latest information, refer to the Roland website.
3.
Press the
* You can also check by pressing the
If the notes were not entered as you intended, re-enter them starting with step 1 of "Entering the timing. "
Entering accents and slides
1.
Press the [PITCH MODE] button
2.
Press the
button and press the
and press the
3.
Press the
Tap Write (Entering Timing in Real Time)
13
[TEMPO] button to make
* Before you continue, complete the steps for "Entering the pitches. "
1.
13
Press the
[TEMPO] button to see the two digits of the tempo value
2.
Press the
14
[VALUE] knob to adjust the tempo.
3.
Press the
The metronome sounds.
4.
In time with the sound of the metronome, press the
to enter the notes.
* Entering the TIE: Hold down one of the
When you finish entering the first measure, the metronome stops and the pattern plays as a loop.
15
[PATTERN CLEAR]
If the timing was not entered as you intended, re-do the procedure from step 3.
Pattern Write (Step Recording Mode)
This is the step recording mode that was newly added on the TB-03. You'll enter notes, rests, accents, and
17
22
[FUNCTION] button and pressing the
[
]
slides/ties while watching the step number in the display.
Select "step recording mode" in system settings
1.
Hold down the
21
[STEP] button the number of times that you want
2.
Release the
3.
Use the
4.
20
Press the
[TIME MODE] button and
Selecting PATTERN WRITE mode
1.
Turn the
Selecting a pattern
& Refer to "Pattern Playback"–"Selecting a pattern"
Clearing a pattern
1.
Hold down the
button.
Step recording
1.
Press the
C
G F D
You're in step recording entry mode.
14
[VALUE]
2.
Use the buttons and the
The display shows the current step number (1–16). You can also use the
different step.
* Even during step recording, you can play back the pattern by pressing the
22
21
[TRANSPOSE UP] or
[TRANSPOSE DOWN],
Controller
14
[VALUE] knob
19
Keyboard buttons
21
[DOWN] button
22
[UP] button
[TIME MODE] button
20
22
23
[6](tie), and
[—](rest) buttons to enter the timing.
[TIME MODE] +
[TIME MODE] +
23
[ACCENT] button
24
[SLIDE] button
3.
To exit the step recording, press the
* For details on the following operations, refer to "Pattern Write (TB-303 Original Mode). "
14
[VALUE] knob to select the step.
5 Using a triplet grid
20
[TIME MODE] button goes dark.
5 Changing the number of steps in the pattern
System Settings
1.
Hold down the
When you release the
displayed.
2.
14
Use the
3.
Press the
Display
Parameter
MIDI Channel 1–16, OFF Specifies the MIDI transmit/receive channel (1–16, OFF).
CH
MIDI Clock
SYnC
Source
Auto Off
A.OFF
LED Demo
dENO
Step
Recording
NoDE
Mode
Overdrive
Od
Type
D. Typ Delay Type
Delay Tempo
d. SnC
Sync
Restoring the Factory Settings (Factory Reset)
Here's how to return the TB-03 to its factory-set state.
1.
While holding down the
26
The
[TAP] button blinks.
If you decide to cancel the factory reset, turn off the power.
2.
Press the
3.
When all buttons blink, turn the TB-03's power off, then on again.
Data Backup/Restore
Backup
1.
Connect your computer to the TB-03's USB port via USB cable.
2.
While holding down the
3.
Open the "TB-03" drive on your computer.
The backup files are located in the "BACKUP" folder of the "TB-03" drive.
4.
Copy the backup files into your computer.
5.
After copying is completed, eject the USB drive and then disconnect the USB cable.
Windows
Right-click on the "TB-03" icon in "Computer" and execute "Eject. "
Mac OS
Drag the "TB-03" icon to the Trash icon in the Dock.
6.
Turn the TB-03 power off.
12-1/8 (W) x 5-1/8 (D) x 2-1/16 (H) inches
Restore
2 lbs 2 oz
1.
As described in the procedure for "Backup" Step 1–3, open the "TB-03" drive on your computer.
2.
Copy the TB-03 backup files into the "BACKUP" folder of the "TB-03" drive.
3.
After copying is completed, eject the USB drive and then press the
4.
After the LEDs have completely stopped blinking, turn off the power.
17
[FUNCTION] button.
16
[RUN/STOP] button to play/stop the pattern.
18
so it's lit.
26
26
[TAP] button to check each note. If you want to add an accent, hold down the
[TAP]
23
26
[ACCENT] button. If you want to add a slide, hold down the
[TAP] button
24
[SLIDE] button.
17
[FUNCTION] button.
17
[FUNCTION] button.
16
[RUN/STOP] button.
15
[PATTERN CLEAR] button.
26
[TAP] button at the timing at which you want
19
26
[1]–[8] buttons and tap the
[TAP] button.
17
14
[FUNCTION] button and turn the
[VALUE] knob to select "NoDE."
17
[FUNCTION] button.
14
[VALUE] knob to select "StEP."
17
[FUNCTION] button.
12
[MODE] knob to set to "PATTERN WRITE."
19
15
PATTERN [1]–[8] button that you want to clear, and press the
[PATTERN CLEAR]
18
[PITCH MODE] button so it's lit.
14
[VALUE] knob to enter performance data into the steps.
14
[VALUE] knob to move to a
16
[RUN/STOP] button.
Explanation
Moves between steps.
Enter a note and proceed to the next step.
Shift the octave up/down.
Lit: ± 1 octave
Blink: ± 2 octaves
While you hold down this button,
the note, tie, and rest are shown
by the lit buttons.
Rest
Tie
Note
22
Enters a tie and proceeds to the next step.
[UP] button
23
[ACCENT] button Enters a rest and proceeds to the next step.
Enters an accent on/off (the step does not advance).
Enters a slide on/off (the step does not advance).
17
[FUNCTION] button.
17
14
[FUNCTION] button and turn the
[VALUE] knob to select a parameter.
17
[FUNCTION] button, the parameter is finalized and the value is
[VALUE] knob to set the value.
17
[FUNCTION] button, to exit the system settings.
Value
Explanation
If MIDI clock is being input to the MIDI IN connector or the USB
port, the TB-03's tempo will automatically synchronize to MIDI clock
AUtO
(default).
The TB-03 operates at the tempo specified on the unit itself. Choose
the "INTERNAL" setting if you don't want to synchronize to an external
Int
device.
The power does not turn off automatically.
OFF
The power turns off automatically after 30 minutes (default).
30 (min)
* Auto Off does not occur while USB-connected.
OFF
1 (min)
Specifies the time until the LED DEMO is shown (default: 3).
3 (min)
10 (min)
This is original mode, which reproduces the TB-303's pattern write
operation (default setting).
This mode uses a unique concept in which pitch and timing (time) are
entered using separate processes, and requires practice in order to
OrG
enter the phrase that you intend. Although this mode requires complex
operation, it can result in some remarkable phrases being created by
accident, so please try using it.
This is step recording mode, which was newly added on the TB-03.
You can enter notes while watching the step number in the display.
Compared with original mode, this mode makes it easier to enter
StEP
the phrase that you intend. We recommend that beginners start by
learning this mode.
This is the high-gain overdrive sound of the BOSS OD-2.
1
This gives a basic, traditional distortion sound.
2
Produces a distortion sound with both the smoothness of an overdrive
3
along with a deep distortion.
Tape Echo
Tape
Digital Delay
diGi
Reverb
Rev
OFF
Delay time is synchronized to the tempo (default: off ).
SynC
19
[2] button, turn on the power.
26
[TAP] button to execute the factory reset.
16
[RUN/STOP] button, turn on the power.
26
[TAP] button.
Advertisement


