Advertisement
Table of Contents
- 1 Dos and Don'ts
- 2 Parts Included
- 3 Warnings/Limitations
- 4 Stinger Assembly - Lock Cylinder Installation into Lock Knob
- 5 Upright Assembly
- 6 Cradle, Anti-Sway Gage and Strap Assembly
- 7 End Cap Lock Core Installation
- 8 Bike Loading
- 9 Integrated Cable Lock Use
- 10 Rear Compartment Access
- Download this manual
See also:
Quick Start Manual
DO
DO NOT
5015950_01
• Loosen locking knob
completely before inserting
stinger into hitch receiver.
• Make sure Auto Pin engages
into receiver hole (STEP 3).
Use knob to tighten. Lock.
• Load heaviest bike first–front
(STEP 8).
to the right
• Alternate bike direction.
• Secure bicycle to rack with
rubber straps and safety
strap through the frames and
around the mast of the rack
(STEPS 8-12).
• Check tightness of all bolts
and knobs periodically (every
6 months).
• Check rubber straps for wear
and replace if worn.
• Install on a trailer or other
towed vehicle.
• Put more than 2 bikes on a
class 1 hitch.
• Do not "overstretch" the
straps.
• Use the rack while traveling
on dirt roads.
• Use the rack to carry tandems
or recumbents.
• Put more than the intended
number of bikes on the rack.
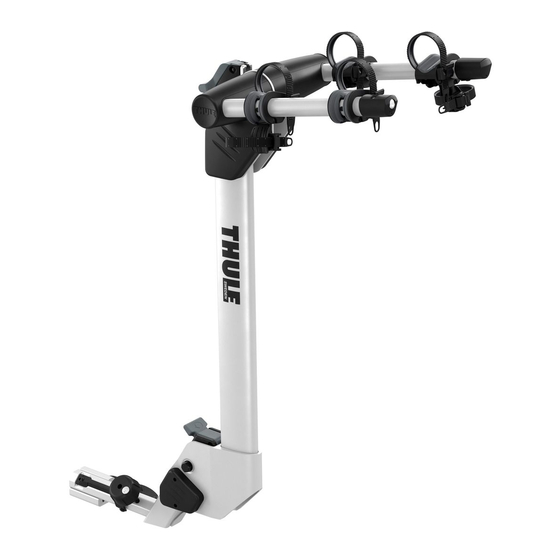
QUICK START GUIDE for:
HELIUM
AERO™ (2 BIKE CARRIER)
9042
, (3 BIKE CARRIER)
9043
Advertisement
Table of Contents

Summary of Contents for Thule HELIUM AERO 9042
- Page 1 QUICK START GUIDE for: 9042 9043 HELIUM AERO™ (2 BIKE CARRIER) , (3 BIKE CARRIER) • Loosen locking knob completely before inserting stinger into hitch receiver. • Make sure Auto Pin engages into receiver hole (STEP 3). Use knob to tighten. Lock. • Load heaviest bike first–front (STEP 8).
- Page 2 HELIUM AERO ™ 9042 / 9043 PARTS INCLUDED part description part number 9042 qty. 9043 qty. mast/arm assembly / 8523037001 anti-sway cage with overmold ripple strap / 8523006001 anti-sway angled extension 8523108001 strap assembly with buckle / 753203007 1/2 - 13 hex bolt / 853701202 951122454 washer 12mm id 24mm od...
- Page 3 WARNINGS / LIMITATIONS • Number of bicycles should not exceed designated carrying capacity for your specific Helium Aero™ model. • Maxiumum bike weight = 35lbs. per bike. • The maximum capacity for class 1 hitches is 100 lbs. • Check tightness of all bolts and knobs periodically. • Check straps for wear and replace if worn.
- Page 4 STINGER INSTALLATION • Loosen locking knob completely. • Pull back gently on Auto Pin and slide stinger into receiver. NOTE: Do not lift/carry hitch rack by Auto Pin. • Once receiver lip is cleared, push Auto Pin so that it rests against receiver.
- Page 5 UPRIGHT ASSEMBLY • Align bottom plate holes with stinger holes as illustrated. • Insert 1/2 - 13 bolt, (2) flat washers and 1/2 -13 lock nut as illustrated. Note: Bolt may need to be threaded (twisted) through stinger assembly. • Tighten firmly using both provided hitch tools. NOTE: It is also acceptable to fasten the mast to the stinger assembly before attaching the rack to the vehicle...
- Page 6 • Attach anti-sway angled extension to the underside of cradle 1 as illustrated. • Pivot down to the vertical position. • Hold anti-sway cage horizontal with smooth edge facing down. Slide c-slot opening into anti-sway extension. • Swing down into vertical position. • Repeat on alternating cradles (left to right) so there is a single cage for each bike as illustrated.
- Page 7 END CAP LOCK CORE INSTALLATION • Insert change key into lock cylinder. • Insert cylinder into locking end cap. • Remove change key. Insert locking key to lock and unlock. BIKE LOADING • With the bike arms in the upright position, load the heaviest bike first onto the cradles that are closest to the vehicle as illustrated.
- Page 8 • Place smooth curved surface of anti-sway cage against seat tube and attach strap as shown. • Mount additional bicycle(s) in alternate directions. NOTE: Do not allow strap to be positioned below Hitch Switch lever. CORRECT / • Secure bikes to mast of carrier with included webbing strap. INCORRECT INTEGRATED CABLE LOCK USE • Once bikes are loaded, pull up...
- Page 9 REAR COMPARTMENT ACCESS NOTE: BIKES MUST BE REMOVED TO LOWER CARRIER. • Firmly hold the upright assembly with one hand. Lift lever to lower. • Gently lower carrier to built-in stop position. • Reverse operation to return to upright, secured position. 5015950_01...


