
Related Manuals for Sennheiser EK 500 G4


Summary of Contents for Sennheiser EK 500 G4
- Page 1 G4 500 P series Instruction Manual Sennheiser electronic GmbH & Co. KG Am Labor 1, 30900 Wedemark, Germany, www.sennheiser.com ew 500 P G4 - v1.1...
-
Page 2: Table Of Contents
Inserting and removing the batteries/rechargeable bat- teries 34 Battery status 35 Attaching the plug-on transmitter to the microphone 36 Using ew 500 P G4 series devices 37 Using the EK 500 G4 39 Operating elements of the EK 500 G4 diversity receiver... - Page 3 Switching the EK 500 G4 on and off 41 Volume control of the PHONES socket 42 Lock-off function 43 Displays on the EK 500 G4 display panel 44 Buttons for navigating through the menu 44 Home screen 46 standard display 46...
- Page 4 Advanced > Pilot Tone menu item 75 Advanced > LCD Contrast menu item 76 Advanced > Reset menu item 76 Advanced > Software Revision menu item 76 Using the SK 500 G4 77 Operating elements of the SK 500 G4 bodypack trans- mitter 77 Switching the SK 500 G4 bodypack transmitter on and off 79...
- Page 5 Establishing a radio link 110 Setting notes 110 Synchronizing devices 111 Overview 112 Product variants 113 EK 500 G4 product variants 113 Made in Germany 113 Assembled in the USA 113 SKM 500 G4 product variants 114 Made in Germany 114...
- Page 6 Pin assignment 127 3.5 mm stereo jack plug 127 3.5 mm mic jack plug 127 3.5 mm line jack plug 127 6.3 mm stereo jack plug, balanced (audio in/loop out) 6.3 mm mono jack plug, unbalanced 128 6.3 mm stereo jack plug for headphone jack 128 XLR-3 plug, balanced 128 Hollow jack plug for power supply 128 Cleaning and maintenance 129...
-
Page 7: Overview
Overview PRODUCT INFORMATION Overview You can find information about the individual products in the ew 500 P G4 series under “ew 500 P G4 series products”. For information about the available accessories, see “Accessories”. You can find information about the ew 500 P G4 series frequency bank system under “The frequency bank system”. -
Page 8: Ew 500 P G4 Series Products
ew 500 P G4 series products ew 500 P G4 series products Click the name of the particular product to learn more about it. You can also find more information here: • A variety of frequency variants are available from the individual prod- ucts. -
Page 9: Ek 500 G4 Diversity Receiver
EK 500 G4 diversity receiver ► You can find more detailed information about the EK 500 G4 in the follow- ing sections: • Installation and Startup: “Installing the EK 500 G4” • Operation: “Using the EK 500 G4” • Technical Data: “EK 500 G4”... -
Page 10: Skm 500 G4 Handheld Transmitter
SKM 500 G4 handheld transmitter ► ► You can find more detailed information about the SKM 500 G4 in the fol- lowing sections: • Installation and Startup: “Installing the SKM 500 G4” • Operation: “Using the SKM 500 G4” • Technical Data: “SKM 500 G4”... -
Page 11: Sk 500 G4 Bodypack Transmitter
SK 500 G4 bodypack transmitter ► You can find more detailed information about the SK 500 G4 in the follow- ing sections: • Installation and Startup: “Installing the SK 500 G4” • Operation: “Using the SK 500 G4” • Technical Data: “SK 500 G4”... -
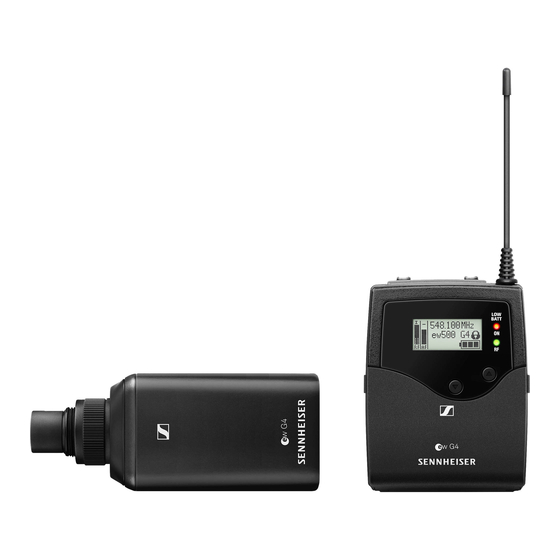
Page 12: Skp 500 G4 Plug-On Transmitter
SKP 500 G4 plug-on transmitter ► You can find more detailed information about the SKP 500 G4 in the follow- ing sections: • Installation and Startup: “Installing the SKP 500 G4” • Operation: “Using the SKP 500 G4” • Technical Data: “SKP 500 G4”... -
Page 13: Accessories
Capacitor, cardioid, black 008652 KK 204 BK Neumann Capacitor, super-cardioid, nickel 008653 KK 205 Neumann Capacitor, super-cardioid, black 008654 KK 205 BK You can find more information about the individual microphone mod- ules on their respective product pages at www.sennheiser.com. -
Page 14: Headset And Lavalier Microphones
You can find more information about the individual microphones on their respective product pages at www.sennheiser.com. Line connecting cable The following cables can be used to connect cameras to the EK 500 G4 di- versity receiver: • CL 1 3.5 mm jack plug on lockable 3.5 mm jack plugs... -
Page 15: Rechargeable Battery And Charger
Accessories Rechargeable battery and charger BA 2015 rechargeable battery The BA 2015 rechargeable battery is designed for use with evolution wire- less G4 series handheld transmitters, bodypack transmitters and bodypack receivers. Article no. 009950 ► L 2015 charger The BA 2015 rechargeable battery can be charged in the L 2015 charger on its own or inside of the bodypack transmitter/bodypack receiver. -
Page 16: Accessories For Camera Mounting
Accessories Accessories for camera mounting CA 2 camera adapter Camera adapter with hot shoe for portable receivers from the ew 100 P G4 and ew 500 PG4 series. Article no. 009986 ►... -
Page 17: Additional Accessories
Accessories Additional accessories Color labeling set • KEN 2, color labeling set for SKM handheld transmitters Article no. 530195 ► Microphone clamp • MZQ 1, microphone clamp for SKM handheld transmitters Article no. 076670 ►... -
Page 18: The Frequency Bank System
The frequency bank system The frequency bank system There are different frequency ranges in the UHF band available for trans- mission. The following frequency ranges are available for the ew 500 P G4 series: • Aw+ range: 470 – 558 MHz •... -
Page 19: Installing Ew 500 P G4 Series Devices
500 P G4 series devices in the following sections. • EK 500 G4 diversity receiver >> “Installing the EK 500 G4” • SKM 500 G4 handheld transmitter >> “Installing the SKM 500 G4” • SK 500 G4 bodypack transmitter >> “Installing the SK 500 G4”... -
Page 20: Installing The Ek 500 G4
Installing the EK 500 G4 Installing the EK 500 G4 These sections contain detailed information about installing the EK 500 G4. You can find information about operating the EK 500 G4 under “Using the EK 500 G4”. Inserting and removing the batteries/rechargeable batteries You can operate the diversity receiver either with batteries (AA, 1.5 V) or... -
Page 21: Battery Status
Installing the EK 500 G4 Battery status Charge status of the batteries: ► Charge status is critical (LOW BATT): ►... -
Page 22: Connecting Headphones To The Ek 500 G4
Installing the EK 500 G4 Connecting headphones to the EK 500 G4 ATTENTION Danger due to high volume levels Volume levels that are too high may damage your hearing. Turn down the volume of the headphone output before you put on the ▷... -
Page 23: Attaching The Diversity Receiver To A Camera
You can attach the diversity receiver on the hot shoe of the camera with the included CA 2 camera kit. To attach the EK 500 G4 diversity receiver to a camera: ▷ Determine where on the perforated plate you need to attach the hot shoe adapter so that the diversity receiver can be optimally attached to the camera. - Page 24 Installing the EK 500 G4 ▷ Place the perforated plate on the rear side of the diversity receiver. Reattach the clip. ▷ Slide the receiver onto a camera. ▷...
-
Page 25: Connecting The Diversity Receiver To A Camera
Installing the EK 500 G4 Connecting the diversity receiver to a camera To connect the diversity receiver to a camera: ▷ Attach the line input of the camera to the jack socket of the receiver us- ing one of the enclosed line connecting cables. -
Page 26: Installing The Skm 500 G4
Inserting and removing the batteries/rechargeable batteries You can operate the wireless microphone either with batteries (AA, 1.5 V) or with the rechargeable Sennheiser BA 2015 battery. ▷ Screw the rear part of the wireless microphone in the direction of the arrow (counter-clockwise) off of the handle of the wireless microphone. -
Page 27: Battery Status
Installing the SKM 500 G4 Battery status Charge status of the batteries: ► Charge status is critical (LOW BATT): ►... -
Page 28: Replacing The Microphone Module
Installing the SKM 500 G4 Replacing the microphone module You can find a list of the recommended microphone modules for the hand- held transmitter under “Microphones and cables”. To change the microphone module: Unscrew the microphone module. ▷ ▷ Screw the desired microphone module on. ►... -
Page 29: Changing The Colored Ring
Installing the SKM 500 G4 Changing the colored ring To change the colored ring: ▷ Pull the colored ring off as shown in the diagram. ► Attached a colored ring in the color you want as shown in the diagram. ▷... -
Page 30: Installing The Sk 500 G4
Inserting and removing the batteries/rechargeable batteries You can operate the bodypack transmitter either with batteries (AA, 1.5 V) or with the rechargeable Sennheiser BA 2015 battery. ▷ Press the two catches and open the battery compartment cover. Insert the batteries or the rechargeable battery as shown below. Please ▷... -
Page 31: Battery Status
Installing the SK 500 G4 Battery status Charge status of the batteries: ► Charge status is critical (LOW BATT): ►... -
Page 32: Connecting A Microphone To The Sk 500 G4
Installing the SK 500 G4 Connecting a microphone to the SK 500 G4 You can find a list of recommended Lavalier and headset microphones for the bodypack transmitter under “Microphones and cables”. To connect a microphone to the bodypack transmitter: Insert the cable’s 3.5 mm jack plug into the MIC/LINE socket on the ▷... -
Page 33: Connecting An Instrument Or Line Source To The Sk 500 G4
To do this, you will need the Ci 1-N (6.3 mm jack plug on a lockable 3.5 mm jack plug) or CL 2 (XLR-3F plug on lockable 3.5 mm jack plug) Sennheiser cables. To connect an instrument or line source to bodypack transmitter: ▷... -
Page 34: Attaching The Bodypack Transmitter To Clothing
Installing the SK 500 G4 Attaching the bodypack transmitter to clothing You can use the belt clip to attach the bodypack transmitter to your waist- band or on a guitar strap. The belt clip is detachable so that you can also attach the bodypack trans- mitter with the antenna pointing downwards. -
Page 35: Installing The Skp 500 G4
Inserting and removing the batteries/rechargeable batteries You can operate the plug-on transmitter either with batteries (AA, 1.5 V) or with the rechargeable Sennheiser BA 2015 battery. ▷ Slide the battery compartment cover in the direction of the embossed arrow and open the cover. -
Page 36: Battery Status
Installing the SKP 500 G4 Battery status Charge status of the batteries: ► Charge status is critical (LOW BATT): ►... -
Page 37: Attaching The Plug-On Transmitter To The Microphone
Installing the SKP 500 G4 Attaching the plug-on transmitter to the micro- phone Microphones with a metal casing should be used for optimal signal transmission. Loosen the locking ring (2) by rotating it in the clockwise direction past ▷ the center point. This unlocks the XLR-3 plug (1) of the plug-on transmitter. -
Page 38: Using Ew 500 P G4 Series Devices
You can find information about using ew 500 P G4 series devices in the fol- lowing sections. • EK 500 G3 diversity receiver >> “Using the EK 500 G4” • SKM 500 G3 handheld transmitter >> “Using the SKM 500 G4”... - Page 39 Synchronizing the receiver settings to the transmitter >> “Synchroniz- ing devices” • Using the menu of the diversity receiver >> “Displays on the EK 500 G4 display panel” • Using the menu of the handheld transmitter >> “Displays on the SKM 500 G4 handheld transmitter display panel”...
-
Page 40: Using The Ek 500 G4
Using the EK 500 G4 Using the EK 500 G4 These sections contain detailed information about using the EK 500 G4. You can find information about installing the EK 500 under “Using the EK 500 G4”. Operating elements of the EK 500 G4 diversity re- ceiver ►... - Page 41 • See “Buttons for navigating through the menu” ON/OFF button with ESC function in the operating menu • Switch the transmitter on or off See “Switching the EK 500 G4 on and off” • Escape function in the menu See “Buttons for navigating through the menu”...
-
Page 42: Switching The Ek 500 G4 On And Off
Press the two catches and open the battery compartment cover. ▷ To switch the receiver on: ▷ Hold down the ON/OFF button until the Sennheiser logo appears on the display. To switch the receiver off: ▷ Hold down the ON/OFF button until the display goes off. -
Page 43: Volume Control Of The Phones Socket
Using the EK 500 G4 Volume control of the PHONES socket To adjust the volume of the connected headphone: Press the UP or DOWN buttons. ▷... -
Page 44: Lock-Off Function
Using the EK 500 G4 Lock-off function You can set the automatic lock-off function in the Auto lock menu (see “Auto Lock menu item”). When you have switched on the lock-off function, you will have to turn the transmitter off and on again in order to operate it. -
Page 45: Displays On The Ek 500 G4 Display Panel
The display panel also displays the operating menu which you can use to configure all of the settings. See “Setting options in the menu”. Buttons for navigating through the menu To navigate through the EK 500 G4 operating menu, you need the following buttons. ►... - Page 46 Using the EK 500 G4 ► Press the SET button • Changes from the current standard display to the operating menu • Calls up a menu item • Changes to a submenu • Stores the settings and returns to the operating menu ►...
-
Page 47: Home Screen
Home screen After you switch on the receiver, the display panel initially displays the Sennheiser logo. After a short time, the home screen is then displayed. The home screen has two different standard displays. Short-press the ON/OFF button to switch between the standard dis- ▷... -
Page 48: Frequency Bank/Channel/Name Standard Display
Using the EK 500 G4 P pilot tone • P = Activated pilot tone evaluation • No symbol = Evaluation is deactivated • P is black = Pilot tone is being received on the current frequency • See “Advanced -> Pilot Tone menu item”... -
Page 49: Setting Options In The Menu
Using the EK 500 G4 Setting options in the menu In the EK 500 G4 menu, you can configure the following settings. Synchronizing the transmitter with the diversity receiver ▷ See “Sync menu item” Adjusting the volume of the headphone socket ▷... - Page 50 Using the EK 500 G4 • Displaying the current software revision See “Advanced menu item” ▷...
-
Page 51: Menu Structure
Using the EK 500 G4 Menu structure The figure shows the complete EK 500 G4 menu structure in an overview. -
Page 52: Sync Menu Item
Using the EK 500 G4 Sync menu item In the Sync menu item you can synchronize ew 500 P G4 series transmit- ters and receivers. For more information, see “Synchronizing devices”. Phones Volume menu item In the Phones Volume menu item you can adjust the volume for the head- phone output. -
Page 53: Squelch Menu Item
Using the EK 500 G4 Squelch menu item You can adjust the squelch threshold in the Squelch menu item. Setting range: • >> 5 dBμV • Middle >> 15 dBμV • High >> 25 dBμV The squelch threshold is displayed on the home screen in the RF signal lev- el area. - Page 54 Using the EK 500 G4 CAUTION Risk of hearing and material damage If you set the squelch threshold to a very low value, a very loud hissing noise can occur in the receiver. This hissing noise can be loud enough to cause hearing damage or overload your system’s loudspeakers.
-
Page 55: Easy Setup Menu Item
Using the EK 500 G4 Easy Setup menu item You can scan for unused frequencies using the Easy Setup menu item. Switch off all transmitters before you perform the scan. If transmit- ters are still switched on, they are detected as unavailable frequen- cies and the frequencies that are actually available cannot then be used. -
Page 56: Frequency Preset Menu Item
Using the EK 500 G4 Frequency Preset menu item In the Frequency Preset menu item, you can adjust the receiving frequen- cy of the receiver by adjusting the frequency bank and the channel. To open the Frequency Preset menu item: On the home screen, press the SET button to open the operating menu. -
Page 57: Af Out Menu Item
Using the EK 500 G4 AF Out menu item In the AF Out menu item you can adjust the level of the line audio output based on the level of the connected camera. Setting range: • –24 dB to +18 dB in 6 dB steps To open the AF Out menu item: On the home screen, press the SET button to open the operating menu. -
Page 58: Auto Lock Menu Item
Using the EK 500 G4 Auto Lock menu item In the Auto Lock menu item you can activate or deactivate the auto lock- off function. You can find information about temporarily deactivating the lock-off function during operation under “Lock-off function”. -
Page 59: Advanced Menu Item
Using the EK 500 G4 Advanced menu item In the Advanced submenu you can configure enhanced settings. To open the Advanced submenu: ▷ On the home screen, press the SET button to open the operating menu. Press the UP or DOWN button until the Advanced menu item appears ▷... -
Page 60: Advanced -> Tune Menu Item
Using the EK 500 G4 Advanced -> Tune menu item In the Tune menu item of the Advanced submenu, you can configure the receiving frequencies for the U frequency bank. Only adjusting the frequency Open the Tune menu item in the Advanced menu. -
Page 61: Advanced -> Sync Settings Menu Item
Using the EK 500 G4 Advanced -> Sync Settings menu item In the Sync Settings menu item of the Advanced submenu, you can con- figure the parameters to be sent to the transmitters and activate or deac- tivate transmission The parameters are defined separately for the SK, SKM and SKP. -
Page 62: Advanced -> Pilot Tone Menu Item
Using the EK 500 G4 Advanced -> Pilot Tone menu item In the Pilot Tone menu item of the Advanced submenu, you can activate and deactivate the pilot tone evaluation. ► The pilot tone has an inaudible frequency that is sent from the transmitter and evaluated by the receiver. -
Page 63: Advanced -> Reset Menu Item
Using the EK 500 G4 Advanced -> Reset menu item In the Reset menu item of the Advanced submenu, you can reset the set- tings of the receiver. When you reset the diversity receiver, only the selected settings of the pilot tone and the U frequency bank are retained. -
Page 64: Using The Skm 500 G4
Using the SKM 500 G4 Using the SKM 500 G4 These sections contain detailed information about using the SKM 500 G4. You can find information on installation and startup of the SKM 500 G4 un- der “Installing the SKM 500 G4”. Operating elements of the SKM 500 G4 handheld transmitter ►... -
Page 65: Switching The Skm 500 G4 Handheld Transmitter On And Off
See “Inserting and removing the batteries/rechargeable batteries” Switching the SKM 500 G4 handheld transmitter on and off To switch on the SKM 500 G4: Hold down the ON/OFF button until the Sennheiser logo appears on the ▷ display. ► To switch off the SKM 500 G4: ▷... -
Page 66: Muting The Handheld Transmitter (Af Mute)
Using the SKM 500 G4 Muting the handheld transmitter (AF mute) The audio signal of the transmitter cannot be muted. However, when you deactivate the RF signal no AF signal is output. See “Deactivating the RF signal (RF mute)”. Deactivating the RF signal (RF mute) You can deactivate the RF signal with the ON/OFF button. -
Page 67: Lock-Off Function
Using the SKM 500 G4 Lock-off function You can set the automatic lock-off function in the Auto lock menu (see “Auto Lock menu item”). When you have switched on the lock-off function, you will have to turn the transmitter off and on again in order to operate it. To temporarily deactivate the lock-off function: ▷... -
Page 68: Displays On The Skm 500 G4 Handheld Transmitter Display Panel
Using the SKM 500 G4 Displays on the SKM 500 G4 handheld transmitter display panel You can view the following information on the transmitter display. ► AF audio level • Displays the audio level with peak hold function • See “Sensitivity menu item” Frequency •... -
Page 69: Select A Standard Display
Using the SKM 500 G4 Select a standard display Move the multi-function switch to select a standard display: ▷ Frequency/Name standard display ► 548.100 ew500 G4 MUTE Channel/Frequency standard display ► B.Ch: 20.12 548.100 MUTE Name/Channel standard display ► ew500 G4 B.Ch: 20.12 MUTE... -
Page 70: Buttons For Navigating The Skm 500 G4 Menu
Using the SKM 500 G4 Buttons for navigating the SKM 500 G4 menu Navigating through the menu To open the menu: Press the SET button. ▷ The operating menu is shown on the transmitter display panel. To open a menu item: ▷... -
Page 71: Setting Options In The Menu
Using the SKM 500 G4 Setting options in the menu In the SKM 500 G4 menu, you can configure the following settings. Adjusting the input sensitivity ▷ See “Sensitivity menu item” Setting the frequency bank and the channel ▷ See “Frequency Preset menu item” Entering a freely selectable name ▷... -
Page 72: Sensitivity Menu Item
Using the SKM 500 G4 Sensitivity menu item • Adjusting the input sensitivity – AF audio level Setting range: 0 dB to -48 dB in 6 dB steps The AF audio level is also displayed when the wireless microphone is mut- ed, e.g. -
Page 73: Name Menu Item
Using the SKM 500 G4 Name menu item • Entering names ► In the Name menu item you can enter any name you want for the wireless microphone (e.g. the names of the musicians). The name can be shown in the Frequency/Name Name/Channel stan-... -
Page 74: Advanced Menu Item
Using the SKM 500 G4 Advanced menu item In the Advanced submenu you can configure enhanced settings. The following sub-items are available: Adjusting the transmission frequencies for the U frequency bank See “Advanced > Tune menu item” ▷ Configuring the transmission power See “Advanced >... -
Page 75: Advanced > Tune Menu Item
Using the SKM 500 G4 Advanced > Tune menu item • Configuring the transmission frequency and frequency bank U When you have configured the wireless microphone to a system bank and you call up the Tune menu item, channel 1 of the frequency bank U is auto- matically set. -
Page 76: Advanced > Rf Power Menu Item
Using the SKM 500 G4 Advanced > RF Power menu item • Configuring the transmission power ► You can configure the transmission power in three steps in the RF Power menu item. Please note the information at the following address: General conditions and restrictions for the use of frequencies Setting range: Low: 10 mW... -
Page 77: Advanced > Lcd Contrast Menu Item
Using the SKM 500 G4 Advanced > LCD Contrast menu item • Adjusting the contrast of the display panel You can configure the contrast of the display in 16 steps. Advanced > Reset menu item • Resetting the wireless microphone ►... -
Page 78: Using The Sk 500 G4
Using the SK 500 G4 Using the SK 500 G4 These sections contain detailed information about using the SK 500 G4. You can find information on installation and startup of the SK 500 G4 under “Installing the SK 500 G4”. Operating elements of the SK 500 G4 bodypack transmitter ►... - Page 79 Using the SK 500 G4 UP button • See “Buttons for navigating the SK 500 G4 menu” SET button • See “Buttons for navigating the SK 500 G4 menu” DOWN button • See “Buttons for navigating the SK 500 G4 menu” ON/OFF button with ESC function in the operating menu •...
-
Page 80: Switching The Sk 500 G4 Bodypack Transmitter On And Off
Press the two catches and open the battery compartment cover. ▷ To switch on the SK 500 G4: ▷ Hold down the ON/OFF button until the Sennheiser logo appears on the display. To switch off the SK 500 G4: ▷... -
Page 81: Muting The Bodypack Transmitter (Af Mute)
Using the SK 500 G4 Muting the bodypack transmitter (AF mute) You can mute the audio signal with the MUTE switch. To do this, the MUTE switch function must be configured to AF On/Off. You can find more information about this subject under “Advanced > Mute Mode menu item”. -
Page 82: Deactivating The Rf Signal (Rf Mute)
Using the SK 500 G4 Deactivating the RF signal (RF mute) You can deactivate the RF signal in two ways: Deactivating the RF signal with the MUTE switch You can deactivate the RF signal with the MUTE switch. To do this, the MUTE switch function must be configured to RF On/Off. You can find more information about this subject under “Advanced >... -
Page 83: Deactivating The Rf Signal With The On/Off Button
Using the SK 500 G4 Deactivating the RF signal with the ON/OFF button You can deactivate the RF signal with the ON/OFF button. To deactivate the RF signal: ▷ Short-press the ON/OFF button. RF Mute On? appears. ▷ Press the SET button. The RF signal is deactivated. -
Page 84: Lock-Off Function
Using the SK 500 G4 Lock-off function You can set the automatic lock-off function in the Auto lock menu (see “Auto Lock menu item”). When you have switched on the lock-off function, you will have to turn the transmitter off and on again in order to operate it. To temporarily deactivate the lock-off function: ▷... -
Page 85: Displays On The Sk 500 G4 Bodypack Transmitter Display Panel
Using the SK 500 G4 Displays on the SK 500 G4 bodypack transmitter display panel You can view the following information on the transmitter display. ► AF audio level • Displays the audio level with peak hold function • See “Sensitivity menu item” Frequency •... -
Page 86: Select A Standard Display
Using the SK 500 G4 Select a standard display Press the UP or DOWN buttons to select a standard display. ▷ Frequency/Name standard display ► 548.100 ew500 G4 MUTE Channel/Frequency standard display ► B.Ch: 20.12 548.100 MUTE Name/Channel standard display ►... -
Page 87: Buttons For Navigating The Sk 500 G4 Menu
Using the SK 500 G4 Buttons for navigating the SK 500 G4 menu Navigating through the menu To open the menu: Press the SET button. ▷ The operating menu is shown on the transmitter display panel. To open a menu item: ▷... -
Page 88: Setting Options In The Menu
Using the SK 500 G4 Setting options in the menu In the SK 500 G4 menu, you can configure the following settings. Adjusting the input sensitivity ▷ See “Sensitivity menu item” Setting the frequency bank and the channel ▷ See “Frequency Preset menu item” Entering a freely selectable name ▷... -
Page 89: Sensitivity Menu Item
Using the SK 500 G4 Sensitivity menu item • Adjusting the input sensitivity – AF audio level ► Setting range: 0 dB to –60 dB in 6 dB steps. The AF audio level is also displayed when the bodypack transmitter is mut- ed, e.g. -
Page 90: Name Menu Item
Using the SK 500 G4 Name menu item • Entering names ► In the Name menu item you can enter any name you want for the bodypack transmitters (e.g. the names of the musicians). The name can be shown in the Frequency/Name Name/Channel stan-... -
Page 91: Advanced Menu Item
Using the SK 500 G4 Advanced menu item In the Advanced submenu you can configure enhanced settings. The following sub-items are available: Adjusting the transmission frequencies for the U frequency bank See “Advanced > Tune menu item” ▷ Configuring the function of the MUTE switch and the RMS 1 remote mute switch ▷... -
Page 92: Advanced > Tune Menu Item
Using the SK 500 G4 Advanced > Tune menu item • Configuring the transmission frequency and frequency bank U When you have configured the bodypack transmitter to a system bank and you call up the Tune menu item, channel 1 of the frequency bank U is auto- matically set. -
Page 93: Advanced > Mute Mode Menu Item
Using the SK 500 G4 Advanced > Mute Mode menu item • Configuring the MUTE switch ► AF On/Off mode • If set to position MUTE, the audio signal is muted RF On/Off mode • If set to the MUTE selector position, the RF signal is deactivated. Disabled mode •... -
Page 94: Advanced > Pilot Tone Menu Item
Using the SK 500 G4 Advanced > Pilot Tone menu item • Activating/deactivating pilot tone transmission ► The pilot tone has an inaudible frequency that is sent from the transmitter and evaluated by the receiver. It supports the receiver’s squelch function. Advanced >... -
Page 95: Using The Skp 500 G4
Using the SKP 500 G4 Using the SKP 500 G4 These sections contain detailed information about using the SKP 500 G4. You can find information on installation and startup of the SKP 500 G4 un- der “Installing the SKP 500 G4”. Operating elements of the SKP 500 G4 plug-on transmitter ►... -
Page 96: Switching The Skp 500 G4 Plug-On Transmitter On And Off
Using the SKP 500 G4 Switching the SKP 500 G4 plug-on transmitter on and off To switch on the SKP 500 G4: Hold down the ON/OFF button until the Sennheiser logo appears on the ▷ display. To switch off the SKP 500 G4: Hold down the ON/OFF button until the display goes off. -
Page 97: Muting The Plug-On Transmitter (Af Mute)
Using the SKP 500 G4 Muting the plug-on transmitter (AF mute) You can mute the audio signal with the MUTE switch. To do this, the MUTE switch function must be configured to AF On/Off. You can find more information about this subject under “Advanced > Mute Mode menu item”. -
Page 98: Deactivating The Rf Signal (Rf Mute)
Using the SKP 500 G4 Deactivating the RF signal (RF mute) You can deactivate the RF signal in two ways: Deactivating the RF signal with the MUTE switch You can deactivate the RF signal with the MUTE switch. To do this, the MUTE switch function must be configured to RF On/Off. You can find more information about this subject under “Advanced >... -
Page 99: Deactivating The Rf Signal With The On/Off Button
Using the SKP 500 G4 Deactivating the RF signal with the ON/OFF button You can deactivate the RF signal with the ON/OFF button. To deactivate the RF signal: ▷ Short-press the ON/OFF button. RF Mute On? appears. ▷ Press the SET button. The RF signal is deactivated. -
Page 100: Lock-Off Function
Using the SKP 500 G4 Lock-off function You can set the automatic lock-off function in the Auto lock menu (see “Auto Lock menu item”). When you have switched on the lock-off function, you will have to turn the transmitter off and on again in order to operate it. To temporarily deactivate the lock-off function: ▷... -
Page 101: Displays On The Skp 500 G4 Plug-On Transmitter Display Panel
Using the SKP 500 G4 Displays on the SKP 500 G4 plug-on transmitter dis- play panel You can view the following information on the transmitter display. ► AF audio level • Displays the audio level with peak hold function • See “Sensitivity menu item” Frequency •... -
Page 102: Select A Standard Display
Using the SKP 500 G4 Select a standard display Press the UP or DOWN buttons to select a standard display. ▷ Frequency/Name standard display ► 548.100 ew500 G4 MUTE Channel/Frequency standard display ► B.Ch: 20.12 548.100 MUTE Name/Channel standard display ►... -
Page 103: Buttons For Navigating The Skp 500 G4 Menu
Using the SKP 500 G4 Buttons for navigating the SKP 500 G4 menu Navigating through the menu To open the menu: Press the SET button. ▷ The operating menu is shown on the transmitter display panel. To open a menu item: ▷... -
Page 104: Setting Options In The Menu
Using the SKP 500 G4 Setting options in the menu In the SKP 500 G4 menu, you can configure the following settings. Adjusting the input sensitivity ▷ See “Sensitivity menu item” Setting the frequency bank and the channel ▷ See “Frequency Preset menu item” Entering a freely selectable name ▷... -
Page 105: Sensitivity Menu Item
Using the SKP 500 G4 Sensitivity menu item • Adjusting the input sensitivity – AF audio level ► Setting range: 0 dB to -48 dB in 6 dB steps. The AF audio level is also displayed when the plug-on transmitter is muted, e.g. -
Page 106: Name Menu Item
Using the SKP 500 G4 Name menu item • Entering names ► In the Name menu item you can enter any name you want for the bodypack transmitters (e.g. the names of the musicians). The name can be shown in the Frequency/Name Name/Channel stan-... -
Page 107: Advanced Menu Item
Using the SKP 500 G4 Advanced menu item In the Advanced submenu you can configure enhanced settings. The following sub-items are available: Adjusting the transmission frequencies for the U frequency bank See “Advanced > Tune menu item” ▷ Configuring the function of the MUTE switch and the RMS 1 remote mute switch ▷... -
Page 108: Advanced > Tune Menu Item
Using the SKP 500 G4 Advanced > Tune menu item • Configuring the transmission frequency and frequency bank U When you have configured the bodypack transmitter to a system bank and you call up the Tune menu item, channel 1 of the frequency bank U is auto- matically set. -
Page 109: Advanced > Mute Mode Menu Item
Using the SKP 500 G4 Advanced > Mute Mode menu item • Configuring the MUTE switch ► AF On/Off mode • If set to position MUTE, the audio signal is muted RF On/Off mode • If set to the MUTE selector position, the RF signal is deactivated. Disabled mode •... -
Page 110: Advanced > Phantom Power 48V Menu Item
Using the SKP 500 G4 Advanced > Phantom Power 48V menu item • Activating phantom powering ► Advanced > Pilot Tone menu item • Activating/deactivating pilot tone transmission ► The pilot tone has an inaudible frequency that is sent from the transmitter and evaluated by the receiver. -
Page 111: Establishing A Radio Link
3. Set the frequency on the receiver and the transmitter manually (EK 500 G4: “Frequency Preset menu item”, SKM 500 G4: “Frequency Preset menu item”, SK 500 G4: “Frequency Preset menu item”, SKP 500 G4: “Frequency Preset menu item”) -
Page 112: Synchronizing Devices
Synchronizing devices Synchronizing devices You can synchronize ew 500 P G4 series transmitters and receivers via the receiver’s infrared interface. You can adjust the Parameters to be transferred to the transmitter here: “Advanced -> Sync Settings menu item” To synchronize the devices: ▷... -
Page 113: Overview
Overview SPECIFICATIONS Overview In the sections below, you can find information about the different variants of the products in the ew 500 P G4 series as well as technical data for the individual products. • Product variants and frequency variants >> “Product variants” •... -
Page 114: Product Variants
Product variants Product variants EK 500 G4 product variants Made in Germany ► EK 500 G4-K+ 925 – 937.5 MHz Art. no. 507822 EK 500 G4-GBw 606 – 678 MHz Art. no. 507823 EK 500 G4-Gw 558 – 626 MHz Art. -
Page 115: Skm 500 G4 Product Variants
Product variants SKM 500 G4 product variants Made in Germany ► SKM 500 G4-K+ 925 – 937.5 MHz Art. no. 507782 SKM 500 G4-GBw 606 – 678 MHz Art. no. 507783 SKM 500 G4-Gw 558 – 626 MHz Art. no. 507784 SKM 500 G4-Bw 626 –... -
Page 116: Sk 500 G4 Product Variants
Product variants SK 500 G4 product variants Made in Germany ► SK 500 G4-K+ 925 – 937.5 MHz Art. no. 507774 SK 500 G4-GBw 606 – 678 MHz Art. no. 507775 SK 500 G4-Gw 558 – 626 MHz Art. no. 507776 SK 500 G4-Bw 626 –... -
Page 117: Skp 500 G4 Product Variants
Product variants SKP 500 G4 product variants Made in Germany ► SKP 500 G4-K+ 925 – 937.5 MHz Art. no. 507814 SKP 500 G4-GBw 606 – 678 MHz Art. no. 507815 SKP 500 G4-Gw 558 – 626 MHz Art. no. 507816 SKP 500 G4-Bw 626 –... -
Page 118: Frequency Tables
Frequency tables Frequency tables You can find frequency tables for all available frequency ranges in the download section of the Sennheiser website uneer www.sennheiser.com/ download. Download area of the Sennheiser website Enter ew G4 into the search bar to show the frequency tables. -
Page 119: Specifications
Specifications Specifications You can find the product-specific technical data in the sections below. -
Page 120: Ek 500 G4
EK 500 G4 RF characteristics ► Modulation Wideband FM Receiving frequency ranges Aw: 470 – 558 MHz AS: 520 – 558 MHz Gw1: 558 – 608 MHz Gw: 558 – 626 MHz GBw: 606 – 678 MHz Bw: 526 – 698 MHz Cw: 718 –... -
Page 121: Af Characteristics
AF characteristics ► Compander system Sennheiser HDX Signal-to-noise ratio Line: ≥ 110 dBA (1 mV, peak deviation) Phones: approx. 90 dBA Total harmonic distortion (THD) ≤ 0.9 % AF output voltage (at peak devia- 3.5 mm jack socket +17 dBu (mo-... -
Page 122: Skm 500 G4
SKM 500 G4 RF characteristics ► Modulation Wideband FM Receiving frequency ranges Aw+: 470 – 558 MHz AS: 520 – 558 MHz Gw1: 558 – 608 MHz Gw: 558 – 626 MHz GBw: 606 – 678 MHz Bw: 526 – 698 MHz Cw: 718 –... -
Page 123: Af Characteristics
AF characteristics ► Compander system Sennheiser HDX AF frequency response 80 – 18,000 Hz Signal-to-noise ratio ≥ 115 dBA (1 mV, peak deviation) Total harmonic distortion (THD) ≤ 0.9 % Setting range for input sensitivity 48 dB in 6 dB steps Overall device ►... -
Page 124: Sk 500 G4
SK 500 G4 RF characteristics ► Modulation Wideband FM Receiving frequency ranges Aw+: 470 – 558 MHz AS: 520 – 558 MHz Gw1: 558 – 608 MHz Gw: 558 – 626 MHz GBw: 606 – 678 MHz Bw: 526 – 698 MHz Cw: 718 –... -
Page 125: Af Characteristics
AF characteristics ► Compander system Sennheiser HDX AF frequency response Microphone: 80 – 18,000 Hz Line: 25 – 18,000 Hz Signal-to-noise ratio ≥ 115 dBA (1 mV, peak deviation) Total harmonic distortion (THD) ≤ 0.9 % Max. input voltage Microphone/line Input impedance 40 kΩ, unbalanced/1 MΩ... -
Page 126: Skp 500 G4
SKP 500 G4 RF characteristics ► Modulation Wideband FM Receiving frequency ranges Aw: 470 – 558 MHz AS: 520 – 558 MHz Gw1: 558 – 608 MHz Gw: 558 – 626 MHz GBw: 606 – 678 MHz Bw: 526 – 698 MHz Cw: 718 –... -
Page 127: Af Characteristics
AF characteristics ► Compander system Sennheiser HDX AF frequency response 80 – 18,000 Hz Signal-to-noise ratio (1 mV, peak ≥ 120 dBA deviation) Total harmonic distortion (THD) ≤ 0.9 % Input voltage Input impedance Ω 68 k , unbalanced Input capacitance... -
Page 128: Pin Assignment
► • Plug for headphone and earphone cables, e.g. IE 4. • Connect to: • EK IEM G4 • EK 500 G4 3.5 mm mic jack plug ► • Plug for lavalier and headset microphone, e.g. ME 2. • Connect to: •... -
Page 129: 6.3 Mm Mono Jack Plug, Unbalanced
Pin assignment 6.3 mm mono jack plug, unbalanced ► • Connect to: • EM 100 G4 Audio Out • EM 300-500 G4 Audio Out 6.3 mm stereo jack plug for headphone jack ► • Connect to: • EM 100 G4 headphone input •... -
Page 130: Cleaning And Maintenance
Cleaning and maintenance Cleaning and maintenance Note the following information when cleaning and maintaining evolution wireless G4 series products. CAUTION Liquids can damage the products’ electronics. Liquids entering the product housing can cause a short-circuit and damage the electronics. ▷ Keep all liquids away from the products. - Page 131 Cleaning and maintenance ▷ Screw the sound inlet basket back onto the microphone module. From time to time, you should also clean the microphone module contacts: ▷ Wipe the contacts of the microphone module with a soft, dry cloth.
-
Page 132: Contact
CONTACT Contact Instruction manual as a PDF You can find this instruction manual as a PDF (German and English) in the download section of the Sennheiser website at www.sennheiser.com/ download. Download area for the Sennheiser website ▷ Enter ew G4 into the search bar to show the instruction manuals for products in the ew G4 series.