Table of Contents
Advertisement
INSTRUCTIONS
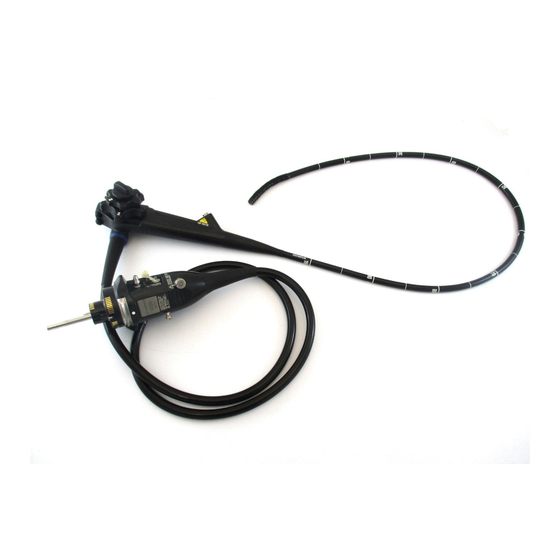
EVIS EXERA III BRONCHOVIDEOSCOPE
OLYMPUS BF-XP190
OLYMPUS BF-P190
OLYMPUS BF-Q190
OLYMPUS BF-H190
OLYMPUS BF-1TH190
Refer to the endoscope's companion manual, the "REPROCESSING MANUAL" with your
endoscope model listed on the cover, for reprocessing information.
USA: CAUTION: Federal law restricts this device to sale by or on the order of a physician.
OPERATION MANUAL
Symbols
Important Information — Please Read Before
Use
Chapter 1
Checking the Package Contents
Chapter 2
Instrument Nomenclature and
Specifications
Chapter 3
Preparation and Inspection
Chapter 4
Operation
Chapter 5
Troubleshooting
Appendix
1
2
13
17
27
51
75
83
Advertisement
Table of Contents
Troubleshooting

Related Manuals for Olympus BF-P190


Summary of Contents for Olympus BF-P190
- Page 1 Important Information — Please Read Before Chapter 1 Checking the Package Contents Chapter 2 Instrument Nomenclature and EVIS EXERA III BRONCHOVIDEOSCOPE Specifications OLYMPUS BF-XP190 OLYMPUS BF-P190 Chapter 3 Preparation and Inspection OLYMPUS BF-Q190 OLYMPUS BF-H190 OLYMPUS BF-1TH190 Chapter 4 Operation...
-
Page 3: Table Of Contents
Contents Contents Symbols ..........................1 Important Information — Please Read Before Use ............2 Intended use .......................... 2 Applicability of endoscopy and endoscopic treatment ............2 Instruction manual ......................... 3 User qualifications ......................... 3 Instrument compatibility ......................4 Reprocessing before the first use/reprocessing and storage after use ......... 4 Spare equipment ........................ - Page 4 Contents Attaching accessories to the endoscope ............. 40 Attaching the suction valve (MAJ-207) or the single use suction valve (MAJ-209) ..... 40 Attaching the biopsy valve (MD-495) or single use biopsy valve (MAJ-210) ....... 41 Inspection of ancillary equipment ................ 42 Connection of the endoscope and ancillary equipment ........
- Page 5 Contents Chapter 5 Troubleshooting ..............75 Troubleshooting ..................... 75 Troubleshooting guide ................... 76 Image quality or brightness ....................76 Water feeding ........................77 Suction ..........................77 EndoTherapy accessories ....................78 Others ..........................78 Withdrawal of the endoscope with an irregularity ..........79 Withdrawal when the WLI and NBI endoscopic images appear on the monitor ....
- Page 6 Contents BF-190 Series OPERATION MANUAL...
-
Page 7: Symbols
Lot number Use by (expiration date) Sterilization lot number Sterilized using irradiation Manufacturer Authorized representative in the European Community Serial number Ingress protection rating is 7. For US Customers only For a Symbols Glossary, visit us: http://www.olympus-global.com/en/common/pdf/symbolsglossary.pdf BF-190 Series OPERATION MANUAL... -
Page 8: Important Information - Please Read Before Use
Important Information — Please Read Before Use Intended use This instrument is intended to be used with an Olympus video system center, light source, documentation equipment, monitor, EndoTherapy accessories (such as a biopsy forceps), and other ancillary equipment for endoscopy and endoscopic surgery. -
Page 9: Instruction Manual
“REPROCESSING MANUAL” with your endoscope model listed on the cover. It also accompanied the endoscope at shipment. Keep this and all related instruction manuals in a safe, accessible location. If you have any questions or comments about any information in this manual, contact Olympus. Terms used in this manual NBI (Narrow Band Imaging) observation: This is optical-digital observation using narrowband light. -
Page 10: Instrument Compatibility
An endoscope with an observed irregularity should not be used, but should be inspected by following Section 5.2, “Troubleshooting guide”. If the irregularity is still observed after inspection, contact Olympus. BF-190 Series OPERATION MANUAL... -
Page 11: Prohibition Of Improper Repair And Modification
Equipment that has been disassembled, repaired, altered, changed, or modified by persons other than Olympus’ own authorized service personnel is excluded from Olympus’ limited warranty and is not warranted by Olympus in any manner. -
Page 12: Warnings And Cautions
Important Information — Please Read Before Use Warnings and cautions Follow the warnings and cautions given below when handling this endoscope. This information is to be supplemented by the warnings and cautions given in each chapter. WARNING • After using this endoscope, reprocess and store it according to the instructions given in the endoscope’s companion “REPROCESSING MANUAL”... - Page 13 Important Information — Please Read Before Use WARNING • Do not touch the light guide on the endoscope connector immediately after removing it from the light source because it is extremely hot. Operator or patient burns can result. • Although the illumination light emitted from the endoscope’s distal end is required for endoscopic observation, it may also cause alteration of living tissues such as protein denaturation of living tissue and perforation of the tissue through improper usage.
- Page 14 Important Information — Please Read Before Use WARNING • When the endoscopic image does not appear on the monitor, the image sensor may have been damaged. Turn the video system center OFF immediately. Continued power supply in such a case will cause the distal end to become hot and could cause operator and/or patient burns.
- Page 15 In this case, stop using the endoscope, and contact Olympus. • Do not twist or bend the bending section with your hands. Equipment damage may result.
- Page 16 Important Information — Please Read Before Use CAUTION • Turn the video system center ON only when the endoscope connector is connected to the light source. In particular, confirm that the video system center is OFF before connecting or disconnecting the endoscope connector. Failure to do so can result in equipment damage, including destruction of the image sensor.
-
Page 17: Warnings And Cautions: Disappeared Or Frozen Endoscopic Image
Important Information — Please Read Before Use Warnings and cautions: disappeared or frozen endoscopic image WARNING • If the endoscopic image disappears unexpectedly or the frozen image cannot be restored during an examination, immediately stop using the endoscope and withdraw it from the patient as described in Section 5.3, “Withdrawal of the endoscope with an irregularity”. -
Page 18: Examples Of Inappropriate Handling
Important Information — Please Read Before Use Examples of inappropriate handling Details on clinical endoscopic technique are the responsibility of trained specialists. Patient safety in endoscopic examinations and endoscopic treatment can be ensured through appropriate handling by the physician and the medical facility. Examples of inappropriate handling are described below. •... -
Page 19: Chapter 1 Checking The Package Contents
Match all items in the package with the components shown below. Inspect each item for damage. If the endoscope is damaged, a component is missing, or you have any questions, do not use the items; immediately contact Olympus. Endoscope BF-XP190, BF-P190, BF-Q190, BF-H190, BF-1TH190 BF-190 Series OPERATION MANUAL... -
Page 20: Packaged Items For The Americas, Europe, Australasia, Middle East, And Africa
1.1 Checking the package contents Packaged items for the Americas, Europe, Australasia, Middle East, and Africa Accessories BF-XP190 Ch.1 Single use single-ended cleaning Single use combination cleaning Mouthpiece (MA-651, 2 pcs) brush (BW-400B, 3 pcs) brush (BW-411B, 3 pcs) Sterilization cap (MAJ-1538) Suction cleaning adapter Single use biopsy valve... -
Page 21: Packaged Items For Countries Other Than The Americas, Europe, Australasia, Middle East, And Africa
1.1 Checking the package contents Packaged items for countries other than the Americas, Europe, Australasia, Middle East, and Africa Accessories BF-XP190 BF-XP190 Except BF-XP190 Ch.1 Suction connector cleaning brush Single use single-ended cleaning Channel cleaning brush (BW-15B) (BW-15SH) brush (BW-400B, 3 pcs) Channel-opening cleaning brush Mouthpiece (MA-651, 2 pcs) - Page 22 1.1 Checking the package contents Ch.1 BF-190 Series OPERATION MANUAL...
-
Page 23: Chapter 2 Instrument Nomenclature And Specifications
2.1 Nomenclature and functions Chapter 2 Instrument Nomenclature and Specifications The instrument nomenclature, functions, and specifications are described in this chapter. Nomenclature and functions Ch.2 BF-190 Series OPERATION MANUAL... -
Page 24: Control Section, Insertion Section
2.1 Nomenclature and functions Control section, insertion section Ch.2 Insertion tube rotation ring Top view BF-190 Series OPERATION MANUAL... - Page 25 Attach the biopsy valve to this port. port Color code This color code and numeral show the compatibility of EndoTherapy accessories. • Blue: BF-Q190, BF-H190, BF-P190 • Yellow: BF-1TH190 • White: BF-XP190 The endoscope can be used with EndoTherapy accessories that have the same color code.
- Page 26 2.1 Nomenclature and functions Ch.2 Insertion tube rotation ring Top view Nomenclature Description UP indication This indication shows the UP direction of the insertion tube. The direction of this indication is the same as the UP direction of the bending section. When returning the insertion tube to its neutral position, turn the insertion tube until the indication aligns with the “...
-
Page 27: Endoscope Connector
2.1 Nomenclature and functions Endoscope connector Ch.2 Rear side Nomenclature Description Light guide Connects the endoscope to the light source and transmits light to the distal end of the endoscope. Electrical contacts Connect the light source and the endoscope electrically. Venting connector Attach the sterilization cap or leakage tester here. -
Page 28: Specifications
2.2 Specifications Specifications Environment Operating Ambient 10 – 40C (50 – 104F) environment temperature Relative humidity 30 – 85% Ch.2 Atmospheric 700 – 1060 hPa pressure (0.7 – 1.1 kgf/cm (10.2 – 15.4 psia) Standard storage Ambient 5 – 40C (41 – 104F) environment (e.g. -
Page 29: Specifications
2.2 Specifications Specifications Model BF-XP190 BF-P190 Optical system Field of view 110° 110° Direction of view 0 (Forward viewing) 0 (Forward viewing) Depth of field 2 – 50 mm 2 – 50 mm Insertion section Distal end outer diameter ø... - Page 30 2.2 Specifications Model BF-Q190 BF-H190 BF-1TH190 Optical system Field of view 120 120 120 Direction of view 0 (Forward viewing) 0 (Forward viewing) 0 (Forward viewing) Depth of field 3 – 100 mm 3 – 100 mm 3 – 100 mm Insertion section Distal end outer ø...
- Page 31 2.2 Specifications Medical Devices Directive This device complies with the requirements of Directive 93/42/EEC concerning medical devices. Classification: Class II a Applied standard IEC 60601-1-2: 2001 IEC 60601-1-2: 2007 • This instrument complies with the EMC standard for medical electrical equipment, edition 2 (IEC 60601-1-2: 2001) and Ch.2 edition 3 (IEC 60601-1-2: 2007).
- Page 32 2.2 Specifications Ch.2 BF-190 Series OPERATION MANUAL...
-
Page 33: Chapter 3 Preparation And Inspection
Should any irregularity be observed after inspection, follow the instructions as described in Chapter 5, “Troubleshooting”. If the endoscope malfunctions, do not use it. Return it to Olympus for repair as described in Section 5.4, “Returning the endoscope for repair”. - Page 34 3.1 The workflow of preparation and inspection Prepare the equipment to be used with the endoscope. Section 3.2 on page 29 Inspect the endoscope. Section 3.3 on page 30 Inspect the accessories. Section 3.4 on page 36 Attach the accessories to the endoscope.
-
Page 35: Preparation Of The Equipment
3.2 Preparation of the equipment Preparation of the equipment Prepare this endoscope, the accessories, equipment, and all personal protective equipment as shown in Figure 3.1. Prepare the equipment in “Combination equipment” on page 83 in accordance with the intended use. Also, refer to the respective instruction manuals for each piece of equipment before use. -
Page 36: Inspection Of The Endoscope
3.3 Inspection of the endoscope Other • Lint-free cloths • Sterile water • Containers for sterile water Figure 3.1 *1 Prepare the endoscope that has been reprocessed as described in the “REPROCESSING MANUAL” with your endoscope model listed on the cover. *2 Prepare the suction valve, mouthpiece, and biopsy valve that have been reprocessed as described in the “REPROCESSING MANUAL”... - Page 37 3.3 Inspection of the endoscope Inspect the control section, and endoscope connector for excessive scratching, deformation, loose parts, or other irregularities. Inspect the boot and the insertion section near the boot for bends, twists, or other irregularities. Inspect the external surface of the entire insertion section, including the bending section and the distal end for dents, bulges, swelling, scratches, peeling of coating, holes, sagging, transformation, bends, adhesion of foreign bodies, missing parts, protruding objects, or other irregularities.
- Page 38 3.3 Inspection of the endoscope Inspect the objective lens and light guide lens Lens at the distal end of the endoscope’s insertion section for scratches, cracks, stains, discoloration, deformation, gaps around the lens, or other irregularities. Also, inspect the entire distal end of the endoscope for chips or cracks.
-
Page 39: Inspection Of The Bending Mechanism
3.3 Inspection of the endoscope Inspection of the bending mechanism Perform the following inspections while the bending section is straight. UP/DOWN angulation control lever UP indication Insertion tube rotation ring Ch.3 Figure 3.9 WARNING • If the movement of the angulation control lever is loose and/or not smooth, or the bending section does not angulate smoothly, the bending mechanism may have an irregularity. - Page 40 3.3 Inspection of the endoscope Inspection for smooth operation Straighten the bending section. Operate the UP/DOWN angulation control lever slowly in each direction until it stops. Confirm that the bending section angulates smoothly and correctly, that maximum angulation can be achieved.
-
Page 41: Inspection Of The Insertion Tube Rotation Mechanism
3.3 Inspection of the endoscope Inspection of the insertion tube rotation mechanism WARNING When rotating the insertion section, the bending section bends to a different direction against the control section. Before operating the angulation control lever, make sure to check the position of the UP indication of the insertion tube rotation ring. -
Page 42: Inspection Of Accessories
3.4 Inspection of accessories Inspection of accessories Inspection of the suction valve (MAJ-207) or single use suction valve (MAJ-209) Button Ch.3 Suction connector Figure 3.12 WARNING • Do not use the suction valve (MAJ-207) for more than six procedures. •... -
Page 43: Inspection Of The Biopsy Valve (Md-495)
3.4 Inspection of accessories Inspection of the biopsy valve (MD-495) Slit Main body Ch.3 Figure 3.13 WARNING The biopsy valve is a consumable that should be inspected as described below before each use. Replace it with a new one if any irregularity is observed during the inspection. -
Page 44: Inspection Of The Single Use Biopsy Valve (Maj-210)
3.4 Inspection of accessories Inspection of the single use biopsy valve (MAJ-210) Slit Housing Figure 3.14 Ch.3 WARNING • Do not use a single use biopsy valve after the expiration date displayed on the sterile package. Doing so may pose an infection control risk. •... -
Page 45: Inspection Of The Mouthpiece (Ma-651)
3.4 Inspection of accessories Inspection of the mouthpiece (MA-651) Opening Outer flange Main body Figure 3.15 WARNING Ch.3 Do not use a mouthpiece that is damaged, deformed or reveals other irregularities. Doing so may cause patient injury and/or equipment damage. NOTE Placing the mouthpiece in the patient’s mouth before the procedure prevents the patient from biting and/or damaging the endoscope’s insertion section. -
Page 46: Series Operation Manual
3.5 Attaching accessories to the endoscope Attaching accessories to the endoscope Attaching the suction valve (MAJ-207) or the single use suction valve (MAJ-209) WARNING Firmly attach the suction valve to the suction cylinder. If the suction valve is attached to the endoscope improperly or a gap between the base of the suction valve and the top of the suction cylinder exists, the suction valve may detach from Ch.3 the endoscope and may cause patient debris to leak or spray from the gap. -
Page 47: Attaching The Biopsy Valve (Md-495) Or Single Use Biopsy Valve (Maj-210)
3.5 Attaching accessories to the endoscope Inspect and verify that the base of the valve is in contact with the suction cylinder properly. Improper attachment makes a gap between the base of the suction valve and the top of the suction cylinder. No gap Proper attachment Improper attachment... -
Page 48: Inspection Of Ancillary Equipment
3.6 Inspection of ancillary equipment Inspection of ancillary equipment Inspect the following equipment as described in their respective instruction manuals. • Light source • Video system center • Monitor • Suction pump • EndoTherapy accessories Ch.3 Connection of the endoscope and ancillary equipment Connect the ancillary equipment to the endoscope as described below. -
Page 49: Connection Of The Suction Tube
3.7 Connection of the endoscope and ancillary equipment If any ancillary equipment is ON, turn it OFF. Hold the endoscope connector while the UP mark is facing upward. Insert the endoscope connector completely into the output socket of the light source. Output socket “”... -
Page 50: Inspection Of The Endoscopic System
3.8 Inspection of the endoscopic system Inspection of the endoscopic system Inspection summary Inspection of the Inspection of the endoscopic suction function image on page 48 on page 44 Inspection of the remote Inspection of the water switches feeding function... - Page 51 3.8 Inspection of the endoscopic system Observe the palm of your hand using the WLI and NBI endoscopic images. Figure 3.21 Confirm that light is output from the endoscope’s distal end. (See Figure 3.21) Ch.3 Adjust the brightness level as appropriate. Confirm that the WLI and NBI endoscopic images are free from noise, blur, fog, or other irregularities.
-
Page 52: Inspection Of The Remote Switches
3.8 Inspection of the endoscopic system Inspection of the remote switches WARNING Check that all remote switches work normally even if they are not expected to be used. Otherwise, the endoscopic image may freeze, or other irregularities may occur during examination and may cause patient injury, bleeding, and/or perforation. -
Page 53: Inspection Of The Water Feeding Function
3.8 Inspection of the endoscopic system Inspection of the water feeding function Insert a syringe filled with sterile water into the biopsy valve. Depress the plunger. Confirm that water is discharged from the distal end of the endoscope. NOTE •... -
Page 54: Inspection Of The Suction Function
If the reattached or replaced suction valve fails to operate smoothly, the endoscope may be malfunctioning; stop using it and contact Olympus. Ch.3 Turn ON the suction pump. -
Page 55: Inspection Of The Instrument Channel
3.8 Inspection of the endoscopic system Inspection of the instrument channel WARNING Keep your eyes away from the distal end when inserting EndoTherapy accessories. Extending the EndoTherapy accessory from the distal end could cause eye injury. CAUTION • If significant resistance is encountered and insertion becomes very difficult, straighten the bending section as much as possible without losing the endoscopic image. - Page 56 3.8 Inspection of the endoscopic system Ch.3 BF-190 Series OPERATION MANUAL...
-
Page 57: Chapter 4 Operation
4.1 Warnings and cautions: operation Chapter 4 Operation This manual does not explain or discuss clinical endoscopic procedures. It only describes basic operation and important information related to the operation of this endoscope. Therefore, the operator of this endoscope must be a physician or medical personnel under the supervision of a physician and must have received sufficient training in clinical endoscopic technique. - Page 58 4.1 Warnings and cautions: operation WARNING • Transnasal insertion is accompanied by the risk of bleeding in the nasal cavity. Be sure to be prepared to deal with any bleeding. When withdrawing the endoscope, observe the inside of the nasal cavity to ensure that there is no bleeding. Even when the endoscope has been withdrawn without bleeding, do not allow the patient to blow his or her nose strongly because this could cause it to start bleeding.
-
Page 59: Insertion
4.2 Insertion WARNING • When performing high-frequency cauterization, do not allow the external surface of the control section and its surroundings to become wet. Unintended leakage current may cause operator and/or patient injury. NOTE Set the brightness of the light source to the minimum level necessary to perform the procedure safely. -
Page 60: Insertion Of The Endoscope
4.2 Insertion Insertion of the endoscope WARNING • Make sure that the UP indication on the insertion tube rotation ring is aligned with the UP indication on the control section. • The shape and size of the nasal cavity and its suitability for transnasal insertion may vary from patient to patient. - Page 61 4.2 Insertion CAUTION • Do not allow the insertion section to be bent within a distance of 10 cm or less from the junction of the boot. Insertion section damage can occur. Boot >10 cm Figure 4.2 Ch.4 If necessary, apply a medical-grade, water-soluble lubricant to the insertion section.
-
Page 62: Observation Of The Endoscopic Image
4.2 Insertion Observation of the endoscopic image WARNING • Do not rely on the NBI observation mode alone for primary detection of lesions or to make a decision regarding any potential diagnostic or therapeutic intervention. • If the endoscopic image seems to be dark in the NBI observation mode, change to the normal observation mode. -
Page 63: Operation Of The Insertion Tube Rotation
4.2 Insertion Operation of the insertion tube rotation WARNING • When rotating the insertion section, the bending section bends to a different direction against the control section. Before operating the angulation control lever, make sure to check the position of the projection of the insertion tube rotation ring. Otherwise, the bending section may bend to a different direction as intended and patient injury, bleeding, and/or perforation could result. -
Page 64: Feeding Fluids
4.2 Insertion Feeding fluids CAUTION Do not depress the suction valve while feeding fluids. The fluids will be aspirated into the suction pump. Securely insert a syringe into the slit of the biopsy valve. Depress the plunger to feed fluids. Ch.4 BF-190 Series OPERATION MANUAL... -
Page 65: Suction
4.2 Insertion Suction WARNING • When aspirating, attach the biopsy valve to the instrument channel port. If the valve is not attached properly, it can reduce the efficacy of the endoscope’s suction system and may cause patient debris to leak or spray. It can pose an infection control risk. -
Page 66: Using Endotherapy Accessories
4.3 Using EndoTherapy accessories Using EndoTherapy accessories For more information on combining the endoscope with particular EndoTherapy accessories, refer to “ Compatible EndoTherapy accessories” on page 86 and the instruction manuals for the accessories. Also, refer to their respective instruction manuals for operating the accessories. WARNING •... -
Page 67: Insertion Of Endotherapy Accessories Into The Endoscope
4.3 Using EndoTherapy accessories CAUTION • Select the EndoTherapy accessories compatible with the endoscope by referring to “Channel inner diameter” in “ Specifications” on page 23. • When using a biopsy forceps with a needle, confirm that the needle is not bent excessively. - Page 68 4.3 Using EndoTherapy accessories WARNING • When inserting an EndoTherapy accessory, hold it close to the biopsy valve and insert it slowly and straight into the biopsy valve. Otherwise, the EndoTherapy accessory and/or biopsy valve could be damaged. This can reduce the efficacy of the endoscope’s suction system and may leak or spray patient debris or fluids, posing an infection control risk.
- Page 69 4.3 Using EndoTherapy accessories Insert the EndoTherapy accessory slowly and straight into the slit of the biopsy valve. Figure 4.6 Hold the EndoTherapy accessory at a point approximately 4 cm from the slit of the biopsy valve and advance it slowly and straight into the slit using short strokes while observing the endoscopic image.
-
Page 70: Operation Of Endotherapy Accessories
4.3 Using EndoTherapy accessories Operation of EndoTherapy accessories Operate the EndoTherapy accessory according to the directions given in its instruction manual. Withdrawal of EndoTherapy accessories WARNING • Do not withdraw the EndoTherapy accessory if the tip is open or extended from its sheath;... -
Page 71: High-Frequency Cauterization Treatment
4.3 Using EndoTherapy accessories High-frequency cauterization treatment Endoscope model: all models except BF-XP190 WARNING • Never use the high-frequency EndoTherapy accessories for the BF-XP190 because the distal end of the BF-XP190 is not insulated. Patient injury may result. • Always confirm that the tissue is an appropriate distance away from the distal end of the endoscope. - Page 72 NOTE • Some Olympus endoscopes are equipped with a feedback circuit to lead leakage current from the endoscope to the electrosurgical unit. However, the BF-190 series Ch.4...
-
Page 73: Argon Plasma Coagulation (Apc)
4.3 Using EndoTherapy accessories Argon plasma coagulation (APC) Endoscope model: all models except BF-XP190 WARNING • The argon gas itself is neither combustible nor a promoter of combustible substances, but the argon plasma is very hot and could ignite combustible substances. - Page 74 • The outer surfaces of the BF-190 series endoscopes except the BF-XP190 are insulated. This allows APC to be performed. • Some Olympus endoscopes are equipped with a feedback circuit to lead leakage current from the endoscope to the electrosurgical unit. However, the BF-190 series...
-
Page 75: Laser Cauterization
Endoscope model: all models except BF-P190 and BF-XP190 WARNING • The BF-P190 and the BF-XP190 are incompatible with laser cauterization. Performing laser cauterization may cause patient injury and/or equipment damage. • Do not perform laser cauterization while supplying oxygen. This may result in combustion during cauterization. -
Page 76: Ultrasonic Observation
4.3 Using EndoTherapy accessories Ultrasonic observation Endoscope model: all models except BF-XP190 WARNING • When withdrawing the ultrasonic probe with balloon sheath from the endoscope, make sure that the balloon is completely deflated. Withdrawing the probe while the balloon is inflated could result in patient injury and/or damage the ultrasonic probe. •... -
Page 77: Bronchoalveolar Lavage
4.3 Using EndoTherapy accessories Bronchoalveolar lavage Using the BAL (bronchoalveolar lavage) kit Disconnect the suction tube from the suction Suction tube valve. Connect the suction tube to the suction connector of a commercially available BAL kit. Connect the BAL kit’s suction line to the suction connector of the suction valve. -
Page 78: Withdrawal Of The Endoscope
EndoTherapy accessory may cause patient injury, bleeding, and/or perforation. If any irregularity with the endoscope is observed, contact Olympus. • Avoid patient fluids adhering to the withdrawn endoscope from coming in contact with the bed or floor. The patient fluids may pose an infection control risk to the patient and/or medical personnel. -
Page 79: Transportation Of The Endoscope
4.5 Transportation of the endoscope Transportation of the endoscope Transporting within the hospital When carrying the endoscope by hand, loop the universal cord, hold the endoscope connector with the control section in one hand and hold the distal end of the insertion tube securely, but gently without squeezing, in the other hand. - Page 80 4.5 Transportation of the endoscope Ch.4 BF-190 Series OPERATION MANUAL...
-
Page 81: Chapter 5 Troubleshooting
Inspection”, do not use the endoscope and solve the problem as described in Section 5.2, “Troubleshooting guide”. If the problem still cannot be resolved, send the endoscope to Olympus for repair as described in Section 5.4, “Returning the endoscope for repair”. -
Page 82: Troubleshooting Guide
Troubles or failures due to other causes than those listed below should be serviced. As repair performed by persons who are not qualified by Olympus could cause patient or user injury and/or equipment damage, be sure to contact Olympus for repair following the instructions given in Section 5.4, “Returning the endoscope for repair”. -
Page 83: Water Feeding
5.2 Troubleshooting guide Irregularity description Possible cause Solution The image is not proper. An incompatible video system center is Use a compatible video system center. being used. An incompatible light source is being Use a compatible light source. used. Foreign objects such as detergent Wipe the electrical contacts on the remnants, hard water residue, finger endoscope connector using clean... -
Page 84: Endotherapy Accessories
5.2 Troubleshooting guide EndoTherapy accessories Irregularity description Possible cause Solution The EndoTherapy accessory An incompatible EndoTherapy Refer to “ System chart” on page 83 does not pass through the accessory is being used. and select a compatible EndoTherapy instrument channel accessory. -
Page 85: Withdrawal Of The Endoscope With An Irregularity
Forcibly withdrawing the endoscope or EndoTherapy accessory may cause patient injury, bleeding, and/or perforation. If any irregularity with the endoscope is observed, contact Ch.5 Olympus. Withdrawal when the WLI and NBI endoscopic images appear on the monitor Turn all equipment OFF except the video system center, light source, monitor, and suction pump. -
Page 86: Withdrawal When Either The Wli Or The Nbi Endoscopic Image Does Not Appear On The Monitor
5.3 Withdrawal of the endoscope with an irregularity Withdrawal when either the WLI or the NBI endoscopic image does not appear on the monitor Turn all equipment OFF except the video system center, light source, and monitor. Operate the video system center and the light source to switch to the endoscopic image that is still displayed. -
Page 87: Returning The Endoscope For Repair
Olympus. CAUTION Olympus is not liable for any injury or damage that occurs as a result of repairs attempted by non-Olympus personnel. Before returning the endoscope for repair, contact Olympus. With the endoscope, include a description of the malfunction or damage and the name and telephone number of the individual at your location who is most familiar with the problem. - Page 88 5.4 Returning the endoscope for repair Ch.5 BF-190 Series OPERATION MANUAL...
-
Page 89: Appendix
Some items may not be available in some areas. New products released after the introduction of the endoscope may also be compatible for use in combination with the endoscope. For further details, contact Olympus. WARNING Be sure to use the equipment in one of the recommended combinations. - Page 90 Suction pumps EVIS EXERA III video system center (CV-190) KV-5 SSU-2 Endoscope Suction valve (MAJ-207 Single use suction valve BF-XP190, (MAJ-209) BF-P190, BF-Q190, BF-H190, BF-1TH190 EVIS EXERA III xenon light source (CLV-190) Biopsy valve (MD-495 App. Single use biopsy valve (MAJ-210)
-
Page 91: Reprocessing Equipment
Combination equipment Reprocessing equipment BF-XP190 BF-XP190 Except BF-XP190 Single use single-ended cleaning Suction connector cleaning brush Channel cleaning brush brush (BW-400B) (BW-15SH) (BW-15B Channel-opening cleaning brush Single use combination cleaning Leakage tester (MB-155) (MH-507 brush (BW-411B Suction cleaning adapter Maintenance unit (MU-1) Sterilization cap (MAJ-1538) (MAJ-222) -
Page 92: Compatible Endotherapy Accessories
Note that some of the accessories may not be available in some areas. EndoTherapy accessories Biopsy forceps Alligator jaws type Rat tooth type Endoscope BF-XP190 – FB-56D-1 BF-P190 BF-Q190 FB-15C-1 FB-56D-1 BF-H190 BF-1TH190 FB-15C-1 – Biopsy forceps (fenestrated) Standard type... - Page 93 Standard type Standard type alligator jaws type alligator jaws type (with needle) (with needle) Endoscope BF-XP190 – – – – BF-P190 BF-Q190 FB-52C-1 FB-19CR-1 – – BF-H190 BF-1TH190 FB-52C-1 FB-19CR-1 FB-22CR-1 FB-55CR-1 Single use biopsy forceps with swing jaws (fenestrated)
- Page 94 Single use grasping Grasping forceps forceps Rubber tips Rat tooth type Sharp tooth type Loop type (non-latex) Endoscope BF-XP190 – – – FG-36D BF-P190 BF-Q190 FG-20P-1 – – FG-36D BF-H190 BF-1TH190 FG-20P-1 FG-26C-1 FG-32C-1 FG-36D Single use grasping forceps Spiral basket type...
- Page 95 Combination equipment Aspiration needle Single use cytology brush No side hole type Side hole type Endoscope BF-XP190 BC-201C-1006 – – BC-203D-2006 BF-P190 BC-202D-1210 BF-Q190 BC-202D-2010 NA-1C-1 NA-2C-1 BF-H190 BC-202D-3010 BC-202D-5010 BF-1TH190 BC-202D-1210 BC-202D-2010 NA-1C-1 NA-2C-1 BC-202D-3010 BC-202D-5010 Single use aspiration needle...
- Page 96 Electrosurgical accessories Electrosurgical Electrosurgical Coagulation snare knife Hot biopsy forceps electrode Crescent Flat type Endoscope BF-XP190 – – – – BF-P190 SD-7C-1 BF-Q190 CD-6C-1 KD-31C-1 FD-7C-1 SD-18C-1 BF-H190 BF-1TH190 SD-7C-1 CD-6C-1 KD-31C-1 FD-6C-1 SD-18C-1 APC probe App. Endoscope BF-XP190 –...
- Page 97 Combination equipment Guide sheath kit Single use guide sheath kit Endoscope BF-XP190 – BF-P190 K-201 BF-Q190 K-202 BF-H190 BF-1TH190 K-203 K-204 Guiding device Endoscope BF-XP190 – BF-P190 BF-Q190 CC-6DR-1 BF-H190 App. BF-1TH190 CC-6DR-1 BF-190 Series OPERATION MANUAL...
-
Page 98: Emc Information
EMC information EMC information Guidance and manufacturer’s declaration — Electromagnetic emissions This model is intended for use in the electromagnetic environment specified below. The customer or the user of this model should assure that it is used in such an environment. Emissions test Compliance Electromagnetic environment —... - Page 99 EMC information Guidance and manufacturer’s declaration — Electromagnetic immunity This model is intended for use in the electromagnetic environment specified below. The customer or the user of this model should assure that it is used in such an environment. IEC 60601 Electromagnetic environment —...
- Page 100 EMC information Guidance and manufacturer’s declaration — Electromagnetic immunity This model is intended for use in the electromagnetic environment specified below. The customer or the user of this model should assure that it is used in such an environment. Portable and mobile RF communications equipment should be used no closer to any part of this model, including cables, than the recommended separation distance calculated from the equation applicable to the frequency of the transmitter.
- Page 101 EMC information NOTE • Field strength from fixed RF transmitters as determined by an electromagnetic site survey should be less than the compliance level in each frequency range Field strength from fixed transmitters, such as base stations for radio (cellular/cordless) telephones and land mobile radios, amateur radio, AM and FM radio broadcast and TV broadcast cannot be predicted theoretically with accuracy.
- Page 102 EMC information Recommended separation distances between portable and mobile RF communications equipment and this model This model is intended for use in an electromagnetic environment in which radiated RF disturbances are controlled. The customer or the user of this model can help prevent electromagnetic interference by maintaining a minimum distance between portable and mobile RF communications equipment (transmitters) and this model as recommended below, according to the maximum output power of the communications equipment.
- Page 103 ©2013 OLYMPUS MEDICAL SYSTEMS CORP. All rights reserved. No part of this publication may be reproduced or distributed without the express written permission of OLYMPUS MEDICAL SYSTEMS CORP. OLYMPUS is a registered trademark of OLYMPUS CORPORATION. Trademarks, product names, logos, or trade names used in this document are generally registered trademarks or trademarks of each company.
- Page 104 A8F, Ping An International Financial Center, No. 1-3, Xinyuan South Road, Chaoyang District, Beijing, 100027 P.R.C. Fax: (86)10-5976-1299 Telephone: (86)10-5819-9000 Olympus Tower 9F, 446, Bongeunsa-ro, Gangnam-gu, Seoul, Korea 135-509 Fax: (02)6255-3494 Telephone: (02)6255-3210 491B, River Valley Road #12-01/04, Valley Point Office Tower, Singapore 248373...