Table of Contents
Advertisement
Refer to the endoscope's companion manual, the "REPROCESSING MANUAL" whose cover lists the model
of your endoscope for reprocessing information.
USA: CAUTION: Federal law restricts this device to sale by or on the order of a physician.
INSTRUCTIONS
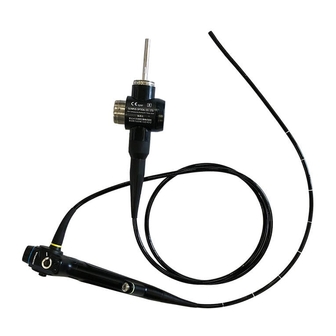
EVIS EXERA BRONCHOVIDEOSCOPE
OLYMPUS BF TYPE 160
OLYMPUS BF TYPE P160
OLYMPUS BF TYPE 1T160
OLYMPUS BF TYPE XT160
OLYMPUS BF TYPE 3C160
EVIS EXERA BRONCHOFIBERVIDEOSCOPE
OLYMPUS BF TYPE MP160F
OLYMPUS BF TYPE XP160F
Advertisement
Table of Contents
Troubleshooting

Related Manuals for Olympus OLYMPUS BF TYPE 160


Summary of Contents for Olympus OLYMPUS BF TYPE 160
- Page 1 INSTRUCTIONS EVIS EXERA BRONCHOVIDEOSCOPE OLYMPUS BF TYPE 160 OLYMPUS BF TYPE P160 OLYMPUS BF TYPE 1T160 OLYMPUS BF TYPE XT160 OLYMPUS BF TYPE 3C160 EVIS EXERA BRONCHOFIBERVIDEOSCOPE OLYMPUS BF TYPE MP160F OLYMPUS BF TYPE XP160F Refer to the endoscope’s companion manual, the “REPROCESSING MANUAL” whose cover lists the model of your endoscope for reprocessing information.
-
Page 3: Table Of Contents
Contents Contents Symbols..................Important Information — Please Read Before Use....Intended use .................... Applicability of endoscopy and endoscopic treatment ......Instruction manual..................User qualifications ..................Instrument compatibility ................Reprocessing before the first use/reprocessing and storage after use ..Repair and modification ................Signal words.................... - Page 4 Contents Chapter 5 Troubleshooting ............Troubleshooting guide ..............Withdrawal of the endoscope with an abnormality......Returning the endoscope for repair..........Appendix..................System chart .................... BF TYPE 160 Series OPERATION MANUAL...
-
Page 5: Symbols
Symbols Symbols The meaning(s) of the symbol(s) shown on the package with the components, the back cover of this instruction manual and/or this instrument are as follows: Refer to instructions. Endoscope TYPE BF applied part Lot number Do not reuse. Use by (expiration date) Sterilization lot number Sterilized using irradiation... -
Page 6: Important Information - Please Read Before Use
Important Information — Please Read Before Use Intended use These instruments have been designed to be used with an Olympus video system center, light source, documentation equipment, video monitor, endo-therapy accessories (such as biopsy forceps) and other ancillary equipment for endoscopy and endoscopic surgery within the airways and tracheobronchial tree. -
Page 7: Instruction Manual
Keep this and all related instruction manuals in a safe, accessible location. If you have any questions or comments about any information in this manual, please contact Olympus. User qualifications The operator of this instrument must be a physician or medical personnel under the supervision of a physician and must have received sufficient training in clinical endoscopic technique. -
Page 8: Instrument Compatibility
This instrument does not contain any user-serviceable parts. Do not disassemble, modify or attempt to repair it; patient or operator injury and/or equipment damage can result. This instrument is to be repaired by Olympus technicians only. BF TYPE 160 Series OPERATION MANUAL... -
Page 9: Signal Words
Important Information — Please Read Before Use Signal words The following signal words are used throughout this manual: Indicates a potentially hazardous situation which, if not avoided, could result in death or serious injury. Indicates a potentially hazardous situation which, if not avoided, may result in minor or moderate injury. - Page 10 Important Information — Please Read Before Use • Never perform angulation forcibly or suddenly. Never forcefully pull or twist the angulated bending section. Patient injury, bleeding and/or perforation can result. It may also become impossible to straighten the bending section during use and/or to withdraw this instrument from the patient.
- Page 11 CV-160. Although the memory chip is durable, damage will prevent data from being backed up on it. When data are lost or damaged, contact Olympus. BF TYPE 160 Series OPERATION MANUAL...
-
Page 12: Precaution For Disappeared Or Frozen Endoscopic Image
Important Information — Please Read Before Use Precaution for disappeared or frozen endoscopic image • If the endoscopic image unexpectedly disappears or the frozen image cannot be restored during an examination, immediately stop using the instrument and withdraw the endoscope from the patient. Continued use of the endoscope in such condition may cause patient injury, bleeding and/or perforation. -
Page 13: Examples Of Inappropriate Handling
Important Information — Please Read Before Use • Do not hit or bend the electrical contacts on the endoscope connector. The connection to the light source may be impaired and faulty contact can result. Examples of inappropriate handling Details on clinical endoscopic technique are the responsibility of trained specialists. -
Page 14: Chapter 1 Checking The Package Contents
Match all items in the package with the components shown below. Inspect each item for damage. If the instrument is damaged, a component is missing or you have any questions, do not use the instrument; immediately contact Olympus. This instrument was not disinfected or sterilized before shipment. - Page 15 Chapter 1 Checking the Package Contents BF TYPE 160 Series OPERATION MANUAL...
-
Page 16: Chapter 2 Instrument Nomenclature And Specifications
Chapter 2 Instrument Nomenclature and Specifications Chapter 2 Instrument Nomenclature and Specifications Nomenclature Water-resistant cap (MH-553) Universal cord Venting connector 2. Electrical connector Serial number Electrical contacts 1. Endoscope connector Light guide BF TYPE 160 Series OPERATION MANUAL... - Page 17 Chapter 2 Instrument Nomenclature and Specifications 4. Single-use suction valve (MAJ-209) 3. UP/DOWN angulation Suction cylinder control lever Slit Control section 5. Single-use biopsy valve (MAJ-210) Instrument channel 6. Instrument channel port 7. Color code Boot Insertion tube/working length 9. Remote switches Distal end Suction cylinder 8.
-
Page 18: Endoscope Functions
Chapter 2 Instrument Nomenclature and Specifications Endoscope functions 1. Endoscope connector This connector connects the endoscope to the output socket of the light source and transmits light from the light source to the endoscope. 2. Electrical connector This connector connects the endoscope to the video system center via the videoscope cable. -
Page 19: Specifications
Chapter 2 Instrument Nomenclature and Specifications 7. Color code This code is used to quickly determine the compatibility of endo-therapy accessories. The endoscope can be used with endo-therapy accessories that have the same color code. • Blue : BF-160, BF-P160, BF-MP160F •... - Page 20 Chapter 2 Instrument Nomenclature and Specifications Specifications Model BF-160 Optical Field of view 120° system Direction of view Forward viewing Depth of field 3 – 100 mm Insertion tube Distal end outer diameter ø 5.3 mm Distal end enlarged 1. Objective lens 2.
- Page 21 Chapter 2 Instrument Nomenclature and Specifications Model BF-P160 Optical Field of view 120° system Direction of view Forward viewing Depth of field 3 – 100 mm Insertion tube Distal end outer diameter ø 4.8 mm Distal end enlarged 1. Objective lens 2.
- Page 22 Chapter 2 Instrument Nomenclature and Specifications Model BF-1T160 Optical Field of view 120° system Direction of view Forward viewing Depth of field 3 – 100 mm Insertion tube Distal end outer diameter ø 6.0 mm Distal end enlarged 1. Objective lens 2.
- Page 23 Chapter 2 Instrument Nomenclature and Specifications Model BF-XT160 Optical Field of view 120° system Direction of view Forward viewing Depth of field 3 – 100 mm Insertion tube Distal end outer diameter ø 6.2 mm Distal end enlarged 1. Objective lens 2.
- Page 24 Chapter 2 Instrument Nomenclature and Specifications Model BF-3C160 Optical Field of view 120° system Direction of view Forward viewing Depth of field 3 – 100 mm Insertion tube Distal end outer diameter ø 3.8 mm Distal end enlarged 1. Objective lens 2.
- Page 25 Chapter 2 Instrument Nomenclature and Specifications Model BF-MP160F Optical Field of view 120° system Direction of view Forward viewing Depth of field 3 – 50 mm Insertion tube Distal end outer diameter ø 4.0 mm Distal end enlarged 1. Objective lens 2.
- Page 26 Chapter 2 Instrument Nomenclature and Specifications Model BF-XP160F Optical Field of view 90° system Direction of view Forward viewing Depth of field 2 – 50 mm Insertion tube Distal end outer diameter ø 2.8 mm Distal end enlarged 1. Objective lens 2.
- Page 27 Chapter 2 Instrument Nomenclature and Specifications Year of manufacture 1312345 The last digit of the year of manufacture is given in the second digit of the serial number. Degree of protection TYPE BF applied part against electric shock BF TYPE 160 Series OPERATION MANUAL...
-
Page 28: Chapter 3 Preparation And Inspection
Inspect other equipment to be used with this instrument as instructed in their respective instruction manuals. If this instrument malfunctions, do not use it. Return it to Olympus for repair as described in Section 5.3, “Returning the endoscope for repair”. -
Page 29: Preparation Of The Equipment
Chapter 3 Preparation and Inspection Preparation of the equipment Prepare the equipment shown in Figure 3.1 (for compatibility, see the “System chart” in the Appendix) and personal protective equipment, such as eye wear, face mask, moisture-resistant clothing and chemical-resistant gloves, before each use. -
Page 30: Inspection Of The Endoscope
Chapter 3 Preparation and Inspection Inspection of the endoscope Clean and disinfect or sterilize the endoscope as described in its companion reprocessing manual. Then remove the water-resistant cap from the endoscope connector. Inspection of the endoscope Inspect the control section and the endoscope connector for excessive scratching, deformation, loose parts or other irregularities. -
Page 31: Preparation And Inspection Of Accessories
Chapter 3 Preparation and Inspection Inspection of the bending mechanism Perform the following inspections while the bending section is straight. If the movement of the angulation control lever is not smooth, or the bending section does not angulate smoothly, the bending mechanism may be abnormal. - Page 32 Chapter 3 Preparation and Inspection Inspect the sterile package for tears, inadequate sealing or water damage. If the sterile package shows any irregularities, the sterile condition of the instrument may have been compromised. Use a spare instead. Confirm that the button can be pushed without excessive resistance. Inspect the suction valve for cracks or other damage (see Figure 3.3).
- Page 33 Chapter 3 Preparation and Inspection Inspect the sterile package for tears, inadequate sealing or water damage. If the sterile package shows any irregularities, the sterile condition of the instrument may have been compromised. Use a spare instead. Inspect the biopsy valve for cracks or other damage (see Figure 3.4). Slit Housing Figure 3.4...
-
Page 34: Attaching Accessories To The Endoscope
Chapter 3 Preparation and Inspection Confirm that the mouthpiece is free from cracks, deformation or discoloration (see Figure 3.5). Opening Outer flange Main body Figure 3.5 Using your fingers, check for excessive scratching or other irregularities on all surfaces of the mouthpiece (see Figure 3.5). Attaching accessories to the endoscope Attaching the suction valve Firmly attach the suction valve to the instrument channel... - Page 35 Chapter 3 Preparation and Inspection Place the suction valve into the suction cylinder, aligning the arm of the main body with the white mark on the endoscope (see Figure 3.6). Press down on the suction valve’s top surface with your both thumbs until it “clicks”...
- Page 36 Chapter 3 Preparation and Inspection Attaching the biopsy valve If the biopsy valve is not properly connected to the instrument channel port, it can reduce the efficacy of the endoscope’s suction system and may cause patient debris to leak or spray from the endoscope.
-
Page 37: Inspection And Connection Of Ancillary Equipment
Chapter 3 Preparation and Inspection Inspection and connection of ancillary equipment Inspection of ancillary equipment • BF-160 series endoscopes are not compatible with the video system center CV-200/240/260. • For the BF-P160/XT160/3C160, use the video system center CV-160 only. These endoscopes are not compatible with the video system center CV-100/140. - Page 38 Chapter 3 Preparation and Inspection Align the mark on the videoscope cable with mark 1 on the endoscope connector and push it in until it stops (see Figure 3.9). Mark (yellow) Mark 2 (yellow) Mark 1 (yellow) Figure 3.9 Turn the connector of the videoscope cable clockwise until it stops (see Figure 3.9).
-
Page 39: Inspection Of The Endoscopic System
Chapter 3 Preparation and Inspection Inspection of the endoscopic system Inspection of the endoscopic image Before inspection, wipe the objective lens with clean, lint-free cloths moistened with 70% ethyl or isopropyl alcohol. Turn on the video system center, light source, video monitor and inspect the endoscopic image as described in their respective instruction manuals. - Page 40 Chapter 3 Preparation and Inspection Remove the distal end from the water. Depress the suction valve and aspirate air for a few seconds to remove any water from the instrument channel. Inspection of the instrument channel Keep your eyes away from the distal end when inserting endo-therapy accessories.
-
Page 41: Chapter 4 Operation
Chapter 4 Operation Chapter 4 Operation The operator of this instrument must be a physician or medical personnel under the supervision of a physician and must have received sufficient training in clinical endoscopic technique. This manual, therefore, does not explain or discuss clinical endoscopic procedures. - Page 42 Chapter 4 Operation • Never insert or withdraw the endoscope under any of the following conditions. Otherwise, patient injury can result. − While the endo-therapy accessory extends from the distal end of the endoscope. − While the bending section is locked in position. −...
-
Page 43: Insertion
Chapter 4 Operation Insertion Holding and manipulating the endoscope The control section of the endoscope is designed to be held in the left hand. The suction valve can be operated using the left index finger. The UP/DOWN angulation control lever can be operated using the left thumb. The right hand is free to manipulate the insertion tube (see Figure 4.1). - Page 44 Chapter 4 Operation > 10 cm Figure 4.2 If necessary, apply a medical-grade, water-soluble lubricant to the insertion tube. Place the mouthpiece between the patient’s teeth or gums, with the outer flange on the outside of the patient’s mouth. Insert the distal end of the endoscope through the opening of the mouthpiece, then from the mouth to the pharynx, while viewing the endoscopic image.
- Page 45 Chapter 4 Operation Suction Avoid aspirating solid matter or thick fluids; channel or valve clogging can occur. If the suction valve clogs and suction cannot be stopped, disconnect the suction tube from the suction connector on the suction valve. Turn the suction pump OFF.
-
Page 46: Using Endo-Therapy Accessories
Chapter 4 Operation Using endo-therapy accessories For more information on combining the endoscope with particular endo-therapy accessories, refer to the “System chart” in the Appendix and the instruction manuals of the accessories. Refer to the instruction manuals of the accessories for instructions on how to operate them properly. - Page 47 Chapter 4 Operation • Do not use the channel cleaning brush for cytologic tissue sampling or other diagnostic or therapeutic purposes. Patient injury, cross-contamination and/or equipment damage may occur. • When using a biopsy forceps with a needle, confirm that the needle is not bent excessively.
- Page 48 Chapter 4 Operation • Do not open the tip of the endo-therapy accessory or extend the tip of the endo-therapy accessory from its sheath in the instrument channel. The instrument channel and/or the endo-therapy accessory may become damaged. • Hold the endo-therapy accessory close to the biopsy valve and insert it straight into the biopsy valve using slow, short strokes.
- Page 49 Chapter 4 Operation High frequency cauterization • Never perform electrosurgery with the BF-3C160/MP160F/XP160F, because the distal ends of these instruments are not insulated. Patient injury can result. • Do not perform electrosurgery while supplying oxygen. This may result in combustion during cauterization. •...
- Page 50 (except the BF-3C160/MP160F/XP160F) are insulated. This allows electrosurgery to be performed. • Some Olympus endoscopes are equipped with a feedback circuit to lead leakage current from the endoscope to the electrosurgical unit. However, the BF-160 series is not equipped with a feedback circuit, because leakage current from the electrosurgical accessory to the endoscope is minimal as the insertion tube is short.
- Page 51 Chapter 4 Operation Laser cauterization • The BF-MP160F/XP160F do not correspond to laser cauterization. If laser cauterization is performed using the BF-MP160F/XP160F, abnormalities in an endoscopic image may occur, which consequently may damage the inside of the patient body. • Do not perform laser cauterization while supplying oxygen.
- Page 52 Chapter 4 Operation Ultrasonic observation • When withdrawing the ultrasonic probe with balloon sheath from the endoscope, make sure that the balloon is completely deflated. Withdrawing the probe while the balloon is inflated could result in patient injury and/or could damage the ultrasonic probe.
-
Page 53: Withdrawal Of The Endoscope
If the endoscope cannot be withdrawn from the patient smoothly, do not attempt to forcibly withdraw it; leave it inside the patient and immediately contact Olympus. Forcibly withdrawing the endoscope may cause patient injury. Carefully withdraw the endoscope while observing the endoscopic image. -
Page 54: Transportation Of The Endoscope
Chapter 4 Operation Transportation of the endoscope Transporting within the hospital When carrying the endoscope by hand, loop the universal cord, hold the endoscope connector together with the control section in one hand and hold the distal end of the insertion tube securely, but gently without squeezing, in the other hand (see Figure 4.7). -
Page 55: Chapter 5 Troubleshooting
Some problems that appear to be malfunctions may be correctable by referring to Section 5.1, “Troubleshooting guide”. If the problem cannot be resolved by the described remedial action, stop using the endoscope and send it to Olympus for repair. Olympus does not repair accessory parts. If an accessory part becomes damaged, contact Olympus to purchase a replacement. -
Page 56: Troubleshooting Guide
Troubles or failures due to other causes than those listed below should be serviced. As repair performed by persons who are not qualified by Olympus could cause patient or user injury and/or equipment damage, be sure to contact Olympus for repair. - Page 57 A black point is shown The image guide fiber When the image to be observed is in a screen. has broken. not visible, send the endoscope to Olympus for repair. BF TYPE 160 Series OPERATION MANUAL...
- Page 58 Chapter 5 Troubleshooting Endo-therapy accessories Irregularity Possible cause Solution description An endo-therapy An incompatible Refer to the “System chart” in the accessory does not endo-therapy accessory Appendix and select a compatible pass through the is being used. endo-therapy accessory. Confirm instrument channel that the color code on the smoothly.
-
Page 59: Withdrawal Of The Endoscope With An Abnormality
If the endoscope or endo-therapy accessory cannot be withdrawn from the patient smoothly, do not attempt to forcibly withdraw it; deal appropriately. If any irregularities are suspected, immediately contact Olympus. Forcibly withdrawing the endoscope or endo-therapy accessory may cause patient injury, bleeding and/or perforation. -
Page 60: Returning The Endoscope For Repair
Olympus. Olympus is not liable for any injury or damage which occurs as a result of repairs attempted by non-Olympus personnel. Before returning the endoscope for repair, contact Olympus. With the... -
Page 61: Appendix
New products released after the introduction of this instrument may also be compatible for use in combination with this instrument. For further details, contact Olympus. If combinations of equipment other than those shown below are used, the full responsibility is assumed by the medical treatment facility. - Page 62 Appendix Suction pumps Electrosurgical units KV-4/5 SSU-2 PSD-10/20/30 Single-use suction valve (MAJ-209) Single-use biopsy valve (MAJ-210) ∗1 Videoscope cable EXERA Videoscope cable 100 (MAJ-843) (MD-680, MD-148 or MH-976) ∗1 EVIS EXERA video system EVIS video system center center (CV-160) (CV-100/140) Mouthpiece (MA-651) EVIS EXERA light source...
- Page 63 Appendix Cleaning and disinfection equipment Leakage tester (MB-155) Maintenance unit Ultrasonic cleaner (MU-1) (KS-2/ENDOSONIC) Channel cleaning brush Water-resistant cap (BW-15B, not for BF-3C160/XP160F) (MH-553) Suction cleaning adapter (MAJ-222) Channel-opening cleaning brush (MH-507) Channel cleaning brush (BW-7B, for BF-3C160/XP160F) Suction connector cleaning brush (BW-15SH, for BF-3C160/XP160F) EVIS EXERA video system center/EVIS video system centers...
- Page 64 Appendix Endo-therapy accessories BIOPSY FORCEPS Fenestrated with Alligator jaws Swing type Fenestrated needle Endoscope BF-1T160 FB-15C-1 FB-52C-1 FB-20C-1 FB-34C-1 BF-160/P160/ FB-15C-1 FB-52C-1 FB-19C-1 FB-34C-1 MP160F BF-XT160 FB-36C-1 FB-52C-1 FB-35C-1 FB-34C-1 BF-3C160/ – – – – XP160F BIOPSY FORCEPS Ellipsoid with Ellipsoid Rat tooth Alligator type...
- Page 65 Appendix DISPOSABLE BIOPSY FORCEPS (Fenestrated) Alligator jaws with Alligator jaws Oval Oval with needle needle (Swinging type) (Swinging type) (Swinging type) (Swinging type) Endoscope BF-1T160 FB-211D FB-221D FB-231D FB-241D BF-160/P160/ FB-211D FB-221D FB-231D FB-241D MP160F BF-XT160 FB-211D FB-221D FB-231D FB-241D BF-3C160/ –...
- Page 66 Appendix CYTOLOGY BRUSH MEASURING DEVICE BALLOON CATHETER Disposable Standard Bendable Endoscope BC-202D ∗1 ∗1 BF-1T160 B5-2C M1-1C M2-1C/2C -1210 to 5010 BF-160/P160/ BC-202D ∗1 ∗1 B5-2C M1-1C M2-1C/2C MP160F -1210 to 5010 BC-202D ∗1 ∗1 BF-XT160 B7-2C M1-1C M2-1C/2C -1210 to 5010 BF-3C160/ BC-201C-1006/ –...
- Page 67 Appendix GRASPING FORCEPS Alligator jaws Basket type Sperial basket type Endoscope – – BF-1T160 FG-51D FG-52D BF-160/P160/ – – FG-51D FG-52D MP160F BF-XT160 FG-6L-1 FG-16L-1 FG-51D FG-52D BF-3C160/ – – FG-51D FG-52D XP160F GRASPING FORCEPS MAGNETIC EXRACTOR Three nail type Parallel basket type Loop type Endoscope...
- Page 68 Appendix CANNULA SPRAY CATHETER ASPIRATION INJECTOR NEEDLE Standard type Spray type Endoscope ∗1 BF-1T160 PR-2B-1 PW-6C-1 NA-1C-1/2C-1 NM-1D /8L-1/9L-1 BF-160/P160/ ∗1 PR-2B-1 PW-6C-1 NA-1C-1/2C-1 NM-3K /8L-1/9L-1 MP160F ∗1 NM-1D BF-XT160 PR-2B-1 PW-6C-1 NA-1C-1/2C-1 4L-1 to 9L-1 BF-3C160/ – – – –...
- Page 69 ©2003 OLYMPUS MEDICAL SYSTEMS CORP. All rights reserved. No part of this publication may be reproduced or distributed without the express written permission of OLYMPUS MEDICAL SYSTEMS CORP. OLYMPUS is a registered trademark of OLYMPUS CORPORATION.
- Page 70 Manufactured by 2951 Ishikawa-cho, Hachioji-shi, Tokyo 192-8507, Japan Fax: (042)646-2429 Telephone: (042)642-2111 Distributed by 3500 Corporate Parkway, P.O. Box 610 Center Valley, PA 18034-0610, U.S.A. Fax: (484)896-7128 Telephone: (484)896-5000 One Corporate Drive, Orangeburg, N.Y. 10962, U.S.A. Fax: (845)398-9444 Telephone: (845)398-9400 5301 Blue Lagoon Drive, Suite 290 Miami, FL 33126-2097, U.S.A.