Advertisement
Quick Links
Advertisement

Related Manuals for Ohlins TTX25


Summary of Contents for Ohlins TTX25
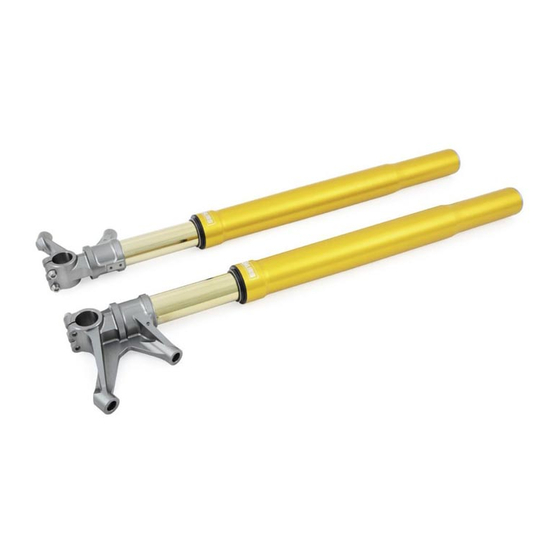
- Page 1 TTX25 Pressurized Front Fork Cartridge Kit Workshop Manual...
-
Page 2: Safety Precautions
Safety PrecautionS Safety Symbols note! Warning! The front fork is a very important part of the After installing this product, take a test ride at In this manual, mounting instructions and vehicle and will affect the stability. low speed to make sure that your vehicle has other technical documents, important maintained its stability. - Page 3 toolS 00146-01 Assembly lubricant – Red grease 00716-01 Snub nose 00720-02 Measure Pin (6 mm) 00727-02 Soft jaws 10/12 00727-09 Soft jaws 28/36 00797-08 Top cap tool 01460-68 Dividing piston positioning tool (tube length 32 mm) 01765-03 Pull-up tool (length 300 mm) 01781-01 Gas filling device assy (gas needle housing 01779-02) 10 01797-05 Seal head tool 33.5 (compress top out spring) 11 01797-07 Seal head tool 36 (tighten with torque) 12 01797-09 Seal head tool 36 (long fangs)
- Page 4 1 rePlace SPring 1 replace Spring note! You can replace the Spring with the front fork still mounted on the motorcycle. Use appropriate tool to release the spring preload completely. Turn the Preload adjuster counter clockwise as far as possible. caution! Do not use the Preload adjuster to tighten or loosen the Top cap from the fork leg.
- Page 5 2 reMove cartridge froM front fork 2 remove cartridge from front fork Use appropriate tool to release the spring preload completely. Turn the Preload adjuster counter clockwise as far as possible. caution! Do not use the Preload adjuster to tighten or loosen the Top cap from the fork leg.
- Page 6 2 reMove cartridge froM front fork note! Please see the Mounting Instructions for the three different types of connections between the cartridge and the front fork. To remove the Cartridge from the fork leg, continue below according to your connection type. Type A –...
- Page 7 3 diSaSSeMBle cartridge kit 3 disassemble cartridge kit 3.1.1 note! Chapters 3, 4 and 5 are applicable for all connection types. 3.1 remove Shaft 3.1.1 Remove the Adjustment rod from the Shaft. Warning! Releasing the reservoir gas pressure can be hazardous. Do not perform any kind of service until gas pressure is completely released.
- Page 8 3 diSaSSeMBle cartridge 3.2 disassemble Shaft 3.2.1 3.2.2 3.2.1 Pull off the Top out spring from the Piston holder. 3.2.3 3.2.2 Use tool 00727-02. Fasten the Shaft in a vice. Fasten the soft jaws close to the Piston holder. note! Note the orientation of and order between the parts before removal.
- Page 9 3 diSaSSeMBle cartridge 3.3 disassemble Seal head 3.3.1 3.3.1 3.3.2 Use tool 01797-07, fasten tool in vice. Use appropriate tool together with tool 01860-04 to loosen the End cap from the Seal 3.3.3 head. 3.3.2 Remove the Seal from the Seal head. note! Be careful not to scratch the Seal surfaces.
- Page 10 4 aSSeMBle cartridge 4 assemble cartridge kit 4.1 assemble dividing Piston 4.1.1 Apply Assembly lubricant on the O-ring. Mount the O-ring on the Dividing piston. 4.1.2 4.1.4 Mount the Piston ring on the Dividing piston. 4.1.3 Apply a thin layer of Assembly lubricant on the inside of the Outer cylinder tube.
- Page 11 4 aSSeMBle cartridge 4.3 assemble Shaft 4.3.1 4.3.1 Mount the O-ring on the Shaft extension. 4.3.2 4.3.2 Use tool 00727-02. Fasten the Shaft in a vice near the Shaft extension end of the Shaft. 4.3.3 Use appropriate torque wrench to mount the Shaft extension on the Shaft.
- Page 12 4 aSSeMBle cartridge 4.3.9 Use tool 00727-02. Fasten the Shaft in a vice near the Piston holder end of the Shaft. 4.3.9 4.3.10 4.3.10 Use a 14 mm long socket to mount the Piston holder on the Shaft. Tightening torque 15 Nm Loctite 243 4.3.11 Use a 14 mm socket to mount the Piston, Shims, settings parts and...
- Page 13 5 fill oil 5 fill oil note! This procedure requires Öhlins Filling Machine. See separate manual for Öhlins Filling Machine for proper use. Use tool 01797-05 and tool 02810-01 to compress the Top out spring with tool 01765-03. Keep the Top out spring compressed during remaining steps of the filling procedure.
- Page 14 5 fill oil Put the O-ring on the Adaptor and install the Adaptor. Use Assembly lubricant on the O-ring. Clean the thread and apply 5.10 Loctite. Tightening torque 40 Nm Loctite 243 5.10 Remove tool 02810-01, 01797-05 and 01765-03. 5.11 Use tool 01781-01.
- Page 15 6 reinStall cartridge into fork leg Mount the Cartridge Kit into the front fork. See Mounting Instructions for correct procedure.
- Page 16 Öhlins retailer: Öhlins racing aB Box 722 Phone: +46 (0)8 590 025 00 Se-194 27, upplands väsby fax: +46 (0)8 590 025 80 www.ohlins.com Sweden...