
Related Manuals for Radio Shack PRO-2096


Summary of Contents for Radio Shack PRO-2096
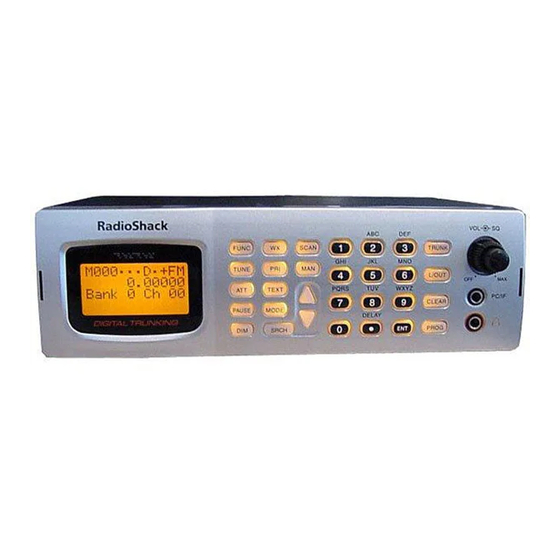
- Page 1 20-496 PRO-2096 Digital Trunking Mobile/Base Scanner Please read this user’s guide before installing, setting up and using your new product www.radioshack.com...
- Page 2 Contents Thank you for purchasing your Pro-2096 digital trunk scanner from RadioShack. You can mount your scanner in a fi xed position and use it as a base scanner or you can use it as a mobile scanner by mounting it in a vehicle. This scanner is the fi...
-
Page 3: Table Of Contents
1: install your scanner mounting your scanner in your dashboard mobile mounting in your vehicle using your scanner as a base station step 2: power your scanner from a wall outlet through your vehicle’s ignition from your vehicle’s cigarrette lighter... - Page 4 V-scanner using digital AGC cloning programmed data cloning v-scanner data full cloning selective cloning...
- Page 5 The Basics trunking operation setting squelch for trunk scanning talkgroup ID hold turning an ID sub-bank on or off open and closed mode operation toggling open and closed modes manual ID lockout toggle activate ID lockout while scanning reviewing locked-out talkgroup IDs changing from ID text tag display to ID code display trunked delay function...
- Page 6 ©2004 RadioShack Corporation. RadioShack, RadioShack.com. Hypersearch, Hyperscan, V-Scanner, and Adaptaplug are trademarks used by RadioShack Corporation. Motorola, Smartnet, ASTRO and Privacy Plus are registered trademarks of Motorla Inc. EDACS is a registered trademark of MA-COM Inc.
-
Page 7: Your Scanner's Keypad
The Basics your scanner’s keypad TRUNK — stores the trunking ID code or holds the trunking ID while scanning. L/OUT — locks out selected channels and ID codes, and skips specifi ed frequencies during a search. CLEAR — clears an incorrect entry. -
Page 8: The Basics
The Basics FUNC — press in combination with other keys to perform various functions. ATT — Press to activate attenuation (reduce scanner sensitivity, block strong signals). Press again to deactivate attenuation. DIM — adjusts the backlight level (Light, Dark, or OFF). -
Page 9: Your Scanner's Rear View
ANT — connect the supplied antenna or an external antenna here. SCREW HOLE — use to mount the scanner in a car with some hardware (screw not supplied). ENT — press to confi rm frequency and text entries. RESET— press to reset your scanner. -
Page 10: Your Scanner's Display
The Basics your scanner’s display Receiving a Signal ( no signal) Channel 00-(49) Bank 0-(9) (M)anual Mode (P)rogram (S)can Search Range Number Zeromatic On/Off Indicator Sub-Group Search Range Name Priority On/Off Indicator Attenuator On/Off Indicator Delay On/Off Indecator Lockout On/Off Indecator (While Scanning, Scanning Direction, or .) -
Page 11: Step 1: Install Your Scanner
If you are unsure about how to install your scanner in your vehicle, consult your automobile manufacturer, dealer, or a qualifi ed installer. Before installing, confi rm your scanner fi ts in the desired mounting area and you have all the necessary materials. -
Page 12: Using Your Scanner As A Base Station
You can place your scanner on a desk, shelf, or table to use it as a base station. Since the speaker is on the bottom of the scanner, you may want to use the mounting bracket to elevate your scanner off the surface for better sound. -
Page 13: Step 2: Power Your Scanner
Note DC and delivers at least 600mA. Its center tip must be set to positive and its plug must fi t the scanner’s DC 13.8V jack. Using an adapter that does not meet these specifi cations could damage the scanner or the adapter. -
Page 14: From Your Vehicle's Cigarrette Lighter
Note delivers at least 600 mA. Its center tip must be set to positive and its plug must fi t the scanner’s DC 13.8V jack. The supplied DC power cord meets these specifi cations. Using a power cord that does not meet these specifi... -
Page 15: Step 3: Connect Your Scanner
You will need to connect an external antenna when you mount your scanner in the dashboard of your vehicle. You may also want to connect an external antenna if you use your scanner as a base station. -
Page 16: Connect An External Speaker Or Headphones
Do not attempt to do so yourself. connect an external speaker or headphones When you mount your scanner in your dashboard, you will need to connect an external speaker or headphones. Connect headphones here... -
Page 17: Step 4: Set Up Your Scanner
The Basics step 4: set up your scanner squelch 1. Rotate VOL clockwise to turn on your scanner. DSP LOADING and Welcome To Digital Trunking appears. In a few seconds, you might hear a hissing sound. 2. Adjust VOL to a comfortable listening level. -
Page 18: Deleting Frequencies From Channels
Your scanner automatically rounds the frequency you enter to the nearest valid frequency. For example, if you enter 151.53, your scanner accepts it as 151.5275. Reception of the frequency will not be adversely affected. If you enter a frequency that is already stored, an error tone sounds. -
Page 19: Searching And Tuning
Notes See “Using Delay”. You can set CTCSS or DCS mode when searching any range, except for SR0, SR1, and SR4. The scanner will display detected CTCSS or DCS codes depending on the mode setting. See “Using CTCSS and DCS”. -
Page 20: Basic Scanning
• The scanner does not scan channels within a bank you have turned off; however, you can manually select any channel in a storage bank, even if the bank is turned off. -
Page 21: Using Ctcss And Dcs
If the transmitted and stored codes match, the scanner stops on the transmission and allows the audio to pass to the speaker. If the codes do not match, the scanner resumes scanning. If the special “search” code is in use,... -
Page 22: Search Bank Charts
5. When the scanner fi nds an active frequency, it stops searching, and resumes when the transmission ends. If delay is programmed with the search range the scanner will pause for a reply before search resumes. -
Page 23: Beyond The Basics
Beyond the Basics Receive mode: FM/Digital Frequency (MHz) 156.0500 156.3000 156.4000 156.5000 156.6000 156.7000 156.8000 156.9000 157.0000 161.6000 157.1000 157.2000 161.8000 157.3000 161.9000 157.4000 162.0000 156.2250 160.8250 156.3250 156.4250 156.5250 156.6250 156.7250 156.9250 157.0250 157.1250 157.2250 161.8250 Frequency (MHz) 156.2500 156.3500 156.4500 156.5500... - Page 24 Beyond the Basics 157.3250 161.9250 157.4250 Search bank: SR1 CB band Receive mode: AM Frequency (MHz) 26.9650 26.9850 27.0150 27.0350 27.0650 27.0850 27.1150 27.1350 27.1650 27.1850 27.2150 27.2550 27.2450 27.2750 27.2950 27.3150 27.3350 27.3550 27.3750 27.3950 Search bank: SR2 FRS/GMRS/MURS Receive Mode: FM/Digital, CT or DC 157.3750 161.9750...
- Page 25 Beyond the Basics Frequency (MHz) 462.5625 462.6125 462.6625 462.7125 467.5875 467.6375 467.6875 462.5500 462.6000 462.6500 462.7000 151.8200 151.9400 154.6000 Search bank: SR3 Police/Fire band Receive Mode: FM/Digital, CT or DC Group Frequency (MHz) 33.420 – 33.980 37.020 – 37.420 39.020 – 39.980 42.020 –...
- Page 26 Beyond the Basics Search bank: SR4 Aircraft Receive mode: AM Frequency (MHz) 108.000 – 136.9875 Search bank: SR5 Ham band Receive mode: FM/Digital, CT, DC, AM (depends on group) Group 153.770 – 154.130 154.145 – 154.445 154.650 – 154.950 155.010 – 155.370 155.415 –...
-
Page 27: Searching For Active Frequencies
FUNC then 0. When this feature is turned on, Zeromatic ON briefl y appears on the display. Then, z appears as the fi rst digit on the second line. If the scanner stops on a signal before it reaches the correct center frequency, skip to the correct frequency using in search banks 3, 4, 5, and 6. -
Page 28: Manually Tuning To A Frequency
• You can copy and save a frequency into a specifi ed bank, channel, or priority channel when the scanner fi nds an active frequency. See “Frequency Copy” on Page 29 to save the frequency. Frequency copy works only in search banks 1 - 6. -
Page 29: Frequency Copy
If you try to copy a frequency that is already stored, the scanner sounds a tone after you press ENT. Dupl.f Chxxx appears at the bottom line. To copy the duplicate frequency anyway, press ENT. -
Page 30: Copying A Frequency To A Vacant Channel Into A Specifi Ed Bank
1. Press FUNC, ENT when you fi nd a frequency you want to copy. Bank9 Store? appears. 2. To copy the frequency into bank 9, press ENT. The scanner stores the frequency in the fi rst available vacant channel in the bank. Otherwise, enter any bank number then press ENT to store the frequency in the selected bank. -
Page 31: Listening To The Weather Band
FIPS (Federal Information Processing Standard) area code, and an event code that corresponds with the type of alert being sent. You can confi gure your scanner to operate in SAME Standby mode, where it monitors a selected weather radio station for SAME alerts for areas you specify. -
Page 32: Testing Weather Alert
In this mode all alerts are received. FIPS settings are ignored. • The scanner sounds an alert or beep when it receives the SAME code. If you do not stop the alert (or beep) for fi ve minutes, the alert stops and the scanner beeps every ten seconds. -
Page 33: Using Delay
When delay is set for a conventional channel, the scanner will pause for reply traffi c before resuming the scan operation. To toggle the delay setting for a channel, press ./DELAY. -
Page 34: Locking Out Frequencies
To lock out a frequency during a search, press L/OUT when the scanner stops on that frequency. The scanner locks out the frequency and continues searching. • You can lock out as many as 50 frequencies in each search bank. -
Page 35: Clearing Locked-Out Search Frequencies
Beyond the Basics fi ve locked out frequency appear as L/O 10 of 25). If the search bank has no locked-out frequencies, Empty. Lockout list appears in the scanner’s display. Press SRCH to cancel reviewing locked-out frequencies. clearing locked-out search frequencies To clear a locked-out frequency, select that frequency (see “Reviewing Locked-Out Search Frequencies”), and then press... -
Page 36: Using Attenuator
To assign attenuation to a channel in the scanner, press ATT when the scanner is stopped on a channel, or manually navigate to a channel. A appears on the top of the display. Press ATT again to turn attenuation off. -
Page 37: Global Attenuator
• The attenuator is very effective at reducing strong signal overload interference when using the scanner in areas close to cellular telephone transmitting facilities. • If you turn on the attenuator, the scanner might not receive weak signals. • Activating the normal attenuator mode on a Motorola or APCO Project 25 trunking control channel applies attenuation to all calls received on that trunking system. -
Page 38: Using The Dimmer
Beyond the Basics 3. Press 1 to turn on the key tone while the message is still on the display. Press 2 to turn it off. using the dimmer Repeatedly press DIM to adjust the brightness of the display backlight to Dark, Light Off, or Light. changing the display contrast 1. -
Page 39: Virtual Scanner
Beyond the Basics virtual scanner The PRO-2096 V-Scanner (Virtual Scanner) feature allows you to edit, store, recall and use up to eleven full sets of scanner memory profi les. With V-Scanner, it is possible to create separate scanner memory profi les for different areas you visit or for different ways that you use the scanner. -
Page 40: Using V-Scanner
Refer to the “Text Input Chart” on Page 69 for more information on text entry. You can only change the name of a V-Scanner while it is loaded into working memory. It is not possible to change the V-Scanner folder name from the V-Scanner menus. Always press FUNC, TEXT while in program mode to assign a V-Scanner folder name to the current working memory. - Page 41 Beyond the Basics 4. If you want to save the contents of the scanner’s working memory to a V-Scanner folder, press 1. Save to V-Scanner: ENTER if YES CLR to EXIT 5. Press the number key that corresponds with the V- Scanner folder you wish to save the current confi...
- Page 42 Beyond the Basics 8. To load the contents of a V-Scanner folder to the scanner’s working memory, press 2. This message appears: Load from V-Scanner: ENTER if YES CLR to EXIT 9. Press the number key that corresponds with the V- Scanner folder you wish to load into the scanner’s...
- Page 43 Beyond the Basics 12. To delete the contents of a V-Scanner folder, select 3. The scanner will display: Delete V-Scanner: ENTER if YES CLR to EXIT 13. Press the number key that corresponds with the V- Scanner folder you wish to clear, or press CLEAR to return to the V-Scanner menu.
- Page 44 You may then use either your original confi guration or the modifi ed one. 18. Be sure to assign a name to each V-Scanner before you save it to a V-Scanner folder. You assign a V-Scanner name while using the confi guration in working memory by pressing PROG, and then FUNC, TEXT.
-
Page 45: Using Digital Agc
You can transfer the contents of the current scanner working memory to and from another PRO-2096 or PRO-96 scanner using an optional connecting cable with 1/8-inch (3.5 mm) phone plugs on both ends (use RadioShack part number... -
Page 46: Cloning V-Scanner Data
Beyond the Basics CLONE MODE Incorrect Model appears if the scanner receives data from a scanner other than a PRO-2096 and PRO-96. This scanner can send/receive the data to or from a PRO-96 scanner. Only the Light (PRO-96) and Dimmer (PRO-2096) settings are not transferred, they are set to default. -
Page 47: Full Cloning
V-Scanner folder with the contents of the selected source V-Scanner folder. This operation cannot be undone. 1. Identify the local and remote radios. Turn both radios on. 2. On the local radio, press PROG FUNC PROG to enter V-Scanner menu, then press SRCH. - Page 48 V-Scanner contents on both radios simultaneously by pressing SRCH on the source radio. Press CLEAR to exit. 5. To send a V-Scanner folder from the local radio to the remote radio, press V-Scanner folder. The name of the source folder appears on the display.
- Page 49 ENT to receive. You may abort the send operation by pressing CLEAR. 7. After data transfer is complete, you will be prompted to press ENT. This returns you to the main V-Scanner menu. To perform additional V-Scanner selective clone operations, press SRCH again. When fi nished, press CLEAR...
-
Page 50: Trunking Operation
ID hold You can set your scanner to follow a trunking signal that you want to track during scanning. 1. While the scanner is stopped on a voice channel (VC appears), hold down TRUNK (or press and release PAUSE) until ID hold ON appears on the display. -
Page 51: Open And Closed Mode Operation
1. The channel storage bank must be set to Closed Mode to change the state of a sub-bank while scanning. 2. Press FUNC and then TRUNK while the scanner is stopped on a voice channel transmission. The bank text display is replaced with a sub-bank status display, T IDbk 01234. -
Page 52: Toggling Open And Closed Modes
Traffi c on locked out talkgroup IDs is ignored when the scanner is operating in Open and Closed Modes. In Open Mode, the scanner will stop on all talkgroup traffi c, except for traffi c on talkgroups that are entered in the ID list and locked out. -
Page 53: Activate Id Lockout While Scanning
ID lockout while scanning When scanning a trunked radio system in Open Mode, you can lock out a trunked ID by pressing L/OUT while the scanner is stopped on a voice call. If the ID has not been previously entered into the ID list for that bank, it will be added and locked out automatically. -
Page 54: Clearing Talkgroups Ids
ID delay programmed into the scanner. For example, if you wish to wait a total of two seconds for a reply trunked call, and the system you are monitoring is using 1.5 seconds of hang time, you should set the... -
Page 55: Clearing All Talkgroup Ids In One Bank
5. Press 1 to clear all talkgroup IDs within a bank. List cleared appears in the scanner’s display. To cancel the delete operation, press any key except 1. The scanner returns to the talkgroup ID memory mode. e or d... -
Page 56: Programming Trunked Systems
Beyond the Basics programming trunked systems If you are just getting started with trunked system monitoring or have any questions about how your PRO-2096 scanner operates when tracking trunked radio systems. For best results, program only one trunking system in each channel storage bank of your scanner. -
Page 57: Edacs Systems
Notes Notes control channel, program the system using the steps outlined above for Motorola systems. Your scanner will automatically detect the proper control channel type. Some systems rotate the control channel on a daily basis. For best results, program all known control channel frequencies into the trunking channel storage bank. -
Page 58: Motorola Vhf And Uhf Systems
Motorola VHF and UHF systems To monitor Motorola VHF and UHF systems, you must program the scanner with three additional parameters — the base frequency, step and offset. 1. Press PROG, and then TRUNK to enter the ID program mode. -
Page 59: Motorola 800Mhz Splinter Systems
800 MHz band plan. These systems are known as “splinter systems”. Your scanner features an offset mode to allow reception of these systems. If the radio appears to be trunking to the wrong... - Page 60 Beyond the Basics 4. Enter the size code supplied with the Type I system information, referring to the prompts that appear in your display. If the information for your Type I system is not available, try the fl eet maps in the following tables. If you set to receive Type I and later wish to restore Type Notes Notes...
-
Page 61: Programming The Priority Channel
Traffi c on the priority channel may be missed if it occurs while the scanner is monitoring a trunking voice call. If you program a weather channel as the priority channel,... -
Page 62: Programming A Weather Channel As The Priority Channel
PRIon (or PRIwx if priority is set to a weather frequency) appears on the bottom of the display, and P appears on the top of the display. If the scanner detects activity on the priority channel, Pri Channel appears. If the scanner detects the 1050 Hz weather alert tone in Priority WX mode, Weather ALERT appears and an alert tone sounds. -
Page 63: Programming Ctcss/Dcs Channels
DCS code that is used on a particular frequency, you can manually enter the code when you are programming the scanner, or any time afterwards. You can also set a special search code that instantly decodes the CTCSS or DCS code on a received transmission. - Page 64 Beyond the Basics change, and follow the steps above. 6. When stopped on an active conventional channel while scanning, you can press MODE to cycle through the valid modes for that channel. This resets any stored CT or DC code to the search code, allowing you to easily check for other CT or DC codes that may be present on the frequency.
-
Page 65: Storing Talkgroup Ids
ID number within the sub-bank, and ZZZZZ is the stored talkgroup ID code. If the ID has already been stored when you press TRUNK, ID was saved appears on the scanner’s display. To manually store talkgroup IDs or to edit a stored ID: 1. - Page 66 10. Press SCAN to start scanning. When automatically storing trunked IDs in the ID list by pressing TRUNK during a trunked transmission, the scanner automatically stores the active ID in the next available open ID storage location in the ID list. We suggest leaving ID sub- bank 0 empty when fi...
-
Page 67: Text Tags
Beyond the Basics text tags assigning a text tag to a channel 1. Navigate to the channel you want to label using direct channel entry, or FUNC 2. Press PROG. M in the display changes to P to indicate program mode. 3. -
Page 68: Assigning A Text Tag To A Group Id
Beyond the Basics 6 is the sixth number associated with 1 on the keypad. Press 1, 6. 5. Press ENT to store the text with the channel. assigning a text tag to a group ID 1. Press PROG. 2. Press TRUNK. 3. -
Page 69: Text Input Chart
Beyond the Basics text input chart Press Character 1 2 3 4 5 6 7 8 9 0 A B C D E F G H I J K L M N O P Q R S T U V W X Y Z . -
Page 70: Truobleshooting
3. Select Software Downloads from the drop down menu. 4. Click on Software Updates and Downloads. 5. Click on PRO-2096 XXX.exe. Full download and upgrade instructions are provided on the Firmware Upgrade page. 6. To check the DSP version number, turn on the scanner and press 3 while Welcome to Digital Trunking appears on the display. -
Page 71: Resetting/Initializing Your Scanner
If the scanner’s display locks up or does not work properly after you connect a power source, you might need to reset or initialize it. If you have problems with the scanner, fi rst try resetting it, which will retain items stored in memory. If that does not work, initialize the scanner. -
Page 72: Initializing Your Scanner
V-Scanner memory is not affected when you initialize the scanner. 1. Turn off the scanner, and turn it on again. First, the DSP boot version, and then Welcome To Digital Trunking appears. -
Page 73: Care
Use and store the scanner only in normal temperature environments. Handle the scanner carefully; do not drop it. Keep the scanner away from dust and dirt, and wipe it with a damp cloth occasionally to keep it looking new. replacing the fuse First, turn off the scanner and your vehicle’s ignition. -
Page 74: Specifi Cations
Beyond the Basics specifi cations Frequency Coverage Frequency Range (MHz) ... Programming/Search Step Value 25–54 ...5 kHz 108–136.9875 ... 12.5 kHz 137–174 ...5, 6.25 or 7.5 kHz 216.0025–221.9975 ... 5 kHz 222.0000 –225.0000 ... 5 kHz 406–512 ... 6.25 kHz 806–823.9875 ... - Page 75 Beyond the Basics 137–174 MHz ... 0.5 µV 216–225 MHz ... 0.5 µV 406–512 MHz ... 0.5 µV 806–960 MHz ... 0.7 µV 1240–1300 MHz ... 0.7 µV 25–54 MHz ...1 µV 108–136.9875 MHz ...1 µV 137–174 MHz ... 1.5 µV 216–225 MHz ...
- Page 76 Beyond the Basics Search Rate ... Up to 75 steps per second Conventional Channel Delay Time ... 2 seconds Priority Sampling ... 2 seconds Trunking Talkgroup Delay Time ... User confi gurable Intermediate Frequencies (IF) 1st ... 380.7275 to 380.86875 MHz 2nd ...
-
Page 77: The Fcc Wants You To Know
Doing so could subject you to legal penalties. In some areas, mobile use of this scanner is unlawful or requires a permit. Check the laws in your area. It is also illegal in many areas to interfere with the duties of public safety offi... -
Page 78: Glossary
50 channels. To make it easier to identify and select the channels you want to listen to, your scanner divides the channels into 10 banks (0 to 9) of 50 (00 to 49) channels each, for a total of 500 channels. You can use... - Page 79 fi ve sub-banks. Each sub-bank has 30 ID locations. You can program up to 150 talkgroup IDs in each bank, so you can program up to 1500 talkgroup IDs in ten banks. When the scanner stops on a transmission in Motorola or EDACS mode, it checks...
- Page 80 V-Scanner – contains a complete, stored confi guration profi le of your scanner’s programming. V-scanner lets you store or recall up to 11 scanner confi gurations in folders on your scanner, without using a personal computer. You can use V- Scanner to build and store confi...
- Page 81 Beyond the Basics EDACS Trunking Mode (ED) – You can set your scanner so it decodes talkgroup IDs used with EDACS (GE/Ericsson/M/ACOM) trunking systems. This setting is called the EDACS mode. EDACS systems are used primarily by business or private communications service providers, as well as by some public safety organizations.
- Page 82 Beyond the Basics...
- Page 83 Beyond the Basics...
-
Page 84: Warranty
This product is warranted by RadioShack against manufacturing defects in material and workmanship under normal use for one (1) year from the date of purchase from RadioShack company-owned stores and authorized RadioShack franchisees and dealers. For complete warranty details and exclusions, check with your local RadioShack store.