Advertisement
Quick Links
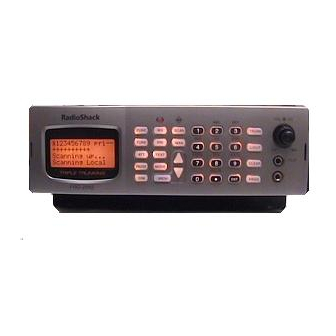
RadioShack
20-428
PRO-2055 1,000 Channel Multi Trunking Mobile/Base Scanner
Please read this user's guide before installing, setting up and using your new product
www.radioshack.com
Thank you for purchasing your Pro-2055 multi trunking scanner from RadioShack. You can mount
your scanner in a fixed position and use it as a base scanner or you can use it as a mobile scanner by
mounting it in a vehicle. This scanner is one of a new generation of scanners designed to track
Motorola® Type I and II (such as Smartnet® and Privacy Plus®) and hybrid analog trunking
systems, GE-Ericsson (EDACS®) type systems, and EF Johnson (LTR) type systems which are
extensively used in many communication systems. No additional hardware or add-on cards are
needed.
what's included
user's guide
quick start guide
Scanner
Antenna
DIN sleeve and keys (2)
Knob (2)
Rubber washer (2)
Screw (2)
Rubber foot (3)
contents
will add
© 2005 RadioShack Corporation.
All Rights Reserved.
RadioShack, RadioShack.com, Hypersearch, Hyperscan, and Adaptaplug are trademarks used by
RadioShack Corporation.
Motorola, Smartnet, ASTRO and Privacy Plus are registered trademarks of Motorola Inc.
EDACS is a registered trademark of MA-COM Inc.
LTR is a registered trademark of EF Johnson.
your scanner's keypad
TRUNK – stores the Trunking ID code or holds the trunking ID while scanning.
preloaded data addendum
DC cable w/fuse
Mounting bracket
Lock washer (2)
Page 1 of 50
20-428 Owner's Manual
AC adapter
Advertisement

Related Manuals for Radio Shack PRO-2055


Summary of Contents for Radio Shack PRO-2055
- Page 1 Please read this user’s guide before installing, setting up and using your new product www.radioshack.com Thank you for purchasing your Pro-2055 multi trunking scanner from RadioShack. You can mount your scanner in a fixed position and use it as a base scanner or you can use it as a mobile scanner by mounting it in a vehicle.
- Page 2 20-428 Owner’s Manual L/OUT (Lock Out) – lets you lock out a selected channel, skip a specified frequency during search, or lock out a selected ID code. CLEAR – clears an incorrect entry. PROG (Program) – programs frequencies in channels PWR/VOL/SQ –...
- Page 3 20-428 Owner’s Manual install your scanner You can mount your multi Trunking scanner in your vehicle, install it for mobility, or install it as a base station. mounting your scanner in your dashboard If you are unsure about how to install your scanner in your vehicle, consult your automobile manufacturer, dealer, or a qualified installer.
- Page 4 20-428 Owner’s Manual 6. Slide the scanner into the bracket, aligning the scanner’s holes with the holes in the bracket, and then screw the mounting knobs into the scanner. Note: When drilling holes, be sure to avoid obstructions behind the mounting surface. Consult a qualified installer if in doubt.
- Page 5 20-428 Owner’s Manual 3. Connect the red wire of the supplied DC power cord to a voltage source that turns on and off with the ignition switch, such as a spare accessory terminal in your vehicle’s fuse box. 4. Insert the power cord’s barrel plug into the scanner’s DC 13.8V jack. 5.
- Page 6 20-428 Owner’s Manual your vehicle. You may also want to connect an external antenna if you use your scanner as a base station. Your local RadioShack store sells a variety of antennas. Always use 50-ohm coaxial cable, such as RG-58 or RG-8, to connect an outdoor antenna. For lengths exceeding 50 feet, use RG-8 low-loss dielectric coaxial cable.
- Page 7 In your PRO-2055 scanner, the CTCSS feature can be used to block the reception of transmissions on shared channel to only those that use the CTCSS mode also features a Code Search setting that allows you to instantly display and store unknown codes into the channel memory.
- Page 8 Like CTCSS, DCS allows multiple users to share a single radio frequency without hearing each other’s transmissions. In your PRO-2055 scanner, the DCS feature can be used to block the reception of transmissions on a shared channel to only those that use the DCS tone that you have specified.
- Page 9 20-428 Owner’s Manual • For example, a valid fleet-subfleet ID identifying all detectives within a police department might be 000-12, where 000 identifies all police users and 12 identifies the Detective division. • Trunking the scanner to an active control channel while in Motorola mode will display the Motorola System.
- Page 10 HR order, starting with Memory X01 in the selected bank. Your PRO-2055 scanner features a new tool to help you determine the correct channel mapping for LTR system frequencies. The scanner’s LTR Repeater Finder displays the current Home Repeater when monitoring LTR transmissions in manual mode.
- Page 11 20-428 Owner’s Manual You can set your scanner to change the way it receives signals. These settings, called open mode and closed mode, affect how the scanner receives signals from communications systems that use some type of closed squelch (such as Motorola, EDACS, and LTR systems). Notes: •...
- Page 12 20-428 Owner’s Manual 2. Turn SQ fully counterclockwise, then turn SQ clockwise until the hissing sound stops. 3. To turn off the scanner, turn VOL counterclockwise to OFF. Notes: • The scanner does not scan if there are no frequencies stored in channels. If the scanner does not scan and you have already stored frequencies in channels, turn SQ further clockwise.
-
Page 13: Ctcss And Dcs
20-428 Owner’s Manual downward one by one. 2. Press PGM. M changes to P. 3. Use the number keys and •/DELAY to enter the frequency (including the decimal point) you want to store. If you make a mistake, press CLEAR to delete a single digit or press and hold CLEAR about 2 seconds to delete all digits. - Page 14 20-428 Owner’s Manual You can also set a special search code up that will instantly decode the CTCSS or DCS code on a received transmission. Channels programmed with the search code will receive all traffic on the channel, and will instantly decode and display any CTCSS or DCS code that is found with the transmission.
- Page 15 20-428 Owner’s Manual 77.0 Hz 107.2 Hz 151.4 Hz 183.5 Hz 225.7 Hz 79.7 Hz 110.9 Hz 156.7 Hz 186.2 Hz 229.1 Hz 82.5 Hz 114.8 Hz 159.8 Hz 189.9 Hz 233.6 Hz 85.4 Hz 118.8 Hz 162.2 Hz 192.8 Hz 241.8 Hz 88.5 Hz 123.0 Hz...
- Page 16 20-428 Owner’s Manual channel transmissions, trunk IDs, or banks. assigning a text tag to a channel 1. Press MAN, enter the channel number where you want to enter the text, then press MAN again. M and the bank and channel number appear at the upper left corner of the display (for example: M100).
- Page 17 20-428 Owner’s Manual 7. Press ENT to store. assigning a text tag to a bank 1. Press PROG. 2. Press FUNC then press bank number. Bank X (0 through 9) selected. Fn+CLR to delete all frequencies, TEXT to edit tag appears. 3.
- Page 18 20-428 Owner’s Manual CLEAR Back Space finding and storing active frequencies You can search for transmissions in the scanner’s preprogrammed search bank. The search bank is divided into seven search bands. You can change the search range of Bank SR6 manually by setting the lower and higher ends of the search range.
- Page 19 20-428 Owner’s Manual band charts search bank: SR0 marine band Note: Two frequencies are assigned in one channel in some Marine frequencies. For example, 157.000 and 161.600 are assigned in Channel 20. Receive mode: FM Frequency (MHz) Frequency (MHz) 156.0500 156.2500 156.3000 156.3500...
- Page 20 20-428 Owner’s Manual search bank: SR1 CB band Receive mode: AM Frequency (MHz) Frequency (MHz) 26.9650 26.9750 26.9850 27.0050 27.0150 27.0250 27.0350 27.0550 27.0650 27.0750 27.0850 27.1050 27.1150 27.1250 27.1350 27.1550 27.1650 27.1750 27.1850 27.2050 27.2150 27.2250 27.2550 27.2350 27.2450 27.2650 27.2750 27.2850...
- Page 21 20-428 Owner’s Manual 151.8200 151.8800 151.9400 154.5700 154.6000 search bank: SR3 police/fire band Receive Mode: FM Group Frequency (MHz) Step (kHz) 33.420 – 33.980 37.020 – 37.420 39.020 – 39.980 42.020 – 42.940 44.620 – 45.860 45.880 45.900 45.940 – 46.060 46.080 –...
- Page 22 20-428 Owner’s Manual step. Some scanner designs do this without showing the correct step in the display. This scanner will show the actual tuned frequency in the display. Because steps are so close together, the audio quality will not be affected by the offset. search bank: SR5 amateur band Receive mode: FM Group...
- Page 23 20-428 Owner’s Manual • You can copy and save a frequency into a specified bank, channel, or priority channel when the scanner finds an active frequency. See “Using Frequency Copy” to save the frequency. The frequency copy works only in search banks 1 through 6. •...
- Page 24 20-428 Owner’s Manual The FCC (Federal Communications Commission) has allocated channels for use by the National Oceanic and Atmospheric Administration (NOAA). Regulatory agencies in other countries have also allocated channels for use by their weather reporting authorities. NOAA and your local weather reporting authority broadcast your local forecast and regional weather information on one or more of these channels.
- Page 25 20-428 Owner’s Manual priority channel and weather priority operation is enabled (see “Priority”). In this mode all alerts are received. FIPS settings are ignored. • The scanner sounds an alert or beep when it receives the SAME code. If you do not stop the alert (or beep) for five minutes, the alert stops and the scanner beeps every ten seconds.
- Page 26 20-428 Owner’s Manual You can copy a frequency into a specified channel when the scanner stops on that frequency during search mode or manual tuning. 1. Press FUNC then PROG when you find a frequency. Store in ChXXX ? appears on the bottom line. After about 1 second, the frequency to be copied flashes.
- Page 27 20-428 Owner’s Manual Your scanner’s Signal Stalker II feature provides a powerful new tool for you to rapidly detect, monitor and store frequencies for nearby radio transmissions. The Signal Stalker II feature is similar in functionality to portable frequency counters that cost much more than your scanner, but provides many advantages over typical portable frequency counters.
- Page 28 20-428 Owner’s Manual frequencies while searching all bands and 50 frequencies while searching Police/Fire frequencies. Signal Stalker II functions by rapidly sweeping through the RF spectrum in 1 MHz segments. If RF signal energy is detected in a 1 MHz segment, Signal Stalker II will sweep through the 1MHz segment in finer steps until the source of the RF signal energy is found.
- Page 29 20-428 Owner’s Manual example to turn bank 1 on again, press 1. Notes: • You cannot turn off all banks. There must be at least one active bank. •You can manually select any channel in a bank, even if the bank is turned off. monitoring a single channel/power save circuit You can monitor a single channel with your scanner by navigating to that channel while in manual mode.
- Page 30 20-428 Owner’s Manual 4. Press PROG to enter the program mode. M changes to P. 5. Press FUNC. 6. Press CLEAR. The frequency number changes and 0.0000 appears. deleting all frequencies in a channel bank 1. Press PROG. 2. Press FUNC then the bank number you want to clear. Bank X selected. Fn+CLR to delete all frequencies.
- Page 31 20-428 Owner’s Manual to lo. reviewing locked-out channels To review all locked out channels, press MAN. Then repeatedly alternate between pressing FUNC and then L/OUT to view each locked-out channel. When you finish reviewing locked-out channels, press MAN. locking out frequencies To lock out a frequency during a search, press L/OUT when the scanner stops on that frequency.
- Page 32 20-428 Owner’s Manual 2. Select the search bank in which you want to clear all locked-out frequencies. 3. Press FUNC then press L/OUT. Lockout list appears. 4. Press FUNC then 6. Clear entire list ? Press 1 to clear all, any other key aborts appears. Press 1 to clear all locked-out frequencies.
- Page 33 20-428 Owner’s Manual To program a weather channel as the priority channel: 1. Press WX. 2. Select the weather channel you want to program as the priority channel. 3. Press FUNC then PRI. The display flashes two times. To turn on the priority feature, press PRI so pri changes PRI on the display while scanning. If the scanner detects activity on the priority channel, Priority Channel appears.
- Page 34 20-428 Owner’s Manual Note: MO (MOT), ED, and LT modes are not available when the scanner tunes up or down through the frequency ranges in which the trunking operation is not used. using the attenuator To reduce interference or noise caused by strong signals, you can reduce the scanner’s sensitivity to these signals.
- Page 35 4. Press ENT to set the display contrast. cloning the programmed data You can transfer the programmed data to and from another PRO-2055 or PRO-97 scanner using an optional connecting cable with 1/8-inch (3.5mm) phone plugs on both ends (not supplied, available at your local RadioShack store).
- Page 36 Frequencies into Channels”) and input ID codes in the ID memory (see “Storing Talk Group IDs”). Your PRO-2055 automatically calculates Motorola voice channel frequencies when it decodes the control channel. This eliminates the need to enter all the Motorola group frequencies.
- Page 37 20-428 Owner’s Manual each transmission to identify talk groups. setting squelch for trunking mode Your scanner automatically mutes the audio during trunk scanning when it decodes control channel data. However, we recommend you turn SQ clockwise and leave it set to a point just after the rushing sound stops.
- Page 38 20-428 Owner’s Manual 5. Enter the desired trunking frequency then press ENT to store. 6. To enter additional trunking frequencies as subsequent channels in the same bank, press PROG or /¥ to access the next open channel then enter the frequencies. (See “Storing Known Frequencies into Channels”).
- Page 39 20-428 Owner’s Manual press ENT. Confirm the entry. If it is incorrect, press the number keys again to set the base frequency. After you confirm the input, press ENT again. 6. While O in Offset blinks, if necessary, enter the offset number and press ENT. Confirm the entry. If it is incorrect, then press the number keys again to set the frequency.
- Page 40 20-428 Owner’s Manual 1. Press PROG then TRUNK. 2. For each bank you want to program, repeatedly press FUNC. Then /¥ or ¥/ to select the bank. 3. Press FUNC. Then press 8. Size Code Setting appears. 4. Enter the size code supplied with the Type I system information, referring to the instruction that appears on the display.
- Page 41 20-428 Owner’s Manual There are 10 talk group ID banks and each ID bank has 5 sub-banks. Each sub-bank has 30 ID locations. You can program up to 150 talk group IDs in each bank, so you can program up to 1,500 talk group IDs in 10 banks.
- Page 42 20-428 Owner’s Manual 10. Press SCAN to start scanning. Notes: • If you made a mistake in Step 4, Invalid ID value appears and the scanner beeps when you press ENT. Start again at Step 3. • You can enter either a decimal or AFS code for ED (EDACS) IDs. The default setting is decimal ID entry.
- Page 43 20-428 Owner’s Manual 1. Press PROG. Note: You can only lock out talk group IDs when the scanner is in the closed mode (see “Open and Closed Modes”). 2. Press TRUNK. 3. Press FUNC, /¥ or ¥/ to move to the desired bank. 4.
- Page 44 20-428 Owner’s Manual 1. Press PROG then TRUNK. 2. Press FUNC. Then L/OUT. The locked out ID appears. If the ID memory bank has no locked-out ID, you hear the low beep tone. clearing talk group IDs 1. Press PROG then TRUNK. 2.
- Page 45 20-428 Owner’s Manual care Keep the scanner dry; if it gets wet, wipe it dry immediately. Use and store the scanner only in normal temperature environments. Handle the scanner carefully; do not drop it. Keep the scanner away from dust and dirt, and wipe it with a damp cloth occasionally to keep it looking new. replacing the fuse First, turn off the scanner and your vehicle’s ignition.
- Page 46 20-428 Owner’s Manual 894– 960 MHz (in 6.25 kHz steps) 1240–1300 MHz (in 6.25 kHz steps) Memory channels 1000 Channel memory banks Number of memory channels per bank Talk group ID memories 1,500 ID memory banks Sub-banks per bank Number of memory IDs per sub-bank Sensitivity (20 dB S/N): 25–54 MHz 0.3 µV...
- Page 47 20-428 Owner’s Manual IF Rejection: 380.8 MHz at 154.1 MHz 60 dB 21.4 MHz at 154.1 MHz 100 dB Squelch Sensitivity: Threshold (FM and AM) 0.5 µV Tight (FM) 25 dB Tight (AM) 20 dB Antenna Impedance 50 Ohms Audio Output Power (10% THD) 1.5 W Built-in Speaker 3 Inches (77 mm)
- Page 48 20-428 Owner’s Manual 3. Press 1. 4. Press ENT. Initializing please stand by. appears for about 5 seconds. Note: Do not turn off the scanner until the initialization is complete. When the initialization is complete, M000 appears on the top line of the display. Bank 0 Ch 00 appears on the third line. The FCC wants you to know This equipment has been tested and found to comply with the limits for a scanning receiver, pursuant to Part 15 of the FCC Rules.
- Page 49 20-428 Owner’s Manual This scanner has been designed to prevent reception of illegal transmissions. This is done to comply with the legal requirement that scanners be manufactured so as to not be easily modifiable to pick up those transmissions. Do not open your scanner’s case to make any modifications that could allow it to pick up transmissions that are illegal to monitor.
- Page 50 20-428 Owner’s Manual FAQs (Frequently Asked Questions) The scanner is not working at all. What’s wrong? The AC or DC adapter or DC cable might not be connected. Be sure the adapter/cable’s barrel plug is fully inserted into the PWR DC 13.8V jack. The center tip of the adapter/cable’s barrel plug must be set to positive.