Table of Contents
Advertisement
Quick Links
Advertisement
Table of Contents

Related Manuals for Epson SureColor F2100 Series


Summary of Contents for Epson SureColor F2100 Series
- Page 1 ® ® Epson SureColor F2100 Series User's Guide...
-
Page 3: Table Of Contents
Contents Epson SureColor F2100 Series User's Guide ................... 9 Introduction to Your Printer........................10 Printer Features ..........................10 Optional Equipment and Replacement Parts................. 11 Notations Used in the Documentation ....................12 Printer Part Locations......................... 12 Printer Parts - Front/Top ........................ 13 Printer Parts - Inside ........................ - Page 4 Attaching the Grip Pad to the Platen....................39 Removing the Grip Pad from the Platen ..................43 Attaching or Removing Spacers ....................46 Installing the Platen ........................54 Attaching the Platen Frame Hooks ....................57 Loading a T-shirt ..........................59 Loading a T-shirt on the Grip Pad ....................
- Page 5 Waste Ink Disposal Guidelines ....................102 Replacing the Waste Ink Bottle ......................103 Cleaning the Suction Cap......................... 107 Replacing the Head Cleaning Set ....................113 Replacing the Wiper Unit and Anti-drying Caps................114 Replacing the Flushing Pad......................119 Washing the Ink Tubes........................124 Shaking and Replacing the Ink Cartridges ..................
- Page 6 Platen Height Error Is Displayed While Printing................168 Message Is Displayed After Cleaning the Encoder Strip (Carriage Scale) ........168 Printing Is Slow or Stops Intermittently ..................169 Cannot Access the USB Memory Device ..................169 Red Light Shines Inside the Printer ..................... 169 Forgot the Network Password .....................
- Page 7 Ink Cartridge Safety Instructions....................188 FCC Compliance Statement......................189 Software License Terms........................190 Binding Arbitration and Class Waiver ....................200 Trademarks ............................203 Copyright Notice..........................203 A Note Concerning Responsible Use of Copyrighted Materials........... 204 Copyright Attribution ........................204...
-
Page 9: Epson Surecolor F2100 Series User's Guide
Epson SureColor F2100 Series User's Guide Welcome to the Epson SureColor F2100 Series User's Guide. For a printable PDF copy of this guide, click here. -
Page 10: Introduction To Your Printer
High Resolution • UltraChrome DG pigment ink optimized for textile printing for smooth gradations and high color reproducibility • High-density white printing using White ink and pre-treatment solution developed specially for Epson pigment ink textile printers Easy-to-use setup and operation features •... -
Page 11: Optional Equipment And Replacement Parts
(U.S.) or proimaging.epson.ca (Canada), select your product series and product, and click the Where to Buy button. Or call 800-GO-EPSON (800-463- 7766) in the U.S. or 800-807-7766 in Canada. Option or part Part number Cleaning cartridge (700 ml) -
Page 12: Notations Used In The Documentation
T725300 UltraChrome DG ink cartridge - Yellow (600 ml) T725400 UltraChrome DG ink cartridge - White (600 ml) T725A00 1-year extended Epson Preferred Plus service plan EPPSCF2KB1 Parent topic: Printer Features Notations Used in the Documentation Follow the guidelines in these notations as you read your documentation: •... -
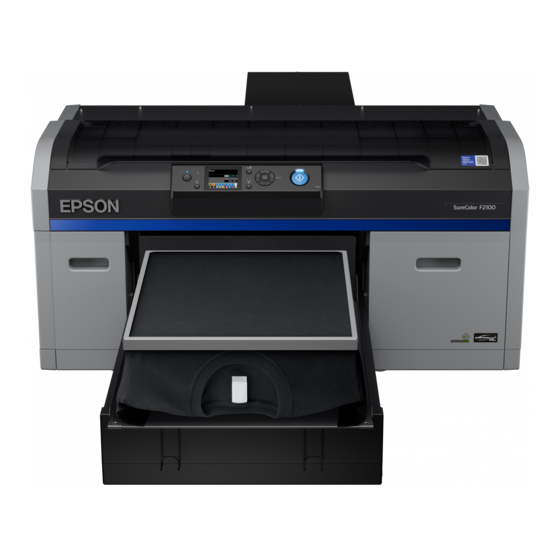
Page 13: Printer Parts - Front/Top
Printer Parts - Front/Top Airflow vents Printer cover Ink cartridge cover (left) Platen Moveable base Hooks (to hang platen frame) Parallel adjustment plate Height adjustment lever Fixing lever Spacer b... -
Page 14: Printer Parts - Inside
Spacer a Ink cartridge cover (right) Tweezer holder Ink cartridges External USB port Control panel Parent topic: Printer Part Locations Printer Parts - Inside Encoder strip (carriage scale) Carriage shaft Flushing pad... -
Page 15: Printer Parts - Back
Air filter Print head Anti-drying caps Suction/cleaning cap Fabric wiper unit Parent topic: Printer Part Locations Printer Parts - Back AC inlet Waste ink outlet (left) Tube clamp... -
Page 16: Control Panel And Lcd Screen
Waste ink bottle holder Waste ink bottle Waste ink tube Waste ink outlet (right) LAN (Ethernet) port Data light Status light USB port Air inlet Parent topic: Printer Part Locations Control Panel and LCD Screen Control Panel Buttons and Lights power light power button cancel button... - Page 17 Up/down arrow buttons OK button Menu/right arrow button USB memory device port start button start light maintenance button error light LCD Screen Message display Offest head alignment status Printer temperature alert Print job name USB memory device status Platen size Waste ink bottle status...
- Page 18 Head cleaning set status Ink cartridge status Total prints (current print job) Preview operation (when printing from a USB memory device and this icon is displayed, press the down arrow button to preview the image) Time before next automatic cleaning Parent topic: Printer Part Locations...
-
Page 19: Printer Usage Guidelines
Printer Usage Guidelines Follow the guidelines in these sections as you use your printer, consumables, and print media. Using Your Printer Storing Your Printer Handling Ink and Cleaning Cartridges Handling White Ink Handling T-shirts (Media) Using Your Printer Follow these guidelines as you use your printer: •... -
Page 20: Storing Your Printer
• Turn the printer off at the end of the day after you are finished using it. The printer runs maintenance that may take up to 5 minutes before turning off. Note: To keep the print head in the optimum operating condition, ink and cleaning solution are also used in maintenance operations such as head cleaning in addition to printing. -
Page 21: Handling Ink And Cleaning Cartridges
Related tasks Storing the Printer Related topics Maintenance Handling Ink and Cleaning Cartridges Follow these guidelines as you handle the ink and cleaning cartridges: • When using the 250 ml installation ink cartridges included with the printer, most of the ink is consumed during initial ink charging. -
Page 22: Handling White Ink
reinstalled. Also make sure that the supply port is free of dust when storing cartridges (the port does not need to be capped since there is a valve inside). Do not put tape over the supply port. • Removed ink cartridges may have ink around the ink supply port, so be careful not to stain any surfaces with ink. -
Page 23: Handling T-Shirts (Media)
• When storing cartridges, lay them down flat. If you store cartridges standing upright, pigments may settle and reduce print quality. • If you do not use the printer for more than two weeks, print a nozzle check. Alternately, you can also replace the White ink with cleaning cartridges (Maintenance >... - Page 24 • If you have applied pre-treatment solution and fixed the ink, we recommend soaking the T-shirt in water and washing it before wearing it to remove any remaining traces of pre-treatment solution. • If pre-treatment solution is applied to a white or light-colored T-shirt, the treated side may turn yellow. Print soon after applying the pre-treatment solution and wash in water.
-
Page 25: Basic Printing
Basic Printing Refer to these sections to learn how to perform basic print functions. Overview of the Printing Process Required Equipment Pre-treating a T-shirt Creating Your T-shirt Design Preparing Your Printer Loading a T-shirt Finishing a T-shirt Overview of the Printing Process This section explains the basic workflow from preparing a T-shirt for printing to post-treatment after printing. -
Page 26: Required Equipment
8. Post-treating the T-shirt Fix the ink to the T-shirt. Parent topic: Basic Printing Related references Required Equipment Related tasks Preparing Your Printer Starting a Print Job Removing a Printed T-shirt Related topics Pre-treating a T-shirt Loading a T-shirt Creating Your T-shirt Design Finishing a T-shirt Required Equipment To print on a T-shirt using this printer, you need the equipment listed here, depending on your print... - Page 27 White ink do not develop properly. For best results, use a paint roller or sprayer to apply pre- treatment solution to the T-shirt. Note: Using non-Epson pre-treatment solution may yield poor color, image quality, or washability. Note: Pre-treatment solution must be diluted with distilled water at a minimum 1:1 ratio. The amount of water added can vary depending on the material type and color of the garment.
-
Page 28: Pre-Treating A T-Shirt
Pre-treating a T-shirt Follow the instructions in these sections to prepare your T-shirt for printing. Pre-treatment Solution Safety Precautions Preparing the Pre-treatment Solution Diluting the Pre-treatment Solution Pre-treating a T-shirt with a Roller Pre-treating a T-shirt with a Pre-treatment Machine Fixing the Pre-treatment Solution (Heat Press) Parent topic: Basic Printing... -
Page 29: Preparing The Pre-Treatment Solution
Preparing the Pre-treatment Solution Prepare the pre-treatment solution for application to the T-shirts. 1. To attach the tap, cut the cardboard along the perforations and remove the tap from inside the cardboard box. 2. Pull the cap section out of the hole in the cardboard. Note: Make sure you pull the cap section out of the hole in the cardboard. - Page 30 3. Remove the cap. 4. Remove the tap from the bag and turn the tap's handle section until the hole is visible as shown. Note: If you cannot see the hole or if the tap is damaged, contact Epson.
- Page 31 5. Attach the tap. 6. Remove the cap from the end of the tap and turn the lever until the hole is facing down. 7. To pour the solution, tilt the cardboard box and pour the pre-treatment solution into the desired container.
-
Page 32: Diluting The Pre-Treatment Solution
Diluting the Pre-treatment Solution Before applying the pre-treatment solution to a T-shirt, make sure you dilute it correctly with distilled or purified water as described here. Caution: If you do not dilute the pre-treatment solution, it leaves noticeable traces on the T-shirt or the printed surface cracks after washing. -
Page 33: Pre-Treating A T-Shirt With A Pre-Treatment Machine
4. Apply the solution evenly in both directions as shown to an area larger than the target print area. It is important to finish in the shoulder-to-shoulder direction; this aligns the fabric fibers to the direction of the print head movement. 5. -
Page 34: Fixing The Pre-Treatment Solution (Heat Press)
Pre-treating a T-shirt Creating Your T-shirt Design After creating the data, use the Garment Creator software to transmit it to the printer. Visit your product's support website at epson.com/support (U.S.) or epson.ca/support (Canada) and select your product to download the Garment Creator software and utilities. -
Page 35: Data Creation And Transmission Guidelines
Parent topic: Basic Printing Data Creation and Transmission Guidelines When creating data and transmitting it to the printer using Garment Creator, follow these guidelines: • For best results, select sRGB colors when creating data to be printed on a T-shirt. sRGB colors are closer to the actual print results. - Page 36 Sleeve platen 0.47 inch (12 mm) margins Platen frame Printable area...
- Page 37 Medium-grooved platen 0.24 inch (6 mm) margins Platen frame Printable area Rectangle part (you cannot print on this area if this part is removed [for zippers]) 2.60 inches (67 mm) 7.79 inches (198 mm) 6.65 inches (169 mm) 1.61 inches (41 mm) 6.33 inches (161 mm)
-
Page 38: Preparing Your Printer
L, M (standard), S, and XS platens 0.24 inch (6 mm) margins Platen frame Printable area Parent topic: Creating Your T-shirt Design Preparing Your Printer Before transmitting print data from the Garment Creator software, check the printer's status and make sure that the print head nozzles are not clogged. -
Page 39: Attaching The Grip Pad To The Platen
Parent topic: Basic Printing Related tasks Performing a Nozzle Check Attaching the Grip Pad to the Platen A grip pad prevents the T-shirt from moving around during printing and can reduce print misalignment. We recommend attaching a grip pad to the platen supplied with the printer. You do not need the platen frame when a grip pad is attached to the platen. - Page 40 2. Place the grip pad on a flat surface with the back facing up, then place the platen in the center of the grip pad. 3. Flip the platen over and rub the section of the grip pad where you removed the backing to adhere it to the platen.
- Page 41 5. Carefully adhere the rest of the grip pad to the platen and rub each section to adhere it. 6. Peel off the grip pad backing from all the edges.
- Page 42 7. Fold over the long edges of the grip pad and adhere them to the back of the platen. 8. Fold over the corners of the grip pad and adhere them to the back of the platen. 9. Fold over the short edges of the grip pad and adhere them to the back of the platen.
-
Page 43: Removing The Grip Pad From The Platen
10. Turn the platen over and firmly press down on the edges of the grip pad to make sure they are firmly in place. Parent topic: Preparing Your Printer Related references Optional Equipment and Replacement Parts Related tasks Attaching the Platen Frame Hooks Removing the Grip Pad from the Platen Loading a T-shirt on the Grip Pad Removing the Grip Pad from the Platen... - Page 44 2. Peel off the edges of the grip pad. 3. Flip the platen over and hold it down with one hand.
- Page 45 4. Using your other hand, peel off the grip pad. If any glue remains on the platen, soak a soft cloth in diluted neutral detergent, wring it out thoroughly, and wipe off the glue. Caution: Do not use solvents such as alcohol to remove the glue. You can damage, warp, or discolor the platen or other parts.
-
Page 46: Attaching Or Removing Spacers
Attaching or Removing Spacers You may need to attach or remove spacers, depending on the platen type and the fabric thickness. You need a Phillips-head screwdriver. 1. If the platen is not in the forward position, press the moveable base button to move the platen forward. - Page 47 4. Check the installed spacers and determine which spacers you need based on the platen and fabric you are using. • When using the large garment, medium garment, small garment, or extra small garment platen: Attach spacers a and b for fabric with a thickness of up to 0.28 inch (7 mm).
- Page 48 Attach only spacer a for fabric with a thickness between 0.2 to 0.5 inch (5 to 13 mm). Attach only spacer b for fabric with a thickness between 0.35 to 0.67 inch (9 to 17 mm). Remove both spacers for fabric with a thickness between 0.59 to 0.95 inch (15 to 24 mm). •...
- Page 49 Remove both spacers for fabric with a thickness between 0.24 to 0.55 inch (6 to 14 mm). 5. Rotate the fixing lever as shown to loosen it.
- Page 50 6. Remove the screw securing the parallel adjustment plate. Note: Keep the screw in a safe place (you will need it if you are attaching both spacers). 7. Remove the parallel adjustment plate. Caution: Be careful not to drop the parallel adjustment plate; it is a precision component.
- Page 51 8. Remove the height adjustment lever. 9. Remove or attach the spacers beneath the height adjustment lever. Removing...
- Page 52 Attaching Note: Make sure the protruding sections of the spacers are aligned with the hole as shown. 10. Replace the height adjustment lever.
- Page 53 11. Reattach the parallel adjustment plate. Reinstall and tighten the screw that was removed in step 6 if you attached both spacers. 12. Rotate the fixing lever as shown to tighten it and secure the height adjustment lever. Parent topic: Preparing Your Printer...
-
Page 54: Installing The Platen
Installing the Platen After you have removed or attached spacers as necessary, you can install a platen on the printer. 1. Align the platen to fit into the holes in the moveable base and place the platen on the printer. •... - Page 55 • If you are installing a sleeve platen, install it as shown. Then go to step 2.
- Page 56 2. Pass the fixing band under the parallel adjustment plate and align it with the groove on top of the platen and secure it tightly. Make sure the end of the fixing band is on the side of the platen.
-
Page 57: Attaching The Platen Frame Hooks
3. After installing a platen of a different size, perform a head alignment. Parent topic: Preparing Your Printer Related references Optional Equipment and Replacement Parts Attaching the Platen Frame Hooks You can attach hooks to the printer to hang the platen frame when it is not in use. Note: Do not use the platen frame when a grip pad is attached to the platen. - Page 58 1. Insert the ends of each hook into the holes in the front of the printer as shown.
-
Page 59: Loading A T-Shirt
2. Make sure the front of the printer extends past the surface of the table or stand. Then hang the platen frame from the hooks. Parent topic: Preparing Your Printer Loading a T-shirt Refer to these sections to load a T-shirt into the printer. Loading a T-shirt on the Grip Pad Loading a T-shirt on the Platen Loading a Sleeve on the Sleeve Platen... -
Page 60: Loading A T-Shirt On The Grip Pad
Loading a T-shirt on the Grip Pad Before printing, carefully load a T-shirt on the platen with a grip pad attached. Do not use the platen frame with the grip pad. 1. If the platen is not in the forward position, press the moveable base button to move the platen forward. - Page 61 Note: Do not pull the T-shirt too much; otherwise, the print quality may decline. 4. Move the grip pad tool across the T-shirt vertically and horizontally from the edges as shown to flatten the printing surface. Repeat as needed to remove any slack or creases from the surface. Note: If the grip pad tool gets dirty, wipe it with a damp cloth.
- Page 62 Note: If the T-shirt is coated with pre-treatment liquid or the grip pad tool catches on the fabric, you can use a heat-resistant release sheet with the grip pad tool as shown. Note: The printer detects the highest part of the garment surface. If there are any wrinkles, creases, or slack, a platen height error may occur or print quality may decline.
-
Page 63: Loading A T-Shirt On The Platen
5. Tuck the T-shirt around the platen so that it does not drape over the movable base. Parent topic: Loading a T-shirt Related tasks Attaching the Grip Pad to the Platen Loading a T-shirt on the Platen Before printing, carefully load a T-shirt on the platen using a platen frame. 1. - Page 64 2. Remove the platen frame. 3. Load the T-shirt so that the shoulders are facing the front of the printer, as shown.
- Page 65 4. Gently pull the T-shirt over the edges of the platen to flatten it. Note: Do not pull the T-shirt too much; otherwise, the print quality may decline. Note: Do not use the grip pad tool to smooth the surface when you are using the platen frame. 5.
- Page 66 6. Gently pull the edges of the T-shirt outside of the frame to remove any slack. Note: The printer detects the highest part of the garment surface and adjusts the height accordingly. If there are any wrinkles, creases or slack near the inside edge of the frame, a platen height error...
- Page 67 may occur or print quality may decline. Stretch the T-shirt to remove the slack, however, do not stretch the T-shirt so much that the printed image will be distorted.
-
Page 68: Repositioning The T-Shirt
7. Tuck the T-shirt around the platen so that it does not drape over the movable base. 8. Reposition the platen frame a final time to make sure the garment is securely held down but not stretched. Repositioning the T-shirt Parent topic: Loading a T-shirt Repositioning the T-shirt... -
Page 69: Loading A Sleeve On The Sleeve Platen
sensor being triggered in the middle of printing. If this happens, try placing the T-shirt over the platen as shown. If the sensor is still triggered, try the following: 1. Check that the platen height is set to position 3 for a standard T-shirt. 2. - Page 70 1. If the platen is not in the forward position, press the moveable base button to move the platen forward. 2. Remove the platen frame. 3. Slide the sleeve over the platen.
- Page 71 4. Gently pull the sleeve over the edges of the platen to flatten it. Note: Do not pull the sleeve too much; otherwise, the print quality may decline. Note: Do not use the grip pad tool to smooth the surface when you are using the platen frame.
- Page 72 5. Replace the platen frame as shown. Make sure the small holes in the frame are at the front and back. 6. Gently pull the edges of the sleeve outside of the frame to remove any slack.
-
Page 73: Loading A Shirt On The Medium-Grooved Platen
7. Tuck the sleeve around and under the frame so that it does not drape over the movable base. 8. Reposition the platen frame a final time to make sure the garment is securely held down but not stretched. Parent topic: Loading a T-shirt Related references Optional Equipment and Replacement Parts... - Page 74 2. Remove the platen frame. 3. Load the shirt so that the shoulders are facing the front of the printer as shown. • For polo shirts: Make sure that the collar or button section of the shirt fits into the cutout on the platen.
- Page 75 • For shirts with zippers: Go to steps 4 and 5 to remove the middle piece of the platen. Replace the platen and make sure that the zipper section of the shirt fits into the removed section on the platen. 4.
- Page 76 5. Slide the middle part of the platen back, then lift it up to remove it. Note: Keep the removed screw and part in a safe place. 6. Gently pull the shirt over the edges of the platen to flatten it. Note: Do not pull the shirt too much;...
- Page 77 7. Replace the platen frame. 8. Gently pull the edges of the shirt outside of the frame to remove any slack. Note: The printer detects the highest part of the garment surface. If there are any wrinkles, creases or slack near the inside edge of the frame, a platen height error may occur or print quality may decline.
-
Page 78: Adjusting The Height Of The Platen
9. Tuck the shirt around the platen so that it does not drape over the movable base. 10. Reposition the platen frame a final time to make sure the garment is securely held down but not stretched. Parent topic: Loading a T-shirt Related references Optional Equipment and Replacement Parts Adjusting the Height of the Platen... - Page 79 Position number LCD message Ready (optimum platen height) Note: The positions above assume that the printed surface of the garment is the highest surface on the platen. Seams, collars, zippers, pockets, and other raised areas will require a higher platen height and result in reduced print quality.
- Page 80 3. Rotate the height adjustment lever to adjust the height of the platen to one of these starting positions: • When printing on T-shirts using the large garment, medium garment, small garment, or extra small garment platens with spacers a and b attached, select 3 on both spacers. •...
-
Page 81: Starting A Print Job
• When printing on sweatshirts or thick fabric, select 8. Note: If you remove both spacers, the height adjustment position numbers are no longer visible. To find the optimum platen height, move the height adjustment lever to the left until it stops then move it 3 positions to the right. -
Page 82: Cancelling A Print Job
1. Check that the shirt is loaded correctly. 2. Make sure the start light is on. 3. Press the start button. Parent topic: Loading a T-shirt Related topics Loading a T-shirt Cancelling a Print Job You can cancel a print job or cancel data that is being received by the printer using the printer's control panel. - Page 83 Caution: Do not touch the printed surface when you handle the T-shirt; the ink is still wet. 1. Remove the platen frame. 2. Hold the T-shirt by the shoulders and carefully remove it from the platen; the ink is still wet and can be easily smudged.
-
Page 84: Fixing The Ink
Parent topic: Finishing a T-shirt Related topics Fixing the Ink Fixing the Ink After printing on a shirt, you must fix the ink using a heat press or a heat tunnel. If the ink is not sufficiently fixed, colors may come out in the wash or when rubbed. Note: If you have applied pre-treatment solution, we recommend washing the shirt before wearing it. -
Page 85: Fixing Conditions (Heat Tunnel)
Parent topic: Fixing the Ink Fixing Conditions (Heat Tunnel) Optimum conditions vary depending on the heat tunnel. Test and check the results in advance to determine the correct temperature and duration. Note: The temperature in the tables here refer to the temperature of the fixing surface of the T-shirt, not the internal temperature of the heat tunnel. -
Page 86: Printing From A Usb Memory Device
Printing from a USB Memory Device You can save print data from Garment Creator on a USB memory device and then connect the device to the printer for printing. Note: Data on the USB memory device is saved as filename Epson_repeat_print.prn. You can save print jobs from the Garment Creator software to any location on the computer or the USB memory device. -
Page 87: Connecting And Printing From A Usb Memory Device
Connecting and Printing from a USB Memory Device You can print from a USB memory device connected to your printer. 1. Make sure the power light on your printer is not flashing. Note: Do not connect or disconnect a USB memory device when the power light is flashing. - Page 88 8. Load the shirt on the platen and press the start button. Note: If you press the maintenance button while the start light is on and highlight Reset Print Count, you can clear the counter for the number of copies displayed on the control panel. To delete data from a USB memory device, repeat steps 3 through 5, but select Delete Print File and press the up or down arrow button to select the data you want to delete.
-
Page 89: Maintenance
Maintenance See the instructions in these sections to maintain your printer for optimum results. Maintenance Guidelines Maintenance Safety Instructions Print Head Maintenance Print Head Alignment Using the Ink Cleaning Solution Disposing of Used Consumables and Optional Parts Replacing the Waste Ink Bottle Cleaning the Suction Cap Replacing the Head Cleaning Set Washing the Ink Tubes... -
Page 90: Maintenance Safety Instructions
Related references Optional Equipment and Replacement Parts Maintenance Safety Instructions When performing any printer maintenance procedures, follow these safety instructions: • Always wear gloves when performing printer maintenance. Should any waste ink or ink cleaner come in contact with your skin or enter your eyes or mouth, immediately take the following actions: •... -
Page 91: Print Head Maintenance
Related tasks Removing a Printed T-shirt Cleaning the Suction Cap Cleaning the Encoder Strip (Carriage Scale) and Replacing the Air Filter Print Head Maintenance You need to maintain the print head if you notice print quality has declined. Print head maintenance keeps the print head in optimum condition to ensure the best print quality. - Page 92 4. Remove the platen frame. 5. Place one sheet of A4- or letter-size plain paper on the center of the platen or grip pad. Secure the corners with tape.
- Page 93 6. Set the height adjustment lever to the P position if you are using a platen or the 1 position if you are using a grip pad. 7. Press the maintenance button on the control panel. The Maintenance menu appears. 8.
-
Page 94: Cleaning The Print Head
• If there are gaps in the pattern, clean the print head. Note: A complete nozzle cleaning is required only if there are more than 3 nozzles missing and the gaps are adjacent to each other. Otherwise, cleaning is not required. 11. -
Page 95: Print Head Alignment
2. Press the up or down arrow button to highlight Head Cleaning, and press the right arrow button to select it. 3. Press the up or down arrow button to choose one of the following cleaning options: • Selected Nozzles: Select this option when you see faint printing or gaps in a specific row of nozzles in the check pattern. -
Page 96: Aligning The Print Head
Aligning the Print Head If your printouts are grainy or blurry and contain vertical lines or faint text, you can realign the print head for each platen size and each ink color. 1. If the platen is not in the forward position, press the moveable base button to move it forward. - Page 97 5. Place one sheet of A4- or letter-size plain paper on the center of the platen or grip pad. Secure the corners with tape. 6. Set the height adjustment lever to the 1 position. 7. Press the right arrow button on the control panel to display the menu. 8.
- Page 98 10. Press the up or down arrow button to highlight the medium size platen, and press the right arrow button to select it. 11. Press the OK button. 12. Press the OK button again. The check pattern is printed. Note: The check pattern is printed at the same size as the top surface of the parallel adjustment plate.
-
Page 99: Fine-Tuning Print Head Alignment
Related tasks Adjusting the Height of the Platen Fine-tuning Print Head Alignment Related topics Loading a T-shirt Fine-tuning Print Head Alignment You can fine-tune adjustments after performing a head alignment. Make sure the height adjustment lever is set to the 1 position. Each movement of one step in platen height is +3 of Offset Head Alignment value. -
Page 100: Using The Ink Cleaning Solution
Adjusting the Height of the Platen Using the Ink Cleaning Solution When cleaning around the suction cap, the encoder strip (carriage scale), or the print head, use the ink cleaning solution. Use the ink cleaning solution only to clean the suction cap and encoder strip (carriage scale), and around the print head. - Page 101 2. Pour a small amount of ink cleaning solution into the cup supplied with the maintenance kit as shown. 3. Place a cleaning swab or cleaning cloth in the ink cleaning solution and let it soak in. Make sure that the solution does not drip from the cleaning swab or cleaning cloth when you remove it from the cup.
-
Page 102: Disposing Of Used Consumables And Optional Parts
When handing over the pre-treatment solution to the industrial waste disposal company, make sure you include the Safety Data Sheet found on Epson's support website. Waste Ink Disposal Guidelines... -
Page 103: Replacing The Waste Ink Bottle
When handing over the waste ink to the industrial waste disposal company, make sure you include the Safety Data Sheet found on Epson's support website. Parent topic: Disposing of Used Consumables and Optional Parts... - Page 104 1. Remove the outer and inner caps from the new waste ink bottle and store them in a safe place. Note: Keep the caps so you can use them to dispose of the used waste ink bottle. 2. Remove the waste ink tube from the used waste ink bottle and insert it into the new waste ink bottle. Be careful not to spill any ink remaining in the tube.
- Page 105 3. Place the inner and outer caps you removed from the new waste ink bottle on the used waste ink bottle.
- Page 106 4. Remove the used waste ink bottle from the waste ink bottle holder and insert the new bottle. Make sure the new waste ink bottle is seated correctly in the waste ink holder. Caution: Verify that the waste ink tube is still inserted into the neck of the bottle. If the waste ink tube comes out of the bottle, waste ink will spill out.
-
Page 107: Cleaning The Suction Cap
Cleaning the Suction Cap You need to clean the suction cap whenever you see a message on the LCD screen or at the end of every week that you use the printer. You may also need to clean the suction cap if you experience difficulty cleaning nozzles after performing a nozzle check. - Page 108 5. Open the printer cover.
- Page 109 6. If a film of waste ink has built up on the suction cap, remove it with the supplied plastic tweezers. Caution: Use only the supplied plastic tweezers. Be careful not to damage the suction cap. If the suction cap is damaged, air may leak and the print head may become dry or difficult to clean.
- Page 110 7. Wipe the inside of the suction cap using a thin cleaning swab dampened with ink cleaning solution. Rotate the swab as you wipe. Caution: Make sure ink cleaner does not drip onto the anti-drying caps to the right of the suction cap.
- Page 111 8. Wipe the outside of the suction cap with a large cleaning swab dampened with ink cleaning solution. 9. Wipe the top edge of the suction cap with a large cleaning swab dampened with ink cleaning solution.
- Page 112 10. If necessary, remove any excess ink from the edges of the cap. 11. Close the printer cover. 12. Press the OK button. The print head returns to its normal position and the Settings menu closes. 13. Perform a nozzle check. Parent topic: Maintenance Related references...
-
Page 113: Replacing The Head Cleaning Set
Related tasks Performing a Nozzle Check Related topics Disposing of Used Consumables and Optional Parts Replacing the Head Cleaning Set Replace the head cleaning set when you see a message on the LCD screen. Note: The printer warns you when the head cleaning set is running low. The printer warning system may not function properly if you do not follow the correct procedure for replacing the head cleaning set. -
Page 114: Replacing The Wiper Unit And Anti-Drying Caps
Replacing the Wiper Unit and Anti-drying Caps When you replace the head cleaning set, begin with replacing the wiper unit and the anti-drying caps. 1. Open the printer cover. 2. Unpack the new wiper unit and retain the packaging for disposing of the used wiper unit. 3. - Page 115 4. Place your fingers into the groove at the back of the wiper unit and raise it slightly as shown. 5. Grasp the wiper unit as shown and lift it out of the printer.
- Page 116 Caution: The wiper unit is classified as industrial waste. When handing it over to the industrial waste disposal company, make sure you include the Safety Data Sheet found on Epson's support website. 7. Insert the new wiper unit into the printer as shown.
- Page 117 8. Press down on the wiper unit until you hear it click into place. 9. Unpack the new anti-drying cap and retain the packaging for disposing of the used anti-drying cap. 10. Remove the cover from the new anti-drying cap.
- Page 118 11. To remove the anti-drying cap from the printer, pull the lever toward you as shown here, and lift out the anti-drying cap. 12. Place the cover on the old anti-drying cap and put it in the bag you retained from the new anti-drying cap.
-
Page 119: Replacing The Flushing Pad
13. Pull the lever forward as shown, and install the new anti-drying cap, placing the holes in the anti- drying cap over the posts on the printer. 14. Close the printer cover. 15. Press the OK button. 16. Press the up or down arrow button to highlight Yes, and press the OK button. 17. - Page 120 Note: The flushing pad, wiper unit, and anti-drying caps should all be replaced at the same time. 1. Open the printer cover. 2. Unpack the new flushing pad and retain the packaging.
- Page 121 3. Grasp the flushing pad by its tab and gently lift it. Caution: Lift the flushing pad carefully as ink could fly out if it is raised with too much force.
- Page 122 4. Hold the flushing pad at an angle and wait until the waste ink stops dripping into the receptacle beneath it. If waste ink drips into the printer, clean it up immediately. 5. Place the used flushing pad into the bag that contained the new flushing pad.
- Page 123 6. Insert the new flushing pad into the printer as shown, and press down on the tab until you hear the pad click into place. Caution: Make sure you insert the new flushing pad correctly or the print head could be damaged. 7.
-
Page 124: Washing The Ink Tubes
Washing the Ink Tubes Before you clean the ink tubes, have new ink and cleaning cartridges handy (in case you run out of ink) and a new waste ink bottle (if a message prompts you that there is not enough free space in the current bottle). - Page 125 4. Press the up or down arrow button to highlight Tube Washing, and press the right arrow button to select it. 5. Press the up or down arrow button to highlight White Ink or Color Ink, and press the right arrow button to select it.
- Page 126 9. Place your finger in the indentation on top of the ink cartridge and pull it straight out. Note: Removed ink cartridges may have ink around the ink supply port, so be careful not to get ink on the surrounding area.
- Page 127 10. Hold a cleaning cartridge with the label side facing the side of the printer and slide it all the way into the slot. Note: Do not touch the IC chip on the top of the cartridge; otherwise, the cartridge may not be recognized, or the printer may not print properly.
-
Page 128: Shaking And Replacing The Ink Cartridges
However, there may be a slight decline in quality in the area where the cartridge was changed. Caution: For best results, always use genuine Epson ink cartridges. Epson cannot guarantee the quality or reliability of non-genuine ink. The use of non-genuine ink may cause damage that is not covered by Epson's warranties and, under certain circumstances, may cause erratic printer behavior. - Page 129 2. Open the cartridge cover. 3. Put your finger into the indentation on top of the ink cartridge and pull it straight out of its slot. Note: Removed ink cartridges may have ink around the ink supply port, so be careful not to get ink on the surrounding area.
- Page 130 • Replace the cartridge as described starting with step 6. 5. Rapidly shake each new ink cartridge for about 15 seconds. For White ink, flip the cartridge over as shown and repeat. Caution: Do not touch the IC chip on the end of the cartridge; otherwise, the cartridge may not be recognized, or the printer may not print properly.
- Page 131 6. Hold the cartridge with the label side facing the side of the printer and slide it all the way into the slot. Note: Make sure that the color of the ink cartridge matches the color of the label on the printer. 7.
-
Page 132: Cleaning The Encoder Strip (Carriage Scale) And Replacing The Air Filter
Cleaning the Encoder Strip (Carriage Scale) and Replacing the Air Filter You see a message on the LCD screen when it is time to clean the encoder strip (carriage scale) and replace the air filter. 1. Turn off the printer. 2. - Page 133 4. Hold down the encoder strip (carriage scale) on the left side as shown. Caution: Do not touch the carriage shaft. Doing so may cause the printer to operate incorrectly. Carriage scale Carriage shaft (do not touch)
- Page 134 5. Use the soaked cleaning cloth to slowly wipe away any ink from the encoder strip (carriage scale) by moving the cleaning cloth in small motions to the right and across the length of the encoder strip (carriage scale). You do not need to clean the sections covered by the print head. Caution: Make sure that ink cleaning solution does not drip into the printer.
- Page 135 Caution: Do not pull on or rub the encoder strip (carriage scale) with too much force, or the right side may detach or the encoder strip (carriage scale) may be damaged, causing the printer to operate incorrectly. 6. Use a dry cleaning cloth to wipe away any ink cleaning solution or dust remaining on the encoder strip (carriage scale).
- Page 136 8. Grasp the tab on the air filter and lift it up to remove it.
- Page 137 9. Place the used air filter into the bag you retained from the new air filter. 10. Install the new air filter into the printer as shown and press it down until you hear it click into place. Parent topic: Maintenance...
-
Page 138: Cleaning Around The Print Head
Cleaning Around the Print Head Clean around the print head to remove any lint or fibers that have accumulated around the print head nozzles. 1. Let the ink cleaning solution soak into a new large cleaning swab. 2. Turn on the printer. 3. - Page 139 7. After the print head has moved to the maintenance position, place a metal or plastic tray, or a sheet of paper under the print head to prevent ink from dripping onto the printer.
- Page 140 8. Look into the print head below the control panel. Wipe the edges at the front and rear of the nozzle surface with the cleaning swab as shown. 9. Wipe the parts on the left and right of the nozzle surface.
-
Page 141: Cleaning The Platen Path
Caution: Do not touch the nozzle surface or the parts on the left side of the nozzles with the cleaning swab. A malfunction may occur. 10. When the area around the print head is clean, remove the tray or paper that you placed on the movable base. - Page 142 3. Open the printer cover. 4. Wipe the metal border on the left of the wiper unit using a soft, clean cloth dampened with water and wrung tight.
- Page 143 Note: Do not apply force to the gears shown below when cleaning. A malfunction may occur.
-
Page 144: Storing The Printer
5. Wipe the metal border on the right of the flushing pad. 6. Dry off the areas that you cleaned using a dry, soft cloth. 7. Close the printer cover. 8. Turn on the printer and perform a nozzle check. Parent topic: Maintenance Related tasks... -
Page 145: Cleaning The Printer
Before you begin the storage operation, gather the necessary number of cleaning cartridges and two waste ink bottles. You may need new cleaning cartridges depending on the amount of solution remaining. 1. Turn on the printer. 2. Press the maintenance button. The Maintenance menu appears. - Page 146 4. Use a soft, clean cloth to carefully remove any dust or dirt from the platen. If necessary, clean the platen using a soft, clean cloth dampened with water and a small amount of detergent. Wipe off excess moisture with a dry, soft cloth. 5.
- Page 147 Parent topic: Maintenance...
-
Page 148: Moving Or Transporting The Printer
Moving or Transporting the Printer Follow the instructions in these sections to prepare and move the printer, and set it back up after moving it. When transporting the printer, protect it from shock and vibration by packing it using the packing materials it came with. -
Page 149: Transportation Preparation
Transportation Preparation Do the following before moving or transporting the printer: • Turn off the printer. • Remove all cables. • Remove the platen. • Close the fixing lever. • Remove any tools or parts from the tool storage space. Parent topic: Moving or Transporting the Printer Moving the Printer... - Page 150 4. Remove the waste ink tube from the tube clamp. 5. Pull out the left and right waste ink tubes. Note: Be careful when removing the waste ink tubes; waste ink may spill from the outlet or tube. Parent topic: Moving or Transporting the Printer...
-
Page 151: Setting Up The Printer After Transport
Related tasks Setting Up the Printer After Transport Setting Up the Printer After Transport Follow these steps to set up the printer after moving it. See the Start Here sheet for detailed information. 1. Verify that the location is suitable for installation. 2. -
Page 152: Using The Control Panel Menus
Using the Control Panel Menus Follow the instructions in these sections to access the printer menu system and select settings. Accessing the Printer's Menus Maintenance Menu Settings Printer Setup Menu Settings USB File List Menu Settings Printer Status Menu Settings Administrator Menu Settings Accessing the Printer's Menus You can use the printer menus to adjust the settings that control how your printer works. -
Page 153: Maintenance Menu Settings
4. Press the up or down arrow button to move through the settings. If there are additional settings, press the right or left arrow button as instructed on the LCD screen. 5. Press the OK button on the control panel when OK is displayed on the LCD screen. 6. - Page 154 Setting Options Description Head Cleaning Set Proceed Select Yes to move the platen and print head to the maintenance position before replacing the head cleaning set Head Cap Cleaning Select to move the platen and print head to the maintenance position before cleaning the caps Cleaning Around Head Select to move the platen and print...
-
Page 155: Printer Setup Menu Settings
Printer Setup Menu Settings Settings on the Printer Setup menu let you run print quality adjustment utilities. Caution: Follow the instructions in the topic links below the table to use these menu settings correctly. Setting Options Description Head Alignment — Select to run the head alignment utility to correct grainy or blurry print results by realigning the print head for each... -
Page 156: Printer Status Menu Settings
Setting Options Description Select Print File List of print files in this Lets you select from a list of the print format: files saved on the connected USB memory device so you can print the file Epson_repeat_print.prn contents Delete Print File List of print files in this Lets you select from a list of the print format:... - Page 157 Caution: Before printing a network status sheet using this menu, remove any connected USB memory device from the printer to avoid losing data on the device or causing unexpected print results. Setting Options Description Network Setup IP Address Setting Select how the network assigns IP addresses Auto: uses DHCP to automatically assign IP addresses Panel: lets you assign the IP Address,...
- Page 158 Setting Options Description Preferences Power On Cleaning Select On to have the printer perform cleaning after power is turned on and before starting printing for the first time. Cleaning is also performed peridiocally after that. Cleaning may take up to 20 minutes. (Available only for White Ink Mode.) Date &...
-
Page 159: Solving Problems
The waste ink bottle is almost full. Make sure you have a replacement waste bottle. ink bottle handy. Suction Error A suction pressure error occurred while cleaning the print head. Clean the suction cap. If the message appears frequently, contact Epson for support. See manual to clean caps. - Page 160 LCD screen message Condition/solution Head cleaning set is It is almost time to replace the head cleaning set (wiper unit, anti-drying caps, nearing end of life. and flushing pad). Although you can continue printing, make sure you have a new head cleaning set handy. Head Cleaning Set Life Replace the head cleaning set (wiper unit, anti-drying caps, and flushing pad).
- Page 161 Firmware update failed. • Turn off the printer, wait a while, and turn on the printer again. Restart the printer. • Use Epson Control Dashboard for DTG to try updating again. If the message appears again, contact Epson for support. Command Error...
- Page 162 LCD screen message Condition/solution Maintenance Request A part used in the printer is nearing the end of its service life. Contact Epson for support and provide them with the displayed maintenance request code. Replace Part The error persists until you replace the requested part.
- Page 163 Icons Description Waste ink bottle status The waste ink bottle status is indicated as follows: The size of the filled square corresponds roughly to the remaining bottle capacity. The waste ink bottle is almost full. Make sure you have a new waste ink bottle ready.
- Page 164 Icons Description Ink cartridge status The ink cartridge status is indicated as follows: The size of the filled square corresponds roughly to the amount of ink remaining in the cartridge. Ink is low. Make sure you have a new ink cartridge ready. The ink cartridge is expended;...
-
Page 165: Solving Printer Problems
Parent topic: Solving Problems Related references Where to Get Help Optional Equipment and Replacement Parts Related tasks Shaking and Replacing the Ink Cartridges Replacing the Waste Ink Bottle Cleaning the Print Head Cleaning the Suction Cap Performing a Nozzle Check Adjusting the Height of the Platen Replacing the Head Cleaning Set Cleaning the Encoder Strip (Carriage Scale) and Replacing the Air Filter... -
Page 166: Solving Printing Problems
• You can adjust the delay time before the printer enters sleep mode in the Administrator menu. Parent topic: Solving Printer Problems Related references Administrator Menu Settings Solving Printing Problems Check these sections if you have problems printing with your product. Nothing Prints Cannot Print Over a Network Print Head Moves But Nothing Prints... -
Page 167: Cannot Print Over A Network
• Make sure the USB cable length does not exceed 10 feet (3 m). Parent topic: Solving Printing Problems Related topics Printing from a USB Memory Device Cannot Print Over a Network If you cannot print over a network, try these solutions: •... -
Page 168: Platen Height Error Is Displayed While Printing
If a cleaning message is displayed on the LCD screen after you have cleaned the encoder strip (carriage scale), make sure that no dust or ink cleaner remains on the encoder strip (carriage scale). If the cleaning message appears again, contact Epson for support. Parent topic:... -
Page 169: Printing Is Slow Or Stops Intermittently
Related tasks Cleaning the Encoder Strip (Carriage Scale) and Replacing the Air Filter Printing Is Slow or Stops Intermittently If printing is slow or stops in the middle of a print job, try these solutions: • Make sure Print Direction is set to Bi-Direction (High Speed) in the Garment Creator software. Disable any Uni-Directional settings. -
Page 170: Forgot The Network Password
Forgot the Network Password If you forgot the password you created during network setup, select Restore Settings from the LCD screen menu list. Parent topic: Solving Printing Problems Related references Administrator Menu Settings Solving Print Quality Problems Check these sections if you have problems with print quality. Nozzle Check Pattern Prints Incorrectly Overall Print Quality Is Poor Lines Are Misaligned... -
Page 171: Overall Print Quality Is Poor
• Perform a feed adjustment. • Make sure you are using genuine Epson ink cartridges. If you use non-Epson ink cartridges, the printed result may be faint or the colors may be inaccurate because the remaining ink level is not correctly detected. -
Page 172: Lines Are Misaligned
• Compare the printed result with the image on your computer screen. Since monitors and printers produce colors differently, printed colors and screen colors do not always look the same. • Make sure that the printer cover is closed during printing. •... -
Page 173: Grainy Or Unclear Printout
Related tasks Aligning the Print Head Grainy or Unclear Printout If your printouts are grainy or unclear, try these solutions: • Clean the suction cap. • Run a nozzle check to see if any of the print head nozzles are clogged. Then clean the print head, if necessary. - Page 174 • Make sure the pre-treatment solution is not too diluted. If the pre-treatment solution has been diluted too much, the solidity of the White ink is weakened and the edges of the image may be blurred. Try reducing the density of the White ink in the Garment Creator software or make the pre-treatment solution stronger.
-
Page 175: Ink Stains Appear Outside The Printed Areas
3. Do one of the following: • Windows 10: Right-click and select Control Panel > Programs > Programs and Features. Select the uninstall option for your Epson product, then select Uninstall/Change. Note: If you see a User Account Control window, click Yes or Continue. -
Page 176: Uninstalling Product Software - Mac
Uninstalling Product Software - Mac In most cases, you do not need to uninstall your product software before re-installing it. However, you can download the Uninstaller utility from the Epson support website to uninstall your product software as described here. -
Page 177: Where To Get Help
6. In the Epson Uninstaller screen, select the checkbox for each software program you want to uninstall. 7. Click Uninstall. 8. Follow the on-screen instructions to uninstall the software. 9. Reinstall your product software. Note: If you uninstall the printer driver and your product name remains in the Print & Fax, Print & Scan, or Printers &... -
Page 178: Technical Specifications
Technical Specifications These sections list the technical specifications for your product. Note: Epson offers a recycling program for end of life Epson products. Please go to this site (U.S) or this site (Canada) for information on how to return your Epson products for proper disposal. -
Page 179: Mac System Requirements
Rear port: for computer connection Front port: for external USB device connection Ethernet 100Base-TX Display resolution XGA (1024 × 768) or higher Note: For the latest product software available for your operating system, visit the Epson support site at epson.com/support (U.S.), epson.ca/support (Canada), or epson.com.jm/support... -
Page 180: Printer Specifications
Printer Specifications Printing method On-demand ink jet Nozzle configuration White Ink Mode: White: 360 nozzles × 4 Color: 360 nozzles × 4 colors Cleaning: 360 nozzles × 2 Color Ink Mode: 360 nozzles × 4 colors Cleaning: 360 nozzles × 6 High-Speed Color Mode: 360 nozzles ×... -
Page 181: Environmental Specifications
Rated frequency range 50/60 Hz Rated current 0.7 to 0.4 A Power consumption Printing: 55 W (approximately) Sleep mode: 10 W (approximately) Power off mode: 0.5 W or less Parent topic: Technical Specifications Environmental Specifications Temperature Operating: 50 to 95 °F (10 to 35 °C) Storage (before unpacking): –4 to 140 °F (–20 to 60 °C);... -
Page 182: Ink Cartridge Specifications
(with supplied platen installed; not including ink cartridges or waste ink tubes) Parent topic: Technical Specifications Ink Cartridge Specifications Type Epson ink cartridges Color White Ink Mode: Cyan, Magenta, Yellow, Black, White Color Ink Mode/High-Speed Color Mode: Cyan, Magenta, Yellow, Black... -
Page 183: Cleaning Cartridge Specifications
Dimensions 600 ml: Width: 1.57 inches (40 mm) Depth: 12 inches (305 mm) Height: 4.3 inches (110 mm) 250 ml: Width: 1.57 inches (40 mm) Depth: 7.87 inches (200 mm) Height: 4.3 inches (110 mm) Parent topic: Technical Specifications Cleaning Cartridge Specifications Expiration date See the date printed on the package;... -
Page 184: Pre-Treatment Solution Specifications
Pre-treatment Solution Specifications Expiration date See the date printed on the package; at normal temperature Temperature Operating: 50 to 95 °F (10 to 35 °C) Storage (in package): –4 to 104 °F (–20 to 40 °C); within 4 days at –4 °F (–20 °C) and 1 month at 104 °F (40 °C) Transporting (in package): –4 to 140 °F (–20 to 60 °C);... -
Page 185: Safety And Approvals Specifications
Safety and Approvals Specifications United States Safety: UL60950-1 EMC: FCC part 15 Subpart B class A Canada Safety: CAN/CSA C22.2 No. 60950-1 EMC: CAN/CSA-CEI/IEC CISPR 22 Class A Caution: This is a class A product. In a domestic environment, this product may cause radio interference in which case the user may be required to take adequate measures. -
Page 186: Notices
Notices Check these sections for important notices about your product. Note: Epson offers a recycling program for end of life Epson products. Please go to this site (U.S) or this site (Canada) for information on how to return your Epson products for proper disposal. - Page 187 • If you use an extension cord with the product, make sure the total ampere rating of the devices plugged into the extension cord does not exceed the cord's ampere rating. Also, make sure the total ampere rating of all devices plugged into the wall outlet does not exceed the wall outlet's ampere rating.
-
Page 188: Ink Cartridge Safety Instructions
• Leave the ink cartridges installed. Removing the cartridges can dehydrate the print head and may prevent the product from printing. • When storing or transporting the product, do not tilt it, stand it on its side, or turn it upside down; otherwise ink may leak. -
Page 189: Fcc Compliance Statement
• If you remove an ink cartridge for later use, protect the ink supply area from dirt and dust and store it in the same environment as the product. Note that there is a valve in the ink supply port, making covers or plugs unnecessary, but care is needed to prevent the ink from staining items that the cartridge touches. -
Page 190: Software License Terms
For Canadian Users This Class A digital apparatus complies with Canadian ICES-003. Cet appareil numérique de la classe A est conforme à la norme NMB-003 du Canada. WARNING This is a Class A product. In a domestic environment this product may cause radio interference, in which case the user may be required to take adequate measures. - Page 191 Version1.2 or its latest version until five (5) years after the discontinuation of same model of this printer product. If you desire to receive the source code of the Bonjour Programs, contact Epson support. You can redistribute Bonjour Programs and/or modify it under the terms of the Apple Public Source License Version1.2 or its latest version.
- Page 192 (I) claims of patents that are now or hereafter acquired, owned by or assigned to You and (ii) that cover subject matter in Your Modifications, taken alone or in combination with Original Code. 1.2 "Contributor" means any person or entity that creates or contributes to the creation of Modifications. 1.3 "Covered Code"...
- Page 193 2.1 Unmodified Code. You may use, reproduce, display, perform, internally distribute within Your organization, and Externally Deploy verbatim, unmodified copies of the Original Code, for commercial or non-commercial purposes, provided that in each instance: (a) You must retain and reproduce in all copies of Original Code the copyright and other proprietary notices and disclaimers of Apple as they appear in the Original Code, and keep intact all notices in the Original Code that refer to this License;...
- Page 194 to secure any other intellectual property rights needed, if any. For example, if a third party patent license is required to allow You to distribute the Covered Code, it is Your responsibility to acquire that license before distributing the Covered Code. 3.
- Page 195 QUALITY, OF FITNESS FOR A PARTICULAR PURPOSE, OF ACCURACY, OF QUIET ENJOYMENT, AND NONINFRINGEMENT OF THIRD PARTY RIGHTS. APPLE AND EACH CONTRIBUTOR DOES NOT WARRANT AGAINST INTERFERENCE WITH YOUR ENJOYMENT OF THE COVERED CODE, THAT THE FUNCTIONS CONTAINED IN THE COVERED CODE WILL MEET YOUR REQUIREMENTS, THAT THE OPERATION OF THE COVERED CODE WILL BE UNINTERRUPTED OR ERROR-FREE, OR THAT DEFECTS IN THE COVERED CODE WILL BE CORRECTED.
- Page 196 (a) automatically without notice from Apple if You fail to comply with any term(s) of this License and fail to cure such breach within 30 days of becoming aware of such breach; (b) immediately in the event of the circumstances described in Section 13.5(b); or (c) automatically without notice from Apple if You, at any time during the term of this License, commence an action for patent infringement against Apple;...
- Page 197 remainder of this License will continue in full force and effect. (b) Notwithstanding the foregoing, if applicable law prohibits or restricts You from fully and/or specifically complying with Sections 2 and/or 3 or prevents the enforceability of either of those Sections, this License will immediately terminate and You must immediately discontinue any use of the Covered Code and destroy all copies of it that are in your possession or control.
- Page 198 OpenSSL License --------------- /* ======================================== * Copyright (c) 1998-2017 The OpenSSL Project. All rights reserved. * Redistribution and use in source and binary forms, with or without modification, are permitted provided that the following conditions are met: * 1. Redistributions of source code must retain the above copyright notice, this list of conditions and the following disclaimer.
- Page 199 Original SSLeay License ----------------------- /* Copyright (C) 1995-1998 Eric Young (eay@cryptsoft.com) * All rights reserved. * This package is an SSL implementation written by Eric Young (eay@cryptsoft.com). * The implementation was written so as to conform with Netscapes SSL. * This library is free for commercial and non-commercial use as long as the following conditions are aheared to.
-
Page 200: Binding Arbitration And Class Waiver
1.3 Pre-Arbitration Steps and Notice. Before submitting a claim for arbitration, you and Epson agree to try, for sixty (60) days, to resolve any Dispute informally. If Epson and you do not reach an agreement to resolve the Dispute within the sixty (60) days), you or Epson may commence an arbitration. Notice to... - Page 201 Long Beach, CA 90806 (the "Epson Address"). The Dispute Notice to you will be sent to the most recent address Epson has in its records for you. For this reason, it is important to notify us if your address changes by emailing us at EAILegal@ea.epson.com or writing us at the Epson Address above. Notice of the Dispute shall include the sender's name, address and contact information, the facts giving rise to the Dispute, and the relief requested (the "Dispute Notice").
- Page 202 Epson's last written offer, if any, to settle the Dispute, Epson will: (i) pay you $1,000 or the amount of the award, whichever is greater; (ii) pay you twice the amount of your reasonable attorney's fees, if any;...
-
Page 203: Trademarks
1.8 Amendments to Section 1. Notwithstanding any provision in this Agreement to the contrary, you and Epson agree that if Epson makes any future amendments to the dispute resolution procedure and class action waiver provisions (other than a change to Epson's address) in this Agreement, Epson will obtain your affirmative assent to the applicable amendment. -
Page 204: A Note Concerning Responsible Use Of Copyrighted Materials
Epson product. Epson is not responsible for any use of this information as applied to other products. Neither Seiko Epson Corporation nor its affiliates shall be liable to the purchaser of this product or third...