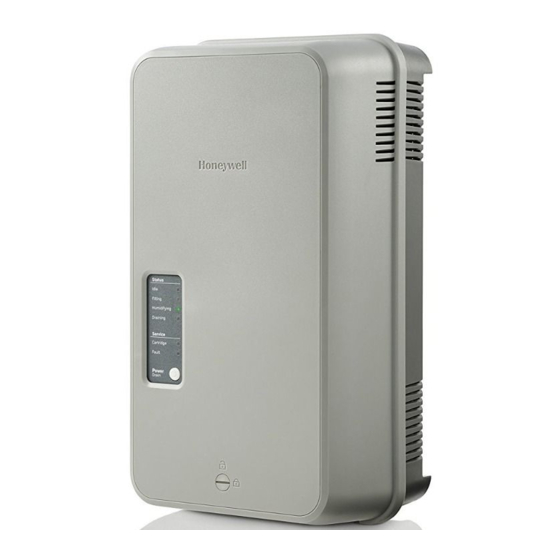
Honeywell HM750A1000 Quick Installation Manual
Advanced electrode steam humidifier
Hide thumbs
Also See for HM750A1000:
- Installation instructions manual (29 pages) ,
- Quick installation manual (9 pages)
Table of Contents
Advertisement
Available languages
Available languages
HM750A1000 Advanced Electrode Steam Humidifier
QUICK INSTALLATION GUIDE
READ AND SAVE THESE INSTRUCTIONS.
This guide should be kept by the installer. Comprehensive information
and best practices are available in the complete product guide available at
customer.honeywell.com
INCLUDED IN THE BOX
• HM750 steam humidifier
• H6062 HumidiPRO
• Steam distributor nozzle
• Rubber drain hose
• LDPE water hose
NOTE
The humidifier comes with a salt tablet inside its cylinder to boost
conductivity during humidification. The salt tablet may make a rattle noise
when the humidifier is moved.
TOOLS AND SUPPLIES NEEDED
• Flat-head screwdriver
• Wrench
MOUNTING
Location Requirements
The HM750 can be installed on a 2x4 stud beside the furnace or directly on
the air supply duct. Keep the following in mind when choosing a location to
install the humidifier:
• The humidifier must be level and mounted vertically to 2x4 stud or supply duct.
Allow minimum clearances shown in Fig. 1.
• The location must have ambient temperature between 41 and 104 °F
(5 - 40 °C) and relative humidity of 5-95% (non-condensing).
41˚ - 104˚ F
4 INCHES (102 MM)
(5˚ - 40˚ C)
5-95%
1
24 INCHES (610 MM)
1
1 INCH (25 MM) IF WIRED BEFORE MOUNTING.
36 INCHES (914 MM) FOR WIRING ACCESSIBILITY.
Fig. 1. Recommended clearances.
• Baffle (duct mount only)
• Foam gasket (duct mount only)
• Steam hose (wall mount only)
• Fittings, hardware, and mounting
template
• Phillips screwdriver
• Copper pipe (optional)
1 INCH
(25 MM)
M36860
AIR FLOW
M36946
Fig. 2. Wall mount.
Mounting to a Wall
The HM750 comes in wall-mount configuration. In this configuration, the
humidifier can be mounted to a 2x4 stud and the steam distributor nozzle,
located at the end of a 5 ft. (1.5 m) steam hose, is inserted through the air
supply duct (see Fig. 2).
NOTE
Use #8 screws at least 2 in. (5 cm) in length (included) to mount directly to a
2x4 stud Use longer screws if the stud is behind a drywall or other spacer.
NOTE
The steam distributor nozzle MUST be installed higher than the humidifier
(see Fig. 2. The steam hose should maintain an inclination of at least 4
inches (10 cm) of rise for every 12 inches (30 cm) of run.
1. Remove the humidifier cover and pull out the cylinder. Insert the top screw
until 1/4 in. (6 mm) is exposed. Hang the humidifier via its keyhole on the
screw head (see Fig. 4).
2. After making sure the humidifier is level, affix it to the stud with another
screw at the lower stud-mount location (Fig. 4).
DUCT
MOUNT
Fig. 4. Mounting locations (rear view).
3. Drill a 1-3/4" hole in the duct for the steam distributor nozzle. Attach the steam
hose to the distributor nozzle and the remote adapter on the humidifier. Then
insert the steam distributor nozzle and secure it with screws.
AIR FLOW
M36947
Fig. 3. Duct mount.
KEYHOLE
STUD
MOUNT
DUCT
MOUNT
M36932
33-00288EF-03
Advertisement
Table of Contents

Summary of Contents for Honeywell HM750A1000
- Page 1 HM750A1000 Advanced Electrode Steam Humidifier QUICK INSTALLATION GUIDE AIR FLOW READ AND SAVE THESE INSTRUCTIONS. This guide should be kept by the installer. Comprehensive information and best practices are available in the complete product guide available at customer.honeywell.com INCLUDED IN THE BOX AIR FLOW •...
-
Page 2: Mounting To The Supply Duct
HM750A1000 Advanced Electrode Steam Humidifier Mounting to the Supply Duct ELECTRICAL CONNECTIONS The HM750 can also be mounted directly onto the supply duct. In this case, the WARNING steam hose and the hose adapter must be removed as follows: 1. Remove the humidifier cover, loosen the hose clamp nearest to the cylinder steam outlet and remove the cylinder. -
Page 3: Wiring Procedure
Air Proving Device • Keep control wires as short as possible. Honeywell recommends the use of an Air Proving device such as Honeywell Differential Pressure Switch (50027910-001) to ensure steam is distributed Wiring Procedure only when there is air circulation. Connect the air proving device to the AP terminals. -
Page 4: Check-Out And Start-Up
5 YEAR WARRANTY Honeywell warrants this product to be free from defects in the workmanship or materials, under normal use and service, for a period of five (5) years from the date of purchase by the consumer. If at any time during the warranty period the product is determined to be defective or malfunctions, Honeywell shall repair or replace it (at Honeywell’s option). -
Page 5: Contenu De L'emballage
Humidificateur à électrodes HM750A1000 GUIDE D’INSTALLATION RAPIDE ÉCOULEMENT D’AIR LISEZ ET CONSERVEZ CES INSTRUCTIONS. Ce guide doit être conservé par l’installateur. Vous trouverez de plus amples renseignements et des pratiques exemplaires dans le guide détaillé du produit sur le site customer.honeywell.com CONTENU DE L’EMBALLAGE... -
Page 6: Branchement De L'alimentation
Humidificateur à électrodes HM750A1000 Montage sur conduit CÂBLAGES ÉLECTRIQUES Le HM750 peut également être monté directement sur le conduit d’approvisionnement d’air de la fournaise. Dans ce cas, le tuyau de vapeur et AVERTISSEMENT l’adaptateur du tuyau doivent être enlevés comme suit : 1. -
Page 7: Voyants Del
• Assurez-vous que les câbles de commande sont aussi courts que possible. Honeywell recommande l’utilisation d’un dispositif de vérification de présence d’air tel que le pressostat différentiel de Honeywell (50027910-001) afin Procédure de câblage de s’assurer que l’humidificateur fonctionne seulement lors qu’il y a une circulation d’air. -
Page 8: Dépannage
GARANTIE DE 5 ANS Honeywell garantit ce produit contre tout vice de fabrication ou de matériau dans la mesure où il en est fait une utilisation et un entretien convenables, et ce, pour cinq (5) ans à partir de la date d’achat par le consommateur.


