Panasonic WJ-NX400K Important Information Manual
Network disk recorder
Hide thumbs
Also See for WJ-NX400K:
- Operating instructions manual (200 pages) ,
- Installation manual (40 pages) ,
- Important information manual (30 pages)
Table of Contents
Advertisement
Quick Links
Download this manual
See also:
Installation Manual
Advertisement
Table of Contents

Related Manuals for Panasonic WJ-NX400K


Summary of Contents for Panasonic WJ-NX400K
-
Page 1: Important Information
Important Information Network Disk Recorder WJ-NX400K Model No. WJ-NX400K/G Before attempting to connect or operate this product, please read these instructions carefully and save this manual for future use. The model number is abbreviated in some descriptions in this manual. -
Page 2: Safety Information
MAINS SWITCH nor an all-all pole circuit breaker, the installation shall be carried out in accordance For U.S. and Canada: with all applicable installation rules. WJ-NX400K • The connections should comply with local electrical code. For Europe and other countries: WJ-NX400K/G... - Page 3 If you lose the fuse cover the plug must not be used until a replacement cover is obtained. A replacement fuse cover can be purchased from your local Panasonic Dealer. IF THE FITTED MOULDED PLUG IS UNSUITABLE FOR THE SOCKET OUTLET IN YOUR HOME THEN THE FUSE SHOULD BE REMOVED AND THE PLUG CUT OFF AND DISPOSED OF SAFELY.
-
Page 4: Important Safety Instructions
Safety Information (continued) Important safety instructions 1) Read these instructions. 2) Keep these instructions. 3) Heed all warnings. 4) Follow all instructions. 5) Do not use this apparatus near water. 6) Clean only with dry cloth. 7) Do not block any ventilation holes. Install in accordance with the manufacturer’s instructions. 8) Do not install near any heat sources such as radiators, heat registers, stoves, or other apparatus (including amplifiers) that produce heat. -
Page 5: Table Of Contents
Contents Safety Information ........................2 Important safety instructions ..............................4 Introduction ..........................6 Preface ...................................... 6 Standard accessories ................................7 About the user manuals ................................7 System requirements for a PC ..............................8 Trademarks and registered trademarks ............................ 8 Abbreviations .................................... 8 GPL/LGPL .................................... -
Page 6: Introduction
Introduction Preface The network disk recorders WJ-NX400K and WJ-NX400K/G (hereinafter, recorders) equipped H.265 CODEC and are designed for use within a H.265 surveillance system, and record images/audio from up to 64 network cameras (hereinafter, cameras) on the hard disk drives (HDDs). Number of cameras to be used in the system (64 cameras in basic system) can be increased to 96 and 128 (maximum) by purchasing the Additional Camera Kit (WJ-NXE40, WJ-NXE40W). -
Page 7: Standard Accessories
*3 This label is the same one found on the surface of this product. Keep it in view when installing this product in the rack. About the user manuals There are 4 sets of operating instructions for the WJ-NX400K, WJ-NX400K/G as follows. Installation Guide (Printed): Contains procedures of how to install/connect this product with devices and descrip- tions about "Easy start". -
Page 8: System Requirements For A Pc
XP compatibility mode is unavailable. Important: • Refer to the Panasonic support website (https://security.panasonic.com/support) for information about the latest operation verification of the supported operating systems and web browsers. • If using a PC that does not meet the above system requirements, it may cause problems such as slow imaging or the browser becomes inoperable. -
Page 9: Gpl/Lgpl
Disclaimer of warranty IN NO EVENT SHALL Panasonic Corporation BE LIABLE TO ANY PARTY OR ANY PERSON, EXCEPT FOR REPLACEMENT OR REASONABLE MAINTENANCE OF THE PRODUCT, FOR THE CASES, INCLUDING BUT NOT LIMITED TO BELOW: (1) ANY LOSS OR DAMAGE, INCLUDING WITHOUT LIMITATION, DIRECT OR INDIRECT, SPECIAL, CONSEQUENTIAL OR EXEMPLARY, ARISING OUT OF OR RELATING TO THE PRODUCT;... -
Page 10: Network Security
Introduction (continued) Network security As you will use this unit connected to a network, your attention is called to the following security risks. ① Leakage or theft of information through this unit ② Use of this unit for illegal operations by persons with malicious intent ③... -
Page 11: About Secure Communication Kit (Option)
Introduction (continued) Important: • The following functions are not available when registering the additional camera kit license. ∙ Display of the camera image on the main and the sub monitors connected to the recorder * Camera images will be displayed on the web browser of the PC, but not on the main or sub monitor. ∙... -
Page 12: Precautions
Precautions Refer installation work to the dealer. Grounding Installation work requires technique and experiences. Failure The power plug of this product is 2-prong plug equipped to observe this may cause fire, electric shock, injury, or dam- with a grounding terminal. Use this product after confirming age to the product. - Page 13 Power source ately. Contact your dealer about servicing. The input power source for this product is 120 V AC 60 Hz (WJ-NX400K), 220 V - 240 V AC 50 Hz/ 60 Hz About external storage devices (External HDD and USB memory) (WJ-NX400K/G).
- Page 14 Disclaimer of warranty on recoded data Panasonic assumes no responsibility or liability, directly or indirectly, for failure of recording or editing including loss of data due to any reason or cause which does not exclude repair or maintenance of this product regardless whether the subject is hard disk or other parts.
-
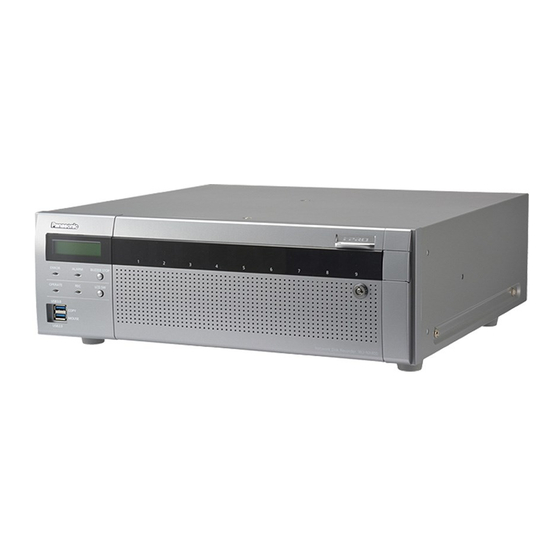
Page 15: Major Operating Controls And Their Functions
Major operating controls and their functions Front view ➀ ➁ ➂ ➃ ➄ ⑥ ⑦ ⑧ ⑫ ⑨ ⑩ ⑪ ① Error indicator [ERROR] Important: • When the indicator lights red in the RAID1/RAID5/RAID6 Blinks when an error that can become a problem for the mode, replace the HDD unit with the error immediately. - Page 16 Major operating controls and their functions (continued) ⑩ Recording indicator [REC] Lights orange when recording is being performed. ⑪ LCD menu switching button [LCD SW] Use this button to switch menus on LCD, i.e. from/to the date/time display (default) to/from the IP address display of the recorder.
-
Page 17: Inside The Front Cover
Major operating controls and their functions (continued) Inside the front cover The following illustration shows that 9 HDD units are installed with the "HDD unit holding brackets" removed. ➀ ➁ ➂ ➃ ➄ ➅ ➆ ① HDD units [Option] Lights red: Indicates that the respective hard disk drive is faulty (which can be recovered by replacing the Only the hard disk drive encased in the dedicated hard hard disk drive) -
Page 18: Rear View
Major operating controls and their functions (continued) Rear view ➀ ➁ ➂ ➃ ➄ ⑥ ⑰ ⑦ ⑧ ⑨ ⑩ ⑪ ⑫ ⑬ ⑭ ⑮ ⑯ ① Alarm/Control connector [ALARM/CONTROL] ⑧ Network port (Camera/PC port) [CAMERA/PC] This connector is used when connecting with an external Connect the recorder with a PC and cameras via a device such as a sensor or anti-theft door switch that out- network compatible with 10BASE-T, 100BASE-TX or... - Page 19 Major operating controls and their functions (continued) ⑬ External storage connector [EXT STORAGE (5 V 50 mA)] Important: • Turn on the power of all extension units first if Connect the optional extension unit (WJ-HXE400) to this connector using the dedicated connection cable connected, and then turn on the power of the recorder.
-
Page 20: User/Host Management
User/Host management It is necessary to register users who operate the recorder and hosts (PC) that accesses the recorder via a network such as a LAN. Up to 32 users can be registered. It is possible to register the following for the user information. Item Description User name... -
Page 21: Hdd Unit
HDD unit Handle the HDD units To install a hard disk drive in the recorder, it is necessary to assemble an HDD unit (encase the hard disk drive in the HDD canister). The HDD unit is designed to easily install/remove the hard disk drive in/from the recorder. Contact your dealer about purchasing, installing, and replacing the hard disk drives. -
Page 22: When You Transport The Recorder
HDD unit (continued) How to attach the HDD unit holding bracket Angle ① ① Insert the HDD unit holding bracket into the angle hole. ② HDD unit holding bracket ② Fix the HDD unit holding bracket with a screw while sliding it to the left. -
Page 23: Install The Hdd Unit In Recorder
HDD unit (continued) Install the HDD unit in recorder The illustration on this page is schematic. Details of the shape are omitted. It is possible to install the HDD unit without stopping the operation (except when RAID1/RAID5 or RAID6 mode is in operation). When the recorder has the "HDD unit holding bracket"... -
Page 24: Remove The Hdd Units From Recorder
HDD unit (continued) Remove the HDD units from recorder When removing the HDD unit, it is necessary to perform the removal process in advance. When replacing the HDD unit, it is necessary to perform the removal process/the link process. Important: •... -
Page 25: Troubleshooting
Troubleshooting Before asking for repairs, check the symptoms with the following table. Contact your dealer if a problem cannot be solved even after checking and trying the solution in the table or a problem is not described below. Symptom Cause/solution Ref. - Page 26 Troubleshooting (continued) Symptom Cause/solution Ref. pages The "Communication error: • Confirm that the camera is connected correctly and firmly. Installation Cam.cc" indication is Check the camera connection. Guide displayed on the main monitor. • If the connection is appropriate, the cable may be broken or the −...
- Page 27 Troubleshooting (continued) Inspect the power cord, power plug and connectors periodically. Symptom Cause/solution Ref. pages The power cord insulation is damaged. • The power cord, connector, or power plug is damaged. This may result in electric shock or a fire. The power cord, plug and Unplug the power plug from the AC outlet immediately, and connectors get hot during use.
-
Page 28: Specifications
Specifications • General Power source: WJ-NX400K: 120 V AC, 60 Hz WJ-NX400K/G: 220 V to 240 V AC, 50 Hz/60 Hz Power consumption: WJ-NX400K: 125 W (230 VA) WJ-NX400K/G: 125 W (245 VA) Ambient operating temperature: Main body: +5 °C - +45 °C {41 °F - 113 °F} Mouse (accessory): +5 °C - +40 °C {41 °F - 104 °F}... - Page 29 Specifications (continued) Network port (Camera/PC): 10BASE-T/100BASE-TX/1000BASE-T (RJ-45) ×1 Network port (PC): 10BASE-T/100BASE-TX/1000BASE-T (RJ-45) ×1 Maintenance port: 10BASE-T/100BASE-TX (RJ-45) ×1 Support protocols: HTTP, RTP, RTSP, TCP/IP, UDP/IP, FTP (Server), SMTP, NTP (Server, Client), DNS, SNMP, POP3 *1 Non-voltage make contact input +3.3 V pull-up Approx. 23 kΩ *2 Open collector output 24 V DC max., –200 mA max.
- Page 30 For U.S. and Canada: For Europe and other countries: Panasonic Corporation Panasonic System Communications Company of North America, Unit of Panasonic Corporation of North America http://www.panasonic.com www.panasonic.com/business/ For customer support, call 1.800.528.6747 Two Riverfront Plaza, Newark, NJ 07102-5490 Panasonic Corporation Osaka, Japan Panasonic Canada Inc.