Table of Contents
Advertisement
Quick Links
Advertisement
Table of Contents

Related Manuals for Motorola XT660d


Summary of Contents for Motorola XT660d
- Page 1 PROFESSIONAL DIGITAL TWO-WAY RADIO XT660d/XT665d FULL KEYPAD PORTABLE RADIO USER GUIDE en-US nl-NL sv-SE da-DK nb-NO tr-TR de-DE pl-PL uk-UA es-ES pt-PT fr-FR ru-RU it-IT fi-FI JUNE 2017 @MN003218A01@ © 2017 Motorola Solutions, Inc. All rights reserved. MN003218A01-AA...
-
Page 3: Table Of Contents
English Contents 2.9 Drop-in Tray Charger LED Indicators..28 2.10 Battery Meter..........29 2.11 Estimated Charging Time......29 Computer Software Copyrights........7 2.12 Charging a Radio and Battery using a Important Safety Information.......... 9 MUC - Optional Accessory........ 30 Handling Precaution............. 11 Chapter 3: Getting Started........... - Page 4 English 3.13 Accessing Menu Options......39 4.4.2 Selecting Priority Channel from a Scan List..........47 Chapter 4: Advanced Features........41 4.4.3 Removing a Channel from a 4.1 Setting............41 Scan List..........48 4.2 Channel Edit..........42 4.4.4 Adding a Channel to a Scan List... 49 4.2.1 Editing Channel Alias.....42 4.5 Message............
- Page 5 4.10.1 Activating Covert Mode....56 8.5 CTCSS And PL/DPL Codes......78 4.10.2 Deactivating Covert Mode... 56 Appendix A: Motorola Solutions Limited Warranty..85 4.11 Break-In............. 56 A.1 What is Not Covered By the Warranty..85 4.12 Radio ID Direct Call........57 A.2 Warranty Information........85...
- Page 6 English This page intentionally left blank.
-
Page 7: Computer Software Copyrights
English Computer Software Copyrights The Motorola Solutions products described in this manual may include copyrighted Motorola Solutions computer programs stored in semiconductor memories or other media. Laws in the United States and other countries preserve for Motorola Solutions certain exclusive rights for... - Page 8 English This page intentionally left blank.
-
Page 9: Important Safety Information
Two-Way Radios which contains important operating instructions for safe usage and RF energy awareness and control for Compliance with applicable standards and Regulations. For a list of Motorola Solutions-approved batteries and other accessories, visit the following website: http://www.motorolasolutions.com Send Feedback... - Page 10 English This page intentionally left blank.
-
Page 11: Handling Precaution
English Handling Precaution CAUTION: Do not disassemble the radio. This could damage radio seals and result in leak paths into XT600d Series Digital Portable radio meets IP55 the radio. Radio maintenance should only be specifications, allowing the radio to withstand adverse field done in service depot that is equipped to test conditions such as being used in rain or dusty environment. - Page 12 English This page intentionally left blank.
-
Page 13: Introduction
English Introduction This user guide covers the operation of your radios. Your dealer or system administrator may have customized your radio for your specific needs. Check with your dealer or system administrator for more information. You can consult your dealer or system administrator about the following: •... - Page 14 English This page intentionally left blank.
-
Page 15: Batteries And Chargers Safety Information
150 ft (45.72 m). Safety Information 5 Do not operate the charger if it has been broken or damaged in any way. Take it to any qualified Motorola This document contains important safety and operating Solutions service representatives. - Page 16 English • Connect the equipment to an outlet which is easy to access and near. • For equipment using fuses, replacements must comply with the type and rating specified in the equipment instructions. • Maximum ambient temperature around the power supply equipment must not exceed 40 °C (104 °F).
-
Page 17: Chapter 1: Radio Overview
English Radio Overview This chapter explains the buttons and functions to control the radio. Send Feedback... -
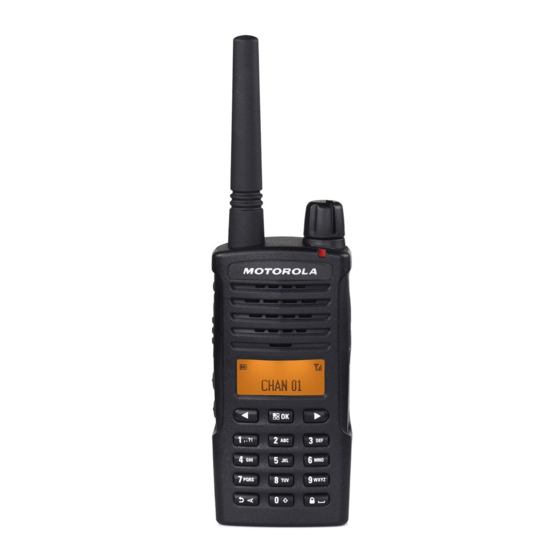
Page 18: Control Buttons
The following table explains the functions of each buttons on the radio: Table 1: Control Buttons Reference Table Number Description Antenna For model XT660d/XT665d, the antenna is non-removable. Loop hole for strap Recording Button Press the button to toggle on off the recording transmission feature. See Recording on page for more details. - Page 19 English Number Description Shows battery status, power-up status, radio call information, and scan status. Speaker Microphone User has to speak clearly into the microphone when sending a message. LCD Display Monochrome Display with Orange color backlight. Menu/OK and Navigation Buttons Press to enter a menu or to confirm selection;...
- Page 20 Battery Latch Battery XT600d Series comes with a Standard Capacity Li-Ion battery. Other batteries may be avail- able. See Table 4: Motorola Solutions Authorized Batteries on page 28 for more details. Table 2: Default Setting for SB1 and SB2 buttons Buttons...
-
Page 21: Radio Specifications
Your dealer or system administrator may have customized your radio for your specific needs. Check with your dealer or system administrator to determine how your radio has been programmed. Radio Specifications The following table explains the radio specifications: Table 3: XT660d/XT665d Radio Specifications XT660d XT665d Frequency Band (MHz) - Page 22 English XT660d XT665d Model Label Send Feedback...
-
Page 23: Chapter 2: Batteries And Chargers
The following steps explain how Li-Ion Battery is installed: 25% discharge, lasts even longer. Motorola Solutions batteries are designed specifically to be used with a Motorola Solutions charger and vice versa. Charging batteries with non-Motorola Solutions equipment may lead to battery damage and void the battery warranty. -
Page 24: Removing Li-Ion Battery
Single Unit Charger (SUC) 1 Turn the radio off. 2 With the Motorola Solutions logo facing up, fit the tabs (2) at the bottom of the battery into slots (3). Your radio comes with one Drop-in Tray SUC, one power supply (also known as Transformer), and a set of adaptors. - Page 25 English Your can switch your power supply to suit the adaptors that NOTICE: come with your radio package. Use the adaptor of the The adaptor shown in the pictures are for region you are located at. illustration purposes only. The adaptor you install may be different depending on region.
-
Page 26: Holster
Slide the radio and remove from the holster. Charging The Radio With radio attached, place battery in a Motorola Solutions approved Drop-in Tray SUC or Multi-Unit Charger (MUC). Charging Radio with the Drop-in... -
Page 27: Charging A Stand-Alone Battery
English 3 Insert the radio into the charger with the radio facing the front, as shown. NOTICE: When charging a battery attached to a radio, turn the radio off to ensure a full charge. See Operational Safety Guidelines on page 15 for more information. -
Page 28: Drop-In Tray Charger Led Indicators
3 Align the slots in the battery with the alignment ribs in Normally, re-po- the Drop-in Tray SUC. sitioning the Battery Faulty Red Fast Blink battery pack will Table 4: Motorola Solutions Authorized Batteries correct this is- Part Number Description sue. Battery temper- PMNN4434_R... -
Page 29: Battery Meter
(≤10% when • Confirm that the battery being used with the radio is 100–70% 70–30% blinking) listed in Table 4: Motorola Solutions Authorized Batteries on page 2.11 2.10 Estimated Charging Time Battery Meter The following provides the charging solutions with The battery meter located in the upper left corner of the estimated charging time of the battery. -
Page 30: Charging A Radio And Battery Using A Muc - Optional Accessory
English 2.12 2 Insert the power cord plug into the MUC’s dual pin Charging a Radio and Battery using connector (1) at the bottom of the MUC. a MUC - Optional Accessory 3 Plug the power cord into an AC outlet. The MUC allows drop-in charging of up to six radios or 4 Turn the radio off. -
Page 31: Chapter 3: Getting Started
English Getting Started NOTICE: Do not hold the radio too close to your ear when the volume is high or while adjusting the volume. This section helps you to get familiar with the basic operation of the radio. Radio Display Turning Radio On/Off To turn the radio on, rotate the On/Off/Volume Knob clockwise. - Page 32 English The following table describes the icons: Icon Description 6.i. The radio is communicating in a Group Icon Description Call. The number of bars (0–3) shown indi- 6.ii. The radio is communicating in a Pri- cates the charge remaining in the bat- vate Call.
-
Page 33: Selecting A Channel
English NOTICE: 2 To respond, hold the radio vertically 1 to 2 inches The radio display shown here is for icon location (2.5 to 5 cm) from mouth. Press the PTT button to only. Each radio display may appear differently talk;... -
Page 34: Talk Range
English To establish a proper two-way communication, the Talk Range Channel, Frequency, and Interference Eliminator Codes must be the same on both radios. This depends on your XT600d Series radios have been designed to maximize radio pre-programmed profile: performance and improve transmission range in the field. Channel To avoid interference, it is recommended that the distance Current channel that the radio is using, depending upon... -
Page 35: Vox And Ivox
English Radio Status LED Indication 'Idle' Programming Mode/Channel Mode Blinking red in heartbeat pace. Channel Busy Shows solid orange. Low Battery Blinks orange in heartbeat pace. Scanning Blinking red in fast pace. VOX/iVOX Mode Blinking red in double heartbeats pace. VOX/iVOX PTT Shows solid red to indicate radio is transmitting. -
Page 36: Setting Up Vox
English iVOX Setting up VOX iVOX is only supported without audio accessories The following steps explain how to setup VOX: attach to radio. When iVOX is activated, radio microphone active all the time which radio will automatically transmit upon detecting signal without having user to press the PTT button. -
Page 37: Setting Up Ivox
There is a short delay between the time you start PTT button or by removing the audio accessory. talking and when your radio transmits. NOTICE: Contact your Motorola Solutions point of purchase 3.9.3 to order accessories. Adjusting iVOX Sensitivity The sensitivity of the radio's accessory or microphone can 3.9.2... -
Page 38: Resetting To Factory Defaults
English Enabling or Disabling Beep Tone Press and navigate to VOX LEVEL. The following steps explain how to enable and disable beep tone: Press and navigate to the suitable sensitivity level. Press and navigate to SETTING. Press to confirm on selection. Press and navigate to BEEP TONE. -
Page 39: Accessing Menu Options
English Press and hold for 4 seconds. Press to see the following features: • SETTING Lock icon appears to indicate keypad and side • CHANNEL EDIT buttons are locked. • CONTACTS • SCAN Press and hold for 4 seconds. • MESSAGE •... - Page 40 English This page intentionally left blank.
-
Page 41: Chapter 4: Advanced Features
English Advanced Features Types of Set- Options Default Value ting • DUTCH Setting • PORTUGUESE • GERMAN In the SETTING menu, there are a few items you are able to directly change the configuration on the radio without • POLISH going through CPS. -
Page 42: Channel Edit
English 3 When the display shows the required channel alias, Press and navigate across the list of selections available. press and navigate to CHAN ALIAS. , or to make your selection. Press and enter the required alphabets or numbers. Channel Edit Press to confirm on selection. -
Page 43: Editing Channel Code
English Press and navigate to FREQUENCY. Press and navigate to PL/DPL. Press and navigate through the list of Press and enter the required numbers. frequencies to select. Press to confirm on selection. Press to confirm on selection. The radio displays COMPLETE. The radio displays COMPLETE. -
Page 44: Making A Call From Contacts Menu
English Private Call 3 Once the radio displays the required Call ID, press A call from an individual radio to another individual the PTT button to make your call. radio. In order to make Private Call, your radio must be programmed to initiate a Private Call. -
Page 45: Adding New Contact To Contact List
English Features Description to scroll to ADD NEW and press Initiate Remote Monitor request will REMOTE MON to enter. result in the target radio's microphone and transmitter activated to be re- motely monitored. Enter the new radio ID numbers and press Initiate Radio Enable command will confirm the ID. -
Page 46: Quick Contact
English 4.3.5.1 1 Hold the radio vertically 1 to 2 inches (2.5 to 5.0 cm) Editing Quick Contact from your mouth. The following steps explain how to edit quick contact: 2 Press the side button that have been programmed with One Touch Access. Press and navigate to CONTACTS. -
Page 47: Making A Quick Contact Call
English 4.3.5.2 Press and navigate to SCAN. Making a Quick Contact Call The following steps explain how to make a quick contact Press and use to scroll call: through the Scan List. At Home screen, press Once the Scan List is selected, press 2 Press the number through the Alphanumeric 4 Navigate to SET ACTIVE. -
Page 48: Removing A Channel From A Scan List
English The following steps explain how to select priority channel Removing a Channel from a Scan List from a scan list: The following steps explain how to remove a channel from a scan list: Press and navigate to SCAN. Press and navigate to SCAN. -
Page 49: Adding A Channel To A Scan List
English Press to confirm on selection. Press to confirm on selection. The radio displays COMPLETE. 4.4.4 Adding a Channel to a Scan List The following steps explain how to add a channel to a scan Message list: NOTICE: This feature is only available in Digital Mode. Press and navigate to SCAN. -
Page 50: Creating New Text Message
English Selections Descriptions Press to confirm on send. Repository of sent messages. User SENT The radio displays a list of contacts in Contact List. can forward or reply the messages here. Scroll to the required contact and press 4.5.1 send. Creating New Text Message The radio displays SENT. -
Page 51: Sending Quick Text
English 4 Scroll through the messages in the inbox. Press Press and navigate to MESSAGE. to select the following actions. Press to enter the Message screen. 5 Perform one of the following: • To create new text message to reply sender, Navigate to QUICK TEXT and press navigate to QUICK REPLY and select NEW TEXT. -
Page 52: Forwarding Or Deleting Sent Message
English 4.5.4 Press to confirm on selection. Forwarding or Deleting Sent Message The following steps explain how to forward and delete sent message: Recording NOTICE: Press and navigate to MESSAGE. This feature is only available in Digital Mode. Once Voice Recording is activated, every conversation in Press to enter the Message screen. -
Page 53: Replaying Or Deleting Recorded Files
English 3 Perform one of the following: Scroll through the list of record files and press • To start recording, navigate to START and press to select. or press and hold the Recording button. 5 Perform one of the following: •... -
Page 54: Call Log
English 4.7.1 Navigate to TIME LEFT and press . The radio Saving Contact from Call Log to display shows the minutes available for recording. Contact List The following steps explain how to save contact from call log to contact list: Call Log Call Log enables user to check the call history of the radio. -
Page 55: Zone
English Once the required zone is displayed, press Zone select. A zone is a group of channels. There are four zones available and each zone consist of different channels. The following table shows the arrangement of the channels for Radio Information each zone: Your radio contains information on various general Zone... -
Page 56: Activating Covert Mode
English system administrator for more information on this 4.11 configuration. Break-In Break-in allows user to transmit to another user that you 4.10.1 want to talk to. Another user will receive it after the Activating Covert Mode transmission is finished. This feature allows user to gain first priority in transmitting and block other user from The following steps explain how to activate covert mode: transmitting. -
Page 57: Radio Id Direct Call
English Radio ID Direct Call 3 Perform one of the following: • To break-in successfully, press on the PTT button Direct call is a feature that enables radio to transmit call of the radio with WAIT on the display within 3 using the Radio ID. -
Page 58: Silent Mode
English • Check with your dealer or system administrator for more information on this configuration. 4.14 Silent Mode Silent mode is enabled through CPS. Check with your dealer or system administrator for more information on this configuration. There are three selections that can be programmed in CPS: Selections Description... -
Page 59: Chapter 5: Setting Up The Radio
English Setting up the Radio Setting up using CPS This chapter explains how to set up the radio. NOTICE: Your dealer or system administrator may have customized your radio for your specific needs. Check with your dealer or system administrator to determine how your radio has been programmed. -
Page 60: Cloning Radios
NOTICE: (*) CPS Programming Cable P/N# HKKN4027_ is an accessory sold separately. Please contact your Motorola Solutions point of purchase for more information. Cloning Radios You can clone XT600d Series radio profiles from one Source radio to a Target radio by using any one of these methods: •... -
Page 61: Operating Instructions
English 2 Unplug all cables (power supply or USB cables) from the SUCs. 3 Connect the cloning cable with USB Converter, plug one side of the cloning cable's mini USB connector Figure 2: CPS Cable to the first SUC and the other side to the second SUC. -
Page 62: What To Do If Cloning Fails
NOTICE: What To Do If Cloning Fails This cloning cable is designed to operate only with compatible Motorola Solutions SUC The radio audible voice will announce “Fail” indicating that RLN6175 and PMLN6394. the cloning process has failed. In the event that the cloning... -
Page 63: Chapter 6: Troubleshooting
English Troubleshooting The following table explains the ways to troubleshoot if the symptom occurred: Symptom and Solutions If... Then... No Power Recharge or replace the Li-Ion battery. Extreme operating temperatures may affect battery life. About Li-Ion Battery on page Hearing other noises or conversation on a chan- Confirm Interference Eliminator Code is set. - Page 64 English If... Then... Audio quality not good enough Radio settings might not be matching up correctly. Double check frequencies, codes, and bandwidths to make sure they are identical in all radios. Limited talk range Steel and/or concrete structures, heavy foliage, build- ings, or vehicles decrease range.
- Page 65 English If... Then... Obstructions and operating indoors, or in vehicles, may interfere. Change locations. See Talk Range on page Heavy static or interference Radios are too close; they must be at least 5 ft apart. Radios are too far apart or obstacles are interfering with transmission.
- Page 66 English If... Then... Use the CPS to ensure that the VOX Sensitivity level is not set to '0'. Accessory not working or not compatible. VOX and iVOX on page Battery does not charge although it has been Check drop-in tray charger is properly connected and placed in the drop-in charger for a while correspond to a compatible power supply.
-
Page 67: Chapter 7: Use And Care
English Use and Care This chapter shows the usage of using radio correctly: Precaution Use a soft damp cloth to clean the Do not use alcohol or cleaning solu- Do not immerse in water exterior tions If the radio is submerged in water, Do not use radio until completely Turn radio off and remove batteries Dry with soft cloth... - Page 68 English This page intentionally left blank.
-
Page 69: Chapter 8: Frequency And Code Chart
Analogue Frequency and Code Charts The charts in this section provide Frequency and Code information. These charts are useful when using the Motorola Solutions XT600d Series two-way radios with other business radios. Table 7: XT660d Default Channel Frequency and Interference Eliminator Code... - Page 70 English Zone Channel Name Frequency (MHz) Codes CHAN 09 446.00625 121–DPL 754 CHAN 10 446.01875 121–DPL 754 CHAN 11 446.03125 121–DPL 754 CHAN 12 446.04375 121–DPL 754 CHAN 13 446.05625 121–DPL 754 CHAN 14 446.06875 121–DPL 754 CHAN 15 446.08125 121–DPL 754 CHAN 16 446.09375...
- Page 71 English Zone Channel Name Frequency (MHz) Codes CHAN 06 446.06875 1–67.0 Hz CHAN 07 446.08125 1–67.0 Hz CHAN 08 446.09375 1–67.0 Hz CHAN 09 433.07500 1–67.0 Hz CHAN 10 433.30000 1–67.0 Hz CHAN 11 433.55000 1–67.0 Hz CHAN 12 433.80000 1–67.0 Hz CHAN 13 434.05000...
-
Page 72: Digital Frequency And Code Chart
English Digital Frequency and Code Chart The chart in this section provide Frequency and Code information. This chart is useful when using the Motorola Solutions XT600d Series two-way radios with other business radios. Table 9: XT660d Default Channel Frequency and Interference Eliminator Code... - Page 73 English Zone Channel Name Frequency (MHz) Codes CHAN 28 446.171875 Color code–12 CHAN 29 446.178125 Color code–13 CHAN 30 446.184375 Color code–14 CHAN 31 446.190625 Color code–15 CHAN 32 446.196875 Color code–16 Table 10: XT665d Default Channel Frequency and Interference Eliminator Code Zone Channel Name Frequency (MHz)
-
Page 74: Xt660D Full Frequency List
Color code–15 CHAN 32 446.096875 Color code–16 XT660d Full Frequency List WARNING: *Only 446.0–446.1 MHz Analogue Frequencies are available by default. 446.1–446.2 MHz Analogue Frequencies should only be used in countries where these frequencies are allowed by governement authorities. 446.1–446.2 MHz Analogue Frequencies are not allowed in Russia. - Page 75 446.11875 446.16875 446.03125 446.08125 446.13125 446.18125 446.04375 446.09375 446.14375 446.19375 WARNING: *446.0–446.1 MHz Digital Frequencies for XT660d is only available to be manufactured on or after January 2018. dPMR446 Frequency (MHz) *446.003125 *446.053125 446.103125 446.153125 *446.009375 *446.059375 446.109375 446.159375 *446.015625 *446.065625...
-
Page 76: Xt665D Full Frequency List
English XT665d Full Frequency List PMR446 Frequency (MHz) 446.00625 446.03125 446.05625 446.08125 446.01875 446.04375 446.06875 446.09375 dPMR446 Frequency (MHz) 446.003125 446.028125 446.053125 446.078125 446.009375 446.034375 446.059375 446.084375 446.015625 446.040625 446.065625 446.090625 446.021875 446.046875 446.071875 446.096875 LPD433 Frequency (MHz) 433.07500 433.52500 433.97500 434.42500 433.10000... -
Page 77: Send Feedback
English LPD433 Frequency (MHz) 433.17500 433.62500 434.07500 434.52500 433.20000 433.65000 434.10000 434.55000 433.22500 433.67500 434.12500 434.57500 433.25000 433.70000 434.15000 434.60000 433.27500 433.72500 434.17500 434.62500 433.30000 433.75000 434.20000 434.65000 433.32500 433.77500 434.22500 434.67500 433.35000 433.80000 434.25000 434.70000 433.37500 433.82500 434.27500 434.72500 433.40000 433.85000 434.30000... -
Page 78: Ctcss And Pl/Dpl Codes
English CTCSS And PL/DPL Codes Table 11: CTCSS Codes CTCSS CTCSS 67.0 136.5 71.9 141.3 74.4 146.2 77.0 151.4 79.7 156.7 82.5 162.2 85.4 167.9 88.5 173.8 91.5 179.9 94.8 186.2 97.4 192.8 100.0 203.5 103.5 210.7 Table continued… Send Feedback... - Page 79 English CTCSS CTCSS 107.2 218.1 110.9 225.7 114.8 233.6 118.8 241.8 123.0 250.3 127.3 122 (*) 69.3 131.8 Table 12: PL/DPL Codes Code Code Code Inverted DPL 69 Inverted DPL 70 Inverted DPL 71 Inverted DPL 72 Inverted DPL 73 Inverted DPL 74 Table continued…...
- Page 80 English Code Code Code Inverted DPL 75 Inverted DPL 76 Inverted DPL 77 Inverted DPL 78 Inverted DPL 79 Inverted DPL 80 Inverted DPL 81 Inverted DPL 82 Inverted DPL 83 Inverted DPL 84 Inverted DPL 85 Inverted DPL 86 Inverted DPL 87 Inverted DPL 88 Inverted DPL 89...
- Page 81 English Code Code Code Inverted DPL 91 Inverted DPL 92 Customized PL Inverted DPL 93 Customized PL Inverted DPL 94 Customized PL Inverted DPL 95 Customized PL Inverted DPL 96 Customized PL Inverted DPL 97 Customized PL Inverted DPL 98 Inverted DPL 39 Inverted DPL 99 Inverted DPL 40...
- Page 82 English Code Code Code Inverted DPL 47 Inverted DPL 107 Inverted DPL 48 Inverted DPL 108 Inverted DPL 49 Inverted DPL 109 Inverted DPL 50 Inverted DPL 110 Inverted DPL 51 Inverted DPL 111 Inverted DPL 52 Inverted DPL 112 Inverted DPL 53 Inverted DPL 113 Inverted DPL 54...
- Page 83 English Code Code Code Inverted DPL 63 Inverted DPL 123 Inverted DPL 64 Customized DPL Inverted DPL 65 Customized DPL Inverted DPL 66 Customized DPL Inverted DPL 67 Customized DPL Inverted DPL 68 Customized DPL Send Feedback...
- Page 84 English This page intentionally left blank.
-
Page 85: Appendix A: Motorola Solutions Limited Warranty
Please return your radio to following the instructions in this user guide. your dealer or retailer to claim your warranty service. Do not return your radio to Motorola Solutions. To be eligible to • Defects or damage from misuse, accident or neglect. - Page 86 English This page intentionally left blank.
-
Page 87: Appendix B: Accessories
English Accessories Table 15: Cables Part No. Description Table 13: Audio Accessories HKKN4028_ Radio to Radio Cloning Cable HKKN4027_ CPS Programming Cable Part No. Description HKLN4601_ Surveillance kit with in-line microphone Table 16: Chargers and PTT HKLN4599_ D-Style Earpiece with in-line micro- Part No. - Page 88 XT600d Series Carry Holster PMLN7709_ XT600d Series Leather Carry Case NOTICE: Certain accessories may or may not be available at the time of purchase. Please contact your Motorola Solutions Point of Purchase or visit http:// www.motorolasolutions.com for latest information on accessories availability and new accessories models.
- Page 90 MOTOROLA, MOTO, MOTOROLA SOLUTIONS and the Stylized M Logo are trademarks or registered trademarks of Motorola Trademark Holdings, LLC and are used under license. All other trademarks are the property of their respective owners. © 2017 Motorola Solutions, Inc. All rights reserved.