
Related Manuals for Westinghouse QL045


Summary of Contents for Westinghouse QL045
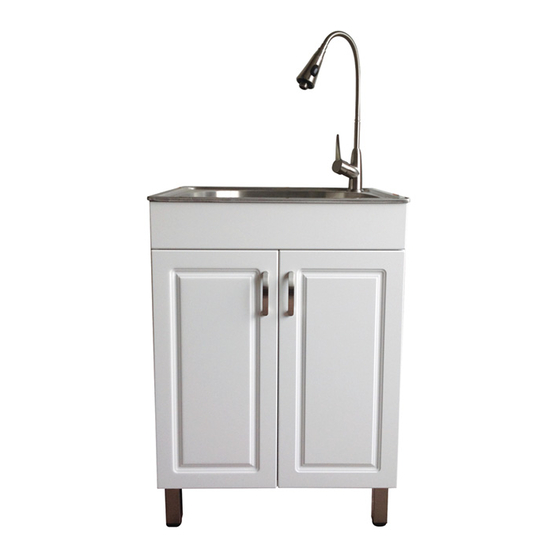
- Page 1 UTILITY SINK, STORAGE CABINET & FAUCET ALL-IN-ONE TOUT-EN-UN ÉVIER UTILITAIRE, ARMOIRE DE RANGEMENT ET ROBINET OWNER’S MANUAL ITEM # 12345007 MANUAL DE L’UTILISATEUR # QL045...
-
Page 2: Table Of Contents
Table of Contents Table of Contents . . . . . . . . . . . . . . . . . . . . . . . . . . . . 2 Door Handle Installation . -
Page 3: Warranty
Warranty ONE YEAR LIMITED WARRANTY A thorough inspection must be made before installation and any damage must be promptly reported . We will not be liable for failures or damage that could have been discovered or avoided by proper inspection and testing prior to installation . Conglom Kitchen &... -
Page 4: Pre-Installation
Pre-Installation TOOLS/MATERIALS REQUIRED (NOT SUPPLIED) Adjustable Needle nose Phillips wrench pliers screwdriver Utility knife Pipe wrench Sealant Carpenter’s level Hacksaw Safety gloves Safety goggles Masking Tape PARTS REQUIRED (NOT SUPPLIED) P-Trap Tail Pipe Supply Line... -
Page 5: Package Contents
Pre-Installation (continued) PACKAGE CONTENTS Part Description Quantity Cabinet Utility Sink Faucet Strainer Basket Strainer Assembly Door Handles Leveling Legs Door Handle Screws Leveling Leg Screws Allen Key CONGLOMKB .COM Please contact customer.service@conglomkb.com or 1-877-333-0098 for further assistance . -
Page 6: Installation
Installation FAUCET ASSEMBLY/INSTALLATION 1 . Carefully take out all the parts of the faucet assembly (C) . The faucet is pre-assembled, except for the sprayer head . 2 . Take the washer, gasket and retaining ring off of the faucet body . 3 . -
Page 7: Strainer Installation
Installation (continued) STRAINER INSTALLATION Sealant 1 . Apply a ring of sealant to the underside of the strainer flange. 2 . Insert the strainer body into the sink . Basket 3 . Assemble the rubber gasket, friction washer and locknut onto the strainer body from under the sink . -
Page 8: Leveling Leg Installation
Installation (continued) INSTALLING THE LEVELING LEGS CAUTION: Do not place side load on the leveling legs when righting the cabinet as they may break . Carefully check the utility sink for damage and/or missing parts prior to installation . If there is any damage or if you are missing parts, do not proceed with the installation . -
Page 9: Door Position Adjustment
Installation (continued) DOOR POSITION ADJUSTMENT If the doors need to be repositioned, the hinges can be adjusted to ensure a precise fit with the cabinet. 1 . The lateral adjustment screw adjusts the door left or right . 2 . Horizontal adjustment of the screws adjust the door forward and backward . -
Page 10: Placement
Installation (continued) PLACEMENT Move the assembled unit to its final location. Final hook up of the supply lines and drain system can now be completed. SUPPLY LINES (NOT INCLUDED) The supply lines that attach the faucet to the household water system, are not supplied with this unit . They need to be purchased separately . -
Page 11: Care And Cleaning
Care and Cleaning UTILITY SINK CABINET After use, always rinse your sink with tap water to Remove dust and dry dirt with a soft, damp cloth . dilute and remove deposits . Clean grease, oil, paint and ink stains with isopropyl Towel dry after use whenever possible to prevent (rubbing alcohol) . -
Page 12: Service Parts
Service Parts If you are missing parts or if you require replacement parts, please contact our customer service team at customer.service@conglomkb.com or 1-877-333-0098, 8:30 am - 5 pm, EST, Monday–Friday . Identify the required part(s) and have the part number(s) ready . Part Description Code Quantity... -
Page 13: Manuel De L'utilisateur
Table des matières OWNER’S MANUAL . . . . . . . . . . . . . . . . . . . . . . . . . . . 2 Table des matières . -
Page 14: Garantie
Garantie GARANTIE LIMITÉE D’UN AN Inspecter minutieusement le produit avant l’installation et signaler tout dommage sans délai . Nous ne serons pas responsables des défaillances ou des dommages qui auraient dû être découverts ou évités par une inspection adéquate et des essais avant l’installation . Conglom Kitchen and Bath garantit ce produit contre tout défaut dans les matériaux ou la fabrication, pour une période d’un (1) an à... -
Page 15: Préinstallation
Préinstallation OUTILS/MATÉRIAUX REQUIS (NON INCLUS) Tournevis Clé Pinces Phillips Couteau à lame Clé à molette Mastic retractable Gants de Niveau à bulle Scie à métaux sécurité Lunettes de Ruban sécurité Cache PIÈCES REQUISES (NON INCLUS) Tuyau de Tuyaux Siphon-P vidange d’alimentation CONGLOMKB .COM Veuillez contacter customer.service@conglomkb.com ou 1-877-333-0098 pour toute assistance supplémentaire . -
Page 16: Contenu De L'emballage
Préinstallation (suite) CONTENU DE L’EMBALLAGE Pièce Description Quantité Armoire Évier Robinet Panier de crépine Assemblage de la crépine Poignées de porte Pattes de nivellement Vis de poignées de porte Vis des pattes de nivellement Clé Allen... -
Page 17: Installation
Installation INSTALLATION DU ROBINET 1 . Sortir soigneusement toute les pièces de l’ensemble de robinet (C) . Le robinet est préassemblé, à l’exception de la tête de pulvérisation . 2 . Enlever la rondelle, le joint d’étanchéité et la bague de retenue du corps du robinet . -
Page 18: Installation De La Crépine
Installation (suite) INSTALLATION DE LA CRÉPINE Mastic 1 . Appliquer une bague d’étanchéité en mastic de plomberie ou scellant en dessous de la bride du corps de la crépine . 1 . Insérer le corps de la crépine dans l’évier utilitaire . Panier 2 . -
Page 19: Installation Des Pattes De L'armoire
Installation (suite) INSTALLATION DES PATTES DE NIVELLEMENT ATTENTION : Ne pas placer de charge latérale sur les pattes lorsque vous redressez l’armoire. Vérifiez soigneusement que l’unité ne comporte aucun dommage ou pièces manquantes. Si vous constatez des dommages ou des pièces manquantes, veuillez communiquer avec le service à... -
Page 20: Ajustement De La Position Des Portes
Installation (suite) AJUSTEMENT DE LA POSITION DES PORTES Si les portes doivent être repositionnées, les charnières peuvent être réglées de façon à s’adapter précisément avec l’armoire . 1 . La vis de réglage latérale ajuste la porte à gauche ou à droite . -
Page 21: Mise En Place
Installation (suite) MISE EN PLACE Déplacer l’unité assemblée à l’emplacement final. Si nécessaire niveler l’unité en ajustant les pieds de nivèlement. ASSEMBLAGE DES TUYAUX D’ALIMENTATION Les tuyaux d’alimentation qui raccordent le robinet au système d’eau résidentiel ne sont pas fournis avec cette unité . Ils doivent être achetés séparément . -
Page 22: Soin Et Nettoyage
Soin et Nettoyage ÉVIER UTILITAIRE ARMOIRE À faire À faire Après l’utilisation, toujours rincer votre évier avec de l’eau de Éliminer la poussière et la saleté sèche avec un linge doux robinet pour diluer et enlever les dépôts . et humide . Si possible, sécher à... -
Page 23: Pièces De Rechange
Pièces de rechange Si des pièces sont manquantes ou vous avez besoin de pièces de rechange, veuillez nous contacter au customer.service@conglomkb.com ou 1-877-333-0098 (service disponible en anglais et français, de lundi au vendredi, 8h30 à 17h, H .N .E .). Veuillez identifier les pièces nécessaires et ayez les codes à... - Page 24 Imported by / Importé par : St-Laurent, Québec, H4S 2C3 1-877-333-0098 | customer.service@conglomkb.com (Service available in English and French, Monday - Friday from 8:30am - 5pm EST) / (service disponible en anglais et français, de lundi au vendredi, 8h30 à 17h, H.N.E.) www.conglomkb.com Made in China / Fabriqué...