Table of Contents
Advertisement
Advertisement
Table of Contents

Related Manuals for Plustek eScan Series


Summary of Contents for Plustek eScan Series
- Page 1 Installation Usage & Maintenance...
- Page 2 Trademarks © 2014 Plustek Inc. All rights are reserved. No portion of this document may be reproduced without permission. All trademarks and brand names mentioned in this publication are property of their respective owners. Liability While all efforts have been made to ensure the accuracy of all contents in this...
-
Page 3: Table Of Contents
Table of Contents ....................1 NTRODUCTION How to Use This Guide....................1 Conventions of This Guide ..................1 A Note about Icons ....................... 1 Safety Precautions...................... 2 Box Contents ......................3 Scanner Overview ...................... 4 I. I ..............6 HAPTER NSTALLING THE CANNER Installing and Setting up the Scanner ................. - Page 4 Replacing the Pad Module ....................68 Replacing the Feed Roller ....................70 Calibrating the Scanner .................... 73 IV. T ................ 75 HAPTER ROUBLESHOOTING Clearing Paper Jams ....................75 A: S ................77 PPENDIX PECIFICATIONS B: C ..........78 PPENDIX USTOMER ERVICE AND ARRANTY Service &...
-
Page 5: Introduction
NTRODUCTION Thank you for choosing us as your scanner supplier. Your new scanner will improve the professionalism of your day-to-day computing tasks by allowing you to input images and electronic text into your computer system. You can easily scan single-sided or double-sided documents with your scanner. Like all of our products, your new scanner is thoroughly tested and backed by our reputation for unsurpassed dependability and customer satisfaction. -
Page 6: Safety Precautions
A procedure that must be followed carefully to prevent injury, or accidents. Warning Instructions that are important to remember and may prevent mistakes. Attention Optional tips for your reference. Information AFETY RECAUTIONS Before using this device, please read the following important information to eliminate or reduce any possibility of causing damage and Warning personal injury. -
Page 7: Box Contents
ONTENTS 1. Scanner 2. AC Adapter 3. Paper Chute 4. Quick Guide 5. Application CD-ROM 6. Calibration Sheet 7. Cleansing Cloth 8. Pad Module Save the box and packing materials in case you need to transport this scanner in the future. -
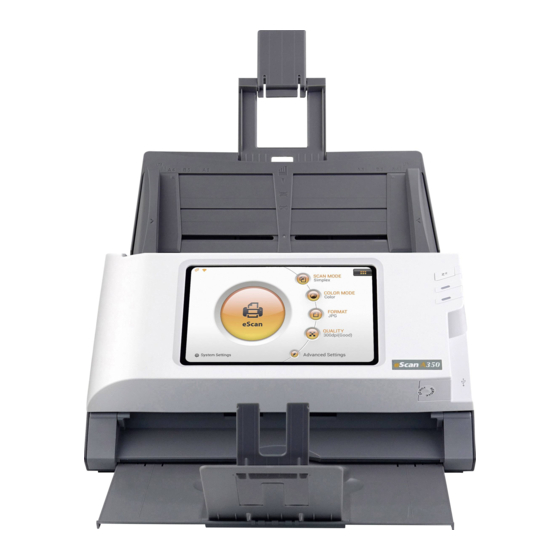
Page 8: Scanner Overview
CANNER VERVIEW 1. STACKER—Keeps the paper in place. Extend it in case of longer paper. 2. PANEL UNIT—ADF cover with the touch panel. 3. TOUCH PANEL—Use this touch panel to operate the scanner. 4. PANEL UNIT OPEN LEVER—Opens the panel unit. Pull it to open the panel unit when you need to clear paper jam or clean the scanner. - Page 9 13. POWER SWITCH—Use this to turn the scanner ON or OFF. 14. POWER RECEPTOR—Connects the scanner to a standard AC power outlet by the included AC adapter. 15. ETHERNET PORT—Connects the scanner to a port on the Ethernet hub by the Ethernet cable.
-
Page 10: Chapter I. Installing The Scanner
A list of the package contents is provided in the “Box Contents” section of this guide. NSTALLING AND ETTING UP THE CANNER Please follow the step-by-step procedures described below to install the Plustek scanner. Choose a Proper Site First! Always place your scanner on a level, smooth... - Page 11 2. Install the paper chute by aligning and inserting the tabs of the paper chute into their slots on the scanner. 3. Close the panel unit by pushing it back down until it snaps back into place.
-
Page 12: Step 2. Connecting The Scanner
Please make sure the scanner is turned OFF before you plug or unplug the scanner power Attention adapter. 1. Plug the AC adapter into the scanner’s power receptor 2. Plug the other end of the AC adapter into a standard AC power outlet. 3. -
Page 13: Download
The System Setting interface contains the following sections: Download, General, Scan Settings and Sending. Download section includes the following items: eScan Client and Supports. eScan Client You may download eScan Client application program for Windows and Mac system from this page. Please install the eScan Client application program on the user's PC before users try the Save to PC function. -
Page 14: Supports
Supports You may download Plustek PDF Tool (Windows) and Plustek TIFF Tool (Windows) application program from this page. Press the button to download the desired file to the USB flash drive. -
Page 15: General
General section includes the following items: About, Wifi, Calibration, Power Saving, History and Reset. About You can set the system language and update the driver version in this page. Tap on Language column to enter Language setting dialog, select the desired language then press OK to confirm the setting. -
Page 16: Wifi
Tap on Update column to update the driver version. Please insert the USB drive containing the update file. Tap on the USB drive icon to start the update process. Wifi You can activate the Wifi function in this page. Select the available Wifi provider and enter the password if it is necessary. -
Page 17: Calibration
Calibration You can perform scanner calibration in this page. Calibrate the scanner if colors appear in areas that should be white, or colors of the scanned image and the original vary a lot. This allows you to adjust and compensate for variations that can occur in the optical component over time by its nature. -
Page 18: Power Saving
Power Saving To save power consumption, when the scanning process is finished, the scanner light source will turn itself off and the scanner will enter a lower-power mode without delay time. You can set the Screen Timeout time in this page. -
Page 19: History
Tap on Screen Timeout column to enter Screen Timeout setting dialog, select the desired time period then press OK to confirm the setting. History You can set the History function, Clear all history and export the system Log in this page. You may activate the History function to memorize the information entered by users, so that the user doesn’t have to enter the entire information every time. - Page 20 Tap on Clear all history column to clear all the history, the following dialog opens to confirm the setting. Tap on Log column to enter the following page. The Log file keeps system operation records and device information. You can e-mail this log file and detail problem descriptions back to the service provider to troubleshoot the system.
-
Page 21: Reset
Reset You can reset the system in this page. -
Page 22: Scan Settings
Tap on Reset All Data column to reset the system, the following dialog opens to confirm the setting. Scan Settings includes the following items: File Name and Initial Default. File Name You may name the saved files in this page. You can see the file-naming example on the top of the screen immediately after you make any adjustments. - Page 23 You can activate Prefix to display prefix in the file name. The text you enter here will become the file name prefix. You can activate Date to display date in the file name. Select the desired format of Date in the following dialog.
- Page 24 You can activate Time to display time in the file name. Select the desired format of Time in the following dialog. Tap on Serial Number column to select the desired format of Serial Number in the following dialog.
-
Page 25: Initial Default
Initial Default You can modify the desired scan settings in this page. The setting result here will be the Initial Default settings for the user scan interface. If you activate Auto return to default settings function and select the desired time period, every time the scan process is completed, the system will return to these default settings after the preset time. - Page 26 Color Mode You can set two color modes for user to select. The selected result will be applied COLOR MODE button in the user scan interface. Select the desired Color Mode in the popup dialog. Available color modes: Color, Gray and Black & White. Press OK to confirm the settings or press Cancel to exit this dialog.
- Page 27 Format You can set two formats for user to select. The selected result will be applied to FORMAT button in the user scan interface.
- Page 28 Select the file saving format in the popup dialog. Available file formats: PDF, JPG, TIFF, PNG, BMP, Multi-Page PDF and Multi-Page TIFF. Press OK to confirm the settings or press Cancel to exit this dialog. Resolution You can set two resolutions for user to select. The selected result will be applied QUALITY button in the user scan interface.
- Page 29 Select the desired Resolution in the popup dialog. Available dpi values: 100dpi (Lower), 200dpi (Standard), 300dpi (Good), 400dpi (Better), and 600dpi (Best). Press OK to confirm the settings or press Cancel to exit this dialog. Scan Mode...
- Page 30 Select the desired Scan Mode in the popup dialog. The selected result will be applied to SCAN MODE button in the user scan interface. Available scan modes: Simplex and Duplex. Press OK to confirm the settings or press Cancel to exit this dialog.
- Page 31 Density Sets the brightness level, the contrast level and the gamma level of the image. Watermark You can activate the Watermark function, and decide to use image or text as the Watermark. Switch on this function to add watermark on the scanned images.
- Page 32 If you select Use Image as the Watermark, you have to upload the desired image and select the desired position.
- Page 33 If you select Use Text as the Watermark, you have to enter the desired text, select the desired position, and adjust the Transparency, the Text Size and the Text Angle. Punch Hole Removal You can activate the Punch Hole Removal function. Switch on this function to remove the hole marks aligned along with the edge of the scanned document.
- Page 34 Blank Page Removal You can activate the Blank Page Removal function. Switch on this function to remove blank pages after the document is scanned. Adjust the Sensitivity level in the following dialog. Press OK to confirm the settings or press Cancel to exit this dialog. Blank Page Split...
- Page 35 You can activate the Blank Page Split function. Switch on this function to split the scanned document by blank page. Reset to Default Tap on Reset to Default column to reset the scan settings to default factory settings. The following dialog opens to confirm the setting.
-
Page 36: Sending
Sending section includes the following item: Sending Settings. Sending Settings You can activate the desired sending destinations. Available options are: USB, PC, Mobile, Mail, FTP, and Clouds. Switch on the USB function to enable sending the scanned file to the USB flash drive. - Page 37 Switch on the Mail function to enable sending the scanned file to the desired e- mail addresses. Press the button to set the mail server. Enter Server, Port, Account and Password then press OK to test the mail server setting. If the connection is success, the mail server information will display on the top of the page.
- Page 38 Clouds Switch on the Clouds function to enable sending the scanned file to the desired cloud server. Press the button to set the cloud server. In the Cloud Settings dialog, press the button to select the desired cloud server. Enter Account and Password then press OK to test the cloud server setting. If the connection is success, the cloud server information will display on the top of the page.
- Page 39 If you switch off Use this cloud as the only destination function, you can switch on the desired cloud servers to enable the cloud server option in the user scan interface. The available options are: Dropbox, Google Drive, Evernote, Box, SharePoint and SharePoint (SSL).
-
Page 40: Chapter Ii. Scanning
II. S HAPTER CANNING REPARING OCUMENTS Proper document preparation prior to the scan can prevent paper feed errors and damages to the scanner. Checking Document Conditions Loosening Documents Make sure the size and ream weight of your documents are acceptable by the scanner. -
Page 41: Loosening Documents
However, don’t use the ADF to scan documents if they meet any of the following conditions: Paper lighter than 40 g/m (10 lb.) or heavier than 220 g/m (58 lb.) Paper with clips or staples attached Paper with inconsistent thickness, e.g., envelops Paper with wrinkles, curls, folds, or tears Paper with an odd (non-rectangular) shape Tracing paper... -
Page 42: Placing Documents
LACING OCUMENTS 1. Load the documents, headfirst and face down, toward the center of the ADF paper chute and all the way into the ADF until touching the bottom. For single-sided scans, load the documents face down so that the side to be scanned faces towards the paper chute. -
Page 43: Scanning Documents
DO NOT load more than 50 sheets of paper (70 g/m , 18 lb.) to the ADF. Paper scanned from the ADF must be a minimum of 5.08 x 5.08 cm (2” x 2”, W x L). Make sure there are no gaps between the document stack and the paper-width slider;... - Page 44 1. Tap on to select SCAN MODE. 2. Tap on to select COLOR MODE. 3. Tap on to select scan FORMAT. 4. Tap on to select scan QUALITY. 5. If it is necessary, you may tap on to adjust Advanced Settings. 6.
- Page 45 Scan Mode Select the desired Scan Mode in the popup dialog. Available scan modes: Simplex and Duplex. Color Mode Select the desired Color Mode in the popup dialog. Available color modes: Color, Gray and Black & White.
- Page 46 Format Select the file saving format in the popup dialog. Available file formats: PDF, JPG, TIFF, PNG, BMP, Multi-Page PDF and Multi-Page TIFF. Resolution Select the desired Resolution in the popup dialog. Available dpi values: 100dpi (Lower), 200dpi (Standard), 300dpi (Good), 400dpi (Better), and 600dpi (Best).
- Page 47 Size Select the desired paper Size in the popup dialog. Available paper sizes: Auto, A4, A5, B5, Letter, Legal and Invoice. Compression Adjust the Compression quality in the popup dialog. Press OK to confirm the settings or press Cancel to exit this dialog.
- Page 48 Density Sets the brightness level and the contrast level of the image. Press OK to confirm the settings or press Cancel to exit this dialog. Watermark Switch on or off the Watermark function. Switch on this function to add watermark on the scanned images.
-
Page 49: Editing The Scanned Documents
Punch Hole Removal Switch on or off the Punch Hole Removal function. Switch on this function to remove the hole marks aligned along with the edge of the scanned document. Blank Page Removal Switch on or off the Blank Page Removal function. Switch on this function to remove blank pages after the document is scanned. - Page 50 When you select a desired scanned image on the screen, a dialog will popup for you to delete or rotate the selected image. In this display mode, you can select the desired scanned image from the miniatures to re-arrange the image order. You can manually transpose the selected image within the same scan task by drag-and-drop operation.
- Page 51 On the right side of the screen, press the mark to go to the first page, press mark to go to the upper page (For example: from page 7 to page 3), press the mark to go to the lower page (For example: from page 2 to page 6) and press the mark to go to the last page.
- Page 52 On the bottom of the screen, there are 4 buttons for you to perform the specific functions. Press Save to save the scanned image, press Cancel to cancel the scan images. If you want to insert scan documents, just select the desired scanned image on the screen.
- Page 53 Press button to select all the scanned images, a dialog will popup for you to delete or rotate the entire file at the same time. Double-click on the desired scanned image to enter image-editing window. You can enlarge the scanned image by moving your two fingers away on the screen, or zoom out the scanned image by pinching your two fingers together on the screen.
-
Page 54: Saving The Scanned Documents
If it is necessary, you may adjust the scanned image by pressing the buttons on the left side of the screen. Button Function Turns the image counterclockwise by 90º. Turns the image clockwise by 90º. Sets the brightness level and the contrast level of the image. Removes the unwanted borders of your image. -
Page 55: Save To Usb
Tap on USB button to save the scanned document to the USB flash drive. If you see the following dialog, the scanned document is successfully saved to the USB flash drive. You may press Continue to save the scanned document to other destination, or press Finish to complete the scanning procedure. -
Page 56: Save To Pc
Download the eScan Client software from System Settings > Download > eScan Client page. Please install the eScan Client software on the user's PC before users try the Save to PC function. In the eScan Client interface, you can modify the User Name, select the desired file Location and determine the action after the file is downloading. - Page 57 Tap on PC button to save the scanned document to the desired PC on the list. The following Save to PC dialog opens, tap on Select a PC column to select the desired PC from the list.
- Page 58 In the Select a PC dialog, you can find a list of the connected PC. If the desired PC is not on the list, please tap on to refresh the list or use the Search PC column to search for the desired PC. After selecting the desired PC, press the button to save the scanned document to the selected PC.
-
Page 59: Save To Mobile
If you see the following dialog, the scanned document is successfully saved to the selected PC. You may press Continue to save the scanned document to other destination, or press Finish to complete the scanning procedure. - Page 60 Tap on Mobile button to save the scanned document to the desired mobile device on the list. The following Save to mobile dialog opens, tap on Select a mobile device column to select the desired mobile device from the list. In the Select a mobile device dialog, you can find a list of the connected mobile device.
- Page 61 the list or use the Search mobile device column to search for the desired mobile device. After selecting the desired mobile device, press the button to save the scanned document to the selected mobile device.
-
Page 62: Save To Mail
If you see the following dialog, the scanned document is successfully saved to the selected mobile device. You may press Continue to save the scanned document to other destination, or press Finish to complete the scanning procedure. Tap on Mail button to send the scanned document to the desired e-mail address. - Page 63 The following Save to mail dialog opens, enter the sender e-mail address in the From: Enter a name column and the receiver e-mail address in the To: Enter an e- mail address column. If it is necessary, you may enter desired e-mail address in the CC: Enter an e-mail address column, and modify the Subject name.
-
Page 64: Save To Ftp
If you see the following dialog, the scanned document is successfully sent to the desired e-mail address. You may press Continue to save the scanned document to other destination, or press Finish to complete the scanning procedure. Tap on FTP button to save the scanned document to the FTP server. If you has already setup the FTP server in the System Setting page, you don’t have to go through the following setting procedure. - Page 65 Enter the FTP address, username and password. If it is necessary, you may change the Port on the left side. Press the button to connect to the FTP server. After successfully connecting to the FTP server, press the button to save the scanned document to the desired FTP server.
-
Page 66: Save To Clouds
If you see the following dialog, the scanned document is successfully saved to the desired FTP server. You may press Continue to save the scanned document to other destination, or press Finish to complete the scanning procedure. - Page 67 Tap on Cloud button to save the scanned document to the cloud server. If you has already setup the cloud server in the System Setting page, you don’t have to go through the following setting procedure. The scanned document will be saved to the preset cloud server directly.
- Page 68 Enter the email address or username and the password for the selected cloud server. Press the button to connect to the cloud server. After successfully connecting to the cloud server, press the button to save the scanned document to the desired cloud server.
- Page 69 If you see the following dialog, the scanned document is successfully saved to the desired cloud server. You may press Continue to save the scanned document to other destination, or press Finish to complete the scanning procedure.
-
Page 70: Chapter Iii. Care And Maintenance
III. C HAPTER ARE AND AINTENANCE Your scanner is designed to be maintenance-free. However, constant care and maintenance can keep your scanner working smoothly. LEANING THE CANNER Paper powder, dust, ink and toner from paper being scanned may make the inner ADF dirty, which leads to poor image quality or document-feeding errors. - Page 71 Panel unit open lever Panel unit 2. Gently wipe the following areas with the cloth dampened with the cleaner. Be careful NOT to scratch their surfaces. Clean Feed Roller: Wipe the Feed Roller from side to side and then rotate it. Repeat this until its entire surface is cleaned.
-
Page 72: Replacing Consumables
Clean ADF Glass: Do not spray cleaner directly onto the scanner glass. Excess liquid residue may fog or damage Attention the scanner. 3. Wait for cleaned areas to dry completely. 4. Close the panel unit by pushing it back down until it snaps back into place. EPLACING ONSUMABLES As a guideline, it is recommended to replace the pad module every 50000 sheets of... - Page 73 Panel unit open lever Panel unit 2. Remove the pad module by pinching both sides of the pad module and pull it out. 3. Install the new pad module by inserting the tabs on the module onto their slots on the scanner.
-
Page 74: Replacing The Feed Roller
4. Close the panel unit by pushing it back down until it snaps back into place. 1. Open the panel unit by pulling the panel unit open lever. Panel unit open lever Panel unit... - Page 75 2. Remove the paper chute by pinching both sides of the handles on the paper chute to remove it. 3. Remove the feed roller by pinching both sides of the feed roller and pull it out.
- Page 76 4. Install the new feed roller by aligning and inserting the feed roller onto the roller pitman on the scanner.
-
Page 77: Calibrating The Scanner
5. Install the paper chute by aligning and inserting the tabs of the paper chute into their slots on the scanner. 6. Close the panel unit by pushing it back down until it snaps back into place. ALIBRATING THE CANNER Calibrate the scanner if colors appear in areas that should be white, or colors of the scanned image and the original vary a lot. - Page 78 2. Insert the special calibration sheet into the ADF of the scanner, with an arrow toward the scanner buttons. Please insert special calibration sheet included with the scanner. Alternatively you may also use any plain white sheet of paper sized in Letter / A4 instead;...
-
Page 79: Chapter Iv. Troubleshooting
IV. T HAPTER ROUBLESHOOTING If you encounter problems with your scanner, please review the installation and scanning instructions contained in this guide. LEARING APER If a paper jam in the ADF happens, please perform the following steps: 1. Remove any unjammed documents still loaded into the ADF. 2. - Page 80 Do not try to pull jammed or half-scanned documents out of the ADF without first opening the panel unit. Doing so may permanently Attention damage the ADF. 4. Close the panel unit by pushing it back down until it snaps back into place.
-
Page 81: Appendix A: Specifications
A: S PPENDIX PECIFICATIONS Optical Resolution 600 dpi ADF Capacity 50 sheets (70 g/m², 18 Lbs) 20 ppm/ 40 ipm (Grayscale mode, 200 dpi, A4 Portrait) Scanning Speed 20 ppm/ 40 ipm (B&W mode, 200 dpi, A4 Portrait) (ADF) 5 ppm/ 10 ipm (Color mode, 200 dpi, A4 Portrait) Interface USB 2.0 x 2, RJ45 (network connection) x 1, WiFi (802.11 g/n) Display... -
Page 82: Ervice And Warranty
ERVICE AND ARRANTY Please visit our website www.plustek.com for more customer service information. For further assistance, visit our website or call our customer support phone number listed on the website. One of our representatives will be happy to assist you from Monday through Friday in office working hours. - Page 83 The manufacturer warranty includes all parts and labor, and is not valid without the receipt of original purchase. To obtain warranty service, you may contact the authorized dealer or distributor, or visit our website to check out the available service information, or send a request via E-mail for further help.
-
Page 84: Fcc Radio Frequency Statement
FCC R ADIO REQUENCY TATEMENT This equipment has been tested and found to comply with the limits for a Class B digital device, pursuant to part 15 of the FCC rules. These limits are designed to provide reasonable protection against harmful interference in a residential installation. This equipment generates, uses and can radiate radio frequency energy and, if not installed and used in accordance with the instructions, may cause harmful interference to radio communications.