Advertisement
Table of Contents
- 1 Table of Contents
- 2 Important Precautions
- 3 Before You Begin
- 4 Assembly
- 5 How to Plug in Power Cord
- 6 Treadmill Operation
- 7 How to Fold and Move the Treadmill
- 8 Troubleshooting
- 9 Conditioning Guidelines
- 10 Ordering Replacement Parts
- 11 Limited Warranty
- 12 Part Identification Chart
- Download this manual
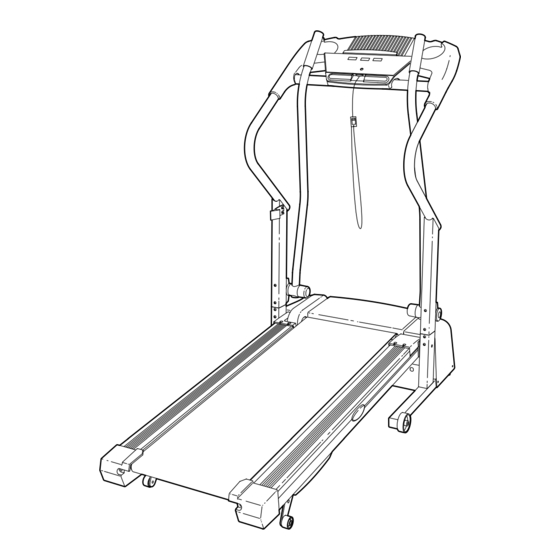
Model No. PFTL39920
USER'S MANUAL
Serial No.
Serial Number
Decal
QUESTIONS?
If you have questions, or if there
are missing parts, we will guar-
antee complete satisfaction
through direct assistance from
our factory.
TO AVOID DELAYS, PLEASE
CALL DIRECT TO OUR TOLL-
FREE CUSTOMER HOT LINE.
The trained technicians on our
Customer Hot Line will provide
immediate assistance, free of
charge to you.
CUSTOMER HOT LINE:
1-800-999-3756
Mon.–Fri., 6 a.m.–6 p.m. MST
CAUTION
Visit our website at
Read all precautions and instruc-
www.proform.com
tions in this manual before using
this equipment. Save this manual
new products, prizes,
for future reference.
fitness tips, and much more!
Advertisement
Table of Contents

Related Manuals for ProForm PFTL39920


Summary of Contents for ProForm PFTL39920
- Page 1 Model No. PFTL39920 USER'S MANUAL Serial No. Serial Number Decal QUESTIONS? If you have questions, or if there are missing parts, we will guar- antee complete satisfaction through direct assistance from our factory. TO AVOID DELAYS, PLEASE CALL DIRECT TO OUR TOLL- FREE CUSTOMER HOT LINE.
-
Page 2: Table Of Contents
HOW TO FOLD AND MOVE THE TREADMILL ........ - Page 3 SAVE THESE INSTRUCTIONS The decals shown have been placed on your treadmill. If a decal is missing, or if it is not legible, please call our Customer Service Department, toll-free, to order a...
-
Page 4: Before You Begin
The model number of the treadmill is PFTL39920. The serial number can be found on a decal attached to the treadmill (see the front cover of this manual for the location). -
Page 5: Assembly
This is a normal condition and does not affect treadmill performance. If there is lubricant on top of the walking belt, simply wipe off the lubricant with a soft cloth and a mild, non-abrasive cleaner. - Page 6 3. Insert a Plastic Shim (104) into each side of the post on the right side of the Base (11). Next, orient the Right Handrail (103) as shown, and insert it into the Base. careful to avoid pinching the Handrail Wire Harness (21).
- Page 7 5, and 6. Then, lower the frame to the floor. 9. Make sure that all parts are properly tightened before you use the treadmill. Note: Extra hardware may be included. Keep the included allen wrenches in a secure place. The large allen wrench is used to adjust the walking belt (see page 14).
-
Page 8: Treadmill Operation
(see drawing 1 at the right). To purchase a surge suppressor, see your local PROFORM dealer or call toll-free 1-800- 806-3651 and order part number 146148. Use only a single-outlet surge suppressor that is UL 1449 listed as a transient voltage surge sup- pressor (TVSS). - Page 9 Follow the steps on this page and page 10 to operate the console. Insert the key fully into the console. Stand on the foot rails of the treadmill. Find the clip attached to the key (see the drawing above) and slide the clip onto the waistband of your clothes.
- Page 10 Mode Indicator HOW TO USE THE UPPER BODY ARMS As you walk on the treadmill, hold either the handrails or the upper body arms. To exercise your arms, shoul- ders, and back for a total body workout, move the upper body arms forward and back as you walk on the treadmill.
-
Page 11: How To Fold And Move The Treadmill
1. Hold the upper ends of the handrails. Place one foot on the base as shown. 2. Tilt the treadmill back until it rolls freely on the front wheels. Carefully move the treadmill to the desired location. To re- duce the risk of injury, use extreme caution while mov- ing the treadmill. - Page 12 HOW TO LOWER THE TREADMILL FOR USE 1. Hold the upper end of the treadmill with your right hand as shown. Using your left thumb, press the storage latch to the left. Pivot the treadmill down until the frame and foot rail are past the storage latch.
-
Page 13: Troubleshooting
PROBLEM: The power turns off during use SOLUTION: a. Check the circuit breaker located on the treadmill frame near the power cord (see the drawing above). If the circuit breaker has tripped, wait for five minutes and then press the switch back in. - Page 14 3 inches off the walking platform. Be careful to keep the walking belt centered. Plug in the power cord, in- sert the key and run the treadmill for a few minutes. Repeat until the walking belt is properly tightened. c. If the walking belt still slows when walked on, please call our toll-free Customer Service Department.
-
Page 15: Conditioning Guidelines
For maximum fat burning, adjust the speed and incline of the treadmill until your heart rate is near the middle of your training zone. Aerobic Exercise If your goal is to strengthen your cardiovascular sys- tem, your exercise must be “aerobic.”... -
Page 16: Ordering Replacement Parts
• The KEY NUMBER and DESCRIPTION of the desired part(s) (see the PART LIST and the EXPLODED DRAW- ING in the center of this manual) PROFORM is a registered trademark of ICON Health & Fitness, Inc. ICON Health & Fitness, Inc. (ICON), warrants this product to be free from defects in workmanship and material, under normal use and service conditions, for a period of ninety (90) days from the date of pur- chase. -
Page 17: Part Identification Chart
PART IDENTIFICATION CHART Remove this chart and use it to identify small parts during assembly. Save this chart and the EXPLODED DRAWING/PART LIST for future reference. Silver Ground Screw (109)–1 1” Tek Screw (119)–4 3/4” Screw (13)–6 Wheel Bolt (36)–2 1/2”... - Page 18 PART LIST—Model No. PFTL39920 Key No. Qty. Description Crossbar Key/Clip Incline Leg Pivot Bolt Battery Cover Left Foot Rail Lift Motor Rear Roller 1” Bolt 1/4” Star Washer Console Assembly Base Motor Belt 3/4” Screw Storage Latch Frame Pivot Spacer 8”...
- Page 19 EXPLODED DRAWING—Model No. PFTL39920 R0902A...