Advertisement
Table of Contents
- 1 Table of Contents
- 2 Important Precautions
- 3 Before You Begin
- 4 Assembly
- 5 How to Plug in Power Cord
- 6 Operation and Adjustment
- 7 How to Exercise on the Treadmill
- 8 How to Operate the Weight Bench
- 9 How to Exercise on the Weight Bench
- 10 Maintenance and Trouble-Shooting
- 11 How to Move the Crosstrainer
- 12 Part List
- 13 Customer Record
- 14 Ordering Replacement Parts
- 15 Limited Warranty
- Download this manual
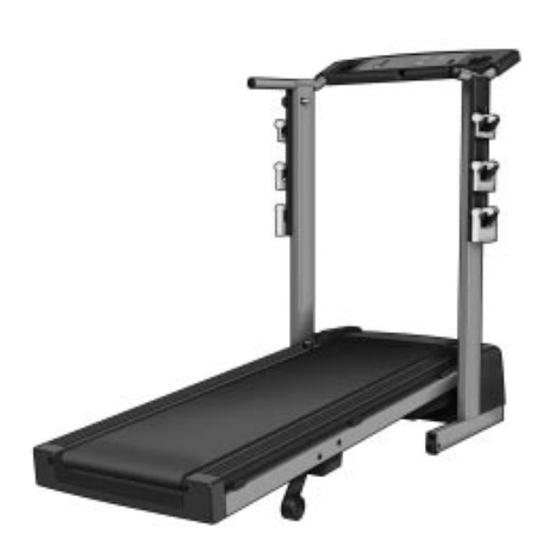
Model No. PCTL50071
Serial No.
Serial
Number
Decal
QUESTIONS?
As a manufacturer, we are com-
mitted to providing complete
customer satisfaction. If you
have questions, or if there are
missing parts, please call:
1-888-936-4266
Mon.–Fri. 8h00 until 18h30 EST
(excluding holidays).
CAUTION
Read all precautions and instruc-
tions in this manual before using
this equipment. Save this manual
for future reference.
USER'S MANUAL
Advertisement
Table of Contents

Related Manuals for ProForm CROSSTRAINER PCTL50071


Summary of Contents for ProForm CROSSTRAINER PCTL50071
- Page 1 Model No. PCTL50071 Serial No. Serial Number Decal QUESTIONS? As a manufacturer, we are com- mitted to providing complete customer satisfaction. If you have questions, or if there are missing parts, please call: 1-888-936-4266 Mon.–Fri. 8h00 until 18h30 EST (excluding holidays).
-
Page 2: Table Of Contents
HOW TO EXERCISE ON THE TREADMILL ........ -
Page 3: Important Precautions
WARNING: To reduce the risk of burns, fire, electric shock, or injury to persons, read the following important precautions and information before operating the PROFORM 1. It is the responsibility of the owner to ensure that all users of the CROSSTRAINER are adequately informed of all warnings and precautions. - Page 4 Do not use any other weights with the CROSSTRAINER. 23. Before moving the CROSSTRAINER, make sure that the bench and treadmill are folded to the storage position, and that the lock pins are fully engaged (see HOW TO FOLD THE...
-
Page 5: Before You Begin
The model number of the treadmill is PCTL50071. The serial number can be found on a decal attached to the CROSSTRAINER (see the front cover of this manual for the location). -
Page 6: Assembly
ASSEMBLY Assembly requires two people. Set the treadmill in a cleared area and remove all packing materials. Do not dispose of the packing materials until assembly is completed. Assembly requires a phillips screwdriver (not included). 1. With the help of a second person, carefully raise the Uprights (102) until the CROSSTRAINER is in the posi- tion shown at the right. - Page 7 4. Put a 2-lb. Weight (79) on the upper hooks on the Right Weight Rack (99). Put a 4-lb. Weight (80) on the centre hooks on the Right Weight Rack. Put a 6-lb. Weight (81) on the lower hooks on the Right Weight Rack. Put the remaining Weights on the Left Weight Rack (not shown).
-
Page 8: Operation And Adjustment
OPERATION AND ADJUSTMENT THE PERFORMANT LUBE Your treadmill features a walking belt coated with PERFORMANT LUBE , a high-performance lubricant. IMPORTANT: Never apply silicone spray or other substances to the walking belt or the walking plat- form. They will deteriorate the walking belt and cause excessive wear. - Page 9 HOW TO LOWER THE TREADMILL FOR USE To use the treadmill, the bench must be folded to the storage position. See HOW TO FOLD THE BENCH TO THE STORAGE POSITION on page 15. Caution: You must be able to safely lift 45 pounds (20 kg) in order to lower the treadmill.
- Page 10 Speed Control Clip STEP BY STEP CONSOLE OPERATION Step onto the foot rails of the treadmill. Find the clip attached to the key (see the drawing above), and slide the clip onto the waistband of your clothing. Follow the steps below and on page 11 to operate the console.
- Page 11 Caution: You must be able to safely lift 45 pounds (20 kg) in order to raise the treadmill. Hold the treadmill in the locations shown below. To de- crease the possibility of injury, bend your legs and keep your back straight. As you raise the treadmill, make sure to lift with your legs rather than your back.
-
Page 12: How To Exercise On The Treadmill
If your goal is to burn fat, adjust the speed and incline of the treadmill until your heart rate is near one of the lower two numbers in your training zone. - Page 13 Training Zone Exercise After warming up, increase the intensity of your exer- cise until your heart rate is in your training zone for 20 to 60 minutes. (During the first few weeks of your exer- cise program, do not keep your heart rate in your train- ing zone for longer than 20 minutes.) Breathe regularly and deeply as you exercise—do not hold your breath.
- Page 14 SUGGESTED STRETCHES The correct form for several basic stretches is shown at the right. Move slowly as you stretch—never bounce. 1. Toe Touch Stretch Stand with your knees bent slightly and slowly bend forward from your hips. Allow your back and shoulders to relax as you reach down toward your toes as far as possible.
-
Page 15: How To Operate The Weight Bench
HOW TO OPERATE THE WEIGHT BENCH HOW TO LOWER THE BENCH FOR USE To use the bench, the treadmill must be folded to the storage position. See HOW TO FOLD THE TREAD- MILL TO THE STORAGE POSITION on page 11. -
Page 16: How To Exercise On The Weight Bench
HOW TO EXERCISE ON THE WEIGHT BENCH The CROSSTRAINER offers a variety of exercises designed to trim, tone, and strengthen the body. Please read these guidelines before using the weight bench. WARNING: Before beginning any exercise program, consult your physician. This is especially important for persons over the age of 35 or persons with pre-existing health problems. - Page 17 WEIGHT BENCH EXERCISES The exercise chart on the CROSSTRAINER shows twenty exercises that can be performed on the weight bench. Read the exercise guidelines on this page before beginning any exercises. Flat Bench Press—Press the weights up in a straight line from your chest. Flat Bench Flyes—With the bench in a flat posi- tion, bend your elbows slightly and bring the weights together above your chest.
-
Page 18: Maintenance And Trouble-Shooting
PROBLEM: The power turns off during use SOLUTION: a. Check the circuit breaker located on the treadmill frame near the power cord (see the drawing above). If the circuit breaker has tripped, wait for five minutes and then press the switch back in. - Page 19 1/4 of a turn each. Be careful not to overtighten the walking belt. Plug in the power cord, insert the key and run the treadmill for a few minutes. Repeat until the walking belt is centred.
-
Page 20: How To Move The Crosstrainer
Before moving the CROSSTRAINER, make sure that the bench and treadmill are folded to the storage position, and that the lock pins are fully engaged (see HOW TO FOLD THE TREADMILL TO THE STOR- AGE POSITION on page 11, and HOW TO FOLD THE BENCH TO THE STORAGE POSITION on page 15). -
Page 21: Part List
PART LIST—Model No. PCTL50071 Key No. Qty. Description Backrest Backrest Screw Backrest Support Bolt Left Backrest Frame Right Backrest Frame Bench Frame Spacer Bench Bracket Bench Bracket Bolt Bench Pivot Bolt Bench Support Pivot Bolt Backrest Support Bench Adjustment Bench Seat... -
Page 22: Customer Record
CUSTOMER RECORDS Model No.: Retailer Name: Retailer Address: Serial No.: Purchase Date:... -
Page 23: Ordering Replacement Parts
Friday 8h00 until 18h30 Eastern Time (excluding holidays). When ordering parts, please be prepared to give the following information: • The MODEL NUMBER OF THE PRODUCT (PCTL50071). • The NAME OF THE PRODUCT (PROFORM • The SERIAL NUMBER OF THE PRODUCT (see the front cover of this manual). - Page 25 EXPLODED DRAWING—Model No. PCTL50071 R0402A...
-
Page 26: Limited Warranty
7) What was the primary reason for purchasing this ICON product? Store Employee Electronic Features Product Design Other Features PROFORM is a registered trademark of ICON Health & Fitness, Inc. Part No. 149170 H0402-C R1098A ® PRODUCT WARRANTY REGISTRATION PHONE: POSTCODE: SERIAL NO.