Table of Contents
Advertisement
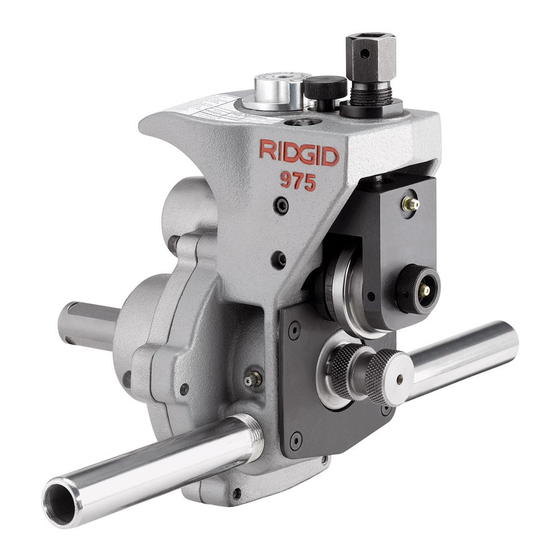
975
Manual
Combo Roll Groover
WARNING!
Read this Operator's Manual
carefully before using this
tool. Failure to understand
and follow the contents of
this manual may result in
electrical shock, fire and/or
serious personal injury.
•
Français – 23
•
Castellano – pág. 47
GlobalTestSupply
www.
.com
Find Quality Products Online at:
sales@GlobalTestSupply.com
Advertisement
Table of Contents

Related Manuals for RIDGID 975


Summary of Contents for RIDGID 975
- Page 1 Manual Combo Roll Groover WARNING! Read this Operator’s Manual carefully before using this tool. Failure to understand and follow the contents of this manual may result in electrical shock, fire and/or serious personal injury. • Français – 23 • Castellano – pág. 47 GlobalTestSupply www.
- Page 2 Machine and Work Area Set-Up For Power Driven Applications Mounting The 975 Combo Groover Onto A RIDGID 300 Power Drive ..............7 Mounting The 975 Combo Groover Onto A RIDGID 300 Compact Threading Machine ..........7 Completing Set Up..............................8 Pipe Preparation ................................9 Pipe Set Up In Roll Groover............................10...
- Page 3 Combo Roll Groover GlobalTestSupply www. .com Find Quality Products Online at: sales@GlobalTestSupply.com...
-
Page 4: Safety Symbols
975 Combo Roll Groover Safety Symbols In this operator’s manual and on the product, safety symbols and signal words are used to communicate important safe- ty information. This section is provided to improve understanding of these signal words and symbols. -
Page 5: Personal Safety
Read these precautions carefully before using the • Dress properly. Do not wear loose clothing or 975 Combo Roll Groover to reduce the risk of seri- jewelry. Keep your hair, clothing, and gloves away ous personal injury. -
Page 6: Roll Groover Safety
Power Drive/Threading Machine a roll set change. The grooves are formed by mechanically • Only use the RIDGID 300 Power Drive or the 300 advancing a grooving roll into the pipe which is supported Compact Threading Machine with this 975 Combo by a drive roll. -
Page 7: Specifications
975 Combo Roll Groover Standard Equipment The 975 Combo Roll Groover is a portable unit intended for occasional use on the job site and should not be used " – 6" Schedule 10 & 40 Groove and Drive Rolls for high volume work or for production work in a pipe fab- Ratchet Wrench ( "... -
Page 8: Machine And Work Area Set-Up For Power Driven Applications
Always wipe up any oil that may be present. 3. Inspect the pipe to be grooved and confirm that the 975 Combo Roll Groover is the correct tool for the job. The 975 Combo Roll Groover is designed to groove schedule 10 and 40 steel, aluminum, and PVC pipe in "... -
Page 9: Mounting The 975 Combo Groover Onto A Ridgid 300 Power Drive
REV switch is in the OFF position. Set up the power range of sizes to be grooved. Do not try to use the 975 drive/threading machine as directed in it’s manual. -
Page 10: Completing Set Up
Figure 5 – Installing Adapter Bracket 4. Place the 975 support arms on the arms of the adapter bracket with the drive bar adapter in the chuck of the machine. Close and tighten the threading machine chuck onto the drive bar adapter. -
Page 11: Pipe Preparation
975 Combo Roll Groover rotate in the correct direction or the foot switch does 2. Make sure to have appropriate support available for not control the machine operation, do not use the the pipe you are going to be grooving. Chart A lists machine until it has been repaired. -
Page 12: Setting/Measuring The Groove Diameter
10. With dry hands, plug the machine into the properly pipe and roll groover helps to insure proper tracking grounded outlet. of the pipe while grooving. (See Figure 9.) Operating The 975 Combo Roll Groover With A Power Drive/Threading Machine WARNING Do not wear loose clothing when operating the roll groover. -
Page 13: Forming The Roll Groove
975 Combo Roll Groover designed for use with pipe. See “Setting The Groove diameter, the adjusting screw must be repositioned to give the correct groove diameter. Diameter For Copper Tube” for use with copper tube. • To increase groove diameter, turn the adjusting 3. -
Page 14: Setting The Groove Diameter For Copper Tubing
3. Move the FOR/OFF/REV switch to the REV (reverse tube, the groove depth gauge on the groover cannot be position). Do not run the 975 Combo Roll Groov er used. It will give incorrect groove diameters. in the FOR (forward). Because of the design of the 975 Combo Roll Groover, this will cause the pipe 1. - Page 15 Always wipe up any oil that may be present. 3. Inspect the pipe to be grooved and confirm that the 975 Combo Roll Groover is the correct tool for the job. The 975 Combo Roll Groover is designed to groove schedule 10 and 40 steel, aluminum, and PVC pipe in "...
-
Page 16: Pipe Preparation
• A minimum opening of 9 " to fit the roll groover onto the pipe 1. Confirm that the 975 Combo Roll Groover has been inspected and has the appropriate roll set installed. Make sure that the support arms are tight in the body of the roll groover or remove them completely for better access in tight spaces. -
Page 17: Setting/Measuring The Groove Diameter
975 Combo Roll Groover Operating The 975 Combo Roll touches the step of the depth gauge. Turn the groove depth gauge to the grooving position (Figure 15B) . If Groover In Place gauge is not in the grooving position it will prevent grooving and may be damaged. -
Page 18: Forming The Roll Groove
Lubrication Lubricate the 975 Combo Roll Groover with a good gen- eral purpose grease once a month. • Grease fittings are located on the side of the oper- ator’s side of the base, the front of the slide block,... -
Page 19: Cleaning
975 Combo Roll Groover • The gear box of the 975 Combo Roll Groover is Gear greased for life and does not require the addition of any grease unless the gear box is opened. Retaining Ring See Inspection Section for other information on mainte- nance. -
Page 20: Accessories
4. Replace the groove roll shaft and the set screw. authorized RIDGID service technician. Tool should be taken to a RIDGID Independent Author - 5. Visually inspect the alignment between the groove roll ized Service Center or returned to the factory. -
Page 21: Table I. Standard Roll Groove Specifications
975 Combo Roll Groover Table I. Standard Roll Groove Specifications For Pipe of IPS Dimensions NOTE! All Dimensions are in Inches. NOM. PIPE MIN. GASKET GROOVE GROOVE NOM. PIPE DIAMETER WALL SEAT WIDTH DIAMETER GROOVE SIZE O.D. TOL. THK. +.015/-.030 +.030/-.015... -
Page 22: Table Iii. Copper Roll Groove Specifications
975 Combo Roll Groover Table III. Copper Roll Groove Specifications Nom. Tubing Outside Gasket Groove Groove Groove Min. Max. Size Diameter O.D. Seat Width Dia. Depth Allow. Allow. Inches +.03 +.00 Ref. Wall Flare Basic Tolerance ±0.03 –.000 –.02 Thick. -
Page 23: Troubleshooting
Feed grooving roll into pipe faster. Driving roll knurls plugged with metal or worn flat. Clean or replace driving roll. Power drive does not supply minimum required Use RIDGID No. 300, 38 RPM Power Drive. Groover will not rotate torque. pipe while grooving. - Page 24 No other express warranty applies This FULL LIFETIME WARRANTY is the sole and exclusive warranty for RIDGID ® products. No employee, agent, dealer, or other person is authorized to alter this warranty or make any other war- ranty on behalf of the RIDGE TOOL COMPANY.