Table of Contents
Advertisement
Model No. 831.28544.0
Serial No.
Serial
Number
Decal
• Assembly
• Operation
• Maintenance
• Part List and Drawing
CAUTION
Read all precautions and instruc-
tions in this manual before using
this equipment. Keep this manu-
al for future reference.
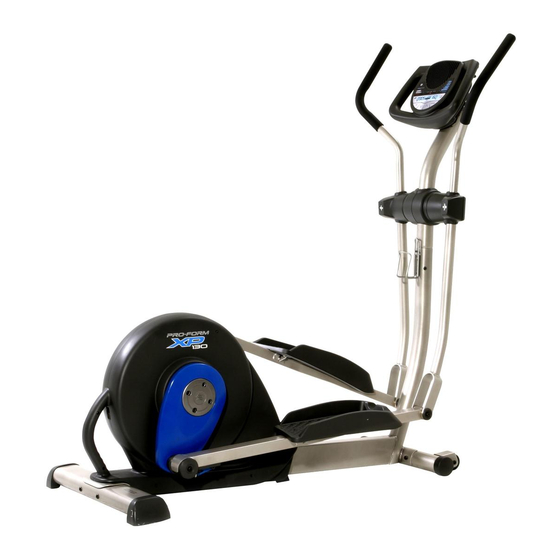
ELLIPTICAL EXERCISER
Sears, Roebuck and Co., Hoffman Estates, IL 60179
User's Manual
Advertisement
Table of Contents

Related Manuals for ProForm XP 130 831.28544.0


Summary of Contents for ProForm XP 130 831.28544.0
- Page 1 Model No. 831.28544.0 Serial No. Serial Number Decal • Assembly • Operation • Maintenance • Part List and Drawing CAUTION Read all precautions and instruc- tions in this manual before using this equipment. Keep this manu- al for future reference. ELLIPTICAL EXERCISER Sears, Roebuck and Co., Hoffman Estates, IL 60179 User’s Manual...
-
Page 2: Table Of Contents
TABLE OF CONTENTS IMPORTANT PRECAUTIONS ..............3 BEFORE YOU BEGIN . -
Page 3: Important Precautions
IMPORTANT PRECAUTIONS WARNING: To reduce the risk of serious injury, read the following important precau- tions before using the elliptical exerciser. 1. Read all instructions in this manual and all warnings on the elliptical exerciser before using the elliptical exerciser. Use the ellipti- cal exercise only as described in this manual. -
Page 4: Before You Begin
Thank you for selecting the revolutionary PROFORM XP 130 elliptical exerciser. The XP 130 elliptical exer- ciser provides a wide array of features designed to make your workouts at home more effective and enjoyable—and when you’re not exercising, the unique XP 130 can be folded out of the away. -
Page 5: Assembly
ASSEMBLY Assembly requires two persons. Place all parts of the elliptical exerciser in a cleared area and remove the packing materials. Do not dispose of the packing materials until assembly is completed. In addition to the included allen wrenches, assembly requires a phillips screwdriver , an adjustable wrench , and a rubber mallet... -
Page 6: Bracket
1. While another person lifts the Base (1), attach the Front Stabilizer (6) to the Base with two M10 x 80mm Carriage Bolts (82) and two M10 Nylon Locknuts (81). 2. Remove the indicated screw and bracket from the Base (1). Discard the screw and the bracket. Next, turn the Base Foot (26) into the Base (1) as far as possible. -
Page 7: Bracket
the Upper Wire Harness (48) to the Lower Wire Harness (49). Gently pull the upper end of the Upper Wire Harness to remove any slack, and insert the Upright into the Base (1). Attach the Upright with an M8 x 69mm Button Bolt (80), an M8 Split Washer (90), and an M8 Jamnut (79). - Page 8 9. Identify the Left Handlebar (8) and the Left Upper Body Arm (11), which are marked with stickers. Orient the Left Handlebar (8) and the Left Upper Body Arm (11) as shown, and insert the Left Handlebar into the Left Upper Body Arm. Attach the Left Handlebar with two M8 x 43mm Button Bolts (78) and two M8 Jamnuts (79).
-
Page 9: Repeat This Step On The Other Side Of The Elliptical Exer
12. Identify the Left Pedal (13) and the Left Pedal Leg (14), which are marked with stickers. Attach the Left Pedal (13) to the Left Pedal Leg (14) with an M4 x 45mm Screw (108), three M4 x 14mm Screws (104), and four Star Washers (112). Attach the Right Pedal (not shown) to the Right Pedal Leg (not shown) in the same way. -
Page 10: How To Use The Elliptical Exerciser
HOW TO FOLD AND UNFOLD THE ELLIPTICAL EXERCISER When the elliptical exerciser is not in use, the frame can be folded out of the way. First, lift the latch under each pedal leg, and lift the pedal legs off the sleeves on the crank arms. - Page 11 HOW TO EXERCISE ON THE ELLIPTICAL EXERCISER To mount the elliptical exerciser, hold the handlebars and step onto the pedal that is in the lowest position. Handlebars Next, step onto the other pedal. Push the pedals until they begin to move with a continuous motion. Note: The crank arms can turn in either direction.
-
Page 12: Features Of The Console
FEATURES OF THE CONSOLE The advanced console offers an array of features designed to make your workouts more effective and enjoyable. When the manual mode of the console is selected, you can change the resistance of the pedals with the touch of a button. As you exercise, the con- sole will provide continuous exercise feedback. -
Page 13: To Use The Manual Mode
To use the manual mode of the console, follow the steps beginning on page 13. To use a calorie goal program, see page 15. To use a pulse control pro- gram, see page 15. To use the distance program, see page 17. To use a resistance & rpm program, see page 17. - Page 14 If there are thin sheets of plastic on Metal Contacts the metal contacts on the handgrip pulse sensor, peel off the plastic. To measure your heart rate, hold the hand- grip pulse sensor, with your palms rest- ing against the metal contacts. Avoid moving your hands or gripping the contacts too tightly.
- Page 15 HOW TO USE A CALORIE GOAL PROGRAM Press the Resistance decrease button or begin pedaling to turn on the console. A moment after the console is turned on, the dis- play will light. Select one of the calorie goal programs. Press the Programs button repeatedly until “P 1”...
- Page 16 Hold the handgrip pulse sensor. It is not necessary to hold the handgrip pulse sensor continuously during a pulse control pro- gram; however, you should hold the handgrip pulse sensor frequently for the program to oper- ate properly. Each time you hold the handgrip pulse sensor, keep your hands on the metal contacts for at least 30 seconds.
- Page 17 HOW TO USE THE DISTANCE PROGRAM Press the Resistance decrease button or begin pedaling to turn on the console. A moment after the console is turned on, the dis- play will light. Select the distance program. Press the Programs button repeatedly until “P 5”...
- Page 18 Important: The pace settings are intended only to provide motivation. Your actual pace may be slower than the pace settings. Make sure to exercise at a pace that is comfortable for you. When only three seconds remain in the first seg- ment of the program, both the Current Segment column and the column to the right will flash, a series of tones will sound, and all resistance set-...
- Page 19 HOW TO CONNECT YOUR CD PLAYER, VCR, OR COMPUTER To use iFIT.com CDs, the elliptical exerciser must be connected to your portable CD player, portable stereo, home stereo, or computer with CD player. See pages 19 and 20 for connecting instructions. To use iFIT.com videocassettes, the elliptical exerciser must be connect- ed to your VCR.
-
Page 20: Wire
HOW TO CONNECT YOUR HOME STEREO Note: If your stereo has an unused LINE OUT jack, see instruction A below. If the LINE OUT jack is being used, see instruction B. A. Plug one end of a 1/8” to RCA stereo audio cable (available at electronics stores) into the jack beneath the console. - Page 21 Note: If your VCR has an unused AUDIO OUT jack, see instruction A below. If the AUDIO OUT jack is being used, see instruction B. If you have a TV with a built-in VCR, see instruction B. If your VCR is connected to your home stereo, see HOW TO CONNECT YOUR HOME STEREO on page 20.
- Page 22 pace setting does not change when a “chirp” is heard: • Make sure that the letters “iFIT” appear in the display. • Adjust the volume of your CD player or VCR. If the volume is too high or too low, the con- sole may not detect the program signals.
-
Page 23: Maintenance And Troubleshooting
Inspect and tighten all parts of the elliptical exerciser regularly. Replace any worn parts immediately. To clean the elliptical exerciser, use a damp cloth and a small amount of mild soap. Important: To avoid damage to the console, keep liquids away from the console and keep the console out of direct sunlight. -
Page 24: Conditioning Guidelines
WARNING: Before beginning this or any exercise pro- gram, consult your physician. This is espe- cially important for persons over the age of 35 or persons with pre-existing health problems. The pulse sensor is not a medical device. Various factors may affect the accuracy of heart rate readings. -
Page 25: Part List
No. Qty. Description Base Frame Upright Console Bracket Console Front Stabilizer Rear Stabilizer Left Handlebar Right Handlebar Handlebar Endcap Left Upper Body Arm Right Upper Body Arm Left Pedal Left Pedal Leg Right Pedal Right Pedal Leg Upright Cover Left Front Handlebar Cover Left Rear Handlebar Cover... -
Page 26: Exploded Drawing
R0805A... - Page 27 R0805A...
-
Page 28: Full 90 Day Warranty
FULL 90 DAY WARRANTY For 90 days from the date of purchase, if failure occurs due to defect in material or workmanship in this Sears Elliptical Exerciser, contact the nearest Sears Service Center throughout the United States and Sears will repair or replace the Elliptical Exerciser, free of charge. This warranty does not apply when the Elliptical Exerciser is used commercially or for rental purposes.