Advertisement
Advertisement
Table of Contents

Related Manuals for Nature's Sleep GHOSTBED


Summary of Contents for Nature's Sleep GHOSTBED
- Page 1 OWNER’S MANUAL Installation & Operation Serial No.
- Page 2 Table of Contents Safety & Warranty Warnings ……………………………………………… 01 Parts List …………………………………………………………………………… 02 GhostBed Electronics Quick Reference Guide ...... 03 Installation Guide ……………………………………………………………… 04 GhostBed Remote Control Instructions ......... 07 Setting Programmable Positions and Pairing Remote………… 08 Special Function..............09 Synchronizing Two Bases……………………………………………………...
-
Page 3: Safety & Warranty Warnings
Safety & Warranty Warnings READ THE FOLLOWING INFORMATION CAREFULLY BEFORE USING THIS PRODUCT If unable to understand warnings, cautions, and/or instructions, contact the dealer or technical personnel if applicable, before attempting to use the equipment. Otherwise, injury or damage may result. SAFETY WARNINGS: Product Rating: The motors are not designed to operate continuously for more than... - Page 4 Parts List All electronics and components that need to be installed are located in boxes under the foundation or attached to the frame. Before discarding the packing materials, ensure that all the parts are accounted for. AAA Batteries (2) Bed Legs (6) Power Supply (1) Power Cord (1) Remote Control (1)
-
Page 5: Remote
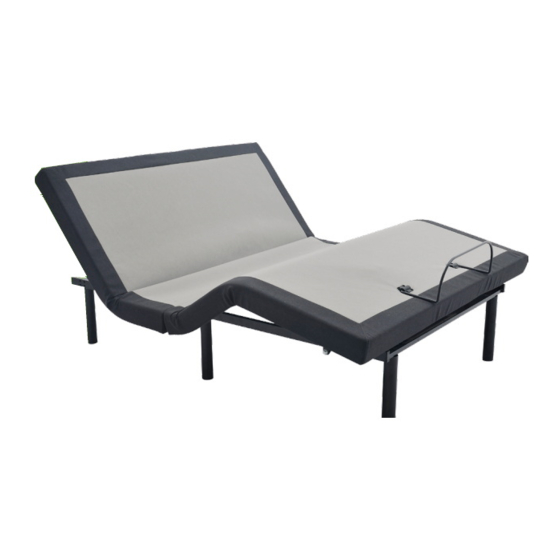
GhostBed Adjustable Power Base Electronics Quick Reference Guide GHOSTBED WIRELESS OVERVIEW Head Massage Motor LED Light Control Box Foot Motor Head Motor USB Ports Head Massage Motor Foot Motor Foot Massage Motor USB Ports Power Cord Head Motor LED Light... -
Page 6: Retainer
Installation Guide Note: For safety reasons, lifting of the adjustable bed frame must be performed by two (2) people; and the unit should always be in a flat position before opening. STEP 1 Lift the folded bed frame unit out of the shipping carton carefully, and then put it on a flat floor. - Page 7 Installation Guide Attaching the bed legs Remove the six (6) bed legs from the accessory box. Hand tighten the legs by threading them clockwise into the pre-threaded holes on the bed frame. Installing the retainer bar STEP 1 Turn the bed frame over carefully, top side up. STEP 2 Insert the ends of the retainer bar into the quick connect brackets located at the foot of the bed.
- Page 8 Installation Guide Setting up the electronics STEP 1 Take out the power supply and the power cord from the accessory box. STEP 2 Connect the power cord from the control box to the power supply. STEP 3 Connect the power cord that was packaged with the power supply to the power supply.
-
Page 9: Ghostbed Remote Control Instructions
GhostBed Remote Control Instructions GhostBed Wireless Remote ***Your Remote will be Black*** Flash Light Lounge Preset Position TV Preset Position Zero-G Preset Position Lifts Head & Foot Lifts and Lowers Lifts and Lowers Foot Head Lowers Head & Foot Flat Button... -
Page 10: Setting Programmable Positions And Pairing Remote
Setting Programmable Positions and Pairing Remote SETTING PROGRAMMABLE POSITIONS The wireless power bed has a programmable feature that allows you to save custom positions. Please read all the instructions below before setting your custom presets on the remote. STEP 1 STEP 2 Adjust the head and foot to your desired position. -
Page 11: Special Function
Special Function Emergency power down Your adjustable bed frame comes with a power supply that, when powered with two new 9V batteries, supports the emergency power down feature. If a power failure occurs while the head and/or foot sections are raised, do the following: STEP 1 Install two (2) new 9V batteries in the battery... -
Page 12: Synchronizing Two Bases
Synchronizing Two Bases SYNCHRONIZING TWO BASES If simultaneous operation of two foundations is desired, please read pairing remotes instructions on page 8. STEP 1 STEP 2 Make sure remote A was already paired to Base A and Remote B Plug A and B bases to power source. was paired to Base B. -
Page 13: Headboard Bracket Installation Guide
Headboard Bracket Installation Guide Headboard brackets are an optional accessory and are not included. A 1/2'' (13 mm) socket and 1/2'' (13 mm) crescent wrench are necessary to complete installation. HEADBOARD BRACKET COMPONENTS (2) Headboard Brackets (2) T-Brackets (4) Short Bolts (12) Nuts (8) Long Bolts STEP 1... -
Page 14: Troubleshooting
Troubleshooting In the event that the power foundation fails to operate, assess the symptoms and possible solutions provided in the chart below. SYMPTOMS SOLUTIONS Verify that the power cord is plugged into a working, grounded Remote control illuminates and appears to be operable, but will not electrical outlet. - Page 15 No action is required. THANK YOU FOR PURCHASING If you have had any issues with the assembly process, you can contact GhostBed Customer Service by calling 855-855-4499; email sales@GhostBed.com; or mail to: GhostBed, Inc., 7143 West Broward Blvd. Plantation, FL 33317 —13—...