Table of Contents

Related Manuals for Sony PXW-Z90T


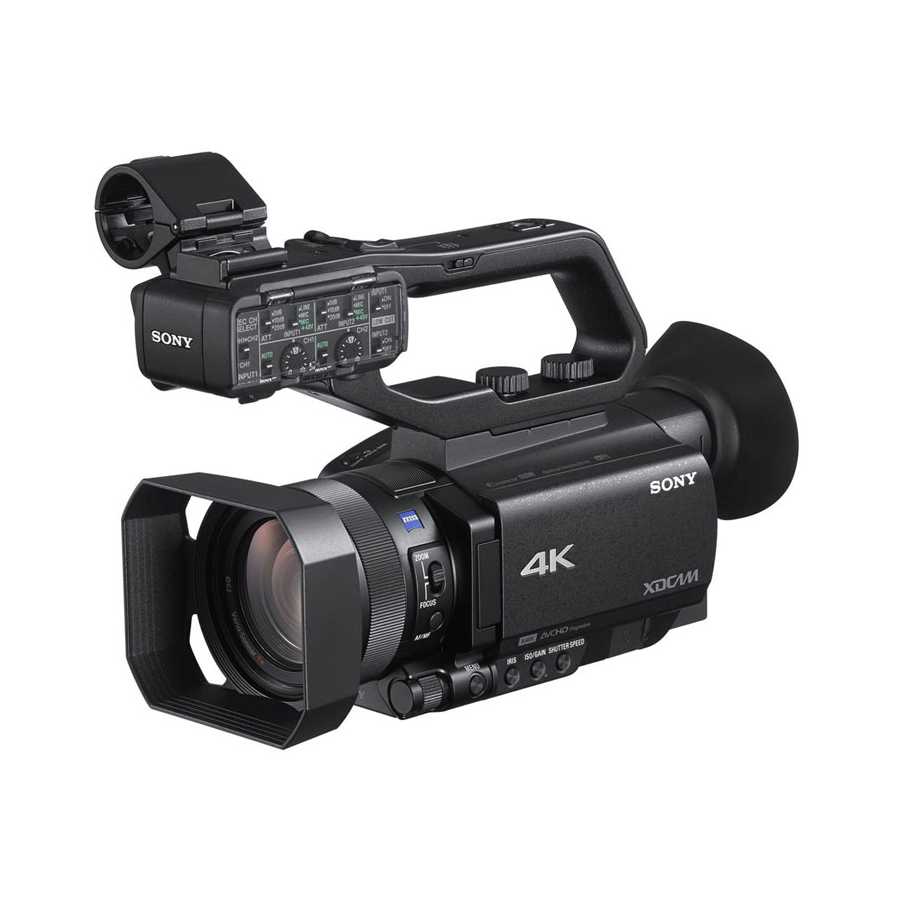
Summary of Contents for Sony PXW-Z90T
- Page 1 4-731-565-11(1) Solid-State Memory Identifying Parts and Controls Camcorder Getting Started Recording Operating Guide Playback Using Network Functions Editing Using the Menu Troubleshooting Additional Information ® PXW-Z90V/Z90T...
-
Page 2: Read This First
Read this first Before operating this unit, please read this manual thoroughly, and retain it for future reference. Precautions when using the black points and/or bright points (white, red, blue, or green in color) that appear constantly on camcorder the LCD screen. This is not a malfunction. •... - Page 3 Format the memory card using when you use it with your camcorder for the first time. All data recorded on the memory card [MEDIA FORMAT] if images are not will be erased by formatting, and cannot be recorded or played back properly recovered.
-
Page 4: Table Of Contents
Table of Contents Read this first ................... 2 Identifying Parts and Controls Identifying Parts and Controls ..............9 Body ..................... 9 Wireless Remote Commander ............17 Screen Indicators ................... 18 Getting Started Step 1: Checking supplied accessories ..........20 Step 2: Charging the battery pack ............22 Step 3: Attaching the accessory shoe ............ - Page 5 Proxy recording ..................43 Notes on proxy recording ..............43 Proxy recording .................. 43 Adjusting the brightness .................44 Adjusting the iris ................44 Adjusting the ISO sensitivity/gain ............45 Adjusting the shutter speed ............... 45 Adjusting the exposure ..............46 Adjusting the light level (ND Filter) ............. 46 Adjusting the color tone ................47 Adjusting the white balance ...............
- Page 6 Table of Contents (Continued) Using Network Functions Using with a Smartphone ............... 75 Downloading “Content Browser Mobile” ..........75 Using a smartphone as a remote controller ........75 Connecting the camcorder to an Android smartphone equipped with the NFC function using One-touch ............. 76 Connecting without using the NFC function (Android) .......
- Page 7 Editing Protecting movies (Protect) ..............99 Dividing a movie ..................99 Deleting movies ..................100 Formatting a memory card ..............101 Deleting all data from the memory card completely ......101 Repairing the image database file ............102 Using the Menu Operating the menu ................103 Menu items ...................104 CAMERA SET menu .................
- Page 8 Table of Contents (Continued) About the MPEG format ..............162 About the AVCHD format ..............162 Memory cards .................. 162 About the “InfoLITHIUM” battery pack ..........163 About handling of your camcorder ..........165 Specifications ..................168 Index ....................171...
-
Page 9: Identifying Parts And Controls
Identifying Parts and Controls Identifying Parts and Controls Body The numbers in ( ) are reference pages. A ASSIGN4/FOCUS MAGNIFIER K Recording lamp (p. 130) button (p. 39) Flashes when remaining capacity of the memory card or battery becomes low. B Accessory shoe mount (p. - Page 10 Identifying Parts and Controls (Continued) Attaching the XLR handle unit 1 Remove the Multi Interface Shoe cap. 2 Remove the handle shoe cap. 4 Press and turn the handle mounting screws to tighten them. 3 Align the mark on the XLR handle with the one on the camcorder, and insert the XLR handle unit in the direction of the arrow.
- Page 11 the Multi Interface Shoe or cause the camcorder to detach and fall. Detaching the XLR handle unit To detach the XLR handle unit, perform the attachment procedure in reverse. Attaching the microphone (sold separately) Use the following procedure to attach an external microphone (sold separately) to record audio.
- Page 12 Identifying Parts and Controls (Continued) A Manual lens ring (p. 35) N LOW CUT (INPUT2) switch (p. 52) B Lens hood O Internal microphone C Lens (ZEISS lens) P ZOOM/FOCUS switch (p. 36) D REC CH SELECT (INPUT1) switch Q AF/MF button (p. 36) (p.
- Page 13 Attaching the lens hood Align the mark on the lens hood to the mark on the camcorder, and turn the lens hood in the direction of the arrow until it is locked. z Tip • If you attach or remove a 62 mm PL filter or MC protector, remove the lens hood.
- Page 14 Identifying Parts and Controls (Continued) A SDI OUT jack (p. 69) separately, screw length 5.5 mm or shorter). B Diopter adjustment dial (p. 27) The camcorder may not be able to C START/STOP button (p. 31) mount in some orientations, depending D HDMI OUT jack (p.
- Page 15 A Handle zoom speed switch (p. 34) B Eye sensor C Viewfinder (p. 27) D Large eyecup (p. 27) E AUTO/MANUAL switch (p. 44) F ND FILTER switch (p. 46) G Battery slot (p. 22) H i (headphones) jack I SHUTTER SPEED button (p. 45) J ISO/GAIN (ISO sensitivity/gain) button (p.
- Page 16 Identifying Parts and Controls (Continued) A SLOT SELECT button (p. 30) B THUMBNAIL/ button (p. 65) C LCD screen/touch panel (p. 27) D Memory card slot A/Memory card access lamp (p. 30) E Memory card slot B/Memory card access lamp (p. 30) F DISPLAY button (p.
-
Page 17: Wireless Remote Commander
H Transmitter Remote Commander may not function properly. I START/STOP button (p. 31) In this case, replace the battery with a Sony CR2025 lithium battery. Use of another battery J Power zoom lever may present a risk of fire or explosion. -
Page 18: Screen Indicators
Screen Indicators Indicator Meaning Center Playback indicator Upper left Upper right (p. 65) Processing Relay recording (p. 32) SDI/HDMI REC CONTROL (p. 119) Bottom Streaming (p. 85, 87) Upper left Upper right Indicator Meaning 100% Remaining battery Indicator Meaning INTELLIGENT AUTO Estimated remaining (face/scene detection/ 0min... - Page 19 to which the DATA CODE function is Indicator Meaning assigned, during playback. F5.6 Iris (p. 44) ISO800 ISO sensitivity (p. 45) Gain (p. 45) 100 180° Shutter speed (p. 45) AVCHD audio format (p. 120) -2.0EV AE shift (p. 107) Auto setting/manual setting (p.
-
Page 20: Getting Started
Accessory shoe plate (1), screws (4)) supplied with your camcorder. If, for any (p. 24) reason, there is something missing, contact your Sony dealer. The number in the parentheses indicates the number of that item supplied. AC Adaptor (p. 22) XLR handle unit Power cord (mains lead) (p. - Page 21 Sony Professional products website: U.S.A. http://pro.sony.com Canada http://www.sonybiz.ca Latin America http://sonypro-latin.com Europe, Middle East, and Africa http://www.pro.sony.eu Japan http://www.sonybsc.com Asia Pacific http://pro.sony-asia.com Korea http://bp.sony.co.kr China http://pro.sony.com.cn Although the data regarding recorded materials are stored over multiple files and folders, you can easily handle the clips...
-
Page 22: Step 2: Charging The Battery Pack
Step 2: Charging the battery pack You can charge the “InfoLITHIUM” battery pack (V series) with the supplied AC Adaptor. b Note • You can use an NP-FV100A large capacity battery pack (sold separately) with your camcorder. You cannot use an NP-FV50A. DC IN jack Close the LCD screen and store DC plug... - Page 23 On the AC Adaptor • Do not short-circuit the DC plug of the AC Adaptor or battery terminal with any metallic objects. This may cause a malfunction. To store the battery pack If the battery pack is not in use for a while, run down the battery and store it (p.
-
Page 24: Step 3: Attaching The Accessory Shoe
Step 3: Attaching the accessory shoe To mount the accessory shoe Mount the accessory shoe on the accessory shoe mount as illustrated. Accessory shoe plate Accessory shoe Accessory shoe Accessory shoe plate 1 Lift the edge of the accessory shoe plate and pull it in the direction opposite to that of the arrow on the accessory shoe plate and remove it from the accessory... -
Page 25: Step 4: Turning On The Camcorder And Setting The Date And Time
Step 4: Turning on the camcorder and setting the date and time Turning on the camcorder Setting the date and time Set the date and time when you use your camcorder for the first time. Open the LCD screen and turn the power on. - Page 26 Step 4: Turning on the camcorder and setting the date and time (Continued) The clock starts. • Set [SUMMERTIME] to [ON] to move the time forward 1 hour. • You can set any year up to the year 2037. • Midnight is indicated as 12:00 AM, and noon as 12:00 PM.
-
Page 27: Step 5: Adjusting The Lcd Screen And Viewfinder
Step 5: Adjusting the LCD screen and viewfinder b Note Using the LCD screen The LCD screen and the viewfinder do not operate at the same time. The LCD screen can be rotated in the range as illustrated below, allowing a person other When the picture in the viewfinder is than the camera operator to see the image. -
Page 28: Step 6: Preparing The Recording Media
Notes • To record in MPEG HD, “CBKZ-SLMP” (sold separately) is required (p. 42). • Operation with all memory cards is not assured. For details about non-Sony memory cards, contact each manufacturer. • See page 153 for the recording time of memory cards. - Page 29 • Movies recorded on “Memory Stick XC-HG Duo” media or SDXC memory cards can be imported to or played back on other equipment, such as a computer or A/V device, by connecting the camcorder to the equipment with the USB cable. However, the equipment must support the exFAT file system used for “Memory Stick XC-HG Duo”...
-
Page 30: Inserting A Memory Card
Step 6: Preparing the recording media (Continued) Inserting a memory card SLOT SELECT button Open the cover, and insert the memory card with the notched corner in the direction as illustrated until it clicks into place. Memory card slot A b Notes •... -
Page 31: Recording
Recording Recording Recording Your camcorder records movies on memory cards. The factory setting for recording is XAVC QFHD. Check that the memory cards are inserted correctly, and press the START/STOP button (handle record button) to start recording. [STBY] t [REC] The recording lamps light up during recording. -
Page 32: Continuous Recording On The Memory Cards (Relay Rec)
Recording (Continued) z Tips • The picture aspect ratio is fixed to 16:9. • For details about changing the screen display during recording, see page 67. • For details about screen display during recording, see page 18. • The recording lamps can be set to stay off ([REC LAMP], p. 130). •... -
Page 33: Recording Movies Using Both Memory Card A And B (Simul Rec)
Recording movies using both memory card A and B (Simul Rec) You can record movies on both memory card A and memory card B simultaneously. (REC/OUT SET) t [REC SET] t [SIMUL/RELAY REC] t [SIMULTANEOUS REC]. b Note • If the file format is AVCHD, MPEG HD, or XAVC HD and [SIMUL/RELAY REC] is switched to [SIMULTANEOUS REC], then [NIGHTSHOT LIGHT] is set to [OFF]. -
Page 34: Adjusting The Zoom
Recording (Continued) z Tips Adjusting the zoom • When focusing, the minimum distance required between the camcorder and the subject is about 1 cm (about 13/32 in.) for wide angle and about 1 m (about 39 3/8 in.) for telephoto. •... - Page 35 Adjusting the zoom with the manual lens ring If you toggle the ZOOM/FOCUS switch to ZOOM, you can zoom at the desired speed by turning the manual lens ring C. Fine adjustment is also possible. b Note • Turn the manual lens ring C at a moderate speed.
-
Page 36: Adjusting The Focus
Adjusting the focus You can adjust the focus manually or Adjusting the focus automatically for different recording automatically conditions. Press the AF/MF button C to set the focus to automatic. 9 disappears and automatic focus adjustment is restored. The camcorder uses phase detection AF for high-speed focusing and contrast AF for high-accuracy focusing. - Page 37 To focus on a position when [WIDE] is z Tips selected • The focal length information (the distance at which the subject is in focus; for when it is dark When [FOCUS AREA] is set to [WIDE] and hard to adjust the focus) appears for about 3 and an unintended position is in focus, seconds in the following cases.
-
Page 38: Adjusting The Focus While Tracking A Selected Subject (Lock-On Af)
Adjusting the focus (Continued) Example [AF TRACKING DEPTH] / [AF – When using [NIGHTSHOT] – When [INTELLIGENT AUTO] is enabled SUBJ. SWITCH. SENS.] settings • For subjects with low contrast or subjects in dark places, AF may operate at the optimum Trains/motor sports speed regardless of the speed setting. -
Page 39: Focusing Using The Focus Magnifier
– [FOCUS AREA] is set to [WIDE] while using lock-on AF. Press the MENU button D. Focusing using the focus Select (CAMERA SET) t magnifier [LOCK-ON AF] t [ON]. The selected area on the LCD screen is magnified and displayed. This is useful when adjusting the focus. -
Page 40: Focusing By Touching The Lcd Screen (Spot Focus)
Adjusting the focus (Continued) enabled, a green frame is displayed Focusing by touching the LCD when in focus. screen (Spot Focus) You can focus on the point where you touch on the LCD screen. To set face detection Move the selection cursor (orange colored underline) to select the priority face, then Press the MENU button D. - Page 41 z Tips • Only faces within the set focus area can be focused. • If [FOCUS AREA] is set to [WIDE], the focus area frame is not displayed when [FACE DETECTION] is set to [ON]. • To make it easy to detect faces, record under the following conditions: –...
-
Page 42: Selecting The File Format And Recording Format
Selecting the file format and recording format EXTERNAL OUTPUT Setting the file format and Output to external output selected in recording format [OUTPUT SELECT]. Set the file format in (REC/OUT SET) t [REC SET] t [FILE FORMAT] and the recording format (bit rate, picture size, b Notes frame rate, scanning method) in (REC/... -
Page 43: Proxy Recording
Proxy recording This function allows you to simultaneously record a low bitrate proxy file at the same Press the START/STOP button time as recording the high bitrate original (handle record button) to start file movie. recording. Notes on proxy recording b Notes Function limitations when proxy •... -
Page 44: Adjusting The Brightness
Adjusting the brightness You can adjust the image brightness by adjusting the iris, ISO sensitivity/gain or Turn the MANUAL dial A to shutter speed, or by adjusting the light level adjust the value. with the ND filter E. The light level increases the more that you open the aperture (decreasing F value). -
Page 45: Adjusting The Iso Sensitivity/Gain
Adjusting the ISO sensitivity/ Adjusting the shutter speed gain Set whether to adjust the ISO sensitivity or Set the AUTO/MANUAL switch F gain using [ISO/GAIN SEL] (p. 106). to MANUAL. Set the AUTO/MANUAL switch F Press the SHUTTER SPEED to MANUAL. button D. -
Page 46: Adjusting The Exposure
Adjusting the brightness (Continued) • When recording under fluorescent lamps, Level 60i/60p/30p 50i/50p/25p sodium lamps, or mercury lamps, the picture 4000 2400 3500 may flicker or change colors, or may have horizontal bands of noise. 6000 4800 6000 You may be able to improve the situation by 10000 10000 10000... -
Page 47: Adjusting The Color Tone
Adjusting the color tone adjustment, set the ND filter to 2. If flashes during the iris automatic adjustment, set the ND filter to 3. Adjusting the white balance The ND filter indicator will stop flashing and remain on the screen. flashes, set the ND filter E to OFF. - Page 48 Adjusting the color tone (Continued) x Setting the A/B value 4 Press the MENU button. Select A or B for recording with the (CAMERA SET) t [WB 5 Select white balance setting stored in memory SET]. A or B. 6 Frame a white object such as a piece of x To use the PRESET value of white paper that fills the screen under the balance...
-
Page 49: Using Direct Menu
Using Direct Menu Direct Menu allows you to change settings directly while recording using the v/V/b/ B/SET buttons. The following items can be configured. • Focus value (p. 36) • AE shift level value (p. 107) • Iris value (p. 44) •... - Page 50 Using Direct Menu (Continued) • If an item (such as iris value or focus value) is changed using buttons or switches while Direct Move the v/V/b/B/SET button up/ Menu is displayed, the Direct Menu may be down to display the desired canceled.
-
Page 51: Audio Setup
Audio setup Recording sound from the internal microphone You can record sound in stereo using the camcorder’s internal microphone. Internal microphone Select [INT MIC] in the [MIC SELECT] menu. z Tip • To reduce wind noise, set [INT MIC WIND] to [ON]. -
Page 52: Recording Sound From A Multi Interface Shoe Compatible Microphone (Sold Separately)
Audio setup (Continued) L: AUDIO LEVEL (CH2) dial ATT 10dB: –50dBu ATT 20dB: –40dBu Wind noise reduction switches b Note G: LOW CUT (INPUT1) switch M: LOW CUT (INPUT2) switch • The input level is fixed to +4dBu when the INPUT1/INPUT2 (LINE/MIC/MIC+48V) switch (D or F) is set to LINE. -
Page 53: Recording Sound From An External Microphone (Sold Separately)
To restore automatic adjustment Select [MI SHOE MIC] in the [MIC • Set the AUTO/MAN switch to AUTO to restore SELECT] menu. automatic adjustment for sound that is input from the INPUT1 and INPUT2 jacks. Adjusting the audio level from Recording sound from an the internal microphone or an external microphone (sold... -
Page 54: Useful Functions
Useful functions Scenes detected by INTELLIGENT Selecting suitable settings AUTO automatically (auto mode Face detection: (Portrait), (Baby) setting) Scene detection: . (Backlight), (Landscape), (Night Scene), (Spotlight), (Low You can make optimal recordings in Light), (Macro) various situations. Camera-shake detection: (Walk), (Tripod) To use [SCENE SELECTION] 1 Select... -
Page 55: Shooting In Dimly Lit Locations (Low Lux)
b Notes Press the MENU button. • When [SCENE SELECTION SET] is set, the following settings are canceled. – White balance – Iris Select (CAMERA SET) t – Shutter speed [NIGHTSHOT] t [ON]. – ISO sensitivity/gain • is displayed. • When [SCENE SELECTION SET] is set, the •... - Page 56 Useful functions (Continued) 2 Select the picture profile number with Picture profile Example setting the settings you want to change. number 3 Select [SETTING]. Example settings of a color tone with 4 Select the item to adjust. [STANDARD] gamma 5 Adjust the picture quality. Example settings of a 6 Repeat steps 4 and 5 to adjust other color tone with [STILL]...
-
Page 57: Shooting In High Dynamic Range (Hdr)
automatically with the appropriate settings. On Shooting in high dynamic range devices that do not support the metadata, manual configuration is required. (HDR) • AVCHD and MPEG HD format recording AVCHD and MPEG HD format recordings do Reproduction of brightness over a wider not support HDR metadata. - Page 58 Useful functions (Continued) 2 Select [GAMMA DISP ASSIST] t [HLG3] is selected ([HLG1]: 87%, [HLG2]: 95%, [HLG3]: 100%). Test shooting beforehand [TYPE]. is recommended to prevent use of an 3 Select one of the following. inappropriate setting during actual shooting. (Default setting in bold) •...
-
Page 59: Setting Time Data
Icon display Playback screen When the gamma display assist function is “HLG” icon* ON, the following icons are displayed on the shooting screen and playback screen. Icon Meaning [S-LOG2t709(800%)] in use [S-LOG3t709(800%)] in use Gamma display assist icon [HLG(BT.2020)] in use * Only files recorded in XAVC format. -
Page 60: Recording With The Slow & Quick Motion Function
Useful functions (Continued) 5 Select [OK]. 1 Press the MENU button, and select (CAMERA SET) t [SLOW & To reset the timecode QUICK] t [S&Q MOTION] t [REC FORMAT]. Select [RESET] in step 2 of “Setting the timecode” to reset the timecode 2 Set the recording format. -
Page 61: Slow-Motion Recording At High Frame Rate (Hfr)
Quick Motion will record at high frame flashing on the screen, and wait till it turns to [STBY]. rate. • After you stop recording, your camcorder continues recording till it completes writing 0.5 The frame rate is fixed to the following seconds unit of data. - Page 62 Useful functions (Continued) the v/V/b/B/SET button, and then press 3 Select [FRAME RATE], and select the frame rate. the v/V/b/B/SET button to apply the setting. 4 Select [REC TIMING], and select the record timing. When you want to abort recording Record button Select [Cancel] on the screen during recording to abort recording.
-
Page 63: Reviewing The Most Recently Recorded Scene (Last Scene Review)
b Note • To change the frame rate setting, first stop recording. • If you edit the movie or remove the recording • The timecode is recorded in [REC RUN] mode media after you stop recording, the Last Scene (p. 127). Review function may not work correctly. -
Page 64: Assigning Functions To The Assign Buttons
Assigning functions to the ASSIGN buttons Some functions can be assigned to the • COLOR BAR (p. 114) ASSIGN buttons. • DIRECT (p. 49) You can assign a single function to each of • MENU (p. 103) the ASSIGN1 to 6 buttons. •... -
Page 65: Playback
Playback Playback Playback Insert a memory on which a movie has been recorded, and press the THUMBNAIL button (p. 16). The THUMBNAIL screen appears after a few seconds. Memory card Playback mode Back Thumbnails Next Current movie data (p. 66) •... - Page 66 Playback (Continued) A Date and time of recording start B Resolution C Frame rate D Recording mode E Recording time F Timecode of recording start Timecode will not be displayed correctly when you play back a memory card with no timecode, or a memory card with timecode that your camcorder does not support.
-
Page 67: Changing/Checking The Settings In Your Camcorder
Changing/checking the settings in your camcorder Displaying recording data (Data Code) You can display information, including date, time and camera data automatically stored during recording on the screen during playback. Press the MENU button during playback. (DISPLAY SET) t Select Changing the screen display [DATA CODE]. -
Page 68: Checking The Settings In Your Camcorder (Status Check)
Changing/checking the settings in your camcorder (Continued) recorded with the iris, ISO sensitivity/ gain, and shutter speed manually adjusted. F Camera shake correction (STEADYSHOT) b Notes • Memory card information • Data code is not displayed in XAVC QFHD, You can check the estimated used and free XAVC HD, MPEG HD 422, and MPEG HD spaces. -
Page 69: Connecting To A Monitor Or A Tv
• The output resolution of VIDEO OUT is 480i when [60i] is selected, and 576i when [50i] is selected. • It is recommended that you use an authorized cable with HDMI logo or a Sony HDMI cable. • Images are not output from the HDMI OUT jack of your camcorder, if copyright protection signals are recorded in the movies. -
Page 70: Selecting Jacks For External Output
Connecting to a monitor or a TV (Continued) • When the frame rate in [REC FORMAT] is set to 24p or 30p (when [60i] is selected) or 25p (when [50i] is selected), the output signal is converted to interlace or progressive through pull-down conversion. •... -
Page 71: Output Signal Formats
Output signal formats The signal format of the outputs from the SDI OUT jack, HDMI OUT jack, and multi/micro USB jack is shown below. SDI OUT/HDMI OUT output format (when [60i] is selected) XAVC QFHD –: Independent of set value Menu item Recording format SDI/HDMI... - Page 72 Connecting to a monitor or a TV (Continued) XAVC HD/MPEG HD 422/MPEG HD 420/AVCHD –: Independent of set value Menu item Recording format SDI/HDMI SDI OUT output HDMI OUT output REC/OUT SET> REC/OUT SET> REC/OUT SET> signal format signal format REC SET>...
- Page 73 Multi/micro USB jack output format (when [60i] is selected) Output is always 480/60i. SDI OUT/HDMI OUT output format (when [50i] is selected) XAVC QFHD –: Independent of set value Menu item Recording format SDI/HDMI SDI OUT output signal HDMI OUT output signal REC/OUT SET>...
- Page 74 Connecting to a monitor or a TV (Continued) Output in Slow & Quick Motion mode When [60i] is selected, the output format is the same as that shown on pages 71 and 72, excluding footnotes 1 and 2. When [50i] is selected, the output format is the same as that shown on page 73. Output in Super Slow Motion mode The output format is the same as in XAVC HD/MPEG HD 422/MPEG HD 420/AVCHD mode (on pages 72 and 73).
-
Page 75: Using With A Smartphone
Using Network Functions Using with a Smartphone • Google Play may not be supported depending on the country or region. In this case, search for “Content Browser Mobile” on the Internet, then The Wi-Fi function of the camcorder install it. enables you to operate the camcorder remotely by a smartphone. -
Page 76: Connecting The Camcorder To An Android Smartphone Equipped With The Nfc Function Using One-Touch
Using with a Smartphone (Continued) the camcorder is ready to be b Notes connected. • Live view images may not be displayed smoothly, depending on the smartphone The connection method will depend on performance and/or transmission conditions. the type of smartphone. •... -
Page 77: Connecting Without Using The Nfc Function (Android)
Connecting without using the Touch the smartphone on the NFC function (Android) camcorder. The smartphone connects to the camcorder, and “Content Browser Select [Settings] on your Mobile” is activated. smartphone, then select [Wi-Fi] [CTRL W/SMARTPHONE] starts on and the SSID (displayed on the the camcorder. -
Page 78: Configuring A Wireless Lan
Configuring a wireless Using with a Smartphone (Continued) Confirm connection to the SSID You can connect the camcorder to a displayed on the camcorder. network using a wireless LAN. b Note Return to the Home screen, then • The frequency band used by the wireless LAN start “Content Browser Mobile.”... -
Page 79: Registering An Access Point Using The Wps Function
Priority WIRELESS Registered Configure the access point Connection TC LINK icon settings. IP address Select the IP address configuration method. When [Manual] is selected, enter the IP z Tip address configuration items displayed on the screen, and select [OK]. • [Priority Connection] or [WIRELESS TC LINK] can be registered on only one access point. -
Page 80: Registering An Access Point Using The Wps Pin Method
Configuring a wireless LAN (Continued) Registering an access point using the WPS PIN method You can register an access point by entering the PIN code of the access point. Press the MENU button. Press the WPS button of the access point within the next two minutes. -
Page 81: Registering An Access Point Manually
Select , and press the Enter the SSID on the displayed MENU button to close the menu screen, and select [Next]. screen. Select the security protocol. If [WEP] or [WPS] is displayed, enter b Notes the password on the displayed screen, •... -
Page 82: Changing The Device Name
Configuring a wireless LAN (Continued) To rename a device, use the following procedure to enter a name from the Select keyboard. After a short delay, a list of access points that can be connected is How to use the keyboard displayed. -
Page 83: Configuring A Wired Lan
Configuring a wired Select (NETWORK SET) t You can connect the camcorder to a [Wi-Fi SET] t [FREQUENCY network using a wired LAN. SET]. Select the frequency band. b Notes • The following configuration is applied when [AUTO] is selected. –... -
Page 84: Using The Streaming Function (Streaming)
Using the streaming Configuring a wired LAN (Continued) function (STREAMING) and then connect to the router You can connect the camcorder to a network and stream a movie in real-time to using a LAN cable. external devices. b Note Press the MENU button. •... -
Page 85: Streaming Distribution
Icon Meaning Press the MENU button. Before wireless LAN connection and after disconnection Select (NETWORK SET) t Wireless LAN connection [STREAMING] t desired PRESET (icon varies depending on number t configuration item. frequency band of access point) Wired LAN connection Select/set the setting value. - Page 86 Using the streaming function (STREAMING) (Continued) • The following functions are not available when • The image quality of fast-changing scenes may the streaming function is on. be adversely affected. – Menu operations z Tip – Touch operation of the LCD screen •...
-
Page 87: Streaming Movies Using Ustream
Streaming movies using USTREAM You can distribute movies using the Configuring using the menu USTREAM video sharing site. USTREAM user registration is required beforehand. Configure the following items in There are limitations imposed by (NETWORK SET) t [USTREAM]. USTREAM for video distribution using USTREAM. - Page 88 Streaming movies using USTREAM (Continued) Icon Meaning To stop streaming, press the Before wireless LAN THUMBNAIL button again. connection and after disconnection Wireless LAN connection (icon varies depending on b Notes frequency band of access • Check that the date and time have been set point) correctly on the camcorder before starting streaming.
-
Page 89: Stopping Ustream
High-quality streaming employing Sony Camcorder operation when using QoS technology is supported by connecting USTREAM a Sony PWS-110RX1 Network RX Station (sold separately) acting as a Connection The following functions are enabled when Control Manager (hereinafter, “CCM”). using USTREAM. Use the hardware... - Page 90 STRM NETWORK CLIENT MODE “Using the streaming function (STREAMING)”. CCM : Sony CCM • Only wired LAN connection is supported when SSID : XXX - XXXXXXXX [AIRPLANE MODE] is set to [ON]. • [QFHD REC OUTPUT] is fixed to [VF/LCD PANEL].
-
Page 91: Network Client Mode Operations
Camcorder operation when using Network client mode stops. network client mode The following functions are enabled during network client mode operation. Use the Importing a CCM root certificate hardware switches and buttons to control the camcorder. Operation from the menu is A CCM root certificate is required to not supported. -
Page 92: Synchronizing The Timecode Of Multiple Cameras Using A
Synchronizing the Using NETWORK CLIENT MODE (Continued) timecode of multiple cameras using a • Resetting network settings (p. 98) will delete the CCM root certificate imported from the memory smartphone card, and will initialize the CCM root certificate of the camcorder. When shooting using multiple cameras, you can synchronize the timecode of each camera using a smartphone and the... -
Page 93: Synchronizing The Timecode To Another Device Using A Smartphone
Launch “Content Browser Select the SSID of a smartphone Mobile” on the smartphone. that has tethering mode enabled. For details on how to operate “Content If the smartphone SSID is not displayed, Browser Mobile” after it starts, refer to select [Manual setting] and configure the Help section in “Content Browser settings manually (p. - Page 94 Synchronizing the timecode of multiple cameras using a smartphone (Continued) • The timecode advance may become • The following functions are not available when Wireless TC LINK is running. non-contiguous at the instant the – Menu operations timecode is synchronized. If this occurs, the timecode output on SDI –...
-
Page 95: Using The Ftp Transfer Function
Using the FTP transfer function USER INFO SET User name and password When the camcorder is connected to a b Note network, you can transfer recorded movie files directly to an FTP server. • It is recommended that [Secure Protocol] be set to [ON]. - Page 96 Using the FTP transfer function (Continued) • Press the thumbnail to preview the image. Select the media, where the files • appears on the thumbnail of files you want to transfer are stored, that have a proxy file. and the file format on the thumbnail screen.
-
Page 97: Checking Ftp Transfer Results
Importing a root certificate If [Secure Protocol] is set to [ON] for FTP Checking FTP transfer results transfer or USTREAM streaming, a root certificate is required. The camcorder You can check whether all files have been contains a built-in root certificate, which transferred. -
Page 98: Resetting Network Settings
• If a problem occurs due to inadequate • CCM settings (p. 89) security measures or due to foreseeable • CCM root certificate (p. 91) circumstances, Sony Corporation is not responsible for any resulting damage. • Root certificate (p. 97) Press the MENU button. -
Page 99: Protecting Movies (Protect)
Editing Protecting movies Dividing a movie (Protect) Protect movies to avoid deleting them by You can divide a movie at a designated point. mistake. Press the MENU button while Press the MENU button when the playing back movies. THUMBNAIL screen is displayed. Select (EDIT) t [DIVIDE]. -
Page 100: Deleting Movies
Deleting movies You can free media space by deleting movies from a memory card. Touch , successively, according to the screen display. b Notes • You cannot restore images once they are deleted. • Do not remove the battery pack, the AC Adaptor, or the memory card from your camcorder during the operation. -
Page 101: Formatting A Memory Card
Formatting a memory Deleting all data from card the memory card completely Formatting deletes data from the memory card to recover recordable free space. If a memory card is used repeatedly, b Notes garbage data accumulate which may prevent the image data from being written •... -
Page 102: Repairing The Image Database File
Repairing the image Deleting all data from the memory card completely (Continued) database file b Notes This function checks the database information and the consistency of movies • It may take from several minutes to several on the memory card, and repairs any hours to empty a memory card, depending on the capacity. -
Page 103: Using The Menu
Using the Menu Operating the menu You can change various settings or make To return to the previous screen, select detailed adjustments using the menu items RETURN]. displayed on the LCD screen. b Notes • The available menu items vary depending on the context of your camcorder during recording or playback. -
Page 104: Menu Items
Menu items CAMERA SET AUDIO SET ISO/GAIN SEL VOLUME AUTO ISO LIMIT AVCHD AUDIO FORMAT AGC LIMI AUDIO REC LEVEL WB PRESET INT MIC WIND WB OUTDOOR LEVEL MIC SELECT WB TEMP SET AUDIO OUTPUT TIMING WB SET AE SHIF DISPLAY SET D. - Page 105 OTHERS NETWORK SET CTRL W/SMARTPHONE STATUS CHECK CAMERA PROFILE STREAMING S&Q BUTTON SETTING USTREAM ASSIGN BUTTON NETWORK CLIENT MODE CLOCK SET WIRELESS TC LINK AREA SET FTP TRANSFER SUMMERTIME WIRED LAN SET LANGUAGE Wi-Fi SET DATE REC AIRPLANE MODE BEEP ROOT CERTIFICATE REC LAMP NETWORK RESET...
-
Page 106: Camera Set Menu
Menu items (Continued) The function and setting value of each menu item are as follows. The default settings are marked with bold text. The display sequence of menu items may vary from the device. CAMERA SET menu CAMERA SET Menu item Sub-items/Settings Description ISO/GAIN SEL... - Page 107 CAMERA SET Menu item Sub-items/Settings Description AE SHIFT ON/OFF Turns the AE shift function on/off. OFF, ON LEVEL Adjusts the brightness. –2.0EV to +2.0EV • This function is not active while you adjust (0EV) the iris, shutter speed, ISO sensitivity/gain all manually.
- Page 108 Menu items (Continued) CAMERA SET Menu item Sub-items/Settings Description FOCUS AREA WIDE Adjusts the focus automatically basically for the whole screen. • When phase detection AF frames are displayed, you can specify the subject for focusing by touch. ZONE Adjusts the focus automatically within a specified zone.
- Page 109 CAMERA SET Menu item Sub-items/Settings Description FOCUS AREA FLEXIBLE SPOT Adjusts the focus automatically at the touched position on the screen. • This allows you to focus on small subjects or on a narrow area. • The auto focus operating range is indicated by the focus area frame.
- Page 110 Menu items (Continued) CAMERA SET Menu item Sub-items/Settings Description SLOW & QUICK S&Q MOTION Sets Slow & Quick Motion recording. HIGH FRAME RATE Sets slow-motion recording at high frame rate OFF, ON (HFR) (p. 61). REC FORMAT Sets the recording format for Slow & Quick Motion.
- Page 111 CAMERA SET Menu item Sub-items/Settings Description SLOW & QUICK AVCHD REC FORMAT When [60i] is selected When [50i] is selected 1080/60p PS 1080/50p PS 1080/30p FX 1080/25p FX 1080/24p FX – FRAME RATE Sets the frame rate for Slow & Quick Motion recording.
- Page 112 Menu items (Continued) CAMERA SET Menu item Sub-items/Settings Description SLOW & QUICK REC FORMAT Sets the recording format for Super Slow Motion. XAVC HD When [60i] is selected When [50i] is selected 1080/60p 50Mbps 1080/50p 50Mbps 1080/60p 35Mbps 1080/50p 35Mbps 1080/30p 50Mbps 1080/25p 50Mbps 1080/30p 35Mbps...
- Page 113 CAMERA SET Menu item Sub-items/Settings Description AUTO MODE SET AUTO, INTELLIGENT Sets auto mode to optimize settings to suit the AUTO, SCENE scene to record (p. 54). SELECTION SCENE SELECTION NIGHT SCENE, Sets the scene to use when [AUTO MODE SUNRISE&SUNSET, SET] is set to [SCENE SELECTION] (p.
-
Page 114: Rec/Out Set Menu
Menu items (Continued) CAMERA SET Menu item Sub-items/Settings Description COLOR BAR ON/OFF Displays and records color bars, and outputs OFF, ON audio tone signals. • This function is automatically set to [OFF] when you switch the format, execute a function with the MENU button, or turn off the camcorder. - Page 115 REC/OUT SET Menu item Sub-items/Settings Description REC SET When FILE FORMAT is When [60i] is selected When [50i] is selected XAVC QFHD 2160/30p 100Mbps 2160/25p 100Mbps 2160/30p 60Mbps 2160/25p 60Mbps 2160/24p 100Mbps 2160/24p 60Mbps • Image size: 2160 (3840×2160) When FILE FORMAT is When [60i] is selected When [50i] is selected XAVC HD...
- Page 116 Menu items (Continued) REC/OUT SET Menu item Sub-items/Settings Description REC SET When FILE FORMAT is When [60i] is selected When [50i] is selected MPEG HD 420 1080/60i HQ 1080/50i HQ 1080/30p HQ 1080/25p HQ 1080/24p HQ – 1080/60i (1440) HQ 1080/50i (1440) HQ 720/60p HQ 720/50p HQ...
- Page 117 REC/OUT SET Menu item Sub-items/Settings Description VIDEO OUT OUTPUT SELECT Sets the video output destination. OUTPUT SELECT OUTPUT SELECT: Selects the jack for SDI, HDMI, VIDEO external output. QFHD REC OUTPUT: Selects whether to QFHD REC OUTPUT output the video signal when recording in VF/LCD PANEL, 4K to the viewfinder/LCD screen or to the EXTERNAL OUTPUT...
- Page 118 Menu items (Continued) REC/OUT SET Menu item Sub-items/Settings Description VIDEO OUT DOWN CONVERT TYPE Sets the video output signal format. SQUEEZE, LETTER Use this function for outputting movies BOX(16:9), EDGE recorded in 16:9 under the following CROP conditions. • Output from VIDEO OUT •...
- Page 119 REC/OUT SET Menu item Sub-items/Settings Description VIDEO OUT SDI/HDMI REC When the camcorder is connected to an CONTROL external recorder, this sets whether to record to OFF, ON the external recorder based on the camcorder’s operation. ON: Record based on the camcorder operation. OFF: Does not record based on the camcorder operation.
-
Page 120: Audio Set Menu
Menu items (Continued) AUDIO SET menu AUDIO SET Menu item Sub-items/Settings Description VOLUME Adjusts the volume. AVCHD AUDIO LINEAR PCM, DOLBY Switches the recording audio format. FORMAT DIGITAL LINEAR PCM ( ): Records in linear PCM format. DOLBY DIGITAL ( ): Records in Dolby Digital format. - Page 121 AUDIO SET Menu item Sub-items/Settings Description MIC SELECT AUTO, INT MIC, MI Selects the microphone to use for recording SHOE MIC, STEREO audio. MINI MIC AUTO: The microphone used for recording audio is automatically selected based on the microphone that is connected. •...
-
Page 122: Display Set Menu
Menu items (Continued) DISPLAY SET menu DISPLAY SET Menu item Sub-items/Settings Description HISTOGRAM OFF, ON, ON[ZEBRA Sets the histogram display. POINT] OFF: Does not display a histogram. ON: Displays a histogram. A line appears at the 100% position, and the color of the zone above the line changes. - Page 123 DISPLAY SET Menu item Sub-items/Settings Description MARKER ON/OFF Sets the marker display. OFF, ON You can display multiple types of markers at the same time. • Markers are not recorded with the image. • During marker display, only the timecode, zebra, peaking, and face detection indicators are output, even if [DISPLAY OUTPUT] is set to [ALL OUTPUT].
- Page 124 Menu items (Continued) DISPLAY SET Menu item Sub-items/Settings Description CAMERA DATA OFF, ON Sets whether to display the iris, ISO sensitivity/ DISPLAY gain, and shutter speed values. Iris value Shutter speed value ISO sensitivity/gain value • The settings appear during manual adjustment, regardless of the setting of this function.
- Page 125 DISPLAY SET Menu item Sub-items/Settings Description DATA CODE OFF, DATE/TIME, Selects the information that is displayed during CAMERA DATA playback. OFF: No information is displayed. DATE/TIME: The date and time are displayed. CAMERA DATA: Camera data is displayed. GAMMA DISP ON/OFF Sets whether to convert the image displayed on ASSIST...
-
Page 126: Tc/Ub Set Menu
Menu items (Continued) DISPLAY SET Menu item Sub-items/Settings Description DISPLAY OUTPUT LCD PANEL, ALL Sets the output to display information, such as OUTPUT the timecode. You can select to display information on the LCD screen only, or output the information to the VIDEO OUT, SDI OUT, HDMI OUT jacks and the LCD screen. -
Page 127: Network Set Menu
TC/UB SET Menu item Sub-items/Settings Description TC RUN REC RUN, FREE RUN Sets how the timecode advances. REC RUN: Advances the timecode only during recording. Select this setting to record the timecode sequentially from the last timecode of the previous recording. •... - Page 128 Menu items (Continued) NETWORK SET Menu item Sub-items/Settings Description USTREAM USER INFO SET Configures USTREAM settings (p. 87). SIZE 640×360, 1280×720 SERVER REC SET Set whether to record the distributed movie on ON, OFF the USTREAM server. NETWORK CLIENT CCM SET Sets network client mode (p.
-
Page 129: Others Menu
NETWORK SET Menu item Sub-items/Settings Description ROOT CERTIFICATE Imports a root certificate (p. 97). NETWORK RESET Resets network settings (p. 98). OTHERS menu OTHERS Menu item Sub-items/Settings Description STATUS CHECK Checks the settings in your camcorder (p. 68). CAMERA PROFILE MEMORY CARD A, Loads, saves, and deletes camera profiles. - Page 130 Menu items (Continued) OTHERS Menu item Sub-items/Settings Description SUMMERTIME OFF, ON Sets whether to use summer time. When set to [ON], the time moves forward 1 hour. LANGUAGE Sets the display language. DATE REC OFF, ON Sets whether to record the date and time on the recorded images.
-
Page 131: Edit Menu
OTHERS Menu item Sub-items/Settings Description OPTION MPEG HD, WIRELESS Checks the installation status of options sold TC LINK separately. Also used to start installation after purchasing option software. • For details about installation, refer to the installation guide for the option software. VERSION DISPLAY Displays the version of your camcorder. - Page 132 Menu items (Continued) Item Sub-items Settings Description GAMMA STANDARD, Selects a gamma curve. STANDARD: Standard gamma curve for STILL, movies. CINE1, STILL: Gamma curve for still image CINE2, capture. CINE3, CINE1: Softens the contrast in dark parts CINE4, and accentuates gradation changes in ITU709, bright parts to produce images with subdued tones (equivalent to...
- Page 133 Item Sub-items Settings Description BLACK Corrects gamma in low intensity areas. GAMMA • [BLACK GAMMA] is disabled when [GAMMA] is set to [HLG], [HLG1], [HLG2], or [HLG3]. RANGE HIGH, Selects the correction range. MIDDLE, LEVEL –7 (maximum Sets the correction level. black compression) to +7...
- Page 134 Menu items (Continued) Item Sub-items Settings Description COLOR STANDARD, Sets the type and level of color. STANDARD: Suitable colors when MODE STILL, [GAMMA] is set to CINEMA, [STANDARD]. PRO, STILL: Suitable colors when ITU709 [GAMMA] is set to [STILL]. MATRIX, CINEMA: Suitable colors when B/W, [GAMMA] is set to [CINE1].
- Page 135 Item Sub-items Settings Description COLOR –7 (greenish) Sets the color phase. PHASE to +7 (reddish) COLOR –7 (light red) Sets the color depth for each DEPTH to +7 (deep color phase. red) The darker the color, the greater the effect. No effect is applied –7 (light green) for subjects lacking color.
- Page 136 Menu items (Continued) Item Sub-items Settings Description COLOR Sets the color correction. CORRECTION • Setting both memories to the same setting doubles the color correction effect. • The settings of [COLOR CORRECTION] will be retained even if the power is turned off.
- Page 137 Item Sub-items Settings Description COLOR MEMORY1 PHASE 0 (purple) to 8 Sets the color phase of memory CORRECTION COLOR (red) to 16 (yellow) to 24 (green) to 31 (blue) PHASE 0 (no color Sets the phase range of memory RANGE selection), 1 (narrow: to select only a...
- Page 138 Menu items (Continued) Item Sub-items Settings Description WB SHIFT Sets the white balance shift. • Items you can adjust differ depending on the filter type. FILTER TYPE LB-CC, R-B Selects a color filter type for the white balance shift. LB-CC: Film type (color temperature conversion and color correction) R-B: Video type (correction of R...
- Page 139 Item Sub-items Settings Description DETAIL LIMIT 0 (low limit Sets the limit level of the level (likely to DETAIL. be limited)) to 7 (high limit level (not likely to be limited)) CRISPENING 0 (shallow Sets the crispening level. crispening level) to 7 (deep crispening level)
-
Page 140: Troubleshooting
(OTHERS) t INITIALIZE. 3 Select This operation will reset the date, time, and area settings. 4 Consult your Sony dealer or local authorized Sony service facility. • Power sources/LCD screen/Wireless Remote Commander (p. 140) • Memory cards (p. 142) • Recording (p. 142) •... - Page 141 The POWER/CHG lamp flashes while charging the battery pack. • The battery pack may not be able to be charged if the temperature of the battery pack is too high or too low. • Reattach the battery pack correctly. • If the lamp continues to flash, there may be a problem with the camcorder. Disconnect the plug from the power outlet, and contact a service representative.
- Page 142 Troubleshooting (Continued) Another video device malfunctions when you use the supplied Wireless Remote Commander. • Select a commander mode other than DVD2 for your video device. • Cover the sensor of your video device with black paper. Memory cards The camcorder does not operate with the memory card inserted. •...
- Page 143 The handle zoom does not work. • Set the handle zoom speed switch to FIX or VAR (p. 34). The access lamp remains lit even after recording was stopped. • Your camcorder is recording the scene you have just shot on the memory card. The imaging field looks different.
- Page 144 Troubleshooting (Continued) • SteadyShot image stabilization may not be able to correct the image if the shaking is too large, even if [STEADYSHOT] is set to [ACTIVE] or [STANDARD]. Image cannot be recorded or played back properly. • If you continue recording and deleting images on recording media for a long period of time, the files on that media may become fragmented.
- Page 145 Black bands appear when you record a TV screen or computer screen. • Adjust the shutter speed (p. 45). Fine patterns flicker, diagonal lines look jagged. • Adjust [DETAIL] to the negative side (p. 138). The timecode is not recorded in sequence. •...
- Page 146 Troubleshooting (Continued) Audio is not recorded properly. • If an external microphone or other device is connected or disconnected while recording a movie, the audio may not be recorded properly. Audio is recorded properly by restoring the connection state of the microphone that was in force at the start of recording. •...
- Page 147 Copying/Editing/Connecting to other devices Timecode and other information appear on the display of the connected device. • Set [DISPLAY OUTPUT] to [LCD PANEL] (p. 126). Copy cannot be done correctly using the A/V connecting cable (sold separately). • The A/V connecting cable (sold separately) is not connected properly. Make sure that the A/V connecting cable (sold separately) is connected to the input jack of the device.
-
Page 148: Warning Indicators And Messages
If the problem (Warning indicators persists even after you have tried a couple pertaining to memory cards) of times, contact your Sony dealer or local authorized Sony service facility. Slow flashing • Free space for recording images are C:04:ss running out. - Page 149 • Access to the memory card was Buffer overflow. Writing to the media restricted on another device. was not completed in time. • You have performed recording and erasing operations repeatedly, or a * When [BEEP] is set to [ON] (p. 130), you hear a memory card that has been formatted melody when the warning indicators appear on by other device is used.
- Page 150 • Use a memory card recommended for Connection to the access point your camcorder (p. 28). failed. • Contact your Sony dealer. Please input your password again. Could not connect to the access point. Try Do not eject the memory card during re-entering the password for the access writing.
- Page 151 Cannot use this USB device. Failed to acquire an IP address. Check the DNS server setting or the Connect a correct USB device. “CCM SET”. Check the LAN cable connection. Check that the CCM host name is correct. Could not connect to the network. Check Check the DNS settings of the camcorder the LAN cable connection.
- Page 152 Warning indicators and messages (Continued) directory settings and the settings on the An invalid channel has been FTP server. specified. Unable to access the media. Specify a valid channel and try to restart The memory card could not be loaded. streaming.
-
Page 153: Additional Information
Additional Information Recording time (Unit: minute) Estimated time of recording and playback with each battery pack XAVC QFHD Approximate time available when you use a 2160 fully charged battery pack. 4K (QFHD) 60Mbps 100Mbps Recording time 64GB (100) (65) (Unit: minute) Continuous Typical 2160... - Page 154 1080 1080 MPEG HD (305) (360) (495) (665) (1255) (1440) 35Mbps 35Mbps 35Mbps • When using Sony memory cards. • The number in ( ) is the minimum recordable 64GB (175) (175) (170) time. b Note 1080 MPEG+ 1080 (1440) •...
- Page 155 25 Mbps 1,920×1,080/16:9 50 Mbps 1,280×720/16:9 – MPEG HD 422 50 Mbps, 1,920×1,080/16:9 50 Mbps, 1,280×720/16:9 – MPEG HD 420 HQ: 35 Mbps (max) 1,920×1,080/16:9 HQ: 35 Mbps (max) 1,440×1,080/16:9 HQ: 35 Mbps (max) 1,280×720/16:9 – AVCHD PS: max. 28 Mbps 1,920×1,080/16:9 FX: max.
-
Page 156: Function Limitations When Recording
Function limitations when recording For details about limitation when streaming is ON, see page 86. Limitations for each file format Yes: Supported, No: Not supported Functions XAVC QFHD XAVC HD MPEG HD AVCHD RELAY REC (p. 32) SIMULTANEOUS REC (p. 33) FACE DETECTION (p. -
Page 157: Slow & Quick Motion And Super Slow Motion Recording Limitations
Slow & Quick Motion and Super Slow Motion recording limitations Yes: Supported, No: Not supported Slow motion at high Functions Slow & Quick Motion Super Slow Motion frame rate FACE DETECTION LOCK-ON AF COLOR BAR STREAMING NETWORK CLIENT MODE USTREAM DATE REC SIMULTANEOUS REC/RELAY PROXY REC MODE... -
Page 158: Streaming, Network Client Mode, And Ustream Supported Formats
Streaming, network client mode, and USTREAM supported formats b Notes • Only streaming is supported if the original file is in QFHD format with bit rate of 60Mbps. • Proxy recording is not supported in the following cases. – If the original file is in QFHD format with bit rate of 100Mbps –... -
Page 159: Proxy Recording Supported Formats
Proxy recording supported formats b Notes • Proxy recording is not supported when the following three are selected at the same time. – Recording mode: XAVC QFHD – Recording format bit rate: 100Mbps – Simultaneous/relay recording: ON • Proxy recording is not supported in the following cases. –... -
Page 160: Using Your Camcorder Abroad
Using your camcorder abroad Power supply time difference. Select [AREA SET], then set the time difference (p. 129). You can use your camcorder in any country/region using the AC Adaptor supplied with your camcorder within the AC 100 V to 240 V, 50/60 Hz range. Viewing on TV Before recording a movie with your camcorder for viewing on a TV, set [60i/50i... -
Page 161: File/Folder Structure On The Recording Media
• Do not modify the files or folders on the camcorder from the computer. Doing so might damage image files, or prevent image files from being played back. • Sony accepts no responsibility for the results of operation using data copied from a PC to a memory card. -
Page 162: Maintenance And Precautions
Maintenance and precautions 1920×1080/60i, 1920×1080/30p, About the XAVC format 1920×1080/24p, 1280×720/60p When [50i] is selected: Recording and playback on your 1920×1080/50i, 1920×1080/25p, camcorder 1280×720/50p Audio: LPCM 2-ch Your camcorder can record 4K (QFHD) Recording media: Memory card and HD (high definition) based on the * The camcorder is not able to play back data that XAVC format. -
Page 163: About The "Infolithium" Battery Pack
• For the latest information about memory cards What is an “InfoLITHIUM” battery that can be used, visit the home page (http:// pack? www.sony.jp/support/r/handycam/connect/). An “InfoLITHIUM” battery pack is a On image data compatibility lithium-ion battery pack that has functions for communicating information related to •... - Page 164 Maintenance and precautions (Continued) About storage of the battery pack to the operating situations of your camcorder. • If the battery pack is not used for a long time, fully charge the battery pack and use it up on To use the battery pack effectively your camcorder once a year to maintain proper function.
-
Page 165: About Handling Of Your Camcorder
Sony dealer before operating it of the appropriate temperature range for charging, the AC Adaptor suspends charging any further. automatically and enters standby mode. When • Avoid rough handling, disassembling, the ambient temperature returns to an modifying, physical shock, or impact such as... - Page 166 Maintenance and precautions (Continued) 1 Press the MENU button t select vice versa) or when you use your camcorder in a humid place as shown below. (OTHERS) t [CALIBRATION] with • When you bring your camcorder from a ski the v/V/b/B/SET button. slope into a place warmed up by a heating 2 Touch “×”...
- Page 167 • Store in a well-ventilated location subject to little dirt or dust. • To prevent mold, periodically clean the lens as described above. Charging the pre-installed rechargeable battery Your camcorder has a pre-installed rechargeable battery to retain the date, time, and other settings even when the 1 (On/ Standby) button is set to the standby position.
-
Page 168: Specifications
Specifications General HDTV 1080/60i, 1080/60p, 720/60p When [50i] is selected Power requirements PAL color, CCIR standards HDTV 8.4 V DC (using AC Adaptor) 1080/50i, 1080/50p, 720/50p 7.4 V DC (using battery pack) Video recording system Power consumption XAVC QFHD: MPEG-4 AVC/H.264 While recording using viewfinder: 4:2:0 Long profile Approx. - Page 169 Effective picture elements (16:9 mode): Frequency band Approx. 14,200,000 pixels 2.4 GHz/5 GHz Color temperature (5 GHz band is supported on the PXW- Preset (Indoor: 3200K, Outdoor: 5600K Z90V only) ± 7 steps, Color temperature set range: Supported security protocols 2300 to 15000K), One-push A, B, Auto WEP/WPA-PSK/ selectable...
- Page 170 Specifications (Continued) Rechargeable battery pack (NP-FV70A) Rated voltage 7.3 V DC AC Adaptor Power requirements 100 V to 240 V AC, 50 Hz/60 Hz Power consumption 18 W Rated output 8.4 V DC Operating temperature 0 °C to 40 °C (32 °F to 104 °F) Storage temperature –20 °C to +60 °C (–4 °F to +140 °F) Dimensions...
-
Page 171: Index
Index CTRL W/ SMARTPHONE....127 AC Adaptor......20 Handle record button ....33 Access point......78 Handle zoom......34 Accessory shoe .....24 Handle zoom lever....34 DATA CODE....... 67 AE SHIFT......144 HISTOGRAM ....122 Date and time ... 19, 25, 26 AGC LIMIT......106 DATE REC ......130 AIRPLANE MODE....128 DELETE...... - Page 172 Index (Continued) “Memory Stick PRO Duo” Pre-installed rechargeable SPOT FOCUS ......40 media ........163 battery ........ 167 START/STOP button ...31 Menu........103 PROTECT......99 STATUS button....68 AUDIO SET....120 Proxy recording Status check......68 CAMERA SET....106 supported formats ..159 STEADYSHOT....107 DISPLAY SET....122 STREAMING....
- Page 173 Warning indicators....148 Warning messages ....149 WB OUTDOOR LEVEL..106 WB PRESET ......106 WB TEMP SET ....106 White balance .......47 WHITE BALANCE button ........47 Wi-Fi SET......128 Wide angle ......34 Wired LAN ......83 WIRED LAN SET....128 Wireless LAN .......78 ZEBRA .......144 Zoom........34 ZOOM DISPLAY....124 ZOOM SET ......107...
- Page 174 Trademarks Notes on the License • “XDCAM” logo is a trademark of Sony THIS PRODUCT IS LICENSED UNDER THE Corporation. AVC PATENT PORTFOLIO LICENSE FOR THE PERSONAL USE OF A CONSUMER OR • “XAVC” and are registered trademarks OTHER USES IN WHICH IT DOES NOT of Sony Corporation.
- Page 175 Establish a Mass Storage connection between the camera and a computer to read licenses in the “PMHOME” - “LICENSE” folder.
- Page 176 © 2017 Sony Corporation Printed in China...