Table of Contents
Advertisement
Advertisement
Table of Contents

Related Manuals for Nvidia GeForce3 Ti200


Summary of Contents for Nvidia GeForce3 Ti200
- Page 1 NVIDIA GeForce3 Ti200 3D GRAPHIC ACCELERATOR MANUAL...
-
Page 2: Table Of Contents
NVIDIA GeForce 3 Ti200 User’ s Manual TABLE OF CONTENTS 1. NVIDIA GeForce 3 Ti200 Features................2 2. GeForce3 Ti200 Board Outline..................4 2.1 GeForce3 Ti200 using DDR SDRAM (SP7000T2/64M-DVI)......4 3.Hardware installation ....................5 3.1 Package Contents.................... 5 3.2 Installing the card..................... -
Page 3: Nvidia Geforce 3 Ti200 Features
1. NVIDIA GeForce 3 Ti200 Features SP7000T2 GeForce 3 Ti200 AGP bus, with 64MB DDR SDRAM on Board Graphics core 256-BIT Fill rate (AA samples/sec.) 2.8 BILLION Operations/sec. 700 BILLION Memory bandwidth 6.4GB/SEC nfiniteFX engine for full programmability Lightspeed Memory Architecture for unmatched performance... - Page 4 Operating systems support - Windows XP, Windows 2000, Windows Me, Windows 98, Linux Compatible API Support - OpenGL 1.3 and lower - DirectX 8.1 and lower...
-
Page 5: Geforce3 Ti200 Board Outline
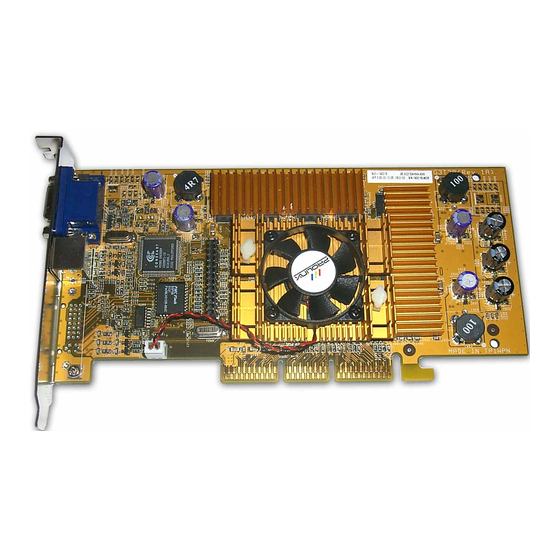
2. GeForce3 Ti200 Board Outline 2.1 GeForce3 Ti200 using DDR SDRAM (SP7000T2/64M-DVI) 64M on board – 4Mx16 DDR SDRAM x8 DB15 Power 4M*16 ENCODER 4M*16 S-VIDEO NVIDIA GeForce 3 4M*16 BIOS Ti200 4M*16 14.318MHZ NOTE 1: TV output connector and encoder are reserved for optional... -
Page 6: Hardware Installation
3.Hardware installation 3.1 Package Contents NVIDIA GeForce3 Ti200 3D Accelerator card CD title or Software diskettes This manual 3.2 Installing the card Turn off your computer Remove the cover of the computer per the owner’ s manual Install the card in the AGP bus slots... -
Page 7: Micro Cross Dvi Connector System
3.3 Micro Cross DVI Connector System “Micro Cross:”/high speed pins; Analog Red Video Out Analog Green Video Out Analog Blue Video Out Analog Horizontal Sync Analog Common Ground Return (Red , Green , Blue Video Out) Main Pin Field: TMDS Data 2- TMDS Data 2+ TMDS Data 2/4 Shield TMDS Data 4-... -
Page 8: Resolutions And Colors Supported
3.4 Resolutions and colors supported: Reference Table based on V21.83 Win9X Driver List GeForce3 Ti200 B.P.P. Refresh Rates (HZ) 60/70/72/75/85/100/120/140/144/150/170/200/240 640*480 60/70/72/75/85/100/120/140/144/150/170/200/240 60/70/72/75/85/100/120/140/144/150/170/200/240 60/70/72/75/85/100/120/140/144/170/200/240 800*600 60/70/72/75/85/100/120/140/144/170/200/240 60/70/72/75/85/100/120/140/144/170/200/240 60/70/72/75/85/100/120/140/144/150/170/200/240 1024*768 60/70/72/75/85/100/120/140/144/150/170/200/240 60/70/72/75/85/100/120/140/144/150/170/200 60/70/72/75/85/100/120/140/144/150/170/200 1152*864 60/70/72/75/85/100/120/140/144/150/170/200 60/70/72/75/85/100/120/140/144/150 60/70/72/75/85/100/120/140/144/150/170 1280*960 60/70/72/75/85/100/120/140/144/150/170 60/70/72/75/85/100/120/140/144/150 60/70/72/75/85/100/120/140/144/150/170... -
Page 9: Smart Installation
4. Smart Installation For Windows XP, Windows 2000, Windows 98, Windows ME 4.1 Put the DRIVERS CD in your CD-ROM 4.2 Click Driver installation 4.3 If everything fine, screen will show Confirm Installation window. Then Select OK... - Page 10 4.4 Now appears the Driver Confirmation window Select Install If the drivers is very new may not certified by Microsoft, if so, system will prompt you the drivers do not have “digital signature”, still you can force to install. 4.5 Then restart your computer.
-
Page 11: Manually Install Windows Xp Drivers
11. Then show Browse for Folder Select E:\drivers\ NVIDIA\7X00\winXP Note: “E:”-> CD Drive, “NVIDIA”-> VGA chip brand name, “7X00”-> VGA model name Then select OK and then click Next 12. If no problem occur, system will start to install the driver 13. -
Page 12: How To Change Refresh Rate In Windows Xp
5.3 How to Change Refresh Rate in Windows XP Make sure that you have installed windows XP Driver. Click on the Start box in the lower left corner and proceed to Setting, Control Panel Inside the Control panel group , click on Display icon to open the Display Properties folder and choose Settings click the Advance Settings choose Monitor Click on the Refresh Rate sub window to change refresh rate Select OK and new refresh rate takes effect... -
Page 13: Nvidia Utility In Windows System
5.4 NVIDIA Utility in Windows System 5.4.1 GeForce3 Ti200 Display Adapter Information Table, you can tell the BIOS and Drivers version, NVIDIA Chip model name, IRQ setting and many useful information. Additional properties is for advance user to setting OpenGL, DirectX and other settings. -
Page 14: Device Selection
5.4.2 Device selection Select output device, if all the optional connector is connected, you will be able to select DVI or TV output as Windows default display device. Geforce3 Ti200 do not support TwinView. Only the device is plugged and functional, then you will be able to check the selection box. -
Page 15: Color Correction
5.4.3 Color correction This Window shows NVIDIA Digital Vibrance is functional and you can adjust Brightness, Contrast, Gamma and save it as your favorite setting. If you don’ t like your adjustments, you can also check Automatically apply these settings at startup to change it back. -
Page 16: Manually Install Windows 98 And Windows Me Drivers
Please select Brows 11. Then show Browse for Folder tab Select E:\drivers\ NVIDIA\7X00\Win9X (or \Winme) Note: “E:”-> CD Drive, “NVIDIA”-> VGA chip brand name, “7X00”-> VGA model name Then select OK 12. Then show Update Device Driver Wizard tab Select CD-ROM driver... -
Page 17: How To Change Refresh Rate
When system boot up, system will prompt find new device. Suppose the device is VGA, now system will find the default drivers for you. If you want to install our drivers along with the GeForce3 Ti200 pack. Please put the drivers CD in your CDROM drive. If now shows SmartInstall window, please click EXIT button to quit. -
Page 18: Fcc Statement
FCC Statement This device complies with part 15 of the FCC Rules. Operation is subject to the following two condition.(1).this device may not cause harmful interference. (2).this device must accept any interference received, including interference that may cause undesired operation Warning: Note: This equipment has been tested and found to comply with the limits for a Class B digital device, pursuant to Part 15 of FCC Rules.