Advertisement
Quick Links
Advertisement

Related Manuals for Baumatic BK26P5PSS


Summary of Contents for Baumatic BK26P5PSS
- Page 1 INSTRUCTION MANUAL...
- Page 3 USE AND MAINTENANCE INSTRUCTIONS FOR BUILT-IN OVEN BK26P5PSS...
-
Page 5: Declaration Of Ce Compliance
DECLARATION OF CE COMPLIANCE This appliance is in compliance with the following European Directives: 93/68 : General regulations 2006/95/CE : Concerning low tensions 2004/108/CEE : Electromagnetic compatibility CE Regulation n° 1935/2004 : this appliance is suitable to come in contact with food products. GENERAL WARNINGS This manual is an integral part of the appliance. - Page 6 Make sure the power cord of the appliance is not crushed by the oven door as this may damage the electrical insulation. If the power cord has been damaged, it must be replaced by the technical service centre in order to avoid the creation of hazardous situations. Before closing the oven door, make sure there are no foreign bodies or pets inside the oven.
-
Page 7: Installation
INSTALLATION The oven can be built into a standard 560mm housing unit, either when built under the worktop or built in a tall housing unit (please see the picture on the following page). In both cases ventilation provisions must be made; for this reason, there must be a gap of 85-90mm at the back of the housing unit. - Page 9 Before the first cooking Attention: before proceeding with the following, the oven must be unplugged from the electrical mains. Before using the oven for the first time, carefully clean the interior, the racks and the drip pan with non-abrasive soap and lukewarm water. Insert the racks and the drip pan into their respective runners.
-
Page 10: Operating The Oven
OPERATING THE OVEN Cooking functions Oven inner light To turn the inner light on Grilling with fan The top centre heating element is turned on and its heat is distributed by the fan resulting in perfectly grilled meat without the need to turn. It is ideal for small cuts such as chicken pieces and racks of lamb. - Page 11 Oven cooking chart Cooking time Cooking Food Temp.°C Shelf position (*) (min) function Cake 55-65 Fruit Cake 30-40 Buttermilk curd cake 35-40 Mould leaven cake 25-35 Choux pastry 20-30 Puff or flaky pastry 15-25 Biscuits 15-20 40-50 Lasagna Meat Fillet beef 50-80 Roast beef 50-80...
-
Page 12: Using The Grill
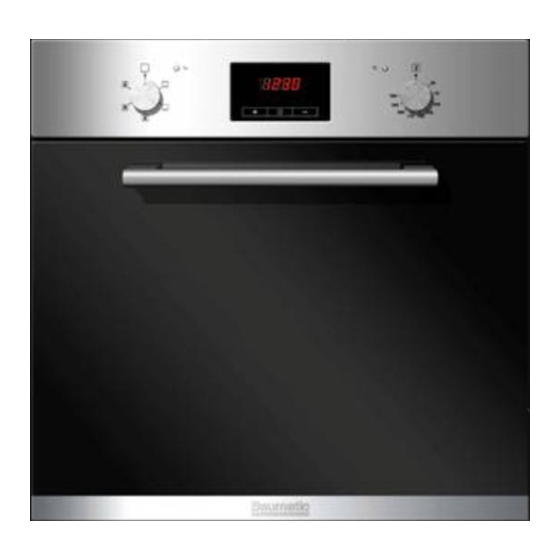
USING THE GRILL Lay the food in the wire shelf or in a tray in case of small pieces. The rack must be positioned in the highest runner possible and the grease drip pan in the runner below. Close the door and turn on the grill. Caution: while the grill is operating, the accessible parts are very hot. - Page 13 ELECTRONIC PROGRAMMER / TEMPERATURE DISPLAY The electronic programmer of the oven is a device which groups together the following functions: - 24 hours clock with illuminated display - Timer (up to 23 hours and 59 min.) - Program for automatic beginning and end of cooking - Program for semi-automatic cooking (either start or finish only) - temperature display: when selecting a required temperature with the thermostat knob, the temperature is...
- Page 14 Description of lighted symbols « AUTO » - (flashing) - Programmer in automatic position but not programmed. « AUTO » - (always lighted) - Programmer in automatic position with inserted program. Manual cooking taking place Automatic cooking taking place Timer in operation NOTE: After having selected the operation, a period of time will pass (about 3-4 seconds) before confirmation, during which the data may be modifies.
- Page 15 Timer The timer can be used to measure a time period between 1 minute and 23 hours & 59 minutes. 1) Automatic cooking (start and end) Set temperature and cooking program required by using the thermostat and the selector knobs. Set the length of cooking time by pushing the button.
- Page 16 2) Semi-automatic cooking A. Set the length of cooking time B. Set the end of cooking time A. Set the length of cooking time by pushing the button. The oven will turn on immediately, the symbol «A» will light. When the set cooking time has elapsed, the oven will turn off, a buzzer will ring until it is stopped as above described.
- Page 17 Cancelling an automatic cooking program An automatic cooking program can be cancelled whenever by pushing the button. Now the oven can work manually. Notes: It is advisable not to leave food in the oven for long periods of time before automatic cooking proceeds.
- Page 18 Replacing the bulb Important: Disconnect the oven from the power supply. To replace the oven bulb B, remove the protective cover A by turning it anti-clockwise. Replace the burnt-out bulb and fit the protective cover back in place A.
- Page 19 Removing the oven door To aid cleaning and make access to the oven interior easier, both oven doors can be simply removed (see picture). To facility cleaning of the oven, the door can be removed via the hinges as follows: The hinges A are provided with two movable bolts B.
- Page 20 Cleaning and maintenance Important: before carrying out maintenance on the oven, it must always be unplugged from the power supply or disconnected from the mains via the electrical system master switch. Wait the appliance to cool down before proceeding with any cleaning operation. Do not use abrasives, bleach or coarse cleaning material.
- Page 22 12300135770...
- Page 24 www.baumatic.com...