Advertisement
Quick Links
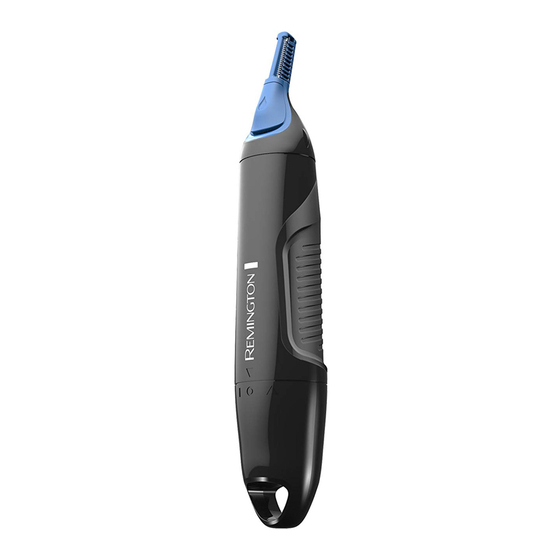
NOSE, EAR
& BROW
TRIMMER
NE 3200 & 3700 Series
Use and Care Guide
REFRESH YOUR LOOK
Scan the QR code to check
out our weekly man-style tip to
keep you looking good! or visit
RemingtonProducts.com/ManStyle
Join us for special offers, grooming tips and product news.
@RemReadyMan
Facebook.com/RemingtonReady
Register Your New Product Today!
By registering your new Remington
®
product you will receive these important
benefits: Proof of ownership • Product protection • Product registration
• Special offers Register online at: www.RemingtonProducts.com
IMpoRtANt sAfetY
INstRuctIoNs
When using an electrical appliance, basic precautions should
always be observed, including the following:
ReAd All INstRuctIoNs befoRe
usING thIs ApplIANce.
WARNING
To reduce the risk of burns, fire, electric shock or injury
to persons:
■ This appliance is for household use only.
■ Close supervision is necessary when this appliance is used
by, on, or near children or individuals with special needs or
certain disabilities.
■ Use this appliance only for its intended use as described
in this manual. Do not use attachments not recommended
by manufacturer.
■ Never drop or insert any object into any of the appliance's
openings.
■ Do not use outdoors or operate where aerosol (spray)
products are being used, or where oxygen is being
administered.
■ Always store the appliance in a moisture-free area. Do not
store it in temperatures exceeding 140°F (60°C).
■ Do not use this appliance with damaged or broken cutters,
as injury may occur.
■ Always remember to turn on the trimmer before you insert
it into your nose or ear to avoid painfully snagging hairs.
■ Never insert the trimmer more than 1/4" (6mm) into your
nose or ear. Foreign objects should not come into contact
with your ear drum.
Use & Care
Inserting the Battery
All Remington
®
Nose and Ear trimmers run on one "AA" ALKALINE
battery.
1. To open the battery compartment, turn the base of the unit
approximately 1/4 inch counterclockwise and pull it off.
2. Insert the battery into the unit, positive end first.
3. Replace the base and turn it 1/4 inch
clockwise to lock it into place.
Battery cautions
■ Use of non-alkaline batteries will impair the unit's operating
performance.
■ Battery should not be left in the unit if the unit is not in use
for long periods.
■ To prevent battery corrosion, the unit should be stored in a
dry environment.
■ Dead batteries should be removed immediately and disposed
of properly.
■ Do not use rechargeable batteries with this appliance.
The lower voltage in rechargeable batteries impairs the
performance of the cutting unit.
Using the trimmer in the shower
■ This appliance allows for use in or out of the shower.
■ This appliance can be stored in the shower using the
hang loop. It is recommended to dry off excess water and
moisture after use.
■ The trimmer should not be submerged in water, bath or sink.
■ The NE3700 model features a non-slip rubber grip for easier
handling in the shower.
Changing the Attachment Heads (if applicable)
Some models have interchangeable attachments. Below is a
guide to help select the proper attachment.
NE3200 – Vertical Head
NE3250 – Vertical Head, Rotary Head
NE3700 – Vertical Head, Detail Trimmer
ROTARY
VERTICAL
DETAIL
HEAD
HEAD
TRIMMER
X
X
NOSE
X
EAR
X
EYEBROW
X
SIDEBURNS
X
X
X
EDGING
X
FACIAL HAIR
X
Using the Eyebrow Comb (if applicable)
Some models include an eyebrow attachment comb that helps
you achieve an even cut without completely removing the hair.
1. To use the attachment comb, be sure the unit is in the "off"
position.
2. Slide the comb over the trimming blades until it locks into
place, making sure the teeth of the comb are facing the
same direction as the trimming blade.
Using the Detail Trimmer with Adjustable Comb (if appli-
cable)
NOTE: The 5-length adjustable comb attaches to the detail trim-
mer head. When first starting, begin with a longer setting then
adjust cutting length as desired.
5 Length Adjustable Comb
1 – 1 mm (Stubble)
2 – 2 mm (Stubble)
3 – 3 mm
4 – 4 mm
5 – 5 mm
1. To attach: Place the adjustable comb on the back of the
detail trimmer head aligning the front of the comb with the
front of trimmer. Push until the comb locks into place.
2. To remove: Push up on both sides of the adjustable comb.
To change heads:
1. Turn the trimmer off.
2. Detach attachment head by turning it counterclockwise to the
unlocked position and pulling it off.
3. Once the previous attachment head is removed, attach the
other head by placing it on top of the unit and turning it
clockwise to the locked position.
Turning on your trimmer:
The on/off switch is integrated into the battery cap.
1. Rotate the battery cap clockwise to turn on.
2. To turn off, simply rotate the battery cap, counterclockwise,
back to the off position.
Advertisement

Summary of Contents for Remington NE3200
- Page 1 NOTE: The 5-length adjustable comb attaches to the detail trim- mer head. When first starting, begin with a longer setting then Inserting the Battery NE3200 – Vertical Head adjust cutting length as desired. When using an electrical appliance, basic precautions should NE3250 –...
- Page 2 RESULTING FROM THE USE OF THIS PRODUCT. ALL IMPLIED will be provided only if all Terms and Conditions are met. 2. The following items must be returned to Remington ® and 800-268-0425 in Canada or visit RemingtonProducts.com your trimmer, follow these simple cleaning and lubricating tips:...


