Table of Contents
Advertisement
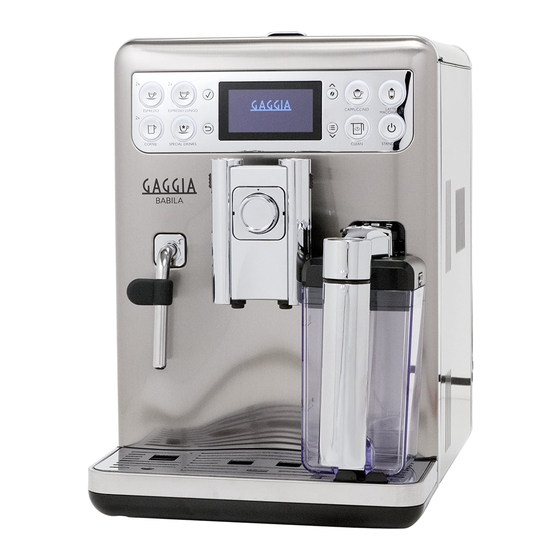
Coffee Machine
Service
TECHNICAL INFORMATION
Power supply and output:
Temperature monitoring:
Safety system:
Coffee heat exchanger output: Stainless steel
for coffee, hot water and steam dispensing
Dimensions: W x H x D in mm:
Stand-by power consumption
Weight:
Water tank capacity:
Coffee bean hopper capacity:
Dreg drawer capacity:
Heating time:
Water circuit filling time:
Power consumption:
Automatic dosage:
Material
Housing
Beans container
Water tank
Dreg drawer
All parts of this document are the property of Saeco International Group.
All rights reserved. This document and all the information herein is provided without liability deriving from any errors or omissions. Furthermore, no part may be reproduced, used or
collected, except where express authorisation has been provided in writing or through a contractual agreement.
Published by Saeco International Group
Service Manual
240 V~ 50 Hz 1900W - 230 V~ 50/60 Hz 1900 W 120 V~ 60 Hz 1300 W
(NTC) variable resistor sensor - transmits the value to the electronic card
2 thermostats at 190°C one shot
(230 V~) 1900 W - (120 V~) 1300 W - (100 V~) 1100 W
245 x 360 x 420 mm (data may vary depending on the model)
< 0,5W
13.4 kg (data may vary depending on the model)
1.5 l
300 g. of coffee beans
11
Approx. 45 sec.
Approx. 15 sec Max. on first filling cycle
During heating phase- approx. 5.6 A
Dose adjustment controlled by the electronic system
ABS/ABS+PMMA/METAL
ABS
SAN
ABS
Subject to modification
GAGGIA BABILA
Rev. 00 MARCH 2017
2017-March-02
Advertisement
Table of Contents

Related Manuals for Gaggia Babila


Summary of Contents for Gaggia Babila
-
Page 1: Coffee Machine
Coffee Machine GAGGIA BABILA Service Service Manual Rev. 00 MARCH 2017 TECHNICAL INFORMATION Power supply and output: 240 V~ 50 Hz 1900W - 230 V~ 50/60 Hz 1900 W 120 V~ 60 Hz 1300 W Temperature monitoring: (NTC) variable resistor sensor - transmits the value to the electronic card Safety system: 2 thermostats at 190°C one shot... -
Page 2: Table Of Contents
GAGGIA BABILA Table of contents Page Table of contents Page Introduction 1.1. Documentation required 5.2. Steam-out 1.2. Tools and equipment required 5.3. Diagnostics mode 1.3. Material 5.4. Saeco Service Center - Quick Start Guide 1.4. Safety warnings Service Policy 1.6.1. - Page 3 GAGGIA BABILA CHAPTER 1 INTRODUCTION...
-
Page 4: Introduction
GAGGIA BABILA 01 INTRODUCTION Documentation required The following documentation is needed for repair procedures: • Instruction booklet for specific model • Technical documentation for specific model (diagrams, exploded view, sympton cure and service manual) Tools and equipment required As well as the standard equipment, the following is required:... -
Page 5: Service Policy
GAGGIA BABILA 01 INTRODUCTION Image 1 Water Hot water /steam From this point circuit in pressure From this point circuit High temperaure Service POLICY grid as used for coffee machine For IN WARRANTY repairs is raccomanded to use when and where possible the single compo- nents, available in the exploded views of the coffee machines or of the specific components. -
Page 6: External Machine Parts
GAGGIA BABILA 01 INTRODUCTION 1.6.1 External machine parts 13 14 01 Water tank 10 Carafe coupling cap 02 Pre-ground coffee compartment 11 Drip tray (external) 03 Service door 12 Brew group 04 Dispensing spout 13 Coffee grounds drawer 05 Hot water/steam wand... - Page 7 GAGGIA BABILA 01 INTRODUCTION 27 Espresso button 28 Espresso Long button 32 29 29 Cappuccino button 30 Coffee button 31 “Special Drink” button 32 “Aroma” - Pre-ground coff ee button 33 “OK” button 34 “ESC” button 35 “MENU” button 36 Carafe cleaning cycle activation...
-
Page 8: Internal Machine Parts
GAGGIA BABILA 01 INTRODUCTION 1.6.2 Internal machine parts Water level capacitive sensor Power Board Multi-way valve Diffuser valve Coffee boiler Flow meter Steam boiler Steam pump Water pump Water tank connection Coffee grinder Coffee cover presence sensor Water tank presence/... -
Page 9: Technical Specifications
GAGGIA BABILA CHAPTER 2 TECHNICAL SPECIFICATIONS... -
Page 10: Machine Parameters And Performance
GAGGIA BABILA 02 TECHNICAL SPECIFICATIONS 2.1. Technical specifications Power supply and output: 240 V~ 50 Hz 1400 W - 230 V~ 50/60 Hz 1400 W - 120 V~ 60 Hz 1500 W - 100 V~ 50/60 Hz 1300 W Temperature monitoring:... - Page 11 GAGGIA BABILA 02 TECHNICAL SPECIFICATIONS RINSE Initial rinse Final rinse When performed When the machine is switched on When the machine is switched and the temperature of the off electronically, manually or boiler reaches ≤ 50°C automatically after 60', if at least...
- Page 12 GAGGIA BABILA 02 TECHNICAL SPECIFICATIONS WATER TANK Description Water reserve (pulses) with water filter Water reserve (pulses) with no water filter Water reserve modifiable by the Production/Service Dept "Fill tank" alarm "No tray" alarm Water mains Descaling cycle frequency with AQUACLEAN filter...
- Page 13 GAGGIA BABILA 02 TECHNICAL SPECIFICATIONS 2.3.1. Specification for the measurement of the coffee products temperature. The temperature is influenced by the flow from the dispenser and stratification of temperatures in the glass. In order to consider these phenomena and to introduce measures that allow comparisons...
-
Page 14: Specification For The Measurement Of The Milk Products
GAGGIA BABILA 02 TECHNICAL SPECIFICATIONS 2.3.2. Specification for the measurement of the Milk products temperature. Milk evaluation To carry out the test, a partially skimmed UHT milk with a percentage of grease between 1.5-1.8% at a refrigerator temperature Trefr. (between 4 to 10°C) must be used. - Page 15 GAGGIA BABILA 02 TECHNICAL SPECIFICATIONS How to measure the milk cream. The temperature (Trefr or Tamb) of the milk doesn’t affect as much the test result on measuring the milk cream; by convection is assumed to always use milk at refrigerator temperature Trefr..
-
Page 16: Brief Instructions
GAGGIA BABILA CHAPTER 3 BRIEF INSTRUCTIONS... -
Page 17: Customer And Programming Menu
GAGGIA BABILA 03 BRIEF INSTRUCTIONS 3.1. Customer and programming menu Menu for customization and maintenance When you enter the programming mode: button = (confirms a selection or a change you have MENU made) BEVERAGE MENU button = (scrolls up the menu) -
Page 18: Meaning Of The Display
GAGGIA BABILA 03 BRIEF INSTRUCTIONS MACHINE MENU GENERAL MENU DISPLAY MENU GENERAL MENU DISPLAY MENU WATER MENU This menu allows you The machine menu allows This menu allows you to to change the langua- you to customize the ope- change the tone, the ecomo- ge and the display ration settings. - Page 19 GAGGIA BABILA 03 BRIEF INSTRUCTIONS Remove and empty the coffee grounds EMPTY COFFEE drawer with the machine GROUNDS DRAWER turned on. mê ç Çì â í ó = â ç å ë É ê ï~ Å ó à å É...
-
Page 20: Operating Logic
GAGGIA BABILA CHAPTER 4 OPERATING LOGIC... -
Page 21: Water Circuit
GAGGIA BABILA 04 OPERATING LOGIC 4.1. Water circuit 1/11... -
Page 22: Frother Valve Assembly
GAGGIA BABILA 04 OPERATING LOGIC 4.2. Frother valve assembly Air solenoid valve Clean solenoid valve (steam) Air inlet Steam outlet Hot water/steam inlet Steam solenoid valve Steam outlet Hot water/steam solenoid valve Hot water/steam outlet Drain protection Drain solenoid valve... - Page 23 GAGGIA BABILA 04 OPERATING LOGIC Functional mode for the production of milk products and cleaning the circuit When the solenoid valves open and let air or hot water/steam through, the following situations occur: • DC3+DC2 STEAM + AIR = Frothing and heating of frothed milk •...
-
Page 24: Multi-Way Valve
GAGGIA BABILA 04 OPERATING LOGIC 4.4. Multi-way valve Drain to the drip tray Needle Drain Functions: Safety valve: opens towards the drain if the pressure exceeds 16-19 bar Filling the circuit: the solenoid valve opens (drain position), the pump is controlled and automatically refills the... -
Page 25: Coffee Cycle
GAGGIA BABILA 04 OPERATING LOGIC 4.5. Coffee cycle Main Switch START STOP Time Coffee grinder Pulses (Dosage) Heating approx.45 sec. Pump Pump action (flow meter pulses) depending on the quantity of the product set Gearmotor Brewing unit Heating Ready Coffee cycle... -
Page 26: Single Microswitch
GAGGIA BABILA 04 OPERATING LOGIC 4.6. Single microswitch The gearmotor is activated by a direct current motor that acts on the smaller double toothed wheel via a worm screw. The unit is mounted on the axle of the large toothed wheel and... -
Page 27: Coffee Grinder
GAGGIA BABILA 04 OPERATING LOGIC 4.8. Coffee grinder The coffee grinder is activated by a direct current motor (1) via helicoidal wheel transmission and a worm screw (2). The worm screw (2) activates a plastic toothed wheel (3), which turns the lower grinder blade (4) and the increment pin (5). -
Page 28: Auto-Learning Dose (Sas)
GAGGIA BABILA 04 OPERATING LOGIC 4.10 Auto-learning dose (SAS) The aim of this function is to automatically regulate the average dose of ground coffee (SELF- LEARNING); this takes place with an algorithm based on the following values and setting by the user: 1. -
Page 29: Sbs
GAGGIA BABILA 04 OPERATING LOGIC 4.11. SBS SBS Principle - Saeco Brewing System Adjusting the flow speed, which influences the contact time between the coffee and water, alters the extraction and therefore the taste intensity and strength of the coffee. -
Page 30: Water Level Detection In The Tank
GAGGIA BABILA 04 OPERATING LOGIC 4.12 Water level detection in the tank Water absence signal (water reserve) Function: Water tank The water level is monitored by a capacitive sensor, located one third up the water tank wall. If the electronic system detects that the water is below the relative... -
Page 31: Aquaclean Water Filter
GAGGIA BABILA 04 OPERATING LOGIC 4.14. AquaClean water filter The AquaClean filter is designed to reduce limescale deposits in the coffee machine and provide filtered wa- ter to preserve the aroma and flavor of each cup of coffee. By using a series of 8 AquaClean filters, there is no need to descale the machine for 5000 cups (It depends both on the type of coffee used, rinsing and cleaning programs). -
Page 32: Service Mode
GAGGIA BABILA CHAPTER 5 SERVICE MODE... -
Page 33: Test Mode
GAGGIA BABILA 05 SERVICE MODE 5.1. Test mode Espresso Long Cappuccino button button Latte macchiato Espresso button button To enter Test Mode: - Switch on the machine - Wait until the display lights - Press the four function keys in the... - Page 34 GAGGIA BABILA 05 SERVICE MODE Activation of loads In Test Mode all loads are initially disabled. To activate a load press the corresponding button on keyboard, to deactivate press again the same button. Other conditions for which a load may be switched off automatically without key presses are: ·...
- Page 35 GAGGIA BABILA 05 SERVICE MODE The appearance of the display in the ready machine with messages debug actives is as follows: Impuse real gringer Effort of the EXPRELIA brew unit in mA Aroma medium after correction in the autodose Upon activation of the flag D. TM restarting the machine (eg leaving the test mode) will be pos- sible enter the test mode display by simultaneously pressing: LATTE MACCHIATO AND POWER ON-OFF while filling the bar at StartUp.
-
Page 36: Brew Unit
GAGGIA BABILA 05 SERVICE MODE Keyboard KEYBOARD L. Ma Espr Coff Capp Spec Clean Stdby Long This is the button test page: each beverage corresponds to a box on the display that changes col- our when the corresponding button is pressed. - Page 37 GAGGIA BABILA 05 SERVICE MODE Hydraulic Circuit HYDR CIRCUIT 1/2 DcV 1 DcV 2 DcV 5 DcV 4 DcV 3 Clean Milk Pres Tank Operation: • Ac V: if pressed, activates the 230V solenoid valve • Dc V1: activates the 24V solenoid valve for draining •...
- Page 38 GAGGIA BABILA 05 SERVICE MODE Indicators • p/s: indicates moment by moment the water flow rate in the turbine, expressed in pulses per second. When coffee pump 1 is switched on and the coffee solenoid valve is on (AcV on the previous screen) the value must be no lower than 10 p/sec.
-
Page 39: Steam-Out
GAGGIA BABILA 05 SERVICE MODE Display DISPLAY Operation: • C+: increases the contrast of the display • C-: decreases the contrast of the display • L+: increases the brightness of the display • L-: decreases the brightness of the display Indicators •... -
Page 40: Diagnostics Mode
GAGGIA BABILA 05 SERVICE MODE 5.3. Diagnostics mode Espresso Long Cappuccino button button Latte macchiato Espresso button button To enter Diagnostics mode: - Switch on the machine - Press the four function keys in the sequence indicated below (1,2,3,4) before the heating bar is completed. - Page 41 GAGGIA BABILA 05 SERVICE MODE 4. Service settings 1. Product counters Espresso (value default 0) Espresso Lungo (value default 0) Coffee (value default 0) Cappuccino (value default 0) Latte macchiato (value default 0) Milk Froth (value default 0) Hot water (value default 0)
-
Page 42: Error Counters
GAGGIA BABILA 05 SERVICE MODE Detailed description of the menu so diagnosis Product counters “Product counters” represents the number of deliveries carried out by the CA for each product: Espresso Esresso Lungo Caffee Cappuccino Latte macchiato Hot water Hot milk Error counters “Error counters”... - Page 43 GAGGIA BABILA 05 SERVICE MODE Grinder blocked: there is the absence of pulses from the grinder. In this case the C.A. It hangs in the instant in which the user asks the machine to dispense a drink made of coffee (only coffee beans).
- Page 44 GAGGIA BABILA 05 SERVICE MODE Water counters “Water counters” shows the consumption of water (in pulses) following the granting of products, to the descaling cycle, cleaning cycle, the activation group and filter. The submenu “Descaling cycle” has the following items: Since last cycle: is the consumption of water after the last cycle descaling.
-
Page 45: Saeco Service Center - Quick Start Guide
GAGGIA BABILA 05 SERVICE MODE Saeco Service Center - Quick Start Guide Saeco Service Center (SSC) is a tool with which you can re-program the machine and check the diagnostic of the same. You can download the software from the following link: http://logsave.logtronics.com/SSC2/publish.htm... - Page 46 GAGGIA BABILA CHAPTER 6 SERVICING AND MAINTENANCE...
-
Page 47: Service And Maintenance
GAGGIA BABILA 06 SERVICE AND MAINTENANCE 6.1. Repair Flow... - Page 48 GAGGIA BABILA 06 SERVICE AND MAINTENANCE...
-
Page 49: Disassembly
GAGGIA BABILA CHAPTER 7 DISASSEMBLY... -
Page 50: Outer Elements
GAGGIA BABILA 07 DISASSEMBLY 7.1. Outer elements Remove the cover and water tank, the coffee container cover, the water drip tray, the coffee dispenser. Remove Brew Unit and and Drip Tray inside the door Loosen the screws shown and Romove the PW cover, loosen the screws... -
Page 51: Coffee Grinder
GAGGIA BABILA 07 DISASSEMBLY 7.2. Coffee grinder Loosen the screws as shown and remove the sound insulating cover of the coffee grinder Lift the coffee grinder Remove the connections shown When reassembling the coffee grinder, make sure the spring is repositioned correctly (see picture) -
Page 52: Grinder Blades
GAGGIA BABILA 07 DISASSEMBLY 7.3. Grinder blades To extract the top support of the appliance, press on the grinding adjustment spindle (A) and turn the support anticlockwise until it unhooks. Turn the grinder blades anticlockwise from the support. Turn the grinder blades clockwise from the support. -
Page 53: Coffee Grinder Adjustment
GAGGIA BABILA 07 DISASSEMBLY 7.4. Coffee grinder adjustment The grinding machine can be adjusted by the user (only with the grinding machine on) by pressing and turning the knob inside the coffee bean container one notch at a time Adjustment knob... -
Page 54: Steam Pump
GAGGIA BABILA 07 DISASSEMBLY 7.5. Steam pump Remove the two pump supports (highlighted) anchored to the structure and disconnect the electrical and water connections 7.6. Coffee pump 1) Loosen the screws as shown 2) Remove the connections from the component support. -
Page 55: Power Board
GAGGIA BABILA 07 DISASSEMBLY 7.8. Power Board Remove the board cover 2)Loosen the screws as shown and remove all the electrical connections 7.9. Steam boiler Remove the screws as shown Loosen the screw as shown and remove and the component support the electrical and water connections 7.10. -
Page 56: Gearmotor
GAGGIA BABILA 07 DISASSEMBLY 7.11 Gearmotor Loosen the screws as Loosen the screws as shown and shown and remove the remove the boiler pin boiler pin The following are located inside the compartment protected by the casing: - The electric motor (A) with gears (B) and (C) for transmission and timing of the dispensing unit. -
Page 57: Frother Valve Assembly
GAGGIA BABILA 07 DISASSEMBLY 7.12. Frother valve assembly Loosen the screws as shown Disconnect the electrical and water connections and remove the frothing valve 7.13. Dispenser assembly Remove the dispenser (picture B) making sure to reposition the highlighted spring Loosen the screws as shown to remove... -
Page 58: Steam Pipe Assembly
GAGGIA BABILA 07 DISASSEMBLY 7.15 Steam pipe assembly Loosen the screw and remove the steam pipe and disconnect the pipe Loosen the screws as shown to remove from the Teflon by removing the fork the inner cover of the front panel 7.16. -
Page 59: Carafe Board General Assembly
GAGGIA BABILA 07 DISASSEMBLY 7.17 Carafe board general assembly Loosen the screw as shown 1) Magnet to improve carafe adherence to the door 2,3,4) Carafe presence and position sensors 5) Carafe board 7.18 CPU board, display and front panel Loosen the screws as shown... -
Page 60: Un/Installing Oetiker Clamps
GAGGIA BABILA 07 DISASSEMBLY 7.19. Un/installing Oetiker clamps 1) Boiler connection 2) Other connections Replacing the pipes 1) Use a suitable pair of pliers to remove the clamp (as shown in the picture) 2) Tighten the clamp as shown in the... -
Page 61: Notes
GAGGIA BABILA CHAPTER 8 NOTES... - Page 62 GAGGIA BABILA 08 NOTES...
-
Page 63: Water Circuit Diagram
GAGGIA BABILA CHAPTER 9 WATER CIRCUIT DIAGRAM... - Page 64 GAGGIA BABILA 09 WATER CIRCUIT DIAGRAM...
-
Page 65: Electrical Diagram
GAGGIA BABILA CHAPTER 10 ELECTRICAL DIAGRAM... - Page 66 GAGGIA BABILA 10 ELECTRICAL DIAGRAM...