Table of Contents
Advertisement
Advertisement
Table of Contents

Related Manuals for Profoto A1


Summary of Contents for Profoto A1
- Page 1 User guide Profoto A1 For other languages visit: www.profoto.com...
- Page 2 www.profoto.com...
- Page 3 Unless it complies with the specified performance, quality and safety, it is a no-go. As a result, we are confident that your new Profoto product will stay with you for years and help you grow as a photographer. But getting the product is only the beginning of that journey.
-
Page 4: General Safety Instructions
Equipment contains electrical and electronic components that could be harmful to the environment. Equipment may be returned to Profoto distributors free of charge for recycling according to WEEE. Follow local legal requirements for separate disposal of waste, for instance WEEE directive for electrical and electronic equipment on the European market, when product life has ended! www.profoto.com... -
Page 5: Table Of Contents
Manual zoom ....................19 Test sync ......................20 Using the flash off-camera ................ 20 Change settings .................... 20 General notes on Profoto Air operation ..............26 Light shaping ........................28 Dome Diffuser ....................29 Bounce Card ....................30 Wide Lens ......................31 Additional functions ....................... -
Page 6: Introduction
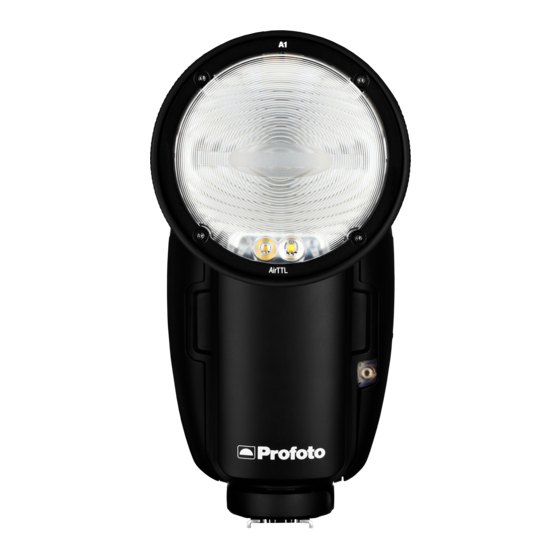
Introduction About the product We have designed the A1 to be the world’s smallest studio light. It is designed to provide a beautiful light with great light shaping capabilities and also being incredible easy to use. We have made the head round to create a circular and natural light pattern. - Page 7 Flash head 5. Battery release button 2. Zoom ring 6. AF (auto focus) assist structured laser light 3. LED Modeling lights Hot shoe connector 4. Battery 8. USB port www.profoto.com...
- Page 8 9. Display 13. Dial 10. Mode switch (TTL or MAN). 14. Settings button Only active when A1 is 15. MODEL button on-camera. 16. Lock ring 11. Group buttons (A, B, C, D) 12. TEST button & ON/OFF button www.profoto.com...
- Page 9 17. Battery charger 22. Bounce card 18. Battery charger indicator 23. Bounce card holder 19. Flash stand 24. Bounce card pouch 20. Bag 25. Wide lens 21. Dome diffuser www.profoto.com...
-
Page 10: Getting Started
Charge the battery: Push the battery release button [5] and remove the battery from the flash. This can be done while the A1 is mounted on the camera. 2. Connect the battery to battery charger [17] 3. Connect the battery charger to mains power. -
Page 11: Attach Battery To Flash
”click”. Attach light shaping tools The dedicated light shaping tools are easy and quick to attach. Just snap them in place in front of the flash lens until you hear a ”click”. To remove them, just pull them off. www.profoto.com... -
Page 12: On-Camera Use In Ttl Mode
On-camera use in TTL mode Slide the hot shoe connector [7] on the A1 into the hot shoe of the camera. Turn the locking mechanism to secure. 2. Switch on the A1. 3. Turn the dial [13] clockwise to unlock. -
Page 13: Off-Camera Use
Switch on the A1. 2. Turn the dial [13] clockwise to unlock. 3. Turn on Air and select the same radio channel on the A1 unit as on the transmitting unit on the camera. 4. Select a group for the A1 flash. -
Page 14: Operation
Operation Mounted in the camera hot shoe, the A1 unit acts both as an on-camera flash and as a wireless extension of your camera to your Profoto off- camera flashes, combining TTL (Through-The-Lens) exposure control with the option to manually adjust and sync your Profoto flashes. -
Page 15: Energy Scale
If a Profoto AirTTL compatible flash is set to group D, E or F, it will be synchronized but not part of the TTL calculation. The flash outputs of these flashes are added to the total flash exposure and can for instance be used to manually set the exposure on the background. -
Page 16: Flash Exposure Compensation
Example of Display [9] settings in TTL mode operation The figure shows an example of the display view in TTL mode when: • AIR is activated and channel 1 is selected. The A1 flash unit is set to belong to group B. •... -
Page 17: Operation In Man Mode (Manual Mode)
Note: If a light output cannot be set by the flash because it is outside its energy range, the A1 beeps to signal that the command was not executed. The light output of all flashes in the selected group then remains unchanged. -
Page 18: Modeling Light
To turn on modeling light on a specific group, first select group A, B, C or D and then press MODEL button [15]. When the A1 modeling light is on, a white dot is displayed to the right on the display and/or on the different groups. -
Page 19: Activate/Deactivate Flash Head
Press and hold the MODEL button [15] to turn on/off the A1 lamp head. When the A1 lamp is off, ‘--’ is shown in the center of the display [9]. Note: The A1 flash head can also be activated/deactivated in the settings menu. -
Page 20: Test Sync
To test the flash or take meter readings with a light meter the test button will fire a flash on the A1 unit. If Air is activated it will also fire test flashes on all flashes on the selected channel. - Page 21 Press the leftmost group button [11] to select EXIT and return to the main menu. Note: Please note that the user interface may be updated in future firmware releases. This is done to improve user interface or improve functionality. www.profoto.com...
- Page 22 A1 unit is ready to flash again. • BEEP DIM: The A1 modeling light turns off after flashing. The A1 modeling light turns on and the A1 unit beeps when it is ready to flash again. • OFF: No ready signal.
- Page 23 Refer to the camera’s user guide for how to change sync settings in camera. The A1 unit can be used on other camera brands in X-sync mode if the camera has a hot shoe with a central positioned sync contact. This is standard for most cameras today. In this mode the camera will be a full manual flash without TTL- or HSS compatibility.
- Page 24 Channel The channel setting (1-8) applies to the A1 control unit and the A1 flash. The selected channel is shown in the top of the display [9]. The Air setting is used to activate/deactivate the built-in Profoto Air transceiver. •...
- Page 25 The beam angle of the A1 flash can be set to five different beam angles, from wide to narrow. Note If a light shaping tool is attached to A1, the beam angle will be different AF assist The AF (autofocus) assist setting activates or deactivates the AF assist.
-
Page 26: General Notes On Profoto Air Operation
General notes on Profoto Air operation The Profoto Air channels [1-8] use eight specific frequencies in the 2.4 GHz band and have an operating range of up to 300 meters (1000ft). The frequencies are evenly distributed over the entire frequency band. - Page 27 www.profoto.com...
-
Page 28: Light Shaping
Light shaping The A1 flash creates a round and even light spread in all zoom positions. In addition, there are specially designed light shaping tools for the A1 that can modify the light quality in various ways. When A1 is used on camera it can automatically follow the zoom setting on the lens. -
Page 29: Dome Diffuser
Dome Diffuser The Dome Diffuser attaches to the A1 unit with the built in magnetic mount. The light quality will be diffused and spread omni directional. This is often used when bouncing the light in the ceiling to get a softer and less directional light. -
Page 30: Bounce Card
In most cases the flash is directed against a bouncing surface and the bounce card is directed against the subject. Note: The Bounce Card can also be stacked together with other light shaping tools. For example the optional gel can be used in combination with the Bounce Card. www.profoto.com... -
Page 31: Wide Lens
The Wide Lens is used when a wider light spread is needed, for example when using super wide lenses. The built in zoom function of the A1 unit will still work which means beam angle can be adjusted from super wide to wide light spread. - Page 32 www.profoto.com...
-
Page 33: Additional Functions
Upgrade of firmware is made via the USB port [8] on the A1, following the instructions provided in the upgrade application downloaded from profoto.com/myprofoto. You can always contact your local dealer or distributor for professional service. -
Page 34: Profoto Air Compatibility
Profoto Air functionality according to the table below. • The Profoto A1 AirTTL can also be used to trigger the Air Remote and Air Sync Profoto Air transceivers. • The Profoto A1 AirTTL flash can also be triggered and controlled by other Profoto Air transceivers. -
Page 35: Technical Data
No of groups per channel TTL operation: 3 (A-C) Manual operation: 6 (A-F) Operation modes TTL, Manual Camera TTL compatibility A1 AirTTL-C - Canon E-TTL II A1 AirTTL-N - Nikon i-TTL Sync modes 1st curtain, 2nd curtain, Hi-S (HSS/ Auto FP), X-Sync Camera mount/Connectors... -
Page 36: Specifications
TTL control TTL with group control for all Profoto flashes labelled AirTTL. Measurements (LxWxH) Dimensions 108x75x165 mm Weight (including battery) 560g All data are to be considered as nominal and Profoto reserves the right make changes without further notice. www.profoto.com... -
Page 37: Warranty
Warranty All Profoto generators and heads are individually tested before they leave the company and guaranteed for a period of two years (local deviations may apply) with the exception of flash tubes, glass covers, modeling lamps and cables. Profoto is not responsible for technical malfunctions created by improper use or accessories made by other companies. -
Page 38: Regulatory Information
SRD (Short Range Devices). This band may be used in most parts of the world. Regional restrictions may apply. Note: Refer to national regulations for the region where the Profoto A1 AirTTL shall be operated and make sure that they are followed. EU Declaration of Conformity Hereby, Profoto AB declares that the radio equipment type Profoto A1 AirTTL is in compliance with Directive 2014/53/EU. - Page 39 www.profoto.com...
- Page 40 Profoto AB Sweden +46 (0) 8 447 53 00 info@profoto.com www.profoto.com...