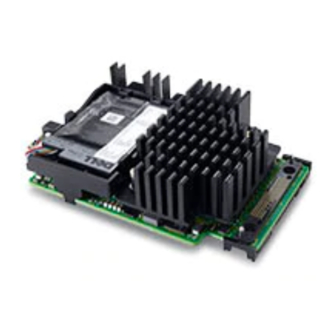
Dell PowerEdge User Manual
Raid controller
Hide thumbs
Also See for PowerEdge:
- Troubleshooting manual (122 pages) ,
- Use manual (44 pages) ,
- System management manual (28 pages)
Table of Contents
Advertisement
Advertisement
Table of Contents

Related Manuals for Dell PowerEdge


Summary of Contents for Dell PowerEdge
- Page 1 Dell PowerEdge RAID Controller S140 - PERC S140 User’s Guide...
- Page 2 A WARNING indicates a potential for property damage, personal injury, or death. Copyright © 2017 Dell Inc. or its subsidiaries. All rights reserved. Dell, EMC, and other trademarks are trademarks of Dell Inc. or its subsidiaries. Other trademarks may be trademarks of their respective owners.
-
Page 3: Table Of Contents
Contents 1 Overview................................ 7 PERC S140 specifications..............................7 Supported operating systems............................9 Supported PowerEdge systems............................9 Supported physical disks..............................10 Management applications for the PERC S140......................10 2 Physical Disks............................... 11 Physical disk features................................11 Physical disk roaming..............................11 Physical disk hot-swapping............................11 Physical disk power management..........................11 Physical disk failure detection............................ - Page 4 Checking PERC S140 options and the boot list priority..................41 Creating the device driver media for Windows driver installation................42 Downloading drivers for PERC S140 from the Dell support website for all operating systems....... 42 Downloading drivers from the Dell Systems Service and Diagnostic Tools media for Windows......42...
- Page 5 Status LED is not working............................49 Blinking and unblinking feature not working on PowerEdge R740 ..............49 Cannot update NVMe PCIe SSD firmware by using Dell Update Package or DUP.......... 50 Third-party driver installation for NVMe PCIe SSD failing..................50 Unable to find the NVMe PCIe SSD for operating system installation............... 50 Cryptographic erase fails for ISE-capable SATA drives..................50...
- Page 6 Cannot perform an Online Capacity Expansion or Reconfigure on a virtual disk ..........55 Unable to configure RAID on NVMe PCIe SSD using a third party RAID configuration utility ......55 9 Getting help..............................56 Contacting Dell EMC...............................56 Locating your system Service Tag..........................56 Related Documentation..............................56 Documentation feedback..............................56...
-
Page 7: Overview
Overview The Dell PowerEdge RAID Controller (PERC) S140 is a Software RAID solution for the Dell PowerEdge systems. The S140 controller supports up to 16 NVMe PCIe SSDs, SATA SSDs, SATA HDDs depending on your system backplane configuration. Topics: •... - Page 8 Specification PERC S140 NVMe connectors PCIe/slimline NOTE: Only Dell-compliant NVMe PCIe SSD 2.5 inch Small Form Factor (SFF), or NVMe PCIe SSD Adapters are supported. Dell-compliant NVMe compatibility Communication with end devices PCIe Software-based RAID for NVMe PCIe SSDs Volume, RAID 1, RAID 0, RAID 10...
-
Page 9: Supported Operating Systems
SLES 12 SP2 NOTE: For the latest list of supported operating systems and driver installation instructions, see the system documentation at dell.com/operatingsystemmanuals. For specific operating system service pack requirements, see the Drivers and Downloads section at dell.com/support/manuals. Supported PowerEdge systems The following PowerEdge systems support the S140 controller: •... -
Page 10: Supported Physical Disks
NVMe PCIe SSDs including NVMe PCIe SSD 2.5 - inch small form factor and NVMe PCIe SSD adapter. NOTE: Only Dell - complaint NVMe PCIe SSDs are supported. For information on PowerEdge NVMe 2.5 - inch SFF and PowerEdge NVMe PCIe SSD adapter, see the Express Flash NVMe PCIe SSD user's guide at dell.com/manuals. -
Page 11: Physical Disks
Physical Disks NOTE: The physical disks in a virtual disk must be of the same drive type (HDD, SSD or NVMe PCIe SSD). For example, you cannot mix an HDD and an NVMe PCIe SSD in the same virtual disk. Physical disk features Physical disk roaming Physical disk roaming is moving the physical disks from one cable connection or backplane slot to another on the same controller. -
Page 12: Mirror Rebuilding
Mirror rebuilding A RAID mirror configuration can be rebuilt after a new physical disk is inserted and the physical disk is designated as a hot spare. NOTE: The system does not have to be rebooted. Fault tolerance The following fault tolerance features are available with the PERC S140: •... -
Page 13: Physical Disk Write Cache Policy For Sata Drives
Linux RAID The Linux RAID feature is supported on all PowerEdge 14th generation systems. You can use Linux RAID to protect data across multiple devices. The S140 configuration utility supports configuring RAID 1 virtual disk in UEFI mode. The Linux operating system can be installed on that virtual disk, and once the system boots to the Linux environment, the Linux native RAID driver manages the virtual disk. -
Page 14: Virtual Disks
Virtual Disks A logical grouping of physical disks attached to a PERC S140 allows you to create multiple virtual disks of the same RAID levels, without exceeding a maximum of 16 virtual disks. The PERC S140 controller allows: • Creating virtual disks of different RAID levels on a S140 controller. NOTE: Ensure that you do not mix RAID levels on the same physical disks. -
Page 15: Disk Initialization
The CC operation reports data inconsistencies through an event notification. A CC cannot be user-initiated in the BIOS Configuration Utility (Ctrl+R). However, CC can be initiated using OpenManage Server Administrator Storage Management. For more information, see OMSA user’s guide at dell.com/openmanagemanuals. Background initialization Background initialization (BGI) of a redundant virtual disk creates the parity data that allows the virtual disk to maintain its redundant data and survive a physical disk failure. -
Page 16: Virtual Disk Cache Policies
Virtual disk cache policies NOTE: Configuring virtual disk cache policies on NVMe PCIe SSD is not supported. The PERC S140 uses part of system memory for cache. It supports the following cache options: • Read Ahead/Write Back • No Read Ahead/Write Back •... -
Page 17: Expanding Virtual Disk Capacity
If the target system was turned off, turn on the system. CAUTION: The BIOS Configuration Utility pauses, and prompts for action, for the degraded virtual disk(s), if the "pause if degraded" option is enabled in the BIOS Configuration Utility. CAUTION: After the migration occurs, ensure that all of the physical disks have been migrated and are present in the appropriate virtual disks. -
Page 18: Cabling The Drives For S140
Damage due to servicing that is not authorized by Dell is not covered by your warranty. Read and follow the safety instructions that are shipped with your product. -
Page 19: Disk Connectivity For Ahci Devices
The S140 controller supports systems with up to two AHCI devices. For systems with two AHCI devices, the first AHCI device connects the drives from ports 0–5 and the second AHCI device connects the drives from ports 6–13. The following table provides information about the disks connectivity to the AHCI devices supported on the 14th generation PowerEdge systems. -
Page 20: Bios Configuration Utility
BIOS Configuration Utility The BIOS Configuration Utility, also known as Ctrl+R or Option ROM (OPROM), is a storage management application integrated into the System BIOS accessible using F2 during system boot, which configures and maintains RAID disk groups and virtual disks on SATA drives. The BIOS Configuration Utility (Ctrl+R) is independent of the operating system. -
Page 21: Entering The Bios Configuration Utility
BIOS. In the SATA Settings field, ensure that SATA controller is set to RAID Mode. If the settings are correct and the BIOS Configuration Utility <Ctrl><R> does not appear, contact Dell support at dell.com/support. Exiting the BIOS Configuration Utility Press Esc in any menu screen. -
Page 22: Converting To Non-Raid Disks
Converting to Non-RAID disks WARNING: You may lose data while converting a disk to a Non-RAID disk. Enter the BIOS configuration utility. See Entering the BIOS configuration utility. Use the arrow keys to select Initializing the physical disks menu and press Enter. Select Convert to Non-RAID disk and press Enter. -
Page 23: Swapping Two Virtual Disks
Select each virtual disk in the Virtual Disks field that you want to delete. Press Insert to confirm each selection. Press Enter. CAUTION: Deleting a virtual disk permanently destroys all data that is on the virtual disk, as well as the virtual disk itself. -
Page 24: Assigning The Dedicated Hot Spare Disks
Assigning the dedicated hot spare disks A dedicated hot spare is a backup physical disk for the redundant virtual disk to which it is assigned. The physical disk that is used as a dedicated hot spare cannot be a member of an existing virtual disk. When the hot spare is activated, it becomes the receptacle for the data from the failed physical disk member of the volume, without interrupting the system or requiring your intervention. -
Page 25: Viewing The Virtual Disks Details
The Rescan disks option may take from 10 to 20 seconds to display the list of disks, depending on the number of disks available in the system. Enter the Dell PERC S140 Configuration Utility. See Entering the DELL PERC S140 Configuration Utility. -
Page 26: Continue To Boot
Continue to boot Enter the BIOS Configuration Utility. See Entering the BIOS configuration utility. In the Main Menu screen, use the arrows to select the Continue to Boot. The system restarts normally. BIOS Configuration Utility... -
Page 27: Uefi Raid Configuration Utility
Setting the NVMe PCIe SSDs to RAID mode NOTE: Use the UEFI RAID configuration utility for initial setup. Topics: • Entering the DELL PERC S140 Configuration Utility • Exiting the DELL PERC S140 Configuration Utility • Controller management • Virtual disk management •... -
Page 28: Exiting The Dell Perc S140 Configuration Utility
Viewing the controller properties The View Controller Information screen allows you to view your controller and firmware properties. In the System Setup Main Menu, click Device Settings > Dell PERC S140 Configuration Utility > Controller Management > View Controller Information. -
Page 29: Changing The Boot Order Of The Virtual Disks
Figure 3. View Controller Information Screen Changing the boot order of the virtual disks Set Bootable Device allows you to change the boot order of the virtual disks. Enter the Dell PERC S140 Configuration Utility. See Entering the DELL PERC S140 Configuration Utility. -
Page 30: Stopping The System From Booting If There Is A Critical Bios Error
The Change Controller Properties screen allows you to either enable or disable the option to stop the system from booting if there is any critical BIOS error requiring manual intervention. Enter the Dell PERC S140 Configuration Utility. See Entering the DELL PERC S140 Configuration Utility. -
Page 31: Virtual Disk Management
NOTE: To enable RAID mode for NVMe PCIe SSDs, see Setting the NVMe PCIe SSDs to RAID mode Enter the Dell PERC S140 Configuration Utility. See Entering the DELL PERC S140 Configuration Utility. Click Controller Management→Convert to RAID Capable Disk. - Page 32 NOTE: If the option to choose Linux RAID is disabled, convert the disk to a non-RAID disk(see Converting physical disk to Non-RAID disk) and then convert it back to RAID capable disk (see Converting physical disk to RAID capable disk). Select the Interface Type.The options are SATA and NVMe.
-
Page 33: Manage Virtual Disk Properties
The Manage Virtual Disk Properties screen allows you to modify the physical disk write cache policy and view the associated physical disk and its properties and policies. In the System Setup Main Menu, click Device Settings > Dell PERC S140 Configuration Utility > Virtual Disk Management > Manage Virtual Disk Properties.The table explains the Manage Virtual Disk Properties screen details: Table 11. -
Page 34: Viewing Virtual Disks Properties And Policies
The View Virtual Disk Properties screen allows you to view the virtual disk properties and the policies. In the System Setup Main Menu, click Device Settings > Dell PERC S140 Configuration Utility > Virtual Disk Management > View Virtual Disk Properties. -
Page 35: Deleting A Virtual Disk
Figure 5. Virtual Disk Properties Screen Deleting a virtual disk Enter the Dell PERC S140 Configuration Utility. See Entering the DELL PERC S140 Configuration Utility. Click Virtual Disk Management > Select Virtual Disk Operations. Select a virtual disk that you want to delete from the drop-down menu. -
Page 36: Viewing Physical Disk Properties
The View Physical Disk Properties screen allows you to view the properties of physical disk and also provides details about the associated virtual disks. In the System Setup Main Menu, click Device Settings > Dell PERC S140 Configuration Utility > Physical Disk Management > View Physical Disk Properties. The table explains the View Physical Disk Properties screen details: Table 12. -
Page 37: Managing The Physical Disk Write Cache Policy For Sata Drives
Figure 6. Physical Disk Properties Screen Managing the physical disk write cache policy for SATA drives Perform the following procedure to enable the physical disk write cache policy: Enter the Dell PERC S140 Configuration Utility. See Entering the DELL PERC S140 Configuration Utility. -
Page 38: Assigning The Global Hot Spare
For more information about the physical disk write cache behavior, see the Troubleshooting your system section. Assigning the global hot spare Enter the Dell PERC S140 Configuration Utility. See Entering the DELL PERC S140 Configuration Utility. Click Physical Disk Management > Select Physical Disk Operations. -
Page 39: Cryptographic Erase
Viewing global hot spares The View Global Hot Spares screen displays the physical disk assigned as global hot spare. In the System Setup Main Menu, click Device Settings > Dell PERC S140 Configuration Utility > Physical Disk Management > View Global Hot Spares. -
Page 40: Installing The Drivers
Installing the drivers The PowerEdge RAID Controller (PERC) S140 requires software drivers to operate with supported operating systems. Which drives to install depends on the type of the system and the operating system installed. NOTE: To check operating system compatibility, see dell.com/support/manuals... -
Page 41: Creating A Virtual Disk
Click NVMe Settings. Select RAID mode. Click Back. Click Finish. Figure 8. NVMe Settings in BIOS NOTE: If you change the NVMe Mode setting from RAID to Non RAID, ensure that the NVMe driver (Microsoft or third- party NVMe driver) is installed manually in the Windows environment. Creating a virtual disk For more information about creating a virtual disk, see Creating the virtual... -
Page 42: Creating The Device Driver Media For Windows Driver Installation
If you do not have the service tag, select Automatically detect my Service Tag for me to allow the system to automatically detect your service tag, or select Choose from a list of all Dell products to select your product from the Product Selection page. -
Page 43: Troubleshooting Your System
Troubleshooting your system To get help with your Dell PowerEdge RAID Controller (PERC) S140, you can contact your Dell Technical Service representative or see dell.com/support. Topics: • Unable to configure Linux RAID using UEFI Configuration Utility • Unable to configure Linux RAID on systems with more than 10 NVMe PCIe SSDs •... -
Page 44: Performance Degradation After Disabling Sata Physical Disk Write Cache Policy
Ensure that there is constant power supply to the system (A UPS is recommended). NOTE: If you create a virtual disk using Dell LifeCycle controller, then the physical disk write cache policy is set to default. For more information about the physical disk write cache policy behavior, see Managing the physical disk write cache policy for SATA drives section. -
Page 45: System Does Not Boot
Controller mode is set incorrectly at System Setup In the system startup, when the Dell Power-On Self-Test (POST) screen is displayed, press F2 to enter the system BIOS screen. Scroll to SATA Settings. Press Enter and ensure that the SATA Controller is set to RAID mode. -
Page 46: The Boot Order Is Incorrect For A Bootable Virtual Disk
Warning Messages The Dell Inc. PERC S140 Controller system BIOS screen is one of the first screens to appear during your system’s boot sequence. If the system’s virtual disks were in Normal or Ready status before a system boot, the boot sequence continues normally to the Microsoft Windows Server operating system. -
Page 47: Warning - Found Virtual Disks That Are Failed
OpenManage Server Administrator Storage Management. When the rebuild operation is completed, the virtual disk status changes from Degraded to Ready. For a description of the rebuild function, see Storage Management at dell.com/support/manuals. WARNING - Found virtual disks that are failed This warning message is displayed when at least one virtual disk is in a Failed state and Pause if Failed is set to ON at the BIOS Configuration Utility (<Ctrl><R>). -
Page 48: Other Errors Appearing On The Bios Screen
NOTE: A boot virtual disk that is in a Failed state prevents the operating system from booting. To investigate the cause, check for the following: • Whether the virtual disk is in Degraded status because one of the physical disks of a RAID 1 or RAID 5 virtual disk has failed, or one of the physical disks of a RAID 10 virtual disk has failed. -
Page 49: A Physical Disk Is Not Visible In The Bios Configuration Utility Or Is Offline
Description The Blink task allows you to locate a disk within an enclosure by blinking one of the light-emitting diodes (LEDs) on the disk. This feature is currently not supported on PowerEdge R740 systems with 2.5 inch back plane. NOTE: The Blink task is available on OpenManage Server Administrator console. -
Page 50: Cannot Update Nvme Pcie Ssd Firmware By Using Dell Update Package Or Dup
Cannot update NVMe PCIe SSD firmware by using Dell Update Package or DUP Likely Cause: The supported device driver for the operating system on your system is not installed. Corrective Action: Before you update the NVMe PCIe SSD firmware using DUP, ensure that the required device driver for the operating system available on your system is installed. -
Page 51: A Virtual Disk Is In A Degraded State
Incorrect number of physical disks selected for the desired RAID level For details about RAID levels and the allowable number of physical disks used with each RAID level, see understanding RAID levels in RAID Technology Guide at dell.com/support/manuals. The desired physical disk is unavailable Determine whether the physical disk: Is a dedicated hot spare and unavailable for use in another virtual disk. -
Page 52: Cannot Assign A Dedicated Hot Spare To A Virtual Disk
(mirrored or parity) data. The failure of an additional physical disk results in lost data. Replace the physical disk or disks. Rebuild the physical disk using Storage Management. See the applicable Storage Management screen at dell.com/support/manuals. Corrupted metadata in the virtual disk Delete the virtual disk that has the failed metadata. -
Page 53: Cannot Create A Global Hot Spare
The physical disk are of different types The physical disk used as a dedicated hot spare must be the same type as the physical disks that are already part of the virtual disk. For example, if a virtual disk consists of SATA-II physical disks, the dedicated hot spare must be a SATA-II physical disk. Cannot create a global hot spare If you cannot create a global hot spare, check the following causes: There are no empty physical disks available or the physical disks have not been converted to RAID-capable... -
Page 54: A Dedicated Hot Spare Fails
A dedicated hot spare fails If a dedicated hot spare fails, check the following causes: The controller cannot communicate with the hot spare. The dedicated spare is not visible in the BIOS Configuration Utility or is offline. The controller cannot communicate with the hot spare Check that the cable from the controller to the physical disk is connected properly. -
Page 55: Cannot Perform An Online Capacity Expansion Or Reconfigure On A Virtual Disk
Cannot perform an Online Capacity Expansion or Reconfigure on a virtual disk Determine whether these physical/virtual disks were migrated from a legacy controller with mixed RAID levels. If so, Online Capacity Expansion/Reconfigure by adding physical disk on such a set of physical disks is not allowed. Unable to configure RAID on NVMe PCIe SSD using a third party RAID configuration utility Corrective Action... -
Page 56: Getting Help
For all PowerEdge documentation, go to dell.com/poweredgemanuals. NOTE: For all PowerVault documentation, go to dell.com/powervaultmanuals. Documentation feedback Click the Feedback link in any of the Dell documentation pages, fill out the form, and click Submit to send your feedback. Getting help...