Table of Contents
Advertisement
Quick Links
AUDIO/VIDEO MULTI-CHANNEL
RECEIVER
VSX-59TXi
Register your product at
www.pioneerelectronics.com
• Protect your new investment
The details of your purchase will be on file for reference in the event of an
insurance claim such as loss or theft.
• Receive free tips, updates and service bulletins on
your new product
• Improve product development
Your input helps us continue to design products that meet your needs.
• Receive a free Pioneer newsletter
Registered customers can opt in to receive a monthly newsletter.
Operating Instructions
Advertisement
Table of Contents

Related Manuals for Pioneer VSX-59TXi Elite


Summary of Contents for Pioneer VSX-59TXi Elite
-
Page 1: Operating Instructions
• Receive free tips, updates and service bulletins on your new product • Improve product development Your input helps us continue to design products that meet your needs. • Receive a free Pioneer newsletter Registered customers can opt in to receive a monthly newsletter. Operating Instructions... - Page 2 Thank you for buying this pioneer product. Please read through these operating instructions so you will know how to operate your model properly. After you...
-
Page 3: Important Safety Instructions
IMPORTANT SAFETY INSTRUCTIONS READ INSTRUCTIONS — All the safety and operating instructions should be read before the product is operated. RETAIN INSTRUCTIONS — The safety and operating instructions should be retained for future reference. HEED WARNINGS — All warnings on the product and in the operating instructions should be adhered to. - Page 4 For U.S. and Australia Model C67-7-3_En Selecting fine audio equipment such as the unit you’ve just purchased is only the start of your musical enjoyment. Now it’s time to consider how you can maximize the fun and excitement your equipment offers. This manufacturer and the Electronic Industries Association’s Consumer Electronics Group want you to get the most out of your equipment by playing it at a safe level.
-
Page 5: Our Philosophy
WMA9 Pro decoder, or through the USB connection using a software decoder on your computer. Seamless video conversion With the Pioneer video converter, you can use a wide range of cords interchangeably, giving you more flexibility when making video connections. -
Page 6: Table Of Contents
Contents Our philosophy ......5 Features ........5 01 Before you start Checking the supplied accessories . - Page 7 12 volt trigger......74 Operating other Pioneer components with this unit’s sensor ......74 09 Using other functions Making an audio or a video recording .
-
Page 8: Before You Start
Before you start Chapter 1 Before you start Checking the supplied accessories Please check that you've received the following supplied accessories: • Microphone • Remote control unit • Remote control unit recharger and AC adapter • AM loop antenna • FM wire antenna •... -
Page 9: Using The Remote Control
Before you start – in extremely hot or cold areas – in places where there is vibration or other movement – in places that are very dusty – in places that have hot fumes or oils (such as a kitchen) Using the remote control Keep the following in mind when using the remote control:... -
Page 10: Calibrating The Remote Control Screen
Before you start There are three remote setup menu screens, which can be navigated by using the touch panel (cursor left/right) soft keys: SETUP CALIBRATE PRESET RECALL LEARNING MULTI OPERATION DIRECT FUNCTION • For more on navigating the remote control menu screens, see Basic remote control displays on page 33. -
Page 11: Setting The Button Alert Volume
Before you start Setting the button alert volume You can set the volume of the ‘beep’ you hear when you press a button on the remote. • Press BEEP to select a setting. Each press selects between quiet, loud or off. The current setting is shown on the touch screen. -
Page 12: Locking The Remote Control
NEC TOKIN Corporation. Use of any other battery cells may result in fire or explosion. Contact the Pioneer Customer Support division to obtain new batteries. Replacement cells are not covered under warranty. replacement. Keep away from children. - Page 13 Before you start Use a small phillips screwdriver to remove the screw fixing the battery cover to the back of the remote. Remove the battery cover. Disconnect the old battery cell from the unit. Do not pull the connector out by holding onto the attached wires.
-
Page 14: Connecting Your Equipment
Connecting your equipment Chapter 2 Connecting your equipment This receiver provides you with almost limitless possibilities for connecting your audio/video system, but it doesn’t have to be difficult. Depending on your needs, you could be up and running in no time after a few simple connections. This section has been designed so that you can read through this short introduction, then jump to the specific connections that you need to make. -
Page 15: When Making Cable Connections
Mini jack terminals for connection to other Pioneer components to enable you to control all your equipment from a single IR remote sensor. See Operating other Pioneer components with this unit’s sensor on page 74 for connection details. 11 Monitor video outputs... -
Page 16: Connecting Your Tv
AC 120 V 60Hz SWITCHED 100W (0.8A) MAX AM LOOP ANTENNA MONITOR 75 UNBAL CENTER SUR- ROUND SELECTABLE (SURROUND BACK & B ) (Single) SUR- ROUND BACK DC OUT 12V 12V TRIGGER TOTAL 100mA MAX SPEAKERS VIDEO S-VIDEO AC OUTLET AC IN VSX-59TXi... -
Page 17: Connecting A Dvd Player
ANTENNA AC OUTLET FRONT AC 120 V 60Hz SWITCHED 100W (0.8A) MAX AM LOOP ANTENNA 75 UNBAL CENTER AC IN SUR- ROUND SELECTABLE (SURROUND BACK & B ) (Single) SUR- ROUND BACK DC OUT 12V TOTAL 100mA MAX SPEAKERS VSX-59TXi... -
Page 18: Connecting The Multichannel Analog Outputs
ROUND BACK DC OUT 12V 12V TRIGGER TOTAL 100mA MAX SPEAKERS VSX-59TXi If your DVD player also has outputs for surround connections. the SURROUND BACK L (SINGLE) jack on this receiver. Note switch the input signal selector to MULTI CH INPUT (see Playing a source on page 41 for more on this). -
Page 19: Connecting A Satellite/Cable Receiver Or Other Set-Top Box
S2 VIDEO AUDIO VIDEO S-VIDEO AV OUT ANTENNA AC OUTLET FRONT AC 120 V 60Hz SWITCHED 100W (0.8A) MAX AM LOOP ANTENNA 75 UNBAL CENTER AC IN SUR- ROUND SELECTABLE (SURROUND BACK & B ) (Single) SUR- ROUND BACK SPEAKERS VSX-59TXi... -
Page 20: Connecting A Vcr Or Dvd Recorder
You can assign them when setting up the receiver (see also Assigning the digital inputs on page 90). Note output, omit step 3 above. audio cables (the digital connection is for playback only). VSX-59TXi ANTENNA AC OUTLET REMOTE IN MULTI ROOM & SOURCE FRONT AC 120 V 60Hz SWITCHED 100W (0.8A) MAX... -
Page 21: Connecting Other Video Sources
ANTENNA AC OUTLET FRONT AC 120 V 60Hz SWITCHED 100W (0.8A) MAX AM LOOP ANTENNA 75 UNBAL CENTER AC IN SUR- ROUND SELECTABLE (SURROUND BACK & B ) (Single) SUR- ROUND BACK DC OUT 12V TOTAL 100mA MAX SPEAKERS VSX-59TXi... -
Page 22: Using The Component Video Jacks
AC OUTLET FRONT AC 120 V 60Hz SWITCHED 100W (0.8A) MAX AM LOOP ANTENNA 75 UNBAL CENTER AC IN SUR- ROUND SELECTABLE (SURROUND BACK & B ) (Single) SUR- ROUND BACK DC OUT 12V 12V TRIGGER TOTAL 100mA MAX SPEAKERS VSX-59TXi... -
Page 23: Connecting Digital Audio Sources
CD-R, MD, DAT, etc. ANTENNA AC OUTLET FRONT AC 120 V 60Hz SWITCHED 100W (0.8A) MAX AM LOOP ANTENNA 75 UNBAL CENTER AC IN SUR- ROUND SELECTABLE (SURROUND BACK & B ) (Single) SUR- ROUND BACK DC OUT 12V SPEAKERS VSX-59TXi... -
Page 24: Connecting Analog Audio Sources
ANTENNA FRONT AC 120 V 60Hz SWITCHED 100W (0.8A) MAX AM LOOP ANTENNA 75 UNBAL CENTER SUR- ROUND SELECTABLE (SURROUND BACK & B ) (Single) SUR- ROUND BACK DC OUT 12V TOTAL 100mA MAX SPEAKERS VSX-59TXi AC OUTLET AC IN... -
Page 25: Connecting A Component To The Front Panel Inputs
TAPE2 STREAM SELECT SELECT MONITOR DIRECT VSX-59TXi video games and portable audio/video equipment. • Pull down the front cover where indicated to access the front panel inputs. • The illustration below shows example connections to a portable DVD player. MULTI ROOM & SOURCE... -
Page 26: Installing Your Speaker System
DVD) (DVD/ 1 IN (DVD/ ASSIGNABLE VSX-59TXi Connecting the speakers Each speaker connection on the receiver comprises a positive (+) red, and negative (–) white terminal. For proper sound you should take care to match these up with the terminals on the speakers themselves. -
Page 27: Placing The Speakers
Connecting your equipment Caution • Make sure that all the bare speaker wire is twisted together and inserted fully into the speaker terminal. If any of the bare speaker wire touches the back panel it may cause the power to cut off as a safety measure. Bare wire connections Before you start connecting the speakers, make sure that the speaker cable you’re going to use is properly... -
Page 28: Connecting Antennas
1 IN SUR- ROUND (DVD/ ASSIGNABLE MULTI CH INPUT VSX-59TXi AM loop antenna Assemble the stand as shown in the illustration. fig. A fig. B • Bend the stand in the direction indicated (fig. A). • Clip the loop into the stand (fig. B). -
Page 29: Plugging In The Receiver
Check the power cord once in a while. If you find it damaged, ask your nearest Pioneer authorized service center or your dealer for a replacement. Plug the supplied power cord into the AC IN socket on the back of the receiver. -
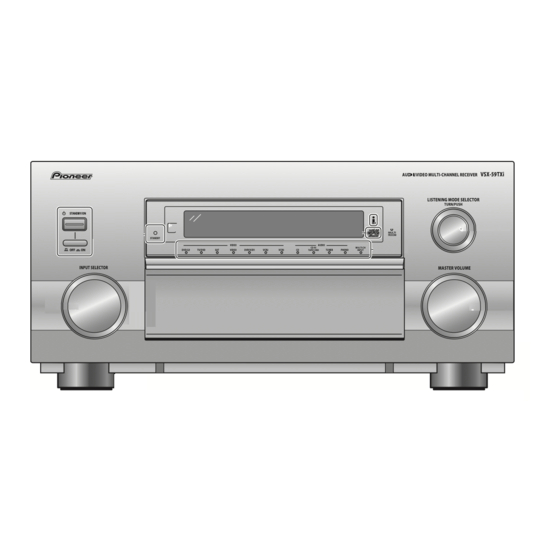
Page 30: Controls And Displays
Shows whether the multi-room function is active or not. AUDIO/VIDEO MULTI-CHANNEL RECEIVER LISTENING MODE SELECTOR TURN/PUSH AUDIO CD-R/ MULTI CH TUNER PHONO INPUT MASTER VOLUME MULTI ROOM & SOURCE TUNER SB CH STATION MODE CONTROL ON/OFF VIDEO INPUT S-VIDEO VIDEO AUDIO 10 11 VSX-59TXi... - Page 31 Controls and displays Input indicators Shows the currently selected source component. The MULTI CH INPUT indicator lights when a component connected to the MULTI CH INPUT is selected. Nothing lights if an unassigned i.LINK-equipped component or USB connection is selected. 10 LISTENING MODE SELECTOR dial (page 43) Turn and push to select a listening mode.
-
Page 32: Display
Controls and displays Display SIGNAL AUTO OVER ATT DIGITAL ANALOG TAPE 2 TUNED STEREO MONO RF ATT SIGNAL indicators (page 75) Light to indicate the currently selected input signal. AUTO lights when the receiver is set to select the input signal automatically. -
Page 33: Remote Control
MASTER VOLUME control) to restore the sound. 12 Servicing terminal For use by Pioneer service technicians. Basic remote control displays The remote control LCD touch screen has a number of displays from which you can control receiver functions, as well as control operations for other components. - Page 34 Press to go to the receiver main menu (see Receiver menu screens below). SYSTEM OFF (page 72) Press to switch off all Pioneer components in your system, or any other component you have also programmed to switch off using the System Off function.
-
Page 35: Remote Control Displays For The Tuner
Controls and displays RECEIVER RECEIVER CONT SB CH INPUT MODE SPEAKER INPUT VIDEO DISPLAY SELECT DIMMER TAPE2 STATUS MONITOR 15 INPUT (page 41) Press repeatedly to cycle through all possible input sources. 16 SPEAKER A/B (page 82) Press repeatedly to select speaker system A,B, A/B or off (in that order). -
Page 36: Remote Control Displays For Other Components
Controls and displays TUNER DIRECT ACCESS 11 Number buttons (page 56) Use to input a radio frequency. 12 DIRECT ACCESS (page 55) After pressing, you can access a radio station directly using the number buttons. Remote control displays for other components The functions on these screens are available once you’ve programmed the remote to control the appropriate... - Page 37 Controls and displays 11 IN1 / IN2 / IN3 / IN4 These are unassigned buttons which can be used to learn new commands. See Programming signals from other remote controls on page 69 for more on this. TV CONTROL ON/OFF MENU GUIDE INFO...
- Page 38 Controls and displays DISPLAY Press to display/change disc information shown on- screen. TOP MENU Press to display the top menu of a DVD disc. Press to return to the main Home menu (see Home menu screens above). (soft keys) Press to go to the previous/next TV control menu screen. TV CONT Press to access the TV control menu (see TV control menu screens above).
-
Page 39: Getting Started
Getting started Chapter 4 Getting started Introduction to home theater You are probably used to using stereo equipment to listen to music, but may not be used to home theater systems that give you many more options (such as surround sound) when listening to soundtracks. - Page 40 Getting started ‘Auto Surround Setup’ should be highlighted. Press ENTER. System Setup Auto Surround Setup [1. Input Assign] [2. Surround Setup] [3. Expert Setup] [4. THX Audio Setup] [Exit] Specify how you are using your speaker system. Highlight ‘Go Next’ then press ENTER. If you are using a normal surround setup, or if you’re not sure, leave the settings at their default: •...
-
Page 41: Other Problems When Using The Auto Surround Setup
Getting started 10 The Auto Surround Setup has finished! Press SYSTEM SETUP to exit the System Setup menu. Auto Surround Setup ! ! Complete ! ! [Data Copy] [Check] [Return] The settings made in the Auto Surround Setup should give you excellent surround sound from your system, but it is also possible to adjust these settings manually using the Surround Setup menu (starting on page 57). - Page 42 Getting started Change the receiver input to the source you want to play. You can use the front panel INPUT SELECTOR knob or the dedicated INPUT buttons on the remote control touch screen Home menu (see Basic remote control displays on page 33 if your unsure how to do this). HOME RECEIVER INPUT 1...
-
Page 43: Listening To Your System
Listening to your system Chapter 5 Listening to your system About the listening modes Using this receiver you can enjoy listening to sources, analog or digital, in either stereo or surround sound. However, the listening mode options and the current active mode may change depending on your speaker setup and the type of source you’re listening to. - Page 44 Listening to your system With multichannel sources, if you have connected surround back speaker(s) and have selected SB CH MODE ON , you can press STANDARD repeatedly to select: • 2 Pro Logic IIx MOVIE – See above • 2 Pro Logic IIx MUSIC – See above •...
-
Page 45: Using The Advanced Surround Effects
Listening to your system Using the Advanced surround effects The Advanced surround effects can be used for a variety of additional surround sound effects. The Advanced Cinema modes are designed to be used with movies, and the Advanced Concert modes are for music. •... -
Page 46: Listening In Stereo
Listening to your system With two channel sources, press THX repeatedly to select a matrix-decoding process for the THX CINEMA mode (see Listening in surround sound above for an explanation of each process): • 2 Pro Logic IIx MOVIE • 2 PRO LOGIC •... -
Page 47: Using The Multichannel Analog Inputs
Listening to your system Using the multichannel analog inputs If you’ve connected to the multichannel inputs on the rear panel (see Connecting the multichannel analog outputs on page 18), you will be able to select them as your input source. See Using the Stream Direct mode below if you want to bypass the signal processing in this receiver for a pure analog signal. -
Page 48: Listening With Acoustic Calibration Eq
Listening to your system Listening with Acoustic Calibration You can listen to sources using the Acoustic Calibration Equalization set in Automatically setting up for surround sound on page 39 or Acoustic Calibration EQ on page 61. Refer to these pages for more on acoustic calibration equalization. -
Page 49: Selecting Usb And Multichannel Analog Input Channels
Listening to your system • If you want to play DTS-encoded sources, you need to have digital connections. If ANALOG is selected, you’ll hear digital noise through your speakers. • Make sure you connect your DVD/LD or LD players using the 2 RF jack. If your player has a 2 RF output this will ensure you can use all LDs. -
Page 50: Using The Surround Back Channel
Listening to your system Using the surround back channel • Default setting: SB CH ON You can have the receiver automatically use 6.1 or 7.1 decoding for 6.1 encoded sources (for example, Dolby Digital EX or DTS-ES), or you can choose to always use 6.1 or 7.1 decoding with other sources (for example, 5.1 encoded material). -
Page 51: Listening With Virtual Surround Back Speakers
Listening to your system Listening with virtual surround back speakers • Default setting: VIRTUAL SB OFF If you don’t have real surround back speakers connected, you can use the Virtual Surround Back feature to simulate one. Sometimes the material may sound better in the 5.1 format for which it was originally encoded. -
Page 52: Using Hi-Bit And Hi-Sampling
Listening to your system Using Hi-bit and Hi-sampling You can use both Hi-bit and Hi-sampling to create a wider dynamic range with digital sources like CDs or DVDs. Press OPTION repeatedly to select HI-BIT or HI- SAMPLING. The remote control menu for this step is shown below (see note at the start of this chapter if you need help). -
Page 53: Adjusting The Bass And Treble
Listening to your system Adjusting the bass and treble • Default setting: Bass: 0, Treble: 0 You can adjust the bass and treble controls separately to adjust the overall tone. Press OPTION repeatedly to select BASS or TREBLE. The remote control menu for this step is shown below (see note at the start of this chapter if you need help). -
Page 54: Using The Tuner
Using the tuner Chapter 6 Using the tuner Note • The remote control operations in this section are accessed from the remote control tuner menus. If you’re not sure how to navigate the touch panel, see Basic remote control displays on page 33. To go to the tuner menu, press TUNER on the remote control Home menu ( HOME... -
Page 55: Tuning Directly To A Station
Using the tuner Tuning directly to a station Sometimes, you'll already know the frequency of the station you want to listen to. In this case, you can simply enter the frequency directly using the number buttons on the remote control. TUNER CONT –... -
Page 56: Naming Station Presets
Using the tuner While the display is blinking, press ENTER. Repeat steps 1 – 5 to memorize up to 30 stations. Naming station presets You can input a name of up to eight characters for each preset station in the receiver’s memory. For example, you could input New Jazz for that station and when you listen to it the name, rather than the frequency, will appear in the display. -
Page 57: The Surround Setup Menu
The Surround Setup menu Chapter 7 The Surround Setup menu Making receiver settings from the Surround Setup menu This receiver allows you to make detailed settings to optimize the surround sound performance. You only need to make these settings once (unless you change the placement of your current speaker system or add new speakers.). -
Page 58: Speaker Systems
The Surround Setup menu • Channel Level – Adjust the overall balance of your speaker system (page 60). • Speaker Distance – Specify the distance of your speakers from the listening position (page 61). • Acoustic Cal EQ – Adjust overall equalization depending on your room characteristics (page 61). - Page 59 The Surround Setup menu Choose the set of speakers that you want to set then select a speaker size. 2.1. Speaker Systems Manual Free ” Normal Surround ” FRONT LARGE CENTER [ LARGE ] SURROUND [ LARGE ] SURR BACK [LARGE SUB WOOFER [ ( NEXT)
-
Page 60: Channel Level
The Surround Setup menu a decrease in the amount of bass due low frequency cancellations. In this case, try changing the position or direction of speakers. If you can’t get good results, listen to the bass response with it set to PLUS and YES or the front speakers set to LARGE and SMALL alternatively and let your ears judge which sounds best. -
Page 61: Speaker Distance
The Surround Setup menu Speaker Distance For good sound depth and separation from your system, you need to specify the distance of your speakers from the listening position. The receiver can then add the proper delay needed for effective surround sound. Select ‘Speaker Distance’... - Page 62 The Surround Setup menu Setting the Acoustic Calibration EQ manually Before manually adjusting the Acoustic Calibration EQ, we recommend copying the ALL CH ADJ or the FRONT CH ALIGN settings from the Auto setup above (or from Introduction to home theater on page 39) to one of the custom settings.
-
Page 63: Professional Acoustic Calibration Eq
(with software available from Pioneer—see Connecting a PC for Advanced MCACC output on page 88 for more on this). How to interpret the graphical output The graph shows decibels on the vertical axis and time (in milliseconds) on the horizontal axis. - Page 64 The Surround Setup menu • Reverb characteristics for different channels – Reverb characteristics can be somewhat different for each channel. Since this difference increases as the sound is influenced by the various room characteristics, it is often better to capture a frequency analysis early on for smoother mixing of channel frequencies/sounds.
-
Page 65: X-Curve
The Surround Setup menu If you selected ‘Reverb Measurement’, select ‘Start’ and press ENTER. 2.4. Acoustic Cal EQ Pro. Reverb •Connect microphone •Please be quiet •Move obstacles away •If you have a subwoofer turn power on and turn volume up [Start] [Cancel] !! Complete !! is displayed on screen when the reverb... -
Page 66: Checking Your Surround Settings
The Surround Setup menu • Semi Auto – The X-Curve is calculated automatically. The larger your listening area (as determined by the speaker distance setting), the greater the X-Curve slope (see the following step for more on this). Check the X-Curve setting. If you selected ‘Manual’, make any adjustments necessary to the X- Curve. -
Page 67: Controlling Other Equipment
Controlling other equipment Chapter 8 Controlling other equipment Using the remote control with other components The supplied remote control can operate not only this receiver, but also your TV, DVD player and other components. If the component is listed in the remote control's memory, simply follow the steps in Recalling preset codes below. - Page 68 BACK Select a setting type. There may be only one option listed, or there may be several. Start with the first button available, which will show the makers name and 1 (in this case Pioneer-1). Setting Type PRESET RECALL Pioneer-1...
-
Page 69: Programming Signals From Other Remote Controls
Pioneer-1 – DVR-7000 Pioneer-2–4 – DVR-310, DVR-510H Pioneer-5 – DVR-57H, DVR-810H If you have more than one Pioneer DVD recorder of setting type 2–4, you can select different setting types for each (allowing for separate control). Programming signals from other... -
Page 70: Remote Direct Function
Controlling other equipment Note • If you see Failed (or OK! doesn’t appear) on the touch panel, or OK! is displayed, but you find that the command wasn't learned, try teaching the command again, but vary the distance (closer or farther) between the remote controls. - Page 71 Controlling other equipment Select the button you want to rename. For example, choose the SEARCH MODE button if it was programmed with the ‘eject’ command from your DVD player’s remote. KEY LABEL CONT SEARCH RETURN MODE • Remote control soft keys such as (cursor left/right) and TV CONT are used to select menu screens (even in learning mode), so therefore cannot be renamed.
-
Page 72: Multi Operation And System Off
Controlling other equipment Multi Operation and System Off The Multi Operation feature allows you to program a series of commands for the components in your system. For example, you could turn on your TV, turn on your DVD player and start playing the loaded DVD using only two buttons on the remote control. - Page 73 • program the power to switch on if it’s the source component selected in step 2; • program a Pioneer TV or monitor to switch on if the input function (selected in step 2) has video input terminals; These take priority in multi operations (not shutdown).
-
Page 74: Switching Components On And Off Using The 12 Volt Trigger
Controlling other equipment Using System off • From the remote control Home menu SYSTEM OFF. The command sequence you programmed will run, then all Pioneer components will switch off, followed by this receiver. HOME RECEIVER INPUT 1 / LD / VCR1... -
Page 75: Using Other Functions
Using other functions Chapter 9 Using other functions Making an audio or a video recording You can make an audio or a video recording from the built-in tuner, or from an audio or video source connected to the receiver (such as a CD player or TV). Keep in mind you can't make a digital recording from an analog source or vice-versa, so make sure the components you are recording to/from are hooked up in... -
Page 76: Reducing The Level Of An Analog Signal
Using other functions Reducing the level of an analog signal The input attenuator lowers the input level of an analog signal when it’s too strong. You can use this if you find the that the OVER indicator is lights often, or you can hear distortion in the sound. -
Page 77: Enhancing Sacd Playback
Using other functions Note • If you change the source using the input buttons (or front panel INPUT SELECTOR dial), the system returns to normal playback. Enhancing SACD playback You can get more detail from SACDs by maximizing the dynamic range (during digital processing) using the SACD gain feature. -
Page 78: Switching The Speaker Impedance
Using other functions Switching the speaker impedance • Default setting: Speaker 6Ω Ω Ω Ω We recommend using speakers of 6Ω to 16Ω with this system, but it is possible to switch the impedance setting if you plan to use speakers with a lower impedance rating (for example, less than 6Ω). -
Page 79: Resetting The System
Using other functions Resetting the system Use this feature to reset the system to its factory default settings (see Default receiver settings below). Switch the receiver into standby. While holding down the front panel DIGITAL NR button, press and hold STANDBY/ON for about three seconds. -
Page 80: Other Connections
Other connections Chapter 10 Other connections Using speaker system B You can connect a pair of speakers to the B speaker terminals on the rear panel to listen to stereo playback in another room, or you can also use these terminals to hear surround sound when playing DVD-Audio sources. -
Page 81: Bi-Amping Your Front Speakers
Other connections Connect an alternate (ITU-R) set of surround speakers as shown below. Connect the ITU-R surround left speaker to the left speaker terminal of speaker system B. Connect the ITU-R surround right speaker in the same way. ITU-R surround left speaker FRONT CENTER... -
Page 82: Bi-Wiring Your Speakers
Other connections Select the ‘Front Bi-Amp’ setting from the Speaker Systems menu. See Speaker Systems on page 58 to specify how you’re using the surround back speaker terminals. Note • For 7.1 surround sound with this configuration, you must connect an additional amplifier to the surround back channel pre-outs. -
Page 83: Connecting An External Stereo Pre-Amplifier
It is possible to make these connections if you have a channel separate amplifier, speakers, TV and an IR receiver (such amplifier as the Pioneer MR-100) for your sub room. Surround back channel amplifier Connect the IR receiver sensor to the green MULTI-ROOM &... -
Page 84: Using The Sub Room Controls
Other connections • When selected in the main room, i.LINK sources can’t be heard in the sub room unless they can output both i.LINK and analog signals at the same time. Also, the sound from an i.LINK source selected in the sub room switches off if the same source is selected as an i.LINK source in the main room. -
Page 85: Using The I.link Interface
• Multi-room can’t be used when you’re setting up the system (from the on-screen System Setup menu). • If you’re using a Pioneer amplifier in the sub room, you may want to cover the remote sensor so that this remote control doesn’t accidently control the sub room amplifier. -
Page 86: About I.link
“i.LINK” and the “i.LINK” logo are trademarks of Sony Corporation. About PQLS rate control Pioneer's PQLS (Precision Quartz Lock System) technology provides high-precision digital audio from DVD-A, SACD and audio CD sources when you use the i.LINK interface. A precision quartz controller in this... -
Page 87: Using The Usb Interface
Control Panel of your operating system: ® • Windows XP – Select Sound, Speech, and Audio Devices, and then select Change the speaker settings. Select Audio, then PIONEER AV Receiver/ Amplifier from the drop down menu. ANTENNA REMOTE IN MULTI ROOM &... -
Page 88: Connecting A Pc For Advanced Mcacc Output
2000 – Select Sound • To prevent noise being output, don’t use other software on your computer during playback. • Pioneer is not responsible for computer system damage, software crashes or failures, or any other possible computer problems due to this configuration. - Page 89 Other connections Select ‘PC Output’ and press ENTER. When the receiver is ready for transmission, Operate a PC shows on the OSD. 2.4. Acoustic Cal EQ Pro. 2.4. Acoustic Cal EQ Pro. Manual Pro. [ Reverb Measurement ] Operate a PC [ Reverb View ] PC Output [ Advanced EQ Setup ]...
-
Page 90: Advanced Setup
Advanced setup Chapter 11 Advanced setup The Input Assign menu You only need to make settings in the Input Assign menu if you didn’t hook up your digital equipment according to the default settings for the digital inputs, or if you have connected equipment using component video or i.LINK cables. -
Page 91: Assigning The Component Video Inputs
Advanced setup When you're finished, select RETURN and press ENTER. You will return to the Input Assign menu. Assigning the component video inputs • Default settings: Component 1 – DVD/LD Component 2 – OFF Component 3 – OFF If you used component video cords to connect your video equipment you must tell the receiver which device it is, or else you may see the S-video or composite video input instead of the component video signal. -
Page 92: Assigning The Video Inputs
Advanced setup Assigning the video inputs • Default settings: MULTI IN – OFF USB – OFF You can choose to watch a video source at the same time as you listen to the audio source from the multichannel analog inputs or USB connector. To do this, you must let the receiver know which video component you want to watch. -
Page 93: Osd Adjustment
Advanced setup Select the setting you want to adjust. 3.Expert Setup [1. OSD Adjustment [2. Bass Peak Level ] [3. D-Range Control ] [4. Function Rename ] [5. OSD Overlay ] [6. 12V Trigger ] [7. Multi-Room Setting ] [Return] •... -
Page 94: Dynamic Range Control
Advanced setup Note • Since the THX Ultra2 feature has a bass limiter to control bass peaks, the bass attenuator is automatically switched off if you set up your system using the THX Ultra2 Subwoofer Setup on page 96. Dynamic Range Control •... -
Page 95: 12 Volt Trigger
Select the type of IR receiver you’re using. [ON . OFF [OFF . OFF ] • PIONEER – Use this setting if you’re using a Pioneer [OFF . OFF] [OFF . OFF] MR-100 (or if the IR receiver you’re using doesn’t [OFF . -
Page 96: Thx Audio Setup
Advanced setup THX Audio Setup The settings in the THX Audio Setup menu allow you to get optimum sound from the Home THX modes (on page 45) if you’re using a subwoofer and surround back speakers with your home theater system. See THX speaker system setup on page 98 for more on this. -
Page 97: Additional Information
Additional information Chapter 12 Additional information Optimizing your speaker setup In addition to the speaker placement tips outlined in Placing the speakers on page 27, you can use the diagrams and explanations provided below as a reference for optimum placement of each set of speakers. -
Page 98: Thx Speaker System Setup
Additional information THX speaker system setup If you have a complete THX speaker system, follow the diagram below to place your speakers. Note that the surround speakers ( indicates bi-polar radiating speakers) should output at an angle parallel to the listener. -
Page 99: Troubleshooting
• The protection circuit may have been activated. • Something is obstructing the rear panel fan. • Unplug the receiver from the wall and call a Pioneer- The receiver suddenly switches • The speaker wires are frayed or sticking out off. -
Page 100: No Sound
Additional information No sound Symptom No sound is output when an input source is selected. No sound output from the front speakers. No sound from the surround or center speakers. No sound from surround back speakers. Cause • Improper connections. •... - Page 101 Additional information Symptom Cause No sound from subwoofer. • The subwoofer is disconnected or switched off. • The subwoofer's settings are incorrect. • The crossover frequency is set too low. • The bass attenuator is set too low. • The subwoofer's levels are too low. No sound from one speaker.
-
Page 102: Other Audio Problems
Additional information Symptom No digital output from the DVD player when playing a multichannel DVD-Audio or SACD disc. No digital output when playing a 192/176.4 kHz sampling rate DVD-Audio disc. During playback of a Dolby Surround EX / DTS ES soundtrack, the LS, S and RS indicators light but there is no surround back channel sound. -
Page 103: Video
filter. • The low-frequency noise could have been caused by an air conditioner or motor. Switch off all appliances in the room and rerun the Auto Surround Setup. • Ask your Pioneer dealer to disable the key lock. -
Page 104: Remote Control
• Unlock the remote control (see Locking the remote control on page 12). Pioneer components with this unit’s sensor on page 74). • Change the setting to correspond with your IR-receiver (Multi-Room Setting on page 95). -
Page 105: Display
Additional information Symptom Cause The date and time have suddenly • The remote control is low on batteries and changed. reset the date automatically. • The date was cleared after restarting the remote control. Display Symptom Cause The display is dark or off. •... -
Page 106: I.link Interface
Additional information i.LINK interface Symptom No sound is output. i.LINK indicator does not light up even when an i.LINK-equipped component is selected. The program format indicators don’t disappear when SACD playback stops. You cant get i.LINK to display when using the SIGNAL SELECT button. -
Page 107: Usb Interface
Additional information USB interface Symptom Cause No sound. • The computer settings are incorrect. • The software or source material you are using is not compatible with USB output. • The volume control on your computer is set too low. No sound from one or more •... -
Page 108: Surround Sound Formats
Additional information Surround sound formats Below is a brief description of the main surround sound formats you’ll find on DVDs, satellite, cable and terrestrial broadcasts, and video cassettes. Dolby The Dolby technologies are explained below. See www.dolby.com for more detailed information. Dolby Digital Dolby Digital is a multichannel digital audio coding system widely used in cinemas, and in the home for DVD... -
Page 109: Windows Media® Audio 9 Professional
Additional information DTS 96/24 DTS 96/24 is an extension of the original DTS Digital Surround which offers high quality 96 kHz / 24-bit audio using a DTS 96/24 decoder. This format is also fully backward compatible with all existing decoders. This means that DVD players can play this software using a conventional DTS 5.1 channel decoder. -
Page 110: Maintenance Of External Surfaces
Additional information Advanced Speaker Array™ (ASA) When you set up your home theater system using all eight speaker outputs and the two surround back speakers are placed close together as shown in the diagram in THX speaker system setup on page 98, the surround sound experience is optimized for THX Ultra2™... -
Page 111: Specifications
Additional information Specifications Amplifier section Continuous average power output of 160 watts* per channel, min., at 6 ohms, from 20 Hz to 20,000 Hz with no more than 0.09%** total harmonic distortion (front). Continuous Power Output (6 Ω) Front... . . 160 W + 160 W (20 Hz-20 kHz, 0.09%) Center . - Page 112 Published by Pioneer Corporation. Copyright © 2003 Pioneer Corporation. All rights reserved. <03J00001> Printed in Japan <ARB7290-A>...