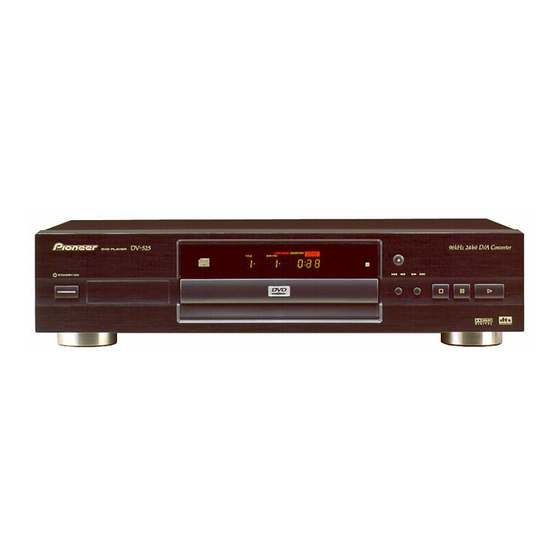
Pioneer DV-525 Operating Instructions Manual
Pioneer dv-525 dvd player operating instructions
Hide thumbs
Also See for DV-525:
- Operating instructions manual (112 pages) ,
- Service manual (85 pages) ,
- Operating instructions manual (56 pages)
Table of Contents
Advertisement
Advertisement
Table of Contents

Related Manuals for Pioneer DV-525


Summary of Contents for Pioneer DV-525
- Page 1 DVD PLAYER DV-525 Operating Instructions...
- Page 2 CONGRATULATIONS ON YOUR PURCHASE OF THIS FINE PIONEER PRODUCT. Pioneer is on the leading edge of DVD research for consumer products and this unit incorporates the latest technological developments. We are sure you will be fully satisfied with the DVD player.
-
Page 3: Important Safety Instructions
Please read through these operating instructions so you will know how to operate your model properly. After you have finished reading the instructions, put them away in a safe place for future reference. • This player is not suitable for commercial use. IMPORTANT The lightning flash with arrowhead symbol, within an equilateral triangle, is intended to alert the user... -
Page 4: Features Of This Player
Compatible with DVD, Video CD and CD formats DVD, Video CD and CD discs that display the logos shown below can be played back on PIONEER DVD players. For more information on discs compatible with this player, refer to the table below. - Page 5 Wide range of DVD viewing options Multiple Languages (page 29) You can select the language on when watching movies or other media that have multiple language and/or audio soundtracks recorded on them. Dolby Digital 5.1CH Audio English Audio Multi-Language Subtitles (page 28) You can select a subtitle language or turn subtitles off when watching movies or other media with subtitles available.
-
Page 6: Play A Disc
Menu screens do not belong to any title. DVD player functions generally apply to titles on a disc or chapters within a selected title. The player functions available may also vary from title to title, depending on the disc. -
Page 7: Table Of Contents
Display Window ... 11 Rear Panel ... 12 Remote Control ... 13 Making Connections ... 15 Connecting Your DVD Player ... 15 Audio Connections ... 16 Video Connections ... 17 System Control Connections ... 18 Setting Up the Player ... 19 Using the Setup Screen Menus ... -
Page 8: Before Using
Before Using Checking Accessories Please confirm that the following were received with the player. Audio cord Video cord Power cord (except for U.S. and Canadian models) Remote control unit AA/R6P batteries Operating instructions (this manual) Preparing the Remote Control Inserting batteries into the remote control While pushing the tab on the battery compartment cover toward the center of the... -
Page 9: Remote Control Operation
Remote control operation When operating the remote control, point it at the remote sensor (Î) located on the player’s front panel. The remote control can be used up to 23 feet (7 m) from the player and within a 30° angle on each side of the sensor. -
Page 10: Names And Functions
Names and Functions Front Panel ÛN¿.<. DV D P LA Y E R S T A N D B Y / O N STANDBY/ON switch Press to switch the player on or to put in standby (pages 24 and 27). Display window Displays system information (page 11). -
Page 11: Display Window
Display Window 96 kHz TITLE TITLE indicator Indicates a title number is being displayed. 96 kHz indicator Indicates play of a disc outputting an audio signal with a sampling frequency of 96 kHz. GUI indicator Indicates an on-screen menu operation is being performed (page 19). -
Page 12: Rear Panel
(page 16). CONTROL IN jack Use to connect this player to another component bearing the Pioneer Î mark. This lets you control this unit as though it were a component in a system. Player operations are then performed by pointing the remote control at the component that the player is connect to (page 18). -
Page 13: Remote Control
Remote Control OPEN/CLOSE AUDIO SUBTITLE ANGLE SETUP DISPLAY MENU TOP MENU RETURN ENTER PREVIOUS NEXT ¢ PLAY ¡ PAUSE STOP STEP/SLOW CLEAR PROGRAM SEARCH MODE RANDOM LAST CONDITION REPEAT MEMORY MEMORY Î (Buttons indicated with * are used for menu operation.) (standby/on) button Press to switch the player on or to put in standby (pages 24 and 27). - Page 14 PROGRAM button You can program titles, chapters, or tracks to play back in a desired order. Programs can be a maximum of 24 steps. Additionally, DVD programs for up to 24 discs can be stored in the player’s memory for future use (page 39). SEARCH MODE button Press to perform a title, chapter/track or elapsed time search (page 35).
-
Page 15: Making Connections
Making Connections Connecting Your DVD Player Unlike any other audiovisual media format, DVD offers a wide array of audio and video output options which allows playback to be enjoyed in any number of system configurations from a standard TV with stereo audio input to a home theater system with a projection monitor and full surround sound capabilities. -
Page 16: Audio Connections
AV amplifier or receiver. AV amplifier or receiver with built-in Dolby Digital (AC-3), DTS, or MPEG decoder DV-525 DIGITAL OUT OPT. DIGITAL OUT (Coaxial) The digital signal is transmitted electronically through a coaxial cable. -
Page 17: Video Connections
S-video input on the TV or monitor. • When making S-video connections, be sure to set the VIDEO OUT SELECT switch on the rear panel of the player to the left to assign S-video output. DV-525 S-VIDEO OUT VIDEO SELECT VIDEO OUT •... -
Page 18: System Control Connections
CONTROL IN jack to the CONTROL OUT jack of another PIONEER component bearing the Î mark, you can control the player as though it were a component in a system (system control). -
Page 19: Setting Up The Player
Setting Up the Player Using the Setup Screen Menus The procedure on this page describes how to operate the menus on the Setup screen. These menus are used to set and adjust a number of system settings. The various functions that can be adjusted are covered throughout this manual. -
Page 20: Changing The Setup Screen Menu Mode
Use the cursor buttons (5/∞) to select a new setting and press ENTER to set the new setting in memory. Press RETURN cursor button (2) to exit the options without making any changes. Press RETURN or the cursor button (2) to go back to the main menu bar to select another menu. -
Page 21: Setting The Digital Audio Output To Be Compatible With Your Av Components
Setting the Digital Audio Output To Be Compatible with Your AV Components This player is capable of digital audio output for Dolby Digital, DTS, MPEG, and signals with a sampling rate of 96 kHZ. Make settings in the Setup screen Audio 1 menu to reflect the capabilities of the components that you have made digital connections to. -
Page 22: Setting The Tv Screen Size
Setting the TV Screen Size The width-to-height ratio of conventional TVs is 4:3, while the width-to-height ratio of wide screen and high-definition TVs is 16:9. This width-to-height ratio is called the aspect ratio. When viewing software recorded in different aspect ratios, the image’s height to width ratio can be switched to match the TV or monitor being used. -
Page 23: Adjusting The Osd (On-Screen Display)
Adjusting the OSD (On-Screen Display) Setting the on-screen display (OSD) language This setting is used to establish the language that operation indicators and on-screen messages and operations display. Change this setting in the Setup screen Language menu [OSD Language] setting. Audio1 Video Language... -
Page 24: Getting Started Using Your Dvd Player
Getting Started Using Your DVD Player Playing DVDs, Video CDs and – DVD/Video CD/CD Before you can start to enjoy the digital audio and video on DVDs, be sure that you have made the necessary settings in the Setup screen menus outlined in the previous section to correspond to your home system. -
Page 25: When A Menu Screen Is Displayed
When a menu screen is displayed Menu screens are displayed for DVDs that have menu screens or Video CDs that include Playback Control (PBC). DVDs often contain extra information that can be accessed in the DVD menu and sometimes makes navigating DVD menu screens as enjoyable as watching the feature presentation. -
Page 26: Chapter (Track) Skip Forward/Skip Back
Chapter (Track) Skip Forward/ Skip Back – DVD/Video CD/CD PREVIOUS 4 S T A N D B Y / O N Forward and Reverse Scanning – DVD/Video CD/CD REV 1 ST ANDBY/ON NEXT ¢ ¢ ¡ ¡ ¢ ¡ ¢ ¢... -
Page 27: Stopping Playback And Switching Power Off
Stopping Playback and Switching Power Off – DVD/Video CD/CD ¢ ¡ ST ANDBY/ON Press STOP 7 (7 on the front panel). Playback stops. Press OPEN/CLOSE 0 (0 on the front panel). The disc tray comes out. Remove the disc. Press The disc tray goes back in. -
Page 28: Setting The Language Options
Setting the Language Options DVDs have the capacity to contain a great deal of audio information, which includes the ability to hold up to 8 different language tracks and subtitle information in as many as 32 different languages. This section outlines the variety of audio language and subtitle options available with this player. -
Page 29: Changing The Audio Language (Multi-Language Function)
Changing the Audio Language (Multi-Language Function) Dolby Digital, PCM, and other audio data can be recorded on DVDs in a number of languages or audio tracks, letting you choose the desired language or audio. Dolby Digital 5.1CH Audio English Audio AUDIO Press AUDIO repeatedly to select the desired language. -
Page 30: Setting Language And Subtitle Preferences In The Setup Screen Menus
Setting Language and Subtitle Preferences in the Setup Screen Menus The Setup screen Language menu contains a number of settings related to the audio and subtitle language preferences. Selecting an audio language preference The audio language that you normally listen to can be selected from the various audio languages on a DVD. - Page 31 When “Other” is selected When you want to select one of the 136 languages as the main audio language, follow the steps below when the following screen appears. A language code list can be found on page 51. Audio1 Video Language General OSD Language –...
- Page 32 Setting Auto Language to control subtitle and audio language based on program content When the Auto Language function is used, foreign movies are shown with the original audio soundtrack and subtitles in the language selected in the [Subtitle Language] menu option. Domestic films are shown with the original audio soundtrack and no subtitles.
-
Page 33: Advanced Functions
Advanced Functions This player is compatible with DVD, Video CD, and CD disc formats. Users already familiar with Video CD or CD will already be familiar with some of the functions the player is capable of performing. With DVD, an even greater number of possibilities and functions are available. -
Page 34: Still Frame/Slow Play/Frame Advance Playback
Still Frame/Slow Play/Frame Advance Playback The video images on DVD and Video CD can be viewed as a still frame, played back at slow speeds and even advanced frame by frame. PLAY 3 Viewing a still frame Press PAUSE 8. When viewing a DVD, if the paused picture shakes, select the “Field”... -
Page 35: Searching For A Title, Chapter, Track, Or Location On A Disc
Searching for a Title, Chapter, Track, or Location on a Disc – DVD/Video CD/CD This player offers different ways of accessing the information on a DVD, Video CD, or CD. Using SEARCH MODE, you can search for titles or chapters on a DVD, tracks on a Video CD or CD, and even select the point in time to start playback. -
Page 36: Viewing From A Desired Camera Angle (Multi-Angle)
Viewing from a Desired Camera Angle (Multi-Angle) – DVD You can select a camera angle when viewing DVDs with the multi-angle option. ANGLE : 1/4 » ANGLE : 4/4 Press ANGLE during playback. The camera angle changes each time you press the button. -
Page 37: Repeat Play
Repeat Play – DVD/Video CD/CD You can repeat an entire title, chapter or track, or just a part. ¢ ¡ REPEAT A–B Repeat play of a chapter/track Press REPEAT once during playback of the chapter or track you want to repeat. Repeat play of a title Press REPEAT twice during playback of the title you want to repeat. -
Page 38: Random Play
Random Play – DVD/Video CD/CD Play titles, chapters, or tracks on a disc in random order. Random playback of chapters within one title – DVD Press RANDOM once, then press ENTER. “Random Chapter” appears on the screen, and chapters within the title will be played back in random order. Random playback of titles Press RANDOM twice, then press ENTER. -
Page 39: Playback In A Desired Order (Program Play)
Playback in a Desired Order (Program Play) – DVD/Video CD/CD The titles and chapters within a title on a DVD and similarly the tracks on a Video CD or CD can be arranged to play in the order you want. Programming DVDs A program with a maximum of 24 steps can be memorized. - Page 40 Programming Video CDs, CDs A program with a maximum of 24 steps can be memorized. Press PROGRAM. The program screen appears. When a Video CD or CD is loaded, the cursor appears in the program window. Program Track Current: Track Total Time ––...
- Page 41 To make a program of your favorite parts of a disc as it plays – DVD/Video CD/CD With this player, it is possible to make a program as you watch a DVD or Video CD or while listening to a CD. Press and hold PROGRAM for at least 2 seconds at any point during playback of a title, chapter, or track you want to program, and it will be made...
-
Page 42: Setting The Parental Lock Level
Setting the Parental Lock Level This player lets you set the Parental Lock if the DVD has a parental lock level recorded on it. With Parental Lock capable discs, you can block access to material you feel is inappropriate for your children. Refer to the DVD disc jacket and the accompanying documentation to see if a particular disc contains a parental lock level. - Page 43 Setting the Parental Lock level Change the Parental Lock level to a higher or lower level according to the settings printed on the DVD disc jacket or accompanying documentation. If you use the Condition Memory function to save the settings for a particular disc, the Parental Lock level is saved as well.
-
Page 44: Continuing Playback From A Specified Location (Last Memory)
Continuing Playback from a Specified Location (Last Memory) – DVD/Video CD The Last Memory function is convenient when you want to continue viewing a disc from the point where you were watching before. Unlike the resume function, the Last Memory function is effective even if the DVD is removed from the player (Last Memory locations saved for Video CDs are effective only if the disc remains loaded in the player). -
Page 45: Memorizing Settings For Often Viewed Dvds (Condition Memory)
Memorizing Settings for Often Viewed DVDs (Condition Memory) – DVD You can store in memory settings for DVDs you often watch. Settings remain in memory even if you remove the disc from the player, or switch power to the player to standby. -
Page 46: Viewing Disc Information
Viewing Disc Information Use DISPLAY to get current information about the disc currently loaded. You can get information about the titles and chapters on a DVD or tracks on a Video CD or CD. When viewing DVDs, you can also check the digital bitstream transmission rate. - Page 47 Track Information: 0.03 Play 3.32 –3.29/ Top Row: current track Track number, track time Bottom Row: remaining time of current track, and total time of track « Disc information: 0.15 Play Top Row: current track –6.15/ 6.32 number, total number of tracks on CD, total elapsed time of CD Bottom Row: remaining time...
-
Page 48: Changing The Background Color Of The Screen
Changing the Background Color of the Screen You can select a blue or black background to appear when the player is in the stop mode. Make changes to the [Background Color] setting in the Setup screen General menu in the “Expert” menu mode (page 20). -
Page 49: Additional Information
The player's pickup lens should not become dirty in normal use, but if for some reason it should malfunction due to soiling, contact your nearest PIONEER authorized service center. Lens cleaners are commercially available, but special care should be exercised in their use since some may cause damage to the lens. -
Page 50: For Proper And Long Use Of This Unit
A damaged power cord can cause a fire or give you an electrical shock. Check the power cord once in a while. When you find it damaged, ask your nearest PIONEER authorized service center or your dealer for a replacement. -
Page 51: Language Code List
Language Code List Language codes are used when setting the audio and subtitle language preferences. (See page 30) Language- Language code Japanese English French German Italian Spanish Dutch Russian Chinese Korean Greek Afar Abkhazian Afrikaans Ameharic Arabic Assamese Aymara Azerbaijani Bashkir Byelorussian Bulgarian... - Page 52 Language- Language code Kirundi Romanian Kinyarwanda Sanskrit Sindhi Sangho Serbo-Croatian Singhalese Slovak Slovenian Samoan Shona Somali Albanian Serbian Siswati Sesotho Sundanese Swedish Swahili Tamil Telugu Tajik Thai Tigrinya Turkmen Tagalog Setswana Tonga Turkish Tsonga Tatar Ukrainian Urdu Uzbek Vietnamese Volapuk Wolof Xhosa Yoruba...
-
Page 53: Troubleshooting
Inspect the other components and electrical appliances being used. If the trouble cannot be rectified even after exercising the checks listed below, ask your nearest PIONEER authorized service center or your dealer to carry out repair work. The disc table comes back out automatically, shortly after the disc table is closed. - Page 54 Static electricity or other external influence may cause malfunctioning of this unit. In this case, unplugging the power cord and then re-plugging it in will usually reset the unit for proper operation. If this does not correct the problem, please consult your nearest PIONEER service center.
-
Page 55: Terms
Terms Aspect ratio Aspect ratio refers to the length to height ratio of TV screens. The ratio of a standard TV is 4:3, while the ratio of a high-definition or wide TV is 16:9. The latter allows you to enjoy a picture with a wider perspective. Chapter number Chapter numbers are the numbers assigned to sections of a title on the disc, similar to chapters in a book. - Page 56 System control When you connect this player via a cord with a mini plug to another Pioneer component such as a receiver or an amplifier bearing the (Î) mark, you can control the player as though it were a component in a system. To control the player, point the player’s remote control at...
-
Page 57: Specifications
Specifications General System ... DVD system and Compact Disc digital audio system Power requirements U.S. and Canadian models ... AC 120 V, 60 Hz Other model ... AC 110-127, 220-240 V, 50/60 Hz Power consumption U.S. and Canadian models ... 13 W Other models ... - Page 58 E S T 1 9 2 4 Selecting fine audio equipment such as the unit you’ve just purchased is only the start of your musical enjoyment. Now it’s time to consider how you can maximize the fun and excitement your equipment offers. This manufacturer and the Electronic Industries Association’s Consumer Electronics Group want you to get the most out of your equipment by playing it at a safe level.
- Page 60 PIONEER ELECTRONICS [USA] INC. PIONEER ELECTRONICS OF CANADA, INC. PIONEER ELECTRONIC [EUROPE] N.V. PIONEER ELECTRONICS AUSTRALIA PTY. LTD. PIONEER ELECTRONICS DE MEXICO S.A. DE C.V. <99D00WF0D00> 4-1, Meguro 1-Chome, Meguro-ku, Tokyo 153, Japan P.O. BOX 1540, Long Beach, California 90801-1540 300 Allstate Parkway, Markham, Ontario L3R OP2, Canada Haven 1087, Keetberglaan 1, 9120 Melsele, Belgium TEL: 03/570.05.11...