Table of Contents
Advertisement
Advertisement
Table of Contents

Related Manuals for Vaillant ecoTEC plus VU GB 656/4-5 A


Summary of Contents for Vaillant ecoTEC plus VU GB 656/4-5 A
-
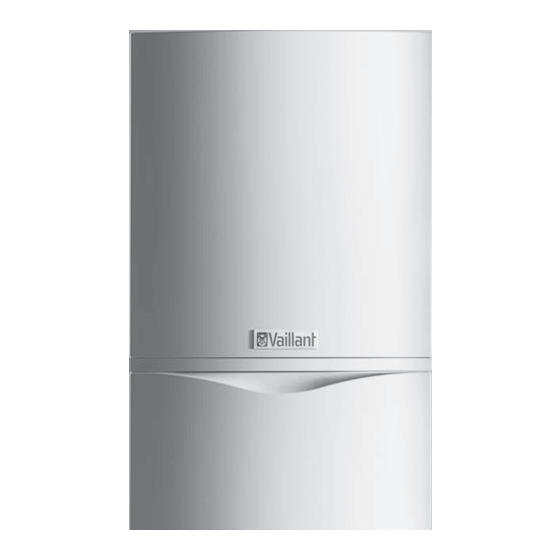
Page 1: Ecotec Plus
Installation and maintenance instructions For the competent person Installation and maintenance instructions ecoTEC plus VU GB 656/4-5 A GB, IE Publisher/Manufacturer Vaillant GmbH Berghauser Str. 40 D-42859 Remscheid Tel. +49 21 91 18‑0 Fax +49 21 91 18‑2810 info@vaillant.de www.vaillant.de... -
Page 2: Table Of Contents
Contents Contents Adapting the unit to the heating installation............23 Calling up diagnostics codes ....... 23 Safety ..............4 Calling up the installer level (second Action-related warnings ......... 4 diagnostics level) ..........23 Intended use ............4 Setting the heating partial load ......23 General safety information ........ - Page 3 Contents Opening of the flue pipe........43 Positioning of the opening of a fan-supported flue gas guiding............ 43 Horizontal terminal positioning......44 Technical data............ 44 Index ................... 46 0020214491_01 ecoTEC plus Installation and maintenance instructions...
-
Page 4: Safety
1 Safety Safety this document shall be considered improper use. Any direct commercial or industrial use Action-related warnings is also deemed to be improper. Classification of action-related warnings Caution. The action-related warnings are classified in Improper use of any kind is prohibited. accordance with the severity of the possible danger using the following warning signs and General safety information... - Page 5 Safety 1 phone once you are outside of the build- 1.3.8 Risk of death due to lack of safety devices ing. The schematic drawings included in this doc- 1.3.3 Risk of death due to blocked or ument do not show all safety devices re- leaking flue gas routes quired for correct installation.
-
Page 6: Regulations (Directives, Laws, Standards)
1 Safety are greater than 60 °C. Young children and 1.3.19 Risk of damage to the flexible gas pipe elderly persons are particularly at risk, even at lower temperatures. The corrugated gas pipe may become dam- ▶ Select a moderate set target temperature. aged if weight is placed on it. -
Page 7: Notes On The Documentation
VU GB 656/4-5 A 0010017820 Benchmark Vaillant is a licensed member of the Benchmark Scheme. Benchmark places responsibilities on both manufacturers and installers. The purpose is to ensure that customers are provided with the correct equipment for their needs, that it is installed, commissioned and serviced in accordance with the manufacturer’s instructions by a competent person approved... -
Page 8: Serial Number
4 Installation Information on the Meaning Num- Description identification plate Permissible total overpressure in heating Bag with small parts mode Permissible total overpressure during hot Transporting the product water generation 4.3.1 General Max. flow temperature max. ▶ ED 92/42 Current efficiency directive fulfilled with Hold the load as close as possible to your body. -
Page 9: Product Dimensions And Connection Dimensions
Installation 4 Product dimensions and connection Flue gas connection, Expansion relief valve 80/125 diameter connection dimensions Hanging bracket Condensate discharge connection Gas pipe, 25 mm dia- Flow drain opening meter, gas connection Ø 80/125 R1“ Filling connection option Expansion vessel con- (combined filling and nection emptying valve) -
Page 10: Wall-Mounting The Product
5 Installation Wall-mounting the product Removing or installing the front casing 4.9.1 Removing the front casing Check whether the wall has sufficient load-bearing ca- Undo the bolt (1). pacity to bear the operational weight of the product. Push in both retaining clips (2) so that the front casing Check if the supplied fixing material may be used for is released. -
Page 11: Selecting A Low Loss Header
Installation 5 5.1.1 Heating circuit connection with low loss Caution. header Risk of material damage caused by residues in the pipelines. Welding remnants, sealing residues, dirt or other residues in the pipelines may damage the product. ▶ Flush the heating installation thoroughly before installing the product. -
Page 12: Gas Installation
5 Installation ▶ Gas installation Note that non-return valves or mixer circuits may be re- quired in order to eliminate cross-flow to other circuits or 5.2.1 Checking the gas meter the effects of high temperatures from the cylinder char- ▶ ging circuit. -
Page 13: Hydraulics Installation
Installation 5 5.2.3 Checking the gas line for leak-tightness 5.3.2 Installing the expansion relief valve ▶ Check the entire gas line properly for leak-tightness. Hydraulics installation Caution. Risk of material damage caused by corro- sion Due to non-diffusion-tight plastic pipes in the heating installation, air gets into the heating water. -
Page 14: Installing The Air/Flue Pipe
▶ Instead of grease, use only water or com- Vaillant boilers are certified only with Vaillant mercially available soft soap to aid install- original air/flue pipes. The use of other ac- ation. cessories may cause personal injury and ma- terial damage, as well as operating faults. - Page 15 Installation 5 5.6.1 Opening or closing the electronics box 5.6.3 Carrying out the wiring 5.6.1.1 Opening the electronics box Caution. Risk of material damage caused by incor- Remove the front casing. (→ Page 10) rect installation. Mains voltage at the incorrect plug terminals on the ProE system may destroy the elec- tronics.
-
Page 16: Start-Up
6 Start-up 5.6.6 Connecting a low loss header sensor 5.6.9 Actuating the circulation pump according to requirements Connect the low loss header sensor to the edge con- nector X41 at terminal RF or to the controller. When do- Note ing so, observe the instructions for the controller. The product's electronics provide the opportunity Plug the edge connector into the PCB slot X41. -
Page 17: Checking And Treating The Heating Water/Filling And Supplementary Water
Start-up 6 Treating the filling and supplementary water Display Meaning ▶ Observe all applicable national regulations and technical Maximum load check programme: standards when treating the filling and supplementary After successful ignition, the product is operated at water. maximum heat input. Provided the national regulations and technical standards Minimum load check programme: do not stipulate more stringent requirements, the following... -
Page 18: Reading Off The Filling Pressure
6 Start-up – Preventing low water pressure Fernox F2 – Sentinel X 100 To prevent damage to the heating installation that is caused – Sentinel X 200 by low filling pressure, the product is fitted with a water pressure sensor. If the filling pressure falls below 0.06 MPa Additives for frost protection intended to remain (0.6 bar), the product indicates low pressure by displaying a permanently in the system... -
Page 19: Flushing The Heating Installation For The First Time ("Cold")
Start-up 6 circuit or the hot water circuit. The display shows 6.11 Filling the condensate trap the filling pressure of the heating installation. Danger! 17. To be able to carry out the purging process properly, Risk of poisoning due to escaping flue the heating installation filling pressure must not fall be- gas. - Page 20 6 Start-up 6.12.4 Checking the gas flow pressure Conditions: The product design is compatible with the local gas group ▶ Ensure that the gas inlet working pressure can be Proceed as described below. obtained with all other gas appliances in the property working.
- Page 21 Benchmark gas boiler commissioning ment range, you must not start up the product. checklist. ▶ If this is the case, inform Vaillant Customer Service. ▶ 6.12.5 Checking the CO₂ content and, if Install the front casing. (→ Page 10) necessary, adjusting it (air index setting) 6.12.6 Checking the CO₂...
-
Page 22: Checking Leak-Tightness
"Filling and purging the heating installation" ▶ (→ Page 18). If this is the case, inform Vaillant Customer Service. ▶ Re-fill the system until the system design pressure of Install the front casing. (→ Page 10) 0,1 MPa (1,0 bar) is attained. -
Page 23: Adapting The Unit To The Heating Installation
Adapting the unit to the heating installation 7 Adapting the unit to the heating installation Calling up diagnostics codes You can use the parameters that are marked as adjustable in the overview of diagnostics codes to adapt the product to the heating installation and the needs of the customer. -
Page 24: Setting The Maximum Flow Temperature
7 Adapting the unit to the heating installation Setting the maximum flow temperature Setting the maintenance interval You can set the maximum flow temperature for the heating If you set the maintenance interval, the maintenance mes- mode under D.71 (default setting: 75 °C). sage SEr appears in the display after a configurable number of burner operating hours. -
Page 25: Adjusting The Product To Large Flue Gas Pipe Lengths
Inspection and maintenance 8 Adjusting the product to large flue gas pipe Warning. lengths Risk of injury and death due to improper inspection and maintenance! At flue gas pipe lengths greater than 10 m (system 80/125), you can increase the product's fan speed. Improper performance of inspections and ▶... -
Page 26: Procuring Spare Parts
8 Inspection and maintenance Procuring spare parts The original components of the product were also certified by the manufacturer as part of the declaration of conformity. If you use other, non-certified or unauthorised parts during maintenance or repair work, this may void the conformity of the product and it will therefore no longer comply with the applicable standards. -
Page 27: Descaling The Heat Exchanger
Inspection and maintenance 8 Checking the burner Check the surface of the burner for damage. If you see any damage, replace the burner. Use vinegar (max. 5% acid) to clean the heating coils Replace the silicone seal (1) and the silicate cord (2). (2) on the heat exchanger (1). -
Page 28: Cleaning The Air Separation System
8 Inspection and maintenance – Installing the compact thermal module Tightening torque: 6 Nm Cleaning the air separation system 8.8.1 Cleaning or replacing the filter in the air separator Unscrew the brass cover (1) on the steel casing (3). Pull the filter (2) up and out. Use hot water to clean the filter, or replace the filter. -
Page 29: Checking The Pre-Charge Pressure Of The External Expansion Vessel
Troubleshooting 9 8.11 Checking the pre-charge pressure of the Reading off the fault codes external expansion vessel If a fault develops in the product, the display shows a fault code F.xx. Depressurise the heating installation. Measure the pre-charge pressure of the expansion ves- Fault codes have priority over all other displays. -
Page 30: Replacing Defective Components
To ensure regular servicing, it is strongly recommended Install the compact thermal module. (→ Page 28) that arrangements are made for a Maintenance Agreement. Please contact Vaillant Service Solutions for further details: 9.9.2 Replacing the PCB and/or the display Telephone: 0330 100 3461... -
Page 31: Appendix
Appendix Appendix Overview of diagnostics codes Note Since the code table is used for various products, some codes may not be visible for the product in question. Default set- Own setting Code Parameter Values or explanations ting Heating partial load, adjustable val- Adjustable heating partial load Approx. - Page 32 Appendix Default set- Own setting Code Parameter Values or explanations ting D.25 Hot water generation enabled by 1 = Yes, 0 = No eBUS controller D.26 Internal accessory relay at X6 (pink 1 = Circulation pump plug) 2 = Second external pump 3 = Cylinder charging pump 4 = Flue non-return flap/extractor hood 5 = External gas valve...
-
Page 33: B Inspection And Maintenance Work - Overview
Appendix Default set- Own setting Code Parameter Values or explanations ting D.72 Pump overrun after cylinder charging Adjustable from 0 to 600 seconds 80 s D.75 Max. charging time for domestic hot 20 - 90 min 45 minutes water cylinder without independent control system D.76 Unit variant: Device-specific number... -
Page 34: Status Codes - Overview
Appendix Mainten- ance Inspection Work (At least (annual) every two years) Check the CO₂ content (the air ratio) of the product and, if necessary, adjust it. Keep a record of this. Disconnect the product from the power mains. Check that the electrical plug connections and other connections are seated correctly and correct these if necessary. -
Page 35: D Overview Of Fault Codes
Appendix Status code Meaning S.24 DHW mode: Burner on S.25 DHW mode: Pump/fan overrun S.26 DHW mode: Fan overrun S.27 DHW mode: Pump overrun S.28 Hot water burner anti-cycling time Special cases S.30 Room thermostat (RT) is blocking heating mode Summer mode active or no heat requirement S.31 from eBUS controller... - Page 36 Appendix Code Meaning Cause F.27 Safety switch-off: Flame simulation Moisture on the electronics, electronics (flame monitor) defective, gas solenoid valve leaking F.28 Failure during start-up: Ignition unsuccessful Gas meter defective or gas pressure monitor has triggered, air in gas, gas flow pressure too low, thermal isolator device (TAE) has triggered, condensate duct blocked, incorrect gas restrictor, incorrect spare part gas valve, fault on the gas valve, multiple plug on PCB incorrectly plugged in, break in cable harness, ignition system (ignition transformer,...
-
Page 37: E Connection Diagram
Appendix Connection diagram brown Cylinder thermostat (accessory) black "C1/C2" black orange Cylinder sensor violet black Water pressure sensor green green signal Flow sensor black blue 1 Earth black 2 Hall signal grey 4 PWM signal 5 + 24 V natural black Flow sensor blue... - Page 38 Appendix 230 V~ Auxiliary relay (can be adjusted under D.26) Internal pump Cylinder charging pump Option: Ext. controller/room thermostat 3-4 (Contact) Mains input Option: Ext. controller/room thermostat 7-8-9 pink (continuous, analogue) Option: Bus connection (controller/digital room therm.) Option: Contact thermostat Earth Earth Plug for controller accessory...
-
Page 39: F Commissioning Checklist
Appendix Commissioning Checklist Benchmark Commissioning and Servicing Section It is a requirement that the boiler is installed and commissioned to the completed in full. www.centralheating.co.uk © Heating and Hotwater Industry Council (HHIC) 0020214491_01 ecoTEC plus Installation and maintenance instructions... - Page 40 Appendix GAS BOILER SYSTEM COMMISSIONING CHECKLIST This Commissioning Checklist is to be completed in full by the competent person who commissioned the boiler as a means of demonstrating compliance with the appropriate Building Regulations and then handed to the customer to keep for future reference. CONTROLS Optimum start control Fitted...
- Page 41 Appendix SERVICE RECORD It is recommended that your heating system is serviced regularly and that the appropriate Service Interval Record is completed. Service Provider SERVICE 01 SERVICE 02 ² % ² % ² % ² % SERVICE 03 SERVICE 04 ²...
- Page 42 Appendix PRIOR TO CO AND COMBUSTION RATIO CHECK NOTE The boiler manufacturer’s installation instructions should have been followed, gas type verified and gas THE AIR GAS RATIO VALVE IS FACTORY supply pressure/rate checked as required prior to commissioning. SET AND MUST NOT BE ADJUSTED As part of the installation process, especially where a flue has been fitted by persons other than the DURING COMMISSIONING UNLESS THIS boiler installer, visually check the integrity of the whole flue system to confirm that all components are...
-
Page 43: G Opening Of The Flue Pipe
Appendix Opening of the flue pipe D, E Positioning of the opening of a fan-supported flue gas guiding Minimum dimen- Installation site sions Directly below an opening, air bricks, opening windows, etc., that can be opened. 300 mm Above an opening, air bricks, opening windows, etc., that can be opened. 300 mm Horizontally to an opening, air bricks, opening windows, etc., that can be opened. -
Page 44: H Horizontal Terminal Positioning
Appendix Horizontal terminal positioning BS 5440-1 recommends that fanned flue chimney terminals should be positioned as follows: a) at least 2 m from an opening in the building directly opposite, and b) so that the products of combustion are not directed to discharge directly across a boundary if the products are likely to cause a nuisance to a neighbour or discharge over a walkway or patio. - Page 45 Appendix Technical data – cylinder charging mode VU GB 656/4-5 A Maximum heat input in cylinder charging mode 65.0 kW Cylinder charging output Such as heating Technical data – General VU GB 656/4-5 A Gas connection, boiler side 1″ Flow/return heating connections, inside thread, boiler 1″...
-
Page 46: Index
Index Index Frost ..................6 Gas connection ..............12 Air index setting..............21 Gas ratio setting ..............19 Air separator................ 28 Air separator, filter ............... 28 Handing the product over to the operator......25 Handling ................8 Air/flue pipe ................. 14 Air/flue pipe, installed ............ - Page 47 Index Treating the heating water........... 17 Unloading the box ..............8 Voltage .................. 5 Wall-mounting the product ..........10 0020214491_01 ecoTEC plus Installation and maintenance instructions...
- Page 48 0020214491_01 0020214491_01 04.01.2017 Supplier Vaillant Ltd. Nottingham Road Belper Derbyshire DE56 1JT Telephone 0330 100 3461 info@vaillant.co.uk www.vaillant.co.uk © These instructions, or parts thereof, are protected by copyright and may be reproduced or distributed only with the manufacturer's written consent. We reserve the right to make technical changes.