Table of Contents
Advertisement
Quick Links
Advertisement
Table of Contents

Related Manuals for Sharp AQUOS R


Summary of Contents for Sharp AQUOS R
- Page 1 AQUOS R User Guide...
-
Page 3: Table Of Contents
Accessing Instructions on Handset........3 Getting Started Package Contents............... 6 Parts & Functions.............. 6 USIM Card................7 Internal Storage and SD Card..........9 AQUOS R User Guide Contents Charging Handset..............12 Power On/Off..............14 Using Touchscreen............15 Handset Initial Settings...........16 Importing Data from Other Mobiles....... 18 Basic Operations Basic Operations............... - Page 4 Camera Radio Wave Exposure and Specific Absorption Rate (SAR) Information..............173 Capturing Photos/Videos..........90 Water & Dust Resistance..........174 Music & Images Listening to Music (Play Music)........94 Viewing & Managing Photos/Videos (Album)....96 Connectivity Connecting by Wi-Fi............100 Using Tethering.............. 103 Using Bluetooth Function..........
-
Page 5: About The User Guide
In the User Guide, the product is referred to as "handset." microSD™/microSDHC™/microSDXC™ Card is referred to as "SD Card." Guide top screen opens. "605SH" here refers to this mobile phone "AQUOS R." ・ Information on usage of (Guide) appears at initial startup. Follow onscreen prompts. - Page 6 Showing Status Bar Indicator Launching Guide from Notifications Window Show indicator to launch Guide from Notifications Window. Launch the Guide quickly for how to use functions, etc. when indicator is set to appear. In Home Screen, Flick Hot Sheet up Drag Status Bar down App list opens.
-
Page 7: Getting Started
Getting Started Package Contents............... 6 Parts & Functions.............. 6 USIM Card................7 Internal Storage and SD Card..........9 Charging Handset..............12 Power On/Off..............14 Using Touchscreen............15 Handset Initial Settings...........16 Importing Data from Other Mobiles....... 18... -
Page 8: Package Contents
Package Contents Parts & Functions Package Contents Handset (Front) ・Handset (AQUOS R) ・Battery is built into handset. ・Handset back cover is not removable. ・ROBOQUL (desktop holder) (SHEGH1) ・USIM Removal Tool (Complimentary sample) ・TV Antenna Cable (Complimentary sample) ・クイックスタート (Japanese) ・お願いとご注意 (Japanese) ・Warranty (Handset/ROBOQUL) -
Page 9: Usim Card
USIM Card Handset (Back and Sides) USIM Card is an IC card containing phone number and other customer information. Handling USIM Card ・See instructions included with USIM Card for handling. ・Avoid applying labels. May damage USIM Card. ・USIM is replaceable (at cost) in case of loss/damage. ・Wipe clean with a dry, soft cloth. -
Page 10: Inserting Usim Card
Inserting USIM Card Removing USIM Card Always power off beforehand. Always power off beforehand. ・Set USIM Card in Card Tray beforehand. Do not insert USIM Card without setting it in Card Tray. With Display upward, insert USIM Removal Tool in removal hole in Card Tray With Display upward, insert USIM Removal Tool in removal hole in Card Tray... -
Page 11: Internal Storage And Sd Card
Internal Storage and SD Card Inserting SD Card Handset supports SD Card up to 256 GB. Some SD Cards may Always power off beforehand. not operate properly. ・Set SD Card in Card Tray beforehand. Do not insert SD Card Internal storage can be used for saving data including system without setting it in Card Tray. - Page 12 Formatting SD Card Format When using a new SD Card for the first time, always format it on handset. ・Formatting erases all data on SD Card. Format SD Card with caution. ・When formatting, keep handset charged or charge it adequately beforehand. ・Insert SD Card beforehand.
- Page 13 Unmounting SD Card Removing SD Card Always unmount SD Card beforehand. In Home Screen, Flick Hot Sheet up (Settings) With Display upward, insert USIM Removal Tool in removal hole in Card Tray ・Press firmly and straight until Card Tray ejects. Storage Pull out Card Tray ・With Display upward, pull out Card Tray.
-
Page 14: Charging Handset
Charging Handset About Charging Battery is built into handset. The following charging options are available. Internal Battery Charging Description Option A lithium-ion battery is built into handset; it is not ROBOQUL Place handset in the included ROBOQUL removable. (desktop and charge using an AC Adaptor (sold holder) separately). - Page 15 Charging with ROBOQUL After charging, remove handset from ROBOQUL and disconnect Charge using the included ROBOQUL [SHEGH1] and a USB Type-C plug on AC Adaptor separately-sold AC Adaptor (USB Type-C Quick Charge™ 3.0) [ZSCAZX] When charging using ROBOQUL and handset is powered on, ROBOQUL swivels when Display lights up, at start of charging, for incoming calls, alarms, etc.
-
Page 16: Power On/Off
Power On/Off Powering Off Powering On (Long Press) Long Press until SHARP logo appears Power off Handset powers on, and lock screen appears after a while. ・If confirmation appears, follow onscreen prompts. ・An initial settings wizard may appear the first time handset is powered on. -
Page 17: Using Touchscreen
Touch icon or other item lightly, move it where desired, and When using handset with gloves on, enable glove mode. release finger. ・Use of pens, pencils or sharp objects ・Use with objects on/against Display ・Use while wet Touchscreen Usage Cautions To prevent malfunctions, do not: ・Touch Display with wet fingers... -
Page 18: Handset Initial Settings
Handset Initial Settings Pinch/Spread When powering on the first time, an initial settings wizard Contact Display lightly, then move fingers toward each other appears for optionally making Wi-Fi, Google™ account, and (Pinch) or away from each other (Spread). other settings. Follow onscreen instructions to set items. Insert USIM Card before powering on handset. - Page 19 Set up a Google Account ALL SET ・See "Google Account" for details on a Google Account. Handset restarts. ・ To skip Google Account setup, Tap SKIP Set up My SoftBank Skip SKIP ANYWAY Initial settings are complete. ・ Tap ADD FINGERPRINT to set fingerprints.
-
Page 20: Importing Data From Other Mobiles
Importing Data from Other Bluetooth Cautions ® Mobiles Connection Import data from other mobiles, etc. using Bluetooth or SD ® Bluetooth connection may not be possible with some ® Card. Bluetooth devices. In addition, noise may interfere with ® wireless or handsfree conversations. Enabling Bluetooth Function ®... -
Page 21: Pairing Bluetooth Devices
Pairing Bluetooth Devices ® Connecting to Bluetooth Devices by Service ® Search for and pair nearby Bluetooth devices. Paired ® In Bluetooth menu, for target device Tap item ® Bluetooth devices can be connected easily. ® ・Enable Bluetooth on handset and set target devices to be ®... - Page 22 Opening Files Received by Bluetooth Receiving Data via Bluetooth (e.g., ® ® Address Book) Transfer When data reception request arrives, notification appears in In Bluetooth menu, Show received files ® lock screen. To receive data: file Follow onscreen prompts Tap Bluetooth share notification twice ®...
- Page 23 Data transfer window opens. ・ In Data transfer window, Tap Function information view a video tutorial (Japanese) on Sharp Website. Data import Import phonebook data from smartphone. ・If SD Card is not inserted or there is no backup file on inserted SD Card, Select device to import from window appears.
- Page 24 Data transfer window opens. storage is deleted. ・ In Data transfer window, Tap Function information view a video tutorial (Japanese) on Sharp Website. Data import Import ・If SD Card is not inserted or there is no backup file on inserted SD Card, Select device to import from window...
-
Page 25: Basic Operations
Basic Operations Basic Operations............... 24 Confirmation when First Activating Applications..27 Applications...............29 Using Recent Apps Window..........30 Handset Phone Number............ 30 Using Manner Mode............31 Using Airplane Mode............32 Text Entry.................33 Google Account..............34 Google Play............... 36 Security Codes..............38 USIM PIN................39 Turning Off Display (Screen Lock)........40 Using Fingerprint Authentication Function....41 Updating Software............ -
Page 26: Basic Operations Basic Operations
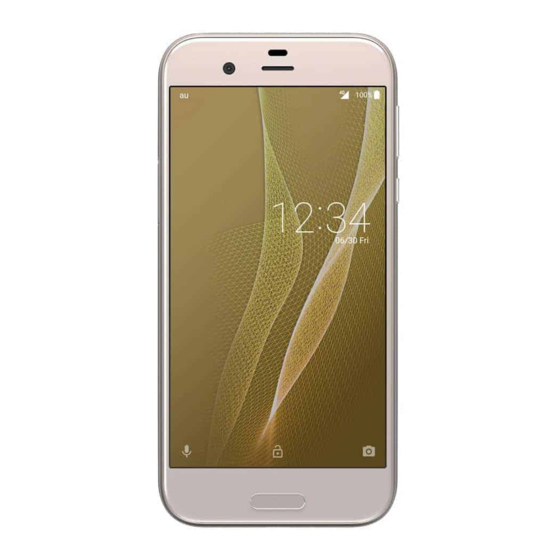
Basic Operations Navigation Bar Tap icons on Navigation Bar (Display bottom) for the Lock Screen following functions/operations. After a period of inactivity, Display turns off to save battery Name Description power (Screen lock active). Return to the previous screen. Appears Press to open lock screen;... -
Page 27: Menu Operations
Menu Operations Handset Settings and Making Settings at Display top or bottom for available settings and In Home Screen, Flick Hot Sheet up (Settings) to items. customize operation of handset functions. ・Screens may also have settings and items that are available ・... - Page 28 Multi-Window Operations Multi-Window Switching between Applications Split screen to view and operate two applications. Activate the two applications beforehand. Viewing and Tap application operating (Address Book) and (Phone) is described as ・Activate application beforehand. an example. ・Viewing in Multi-Window is not available for some Exiting Multi-Window applications.
-
Page 29: Confirmation When First Activating Applications
Confirmation when First Other Ways to Set Required Permissions Activating Applications for Applications Setting Functions to Use by Application Set the operation of applications when activating for the first time. In Home Screen, Flick Hot Sheet up (Settings) The type and content of a confirmation differ with the Apps Tap application Permissions... - Page 30 Other Ways to Set Battery Setting Battery Optimization Optimization Enable Battery optimization to prevent applications from running while Display is turned off (except while charging). In Home Screen, Flick Hot Sheet up (Settings) Activating (TV) for the first time is described as an Apps Special access Battery...
-
Page 31: Applications
Applications Exiting Applications Activating Applications In any application, Tap repeatedly In Home Screen, Flick Hot Sheet up Tap application Home Screen returns and application exits. ・ Home Screen also returns when Tapping on Navigation Bar, but application does not exit. In this case, Tap and exit it from recent apps window. -
Page 32: Using Recent Apps Window
Using Recent Apps Window Handset Phone Number Open a list of recently used applications to activate or remove Checking Your Phone Number them from the list. Opening Recent Apps Window In Home Screen, Flick Hot Sheet up (Settings) Settings appear. ・Handset number is shown below "Profile."... -
Page 33: Using Manner Mode
Using Manner Mode Activating Manner Mode Mute ringtones and other handset sounds to avoid disturbing Camera shutter sound, video recording tones, etc. still play others around you. even in Manner mode. Manner Mode Options Drag Status Bar down with two fingers Settable options are the following. -
Page 34: Using Airplane Mode
Using Airplane Mode Operations of Manner Mode Using Volume Up/Down Key Leaving power on, suspend signal-transmitting functions. When screen is unlocked, the following operations are possible with Volume Up/Down Key. Activating Airplane Mode ・When Manner mode is active, Press Volume Up/Down Key (a volume bar appears) and Tap END NOW to cancel... -
Page 35: Text Entry
Text Entry Switching Keyboards Keyboards In a text entry window, Use onscreen keyboards for text entry. ・ Tap Text entry field for keyboard. To hide it, Tap ・Text entry descriptions are for Google Keyboard (default input method). Enabling One-Handed Mode Shrink onscreen keyboard for easier one-handed operation;... -
Page 36: Google Account
Google Account More options Create account Use a Google Account and get more convenience with Google services. A Google Account is required to use some services or fully use some applications. Google Account Cautions Google Account Mail Address & Password Be careful not to forget your Google account mail address and password. - Page 37 Enter phone number for recovery NEXT Select whether to enable data backup Select whether to receive news and offers from Google Play NEXT Account is created. VERIFY ・If confirmation appears, follow onscreen prompts. Signing in to a Google Account If an application requires a Google Account, Add your account appears.
-
Page 38: Google Play
Google Play Purchasing Applications Download a variety of applications (free/paid) from Google Play. Change the setting of downloaded applications to enable manual or automatic updates. Sign in to a Google Account In Home Screen, Flick Hot Sheet up (Play Store) beforehand. -
Page 39: Uninstalling Applications
Updating Installed Applications Uninstalling Applications Applications installed via Google Play can be uninstalled. In Home Screen, Flick Hot Sheet up (Play Store) In Home Screen, Flick Hot Sheet up (Play Store) Google Play opens. ・If confirmation appears, follow onscreen prompts. Google Play opens. -
Page 40: Security Codes
Security Codes Setting Operation Password Main Security Codes In Home Screen, Flick Hot Sheet up (Settings) Lock & Security The following are main security codes required for handset use. Type Description A code required for using some functions. Operation "Operation Password and Center Password Access Code"... -
Page 41: Usim Pin
USIM PIN Enabling USIM PIN When PIN (a code for USIM Card) is enabled, PIN entry is USIM PIN and USIM Card Lock required for handset use each time handset is powered on with USIM Card installed. When USIM card lock is enabled, PIN (a code for USIM Card) is required for handset use each time handset is powered on;... -
Page 42: Turning Off Display (Screen Lock)
Turning Off Display (Screen Lock) Changing USIM PIN Enable USIM card lock first. See "Enabling USIM PIN" for Screen Lock details. After a period of inactivity, Display turns off to save battery power (Screen lock active). Screen lock prevents accidental In Home Screen, Flick Hot Sheet up (Settings) Touchscreen operation. -
Page 43: Using Fingerprint Authentication Function
Using Fingerprint Authentication Saving Fingerprints Function Save your fingerprints for fingerprint authentication. ・Save up to 5 fingerprints. Fingerprint Authentication Function Hold finger to sensor to authenticate and use handset. Use this function to unlock screen, activate applications, etc. In Home Screen, Flick Hot Sheet up (Settings) Lock &... - Page 44 Backup Screen Unlock Methods Set pattern/Lock No./password for unlocking screen Make sure not to forget pattern/Lock No./password set as backup for unlocking screen. Fingerprint Saving Operations Setting/Changing Names of Saved Fingerprints In Fingerprint settings, Tap saved fingerprint Enter name Fingerprint settings open. ・This is a backup method for unlocking the screen if unable Deleting Fingerprints to authenticate with your fingerprint.
-
Page 45: Updating Software
Updating Software Performing Fingerprint Authentication Software Updates In authentication window, hold finger to sensor At specified time, handset automatically checks for/downloads firmware updates as required. ・Software Update cannot be performed if application or function is in use. ・Alternatively, update firmware manually. Software Update Cautions Applications Fingerprint is authenticated. -
Page 46: Using Roboqul
Using ROBOQUL Updating Software Manually When charging using ROBOQUL and handset is powered on, Operate handset where signal reception is good and without ROBOQUL swivels when Display lights up, at start of charging, changing location. Also operate with adequate battery charge. for incoming calls, alarms, etc. - Page 47 Setting ROBOQUL NEXT Set whether ROBOQUL swivels while charging with ROBOQUL. ・When enabled while charging using ROBOQUL and handset is powered on, ROBOQUL swivels when Display lights up, at start of charging, for incoming calls, alarms, etc. ALLOW ALLOW In Home Screen, Flick Hot Sheet up (Settings) CLOSE AQUOS Useful...
- Page 48 Operations of ROBOQUL Setting is complete. ・ Tap Operations of ROBOQUL to toggle on ( )/off Viewing Information on ROBOQUL In ROBOQUL window, More info...
-
Page 49: Handset Interface
Handset Interface Lock Screen Basics............48 Home Screen Basics............49 Icons at Display Top (Status Bar)........49 Checking Handset Status & Notifications (Notifications Window/Quick Settings Window)........51 Customizing Home Screen..........53 Capturing Screenshots (Clip Now)........56 Scrolling Screen Automatically (ScrollAuto)....58... -
Page 50: Lock Screen Basics
Lock Screen Basics Notifications (Missed Calls, New Messages, Etc.) Lock screen appears at power on or when is Pressed while Display is turned off (Screen lock active). Notification appears in lock screen for missed calls, new From lock screen, unlock screen or quickly activate messages and information from applications. -
Page 51: Home Screen Basics
Home Screen Basics Icons at Display Top (Status Bar) Most operations start from Home Screen. Add shortcuts to Indicators (new message notification, handset status, etc.) frequently-used applications and widgets. appear at the top of Display. To change Home Screen, switch to another home screen app. Home Screen Layout Status Bar Layout Desktop sheet... - Page 52 Main Notification Indicators Main Status Indicators Notification Indicators appear on the left. Status Indicators appear on the right. ・Notification Indicators do not appear in lock screen. Indicator Description Indicator Description Battery Strength Glove Mode On Charging Call (Dialing/Arriving/in Progress) Signal Strength Call on Hold No Signal (4G LTE/4G/3G) Missed Call...
-
Page 53: Checking Handset Status & Notifications (Notifications Window/Quick Settings Window)
Checking Handset Status & Notifications Window Layout Notifications (Notifications Window/Quick Settings Window) Open notifications, check handset status or change various settings. Opening Notifications Window/Quick Settings Window Notifications and active functions Drag Status Bar down Use corresponding functions. Delete all notifications and close Notifications Window. 1 Usable functions depend on the notification. - Page 54 Quick Settings Window Layout Adding Setting Keys In Quick Settings Window, Touch & Hold Setting key below "Drag to add tiles" Drag Setting key to target location Deleting Setting Keys In Quick Settings Window, Touch & Hold Setting Drag to "Drag here to remove" Resetting Quick Settings Window In Quick Settings Window, Reset...
-
Page 55: Customizing Home Screen
Customizing Home Screen Home screen Home screen and lock screen Set Wallpaper for Home Screen, rearrange icons, as well as add folders, shortcuts and widgets. Setting Wallpaper Touch & Hold open area of Home Screen Setting is complete. ・ Tap Home screen to set the image as Wallpaper for Home Screen only. -
Page 56: Adding Folders
Adding Folders Adding Shortcuts Add folders to collect icons. Add shortcuts for applications in Home Screen. ・Folders can also be created in Hot Sheet and app list. In app list, Touch & Hold application and Drag to "Add to home screen"... -
Page 57: Adding Widgets
Removing Widgets Adding Widgets Add Album, Analog clock, etc. as follows. In Home Screen, Touch & Hold widget Drag to "Remove" Touch & Hold open area of Home Screen Rearranging Home Screen Sheets Touch & Hold open area of Home Screen WIDGETS ・Alternatively, Pinch Home Screen to rearrange sheets. -
Page 58: Capturing Screenshots (Clip Now)
Capturing Screenshots (Clip Now) Moving Icons/Widgets Slide finger along the edge of Display to capture a screenshot. Icons can also be rearranged in Hot Sheet and app list. Capture permanent screenshots for saving as image files or temporary screenshot for temporary use. In Home Screen, Touch &... - Page 59 Capturing Permanent Screenshots Capturing and Opening Temporary Screenshot Capture screenshots for saving as files. Capture screenshot of webpage, etc. for saving it temporarily. ・Some screens may not be capturable. Captured screenshot can be opened while using other ・ View captured screenshots in (Album), etc.
-
Page 60: Scrolling Screen Automatically (Scrollauto)
Scrolling Screen Automatically Setting Clip Now (ScrollAuto) Scroll the screen up and down automatically. In Home Screen, Flick Hot Sheet up (Settings) AQUOS Useful Clip Now Enabling ScrollAuto In Home Screen, Flick Hot Sheet up (Settings) AQUOS Useful Clip Now menu opens. Set each item Setting is complete. - Page 61 Setting Whether to Show Status Bar Indicator while Running Target Applications In ScrollAuto menu, Notify in status bar ・ Tap Notify in status bar to toggle on ( )/off Using ScrollAuto The feature may not follow the setting with certain applications.
-
Page 63: Phone
Phone Placing/Answering Calls........... 62 Optional Services..............66 Making Call Settings............70 Address Book..............71... -
Page 64: Placing/Answering Calls
Placing/Answering Calls To end call, End call How to dial directly to make a call and answer a call, as well as options when a call is arriving/during a call are described. Support for VoLTE/VoLTE (HD+) and HD Voice Handset supports VoLTE/VoLTE (HD+) and HD Voice for high-quality call sound. -
Page 65: Answering Calls
Answering Calls Airplane Mode Note that emergency calls cannot be made in Airplane mode. Drag Status Bar down with two fingers and cancel it. When a call arrives, Drag Answer down Call connects. ・ When screen is unlocked, Tap Answer at Display top. - Page 66 Arriving Call/Answer Phone Operations Call Window Layout/In-Call Operation Placing Call on Hold As call is arriving, Drag Answer Holding down ・ When screen is unlocked, Tap Hold at Display top. ・Caller incurs call charges while on hold. ・ To answer call, Tap Answer ・...
- Page 67 Using VoLTE/VoLTE (HD+) Placing Call on Hold VoLTE (Voice over LTE) is a system enabling voice calls over During call, Menu Hold LTE networks. Compared to voice calls over conventional 3G ・ To resume call, Tap Unhold connections, high-sound quality calls and reduced time until ringtones sound are possible (requires separate subscription).
-
Page 68: Optional Services
Optional Services Call Forwarding Use these optional services for voice calls: In Home Screen, Flick Hot Sheet up (Settings) Optional Services Call The following optional services are available. Service Description Call Divert all/unanswered calls to a preset Forwarding number. Divert all/unanswered calls to Voicemail Voicemail Center;... - Page 69 Voicemail Call Forwarding is set. In Home Screen, Flick Hot Sheet up (Settings) Call Canceling Call Forwarding In Divert menu, Stop call forward Call settings appear. Voicemail/divert Voicemail/divert menu opens. Settings/stop Divert menu opens. Always No answer VOICEMAIL ・ For No answer , Tap WAIT TIME...
-
Page 70: Call Waiting
Call Waiting Group Calling Requires separate subscription. Requires separate subscription. In Home Screen, Flick Hot Sheet up (Settings) During a call, Menu Add Call Call Call settings appear. Enter number CALL Other service settings When call connects, Menu Merge calls Group Calling starts. -
Page 71: Call Barring
Call Barring Restrict Not restrict Restrict outgoing/incoming calls and SMS messages. Restriction is set. ・When attempting to place/send a call/SMS while calling is restricted, a message appears. Message may take time to appear in some areas. Call Barring Operations Restriction Description Canceling All Outgoing Call Restrictions All outgoing... -
Page 72: Making Call Settings
Making Call Settings Call Setting Operations Editing SMS Message to Send to Caller when Call Settings Unable to Answer In Call settings, Quick responses Tap message to Check call information and make settings. Settable items are edit Enter message the following. Setting/Canceling Answer Phone Item Description... -
Page 73: Address Book
Address Book Save phone numbers and mail addresses as well as birthdays, nicknames, etc. Set ringtones for each contact as needed. Address Book Caution Contacts may be altered/lost if handset is left uncharged or due to accidents, malfunctions, repairs, handset upgrade/replacement, mishandling, etc. - Page 74 Dialing from Address Book Saving Multiple Different Phone Numbers, Etc. to Contact In window for saving new contact, for item to add In Home Screen, Flick Hot Sheet up (Address Book) Enter number, etc. Deleting Entered Phone Number, Etc. In window for saving new contact, for item to delete Saving Contact from Dialpad Window Save a number entered in dialpad window directly to...
- Page 75 To end call, End call Call ends.
-
Page 77: Messaging & Internet
Messaging & Internet Messaging................76 Sending S! Mail/SMS............76 Opening & Replying to S! Mail/SMS........ 78 Using Gmail............... 80 Using Email................82 Using the Internet (Chrome)..........85... -
Page 78: Messaging
Messaging Sending S! Mail/SMS S! Mail Sending S! Mail/SMS Exchange messages with S! Mail-compatible SoftBank handsets and email compatible devices (other mobiles, PCs, etc.) beyond In Home Screen, Flick Hot Sheet up (Mail) SMS character entry limit; attach media files. Exchange short messages (up to 160 single-byte characters) using handset numbers as addresses. - Page 79 Sending of S! Mail/SMS Select recipient(s) S! Mail and SMS Switching S! Mail and SMS automatically switch at sending, depending on whether a subject is entered, text length, etc. ・When creating a message, check which it is sent as at top of Display.
-
Page 80: Opening & Replying To S! Mail/Sms
Opening & Replying to S! Mail/SMS Opening S! Mail/SMS Handset receives S! Mail/SMS messages automatically by default. Optionally, retrieve messages manually, and also retrieve all messages saved on the server. In Home Screen, Flick Hot Sheet up (Mail) Opening New S! Mail/SMS When message arrives, new message notification and Notification Indicator appear. - Page 81 Message Operations Replying to S! Mail/SMS Deleting All Server Mail In thread list, Handle Server Mail Delete all In S! Mail/SMS message window, mails Delete Checking Available Storage on Mail Server In thread list, Handle Server Mail Check storage space Protecting Messages In thread details, Touch &...
-
Page 82: Using Gmail
Using Gmail Creating/Sending Gmail Use Gmail (Google's webmail service) as well as your work/ personal email. In Home Screen, Flick Hot Sheet up (Google) (Gmail) Setting an Account Set up a Google Account or an email account to use Gmail. When activating (Gmail) for the first time, account setup menu appears;... - Page 83 Opening Gmail Selecting Recipients from Address Book In message composition window, Add from Contacts Select recipient In Home Screen, Flick Hot Sheet up (Google) (Gmail) Saving Current Message as Draft While creating message, Save draft Discarding Current Message In message composition window, Discard DISCARD Message list opens.
-
Page 84: Using Email
Using Email Archiving Messages Send/receive email using (Email), an email-only In message window, application. ・Alternatively, in message list, Tap icon for message to archive ( appears) Setting an Account Syncing Accounts Manually Set up an email account to use email. When activating (Email) for the first time, account setup In message list, Drag down... - Page 85 Creating/Sending Email Discarding Current Message In message composition window, Discard DISCARD In Home Screen, Flick Hot Sheet up (Tools) (Email) Adding Quick Response Text In message composition window, Insert quick response Select text Opening New Email Message list opens. When message arrives, new message notification appears in lock screen.
- Page 86 Opening Email Syncing Accounts Manually In message list, Drag down ・Sync sent and received messages manually at any time In Home Screen, Flick Hot Sheet up (Tools) regardless of the automatic sync settings. (Email) Message list opens. Tap message Message window opens. Operations when Opening Messages Replying to Messages In message window,...
-
Page 87: Using The Internet (Chrome)
Using the Internet (Chrome) Chrome Operations Use Chrome simply by entering words to search for or URLs. Signing in to My SoftBank Access My SoftBank to check service charges or reward points, change contract details (subscribed price plan, optional services, etc.), check handset email address, use TLS (Transport Layer Security) is a protocol for encrypting anti-spam settings, etc. -
Page 88: Adding Bookmarks
Adding Bookmarks Opening Bookmarks In Home Screen, Flick Hot Sheet up (Google) In Home Screen, Flick Hot Sheet up (Google) (Chrome) (Chrome) Chrome activates. Chrome activates. Open target webpage Bookmarks Current webpage is saved as a bookmark. Bookmarks window opens. Bookmark Operations Tap bookmark Editing Bookmarks... - Page 89 Checking Browsing History Opening New Tabs Open multiple webpages in different tabs to switch between them easily. In Home Screen, Flick Hot Sheet up (Google) (Chrome) In Home Screen, Flick Hot Sheet up (Google) (Chrome) Chrome activates. Chrome activates. History New tab History window opens.
- Page 90 Setting Chrome Make Chrome settings. Settable items are the following. Item Description Sign in to your Google Account and make Sign in to settings for tabs, bookmarks, history, etc. Chrome View account information. Search engine Select a search engine. Enable or disable automatic form entry, or Autofill forms edit address and credit card information.
- Page 91 Camera Capturing Photos/Videos..........90...
-
Page 92: Capturing Photos/Videos
Capturing Photos/Videos Aim Back Camera at subject By default, photos and videos taken with handset are saved to handset (internal storage). To save them on SD Card, insert SD Card before using Camera, then change save location as follows. In Home Screen, Flick Hot Sheet up (Camera) COMMON Save To... -
Page 93: Recording Videos
Recording Videos Viewfinder Layout In Home Screen, Flick Hot Sheet up (Camera) Front/Back Camera switch Switch between Front Camera and Back Camera. Aim Back Camera at subject Mobile Light Change Mobile Light setting. Settings Access various Camera settings. Shooting mode Change shooting mode. -
Page 95: Music & Images
Music & Images Listening to Music (Play Music)........94 Viewing & Managing Photos/Videos (Album)....96... -
Page 96: Listening To Music (Play Music)
Listening to Music (Play Music) ARTISTS ALBUMS SONGS GENRES Playing High-Resolution Audio Handset supports high-resolution audio* playback. (*Sampling frequencies: 44.1 kHz, 48 kHz, 88.2 kHz, 96 kHz, 176.4 kHz, 192 kHz Quantization bit rates: 24-bit File formats: FLAC, WAVE) ・Requires commercially available earphone / headphone / speaker / etc. -
Page 97: Creating Playlists
Music Playback Screen Layout Creating Playlists In Home Screen, Flick Hot Sheet up (Google) (Play Music) Song image Toggle repeat all songs, repeat current song, normal Listen Now opens. playback. ・If confirmation appears, follow onscreen prompts. Drag slider to adjust playback position. Song rating Play previous song/play current song from beginning. -
Page 98: Viewing & Managing Photos/Videos (Album)
Viewing & Managing Photos/ Adding Currently Playing Song to a Videos (Album) Playlist Photos/videos captured on handset and downloaded images are In Music Playback screen, Add to playlist automatically sorted into Event and Map categories. playlist name Song is added to playlist. Viewing Photos/Videos View captured/downloaded photos and videos. - Page 99 Filtering Files by Shooting Mode in File List Switching Views in File List to show shooting mode types ( All Video In file list, folder list, or file view window, HighSpeed/Slow Video Rapid Shooting pic Photo Settings Thumbnail view Multi-tile view Sphere Background Blur ) below Filter Change.
- Page 100 USB Type-C cable (commercially available), and Drag left or right to show frame to capture delete the DATABASE folder in ¥PRIVATE¥SHARP¥PM on internal storage before opening photos or videos. Current image is saved to internal storage. ・ To move backward/forward frame by frame, Tap or Drag frame left/right.
-
Page 101: Connectivity
Connectivity Connecting by Wi-Fi............100 Using Tethering.............. 103 Using Bluetooth Function..........104 ®... -
Page 102: Connecting By Wi-Fi
Connecting by Wi-Fi Enabling Wi-Fi Handset supports Wi-Fi (wireless LAN). Access the Internet via household Wi-Fi networks. In Home Screen, Flick Hot Sheet up (Settings) Wi-Fi About Wi-Fi Available in the following environments. Environment Description Connect handset to your Wi-Fi home network. -
Page 103: Installing Certificates
Connecting Selected Access Points Checking IP Address Enable handset Wi-Fi first. In Wi-Fi menu, ・IP address is shown below "IP address." In Home Screen, Flick Hot Sheet up (Settings) Installing Certificates Wi-Fi In Wi-Fi menu, Advanced Install certificates Follow onscreen prompts Wi-Fi menu opens. - Page 104 Wi-Fi Connection Operations Disconnecting Wi-Fi Connecting Access Points Manually In Wi-Fi menu, Add network Enter network SSID In Home Screen, Flick Hot Sheet up (Settings) Tap Security field Tap security protocol Enter Wi-Fi password SAVE ・Available when Wi-Fi is enabled. ・Depending on security protocol, other fields may also need to be completed.
-
Page 105: Using Tethering
Using Tethering Using Wi-Fi Direct Use Wi-Fi Direct to establish a Wi-Fi connection with other About Tethering Wi-Fi Direct compatible devices with no need for an access point or Internet connection. Tethering makes handset act as an external modem (like a Wi- ・Enable handset Wi-Fi first. -
Page 106: Using Bluetooth ® Function
Using Bluetooth Function ® Setting Tethering Connect handset to other Bluetooth devices (e.g., headset) ® When using tethering, several methods are available for for handsfree conversations, or connect to other Bluetooth ® connecting handset with other devices. capable mobile phones, etc. to exchange data. Make settings according to connection method and status of target device beforehand. -
Page 107: Sending Data Via Bluetooth
Sending Data via Bluetooth (e.g., ® Address Book) In Home Screen, Flick Hot Sheet up (Address Book) Address Book opens. Tap index Tap contact Contact opens. Send Send by Bluetooth SEND (NO IMG) SEND (IMAGE) when face image is not saved) Tap target device Data is sent. -
Page 109: Global Services
Global Services Global Roaming............... 108 Calling from Outside Japan...........109... -
Page 110: Global Roaming
Global Roaming Tap provider Handset is Global Roaming Service eligible. Use the same handset number outside Japan. Cellular provider is set. ・To set an appropriate cellular provider automatically, Tap Setting a Cellular Provider Choose automatically ・ To search for all available cellular providers, Tap Search Handset connects to an appropriate cellular provider networks... -
Page 111: Calling From Outside Japan
Calling from Outside Japan Changing Data Roaming Setting See SoftBank Website to learn about roaming areas/rates, etc. Change setting for data communication outside Japan. http://mb.softbank.jp/en/global_services/ Print out roaming area/rate information to carry while traveling abroad as needed. In Home Screen, Flick Hot Sheet up (Settings) Enabling/Disabling Abroad Assistant While outside Japan, use Abroad assistant to select how to... -
Page 112: Current Country
Calling Landlines & Mobiles within Calling Countries aside from Japan Current Country In Home Screen, Flick Hot Sheet up (Phone) Dial In Home Screen, Flick Hot Sheet up (Phone) Dial Dialpad window opens. Dialpad window opens. Use onscreen dialpad to enter number Add Prefix Use onscreen dialpad to enter number CALL... - Page 113 Country Code List Operations Changing Country Codes In Home Screen, Flick Hot Sheet up (Settings) Call Int'l call settings User list country/area ENTRY DIRECT Enter country name and code Deleting Country Codes In Home Screen, Flick Hot Sheet up (Settings) Call Int'l call settings User list...
-
Page 115: Handset Settings
Handset Settings About Settings............... 114 Notifications Settings........... 115 Sound Settings..............116 Display Settings............. 118 AQUOS Useful Settings..........120 Illumination Settings............124 Battery & Energy Saving Settings........125 Call Settings..............126 Home Applications Setting..........126 Apps Settings..............127 Storage Settings.............128 Memory Settings.............129 Data Usage Settings............129 More Settings.............. -
Page 116: About Settings
About Settings Back up application data and handset settings including Wi-Fi password to Google server, or delete all data in Backup & internal storage. In addition, import data About Settings reset from other mobiles, etc. using SD Card or Bluetooth , or save handset data to SD ®... -
Page 117: Notifications Settings
Notifications Settings Setting Whether to Give Priority to Application Notifications Notifications Settings In application notification menu, Override Manner mode ・ Tap Override Manner mode to toggle on ( )/off Make application notification settings. Setting Whether to Show Notifications in Lock In Home Screen, Flick Hot Sheet up (Settings) Screen... -
Page 118: Sound Settings
Sound Settings Sound Sound Settings Set ringtone, operation tones, notifications, etc. Settable items are the following. Item Description Media volume Set volume for music, videos, etc. Alarm volume Set volume for Alarm. Sound menu opens. Set volume for ringtones for incoming Ring volume calls, etc. - Page 119 Setting Vibration Pattern for Incoming Calls Setting Whether to Show Notifications with Display Off (Screen Lock Active) when Manner In Sound menu, Vibrator pattern for incoming call Mode is Set to Total silence Tap pattern In Sound menu, Manner Mode Block visual ・Handset vibrates when Tapping a pattern.
-
Page 120: Display Settings
Display Settings Display Display Settings Set Wallpaper, Display brightness, etc. Settable items are the following. Item Description Set Wallpaper for Home Screen and lock Wallpaper screen. Display menu opens. Brightness Set Display brightness. level Set a period of inactivity after which Sleep Display turns off automatically. - Page 121 Enabling/Disabling RelaxView for Eye-friendly Enabling/Disabling Automatic Screen Rotation Image Quality In Display menu, When device is rotated Rotate the In Display menu, Relax settings RelaxView contents of the screen Stay in portrait view ・ Tap RelaxView to toggle on ( )/off ( ・...
-
Page 122: Aquos Useful Settings
AQUOS Useful Settings Glove Mode Cautions Observe the following when using Glove mode. AQUOS Useful Settings ・Touch operation may not be possible depending on materials of your gloves. ・Disable Glove mode when not wearing gloves or when Set useful functions such as ScrollAuto and Clip Now. Settable using handset in a bathroom. - Page 123 High-Speed Display Settings Set each item Set whether screen display is smoother. Setting is complete. In Home Screen, Flick Hot Sheet up (Settings) AQUOS Useful AQUOS Useful menu opens. High-speed display High-speed display window opens. to toggle on ( to toggle off ・...
- Page 124 High-Speed Display Operations Auto Sleep Off Settings Viewing Information on High-Speed Display Set Display on or off by handling handset. Settable items are the following. In high-speed display window, Item Description Setting Whether High-Speed Display is Set whether to turn on Display when Automatically Enabled when Installing Turn screen handset is picked up (e.g., from a desk)
- Page 125 Auto Sleep Off Settings Phone Cover Setting Setting Whether to Turn On Display when Make settings for smartphone cover motion. Handset is Picked Up In Auto sleep Off window, Turn screen on by holding In Home Screen, Flick Hot Sheet up (Settings) ・...
-
Page 126: Illumination Settings
Illumination Settings appears) Illumination Settings Set illumination pattern for Display. Settable items are the following. Item Description For incoming Set whether handset illuminates for call incoming calls. Setting is complete. Illumi pattern/color Set illumination pattern and color for ・ To disable illumination, Tap for incoming incoming calls. -
Page 127: Battery & Energy Saving Settings
Battery & Energy Saving Settings Viewing Energy Saving Overview In Battery & energy saving menu, Energy saving Battery & Energy Saving Settings Overview of Energy saving Save battery power or check Battery usage. Settable items are the following. Selecting Functions to be Restricted by Energy Saving Item Description... -
Page 128: Call Settings
Call Settings Home Applications Setting Call Settings Home Applications Setting Set the home application. Settings can also be accessed by activating (Phone) then Settings In Home Screen, Flick Hot Sheet up (Settings) In Home Screen, Flick Hot Sheet up (Settings) Home applications Call Home applications window opens. -
Page 129: Apps Settings
Apps Settings Setting Default Applications for Browser, Phone, SMS, Etc. Apps Settings In Apps menu, Browser app Phone app SMS app Select item Follow onscreen prompts Make settings for installed applications and running applications or check their information. Setting Whether to Allow Other Applications to ・For details on settings for application permissions and Appear over Current Application battery optimization, see... -
Page 130: Storage Settings
Storage Settings Storage Operations Checking Data Saved in Internal Storage Storage Settings In Storage menu, Internal shared storage Explore Check memory space of internal storage, SD Card and USB drive, mount or unmount SD Card, erase data on SD Card, etc. Encrypting/Decrypting SD Card Data Settable items are the following. -
Page 131: Memory Settings
Memory Settings Data Usage Settings Check the amount of your cellular data usage (per month) and Memory Settings restrict usage. Data usage is only as tracked by handset, and may differ from actual data usage statement. Check usage of memory (RAM). Checking Data Usage In Home Screen, Flick Hot Sheet up (Settings) - Page 132 Enabling/Disabling Cellular Data Setting Upper Limit on Cellular Data Usage In Data usage menu, Cellular data In Data usage menu, Billing cycle Data limit Enter amount to set as upper limit ・ Tap Cellular data to toggle on ( )/off ( ・If confirmation appears, follow onscreen prompts.
-
Page 133: More Settings
More Settings More Operations Enabling/Disabling Signal-Transmitting More Settings Functions In More menu, Airplane mode Set Airplane mode or make network settings for Cellular ・ Tap networks, etc. Settable items are the following. Airplane mode to toggle on ( )/off ( Adding VPN Destinations Item Description... -
Page 134: Location Settings
Location Settings Resetting All Network Settings In More menu, Network settings reset RESET Location Settings SETTINGS RESET SETTINGS ・If method for unlocking screen is setting other than Enable location information. Settable items are the following. None Swipe , first Tap RESET SETTINGS unlock screen. -
Page 135: Lock & Security Settings
Lock & Security Settings Changing Accuracy of Location Information Lock & Security Settings In Location menu, Mode Tap location mode ・Available when Location is enabled. Make security settings including Screen lock and security ・If confirmation appears, follow onscreen prompts. codes. Settable items are the following. Item Description Set Operation Password to use or change... - Page 136 Requiring Lock No. Entry for Unlocking Screen Lock & Security In Lock & Security menu, Screen lock Lock No. Set whether to require Lock No. entry to start handset Enter Lock No. CONTINUE Re-enter Lock No. ・ When screen unlock option other than None Swipe is set, after Tapping...
- Page 137 Showing Message in Lock Screen Deleting IC Cards (NFC)/Bluetooth Devices ® Saved as Trusted Devices In Lock & Security menu, for Screen lock Lock In Lock & Security menu, Smart Lock Enter pattern/ screen message Enter message SAVE Lock No./password Trusted devices Tap IC card/ Bluetooth...
- Page 138 Enabling/Disabling Installation of Non-Google Requiring Screen Unlock Operation when Play Applications Canceling Screen Pinning In Lock & Security menu, Unknown sources In Lock & Security menu, Screen pinning Authentication when unpinning appears) ・ Tap Unknown sources to toggle on ( )/off ( Tap screen unlock option for canceling screen pinning ・If confirmation appears, follow onscreen prompts.
-
Page 139: Languages & Input Settings
Languages & Input Settings Languages & Input Operations Adding Display Languages Languages & Input Settings In Languages & input menu, Languages Add a language Tap language to add Make settings for display language and text entry. Settable items are the following. Selecting Display Language Item Description... - Page 140 Setting Speech Output for Voice Input Setting Voice Synthesis Engine for Text-to- Speech Engine In Languages & input menu, Virtual keyboard Google In Languages & input menu, Text-to-speech output voice typing Speech output Tap item Tap engine ・ If Hands-free only is selected, speech output is ・...
-
Page 141: Backup & Reset
Backup & Reset Deleting Words Added to Personal Dictionary Back up application data and handset settings including Wi- In Languages & input menu, Personal dictionary Fi password to Google server, or delete all data in internal all languages English (United States) Japanese storage. - Page 142 Import data (Address Book, Mail, Schedule (Calendar), Notepad, ・ Tap Function information to view a video tutorial User/Learning dictionary, emopa) saved to SD Card on other (Japanese) on Sharp Website. mobiles or handset to handset. ・See "Importing Data from SD Card (Data Transfer)" for details.
-
Page 143: Accounts Settings
Accounts Settings Save Accounts Settings Create/add accounts; sync them as needed. In Home Screen, Flick Hot Sheet up (Settings) Saving starts. ・ When saving only Mail messages, Tapping Save activates あんしんバックアップ (Anshin Backup). When saving data of other categories at the same time, data other than Mail messages is saved first;... -
Page 144: Google Settings
Google Settings Date & Time Settings Google Settings Date & Time Settings Make settings for Google services. Make settings for date and time. Settable items are the following. Item Description In Home Screen, Flick Hot Sheet up (Settings) Automatic Set date and time automatically. date &... -
Page 145: Accessibility Settings
Accessibility Settings Enabling/Disabling Automatic Time Zone Adjustment Accessibility Settings In Date & time menu, Auto timezone ・ Tap Auto timezone to toggle on ( )/off ( Make settings for user accessibility, such as Captions and Magnification gesture. Setting Date Manually Item Description In Date &... - Page 146 Setting Whether to Click after Mouse/Trackpad Accessibility Pointer Stops Moving In Accessibility menu, Click after pointer stops moving ・ Tap to toggle toggle ・Drag Delay before click slider to adjust click delay. Setting Whether to Make Text Easier to Read Accessibility menu opens.
-
Page 147: Printing Settings
Printing Settings Setting the Amount of Time Required for Touch & Hold Printing Settings In Accessibility menu, Touch & hold delay Tap option Make settings for cloud printing. Setting Whether to Invert Colors of Screen Content In Home Screen, Flick Hot Sheet up (Settings) In Accessibility menu, Color inversion... -
Page 148: About Phone
About Phone Setting a Cellular Provider In Phone status menu, Carrier Setting About Phone Follow onscreen prompts Check handset status or calibrate sensors. Checking Legal Information and Authentication Information Handset conforms to technical regulations pursuant to the In Home Screen, Flick Hot Sheet up (Settings) Radio Law and the Telecommunications Business Law. - Page 149 Self Check Settings SELECT FROM PHONE SYMPTOMS SELECT FROM PHONE FUNCTIONS In Home Screen, Flick Hot Sheet up (Settings) Follow onscreen prompts About phone Diagnosis results appear. ・Tap diagnosis result for detailed result screen. Self Check Operations Restarting Handset in Safe Mode In Self check window, REBOOT WITH SAFE MODE Phone status menu opens...
-
Page 151: For Assistance
For Assistance File Storage..............150 Backup & Restore............150 Automatic Data Communication & Sync Settings..151 Troubleshooting.............. 151 Specifications..............153 Warranty & After-Sales Service........155 Customer Service............156... -
Page 152: File Storage
File Storage Backup & Restore File Save Location Backup/Restore Options Save data to internal storage or SD Card. Backup and restore options are the following. Default save location is internal storage; save location when creating data may be changed depending on application. Option Description Main file types and save locations are the following. -
Page 153: Automatic Data Communication & Sync Settings
Automatic Data Communication & Troubleshooting Sync Settings Check Here First Changing Automatic Data Communication & Sync Settings If symptoms continue even after checking, contact a nearby SoftBank Shop or Customer Service. Change settings to automatically lower amount of data communication. Troubleshooting Settable items are the following. - Page 154 Cannot use calling, messaging, or Internet Application/widget screens are not refreshed Check whether you are where signal is weak or are out Setting Data saver may affect behavior of of service area. some applications, widgets and services, such as Yahoo! JAPAN for SoftBank.
-
Page 155: Specifications
Specifications USIM Card is not recognized Is USIM Card installed properly? Is it installed in the Handset right location and orientation? Turn off handset, check whether USIM Card is installed properly, and then turn Handset specifications are as follows. handset on again. If this does not remedy the problem, USIM Card may be damaged. - Page 156 6 Provided on a best-effort basis; transmission speed may Materials (Handset) decrease or transmission may become unavailable due to traffic conditions, network environment, etc. Parts Materials Used/Surface Finish 7 Downlink max. 350 Mbps service areas being provided sequentially starting with areas of Tokyo, Nagoya, and Display Tempered glass/anti-smudge coating Osaka.
-
Page 157: Warranty & After-Sales Service
Warranty & After-Sales Service Materials (ROBOQUL) Parts Materials Used/Surface Finish Warranty Body ABS resin Handset purchase includes warranty. Charging Plug SUS/nickel plating (metal part) ・Check shop name and purchase date. Charging Plug ・Read warranty and keep in a safe place. LCP resin (resin part) ・Warranty period is given in warranty. -
Page 158: Customer Service
Customer Service For SoftBank handset or service information, call General Information. For repairs, call Customer Assistance. SoftBank Customer Support General Information From a SoftBank handset, dial toll free at 157 From a landline/IP phone, dial toll free at 0800-919-0157 Customer Assistance (Repairs/Lost Handsets) From a SoftBank handset, dial toll free at 113 From a landline/IP phone, dial toll free at 0800-919-0113... -
Page 159: Safety Precautions
Safety Precautions Safety Precautions............158 Important Product Information........166 Handset & Hardware Care..........168 General Notes..............170 Radio Wave Exposure and Specific Absorption Rate (SAR) Information..............173 Water & Dust Resistance..........174... -
Page 160: Safety Precautions
Safety Precautions Handset, USIM Card, USIM Removal Tool, TV Antenna Cable, ROBOQUL, AC Adaptor (Sold Separately) (Common) Read Safety Precautions before using handset. Observe precautions to avoid injury to self or others, or damage to property. Safety Precautions These labels show degree of risk from improper use. Do not use, store, or leave in extreme heat or where heat collects, such as fire, heat sources, Label... - Page 161 Do not disassemble or modify. Do not drop, stomp, throw or subject to May cause fire, burns, injury, electric shock, etc. excessive force or strong impact/vibration. May cause fire, burns, injury, electric shock, etc. Do not wet with water or other liquids (drinking water, sweat, sea water, pet urine, etc.).
- Page 162 For use by a child, explain instructions and supervise use. Do not apply excessive force; do not puncture with a nail or other sharp-pointed object, hit Failure to do so may cause injury, etc. with a hammer or other hard object, or stomp.
- Page 163 Regarding handset use in a hospital, follow the instructions given by the respective medical Do not shine Mobile Light close to eyes. institution. Maintain a safe distance, especially from small children. Power off handset where handset use is prohibited. May cause visual impairment or other problems; may temporarily affect eyesight or startle, leading to injury or Radio waves may adversely affect an airplane's electronic other accident.
- Page 164 If Display or Camera lens breaks, be careful with shards of broken tempered glass and When using the motion sensor and exposed handset parts. electromagnetic sensor, make sure of the safety around you and hold handset firmly; do Touching the broken or exposed parts may cause burns, not swing with excessive force.
- Page 165 ROBOQUL, AC Adaptor (Sold Separately) Before using handset in a vehicle, check with the manufacturer or dealer of the vehicle on radio wave effects. In rare cases, radio waves may adversely affect operation Do not use AC Adaptor if the cord is damaged. of on-vehicle electronic devices, depending on the type of vehicle.
- Page 166 When AC Adaptor is connected to handset, do If charging terminals become bent or deformed, not apply excessive force to the connection. discontinue use immediately. In addition, do not use AC Adaptor by restoring the terminals to May cause fire, burns, injury, electric shock, etc. their original state.
- Page 167 TV Antenna Cable. Cut edges may be sharp and cause injury. Failure to do so may cause fire, burns, injury, electric shock, etc. USIM Removal Tool...
-
Page 168: Important Product Information
Important Product Information Handset Use & Electronic Medical Devices General Use ・If your USIM Card or handset (with USIM Card inserted) is lost or stolen, suspend your service immediately. For details, contact SoftBank Customer Support, General Information. ・Handset transmissions may be disrupted inside buildings, If you are using an electronic medical device tunnels or underground, or when moving into/out of such (implanted pacemaker, implanted defibrillator,... - Page 169 ROBOQUL Firmware Updates ・Handset transmissions may be disrupted inside buildings, ROBOQUL firmware is updatable. When an update is required, tunnels or underground, or when moving into/out of such "Updating ROBOQUL" appears on handset. Follow onscreen places; may affect TV viewing. prompts to update firmware.
-
Page 170: Handset & Hardware Care
Handset & Hardware Care USIM/SD Card Insertion/Removal Handset & Hardware Care With Display upward, insert USIM Removal Tool in removal hole in Card Tray ・Use handset within 5 C - 35 C and 35% - 90% humidity. For use in bathrooms, see "Cautions for Use in a Bathroom."... - Page 171 ・Touchscreen may not respond in these situations: ・Use with gloves/long fingernails ・ (Long Press for at least 8 seconds) ・Use of pens, pencils or sharp objects Release finger after vibration; handset powers off. ・Use with objects on/against Display ・Use while wet...
-
Page 172: General Notes
General Notes Wi-Fi (Wireless LAN) "605SH" here refers to this mobile phone "AQUOS R." Wireless LAN (hereafter "Wi-Fi") uses radio waves to enable communication between compatible devices within range. However, it is advisable for the user to configure security Portrait Rights settings to avoid risk of data interception. -
Page 173: Regulatory Information
Ny-Alesund, Svalbard. Rx 925.7 to 959.3 MHz Tx 704.5 to 746.5 MHz Hereby, SHARP CORPORATION declares that the radio LTE Band 28 Rx 759.5 to 801.5 MHz equipment type 605SH is in compliance with Directive Tx 2402 to 2480 MHz 2014/53/EU. - Page 174 Maximum Transmit Power FCC Notice This device complies with part 15 of the FCC Rules. Operation Item Description is subject to the following two conditions: GSM 900 +33 dBm (Power Class 4) (1) This device may not cause harmful interference, and (2) this device must accept any interference received, including DCS 1800 +30 dBm (Power Class 1)
-
Page 175: Information
RF Exposure Information This mobile phone 【605SH】 is confirmed to comply with 【605SH】 here refers to this mobile phone 【AQUOS R】. guidelines relating to effects of radio wave exposure as set forth by the Council of Europe (CE) and the Federal Specific Absorption Rate (SAR) for This Communications Commission (FCC). -
Page 176: Water & Dust Resistance
Water & Dust Resistance The use of accessories that do not satisfy these requirements may not comply with FCC RF exposure requirements, and should be avoided. The FCC has granted an Equipment Authorization for this model handset with all reported SAR Handset Water &... - Page 177 In addition, do not splash cold water on handset when it is do not poke Mic, Earpiece, Speaker, Recorder Mic, etc. with a warm in a bathroom. sharp object; may affect water and dust resistance. May cause malfunction. ・Avoid placing handset directly on sand. Sand may penetrate ・Never charge handset in a bathroom.
- Page 178 Connection Jack, Speaker, and Earphones-Microphone Jack. ・If Card Tray is damaged or deformed, contact a SoftBank Shop. ・Do not insert a sharp object into Card Tray gap, Earphones- Wipe handset surface with dry cloth Microphone Jack or External Connection Jack.
- Page 179 About the User Guide............3 Accessibility Settings............ 143 Accessing Instructions on Handset........3 Accounts Settings............141 Address Book..............71 Album................. 96 AQUOS R User Guide Index Applications...............29 Apps Settings..............127 AQUOS Useful Settings..........120 Automatic Data Communication & Sync Settings..151 B...
- Page 180 H S Handset & Hardware Care..........168 Safety Precautions............158 Handset Initial Settings...........16 SAR...................173 Handset Phone Number............ 30 Screen Lock............... 40 Home Applications Setting..........126 ScrollAuto................58 Home Screen Basics............49 Scrolling Screen Automatically (ScrollAuto)....58 Security Codes..............38 Sending S! Mail/SMS............76 I...
- Page 182 AQUOS R User Guide August 2017, First Edition SoftBank Corp. Visit SoftBank Shop for assistance Model : AQUOS R Manufacturer : SHARP CORPORATION...