Table of Contents
Advertisement
Quick Links
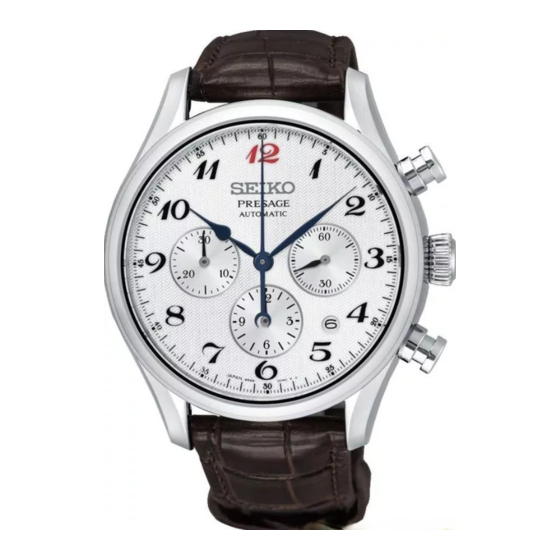
PARTS LIST / TECHNICAL GUIDE
Automatic Chronograph Cal. 8 R48A/8R49A
Item
Cal. 8R48A
• 3 hands
(hour and minute hands, and small second hand at
3 o'clock position)
• Calendar
(Date: Date disk)
Driving system
Additional function
Crown operation
Normal position
1st click position
2nd click position
Vibration per hour
Daily Date
Loss/Gain
Standard rate
for movement
Regulation system
Lift angle of the escapment
Coutinuous operating time
Number of jewels
Cal. No.
Cal. 8R49A
Automatic winding with manual winding mechanism
• Stopwatch function
Measures up to 12 hours
• Semi-instantaneous date change mechanism
• Second hand stop function
Manual winding (clockwise only)
Date setting (counterclockwise only)
Time setting (Hour and minute)
28,800 (8 beats per second)
+ 25 / - 15 seconds at normal temperature range
(Between 5°C and 35°C )
Testing
positions
Measurement
(daily rate in
seconds:s/d)
ETACHRON system
52 °
From fully wound to stoppage: Approximately 45 hours
34 jewels
8R48A/8R49A
Movement
[Bridge side]
Movement size
•
Diameter
•
Height: 7.62 mm
Instantaneous rate at T0
(Fully wound condition)
6 o'clock
Dial upward
at the top up
+ 15 s/d
+ 20 s/d
– 5 s/d
– 10 s/d
1/24
[Calendar side]
Outside: Ø 28.6 mm
Casing: Ø 28.0 mm
Isochronous fault
9 o'clock
Dial upward
at the top up
+ 20 s/d
± 10 s/d
– 10 s/d
Advertisement
Table of Contents

Related Manuals for Seiko 8R48A


Summary of Contents for Seiko 8R48A
- Page 1 Automatic Chronograph Cal. 8 R48A/8R49A [SPECIFICATIONS] Cal. No. 8R48A/8R49A Item Movement [Bridge side] [Calendar side] Cal. 8R48A Cal. 8R49A Movement size • 3 hands (hour and minute hands, and small second hand at • Diameter Outside: Ø 28.6 mm 3 o'clock position) Casing: Ø...
-
Page 2: Specifications
Cal. 8R48A/8R49A SPECIFICATIONS Disassembling procedures figs. 1 Types of oil Oil quantity mark AO-3 (Moebius A) NORMAL QUANTITY Reassembling procedures Figs. 93 SUFFICIENT QUANTITY [ NOTE ] Please press button A to START the chronograph function before disassembly. If it is at RESET position 41 Chronograph coupling lever A and 42 Chronograph coupling lever B are under 47 Second counting intermediate wheel;... - Page 3 PARTS CATALOGUE Cal. 8R48A/8R49A Types of oil Oil quantity mark AO-3 (Moebius A) NORMAL QUANTITY SUFFICIENT QUANTITY 2 0016 709 Hour wheel guard screw 3 0376 178 Hour wheel guard 4 0491 184 6 0270 443 Dial washer A Center wheel...
- Page 4 PARTS CATALOGUE Cal. 8R48A/8R49A Types of oil Oil quantity mark AO-3 (Moebius A) NORMAL QUANTITY SUFFICIENT QUANTITY Note: 20 0491 181 19 0491 182 Refer to the page 19 for distinguishing Dial washer B Dial washer C the dial washers B, C and D.
- Page 5 PARTS CATALOGUE Cal. 8R48A/8R49A Types of oil Oil quantity mark AO-3 (Moebius A) NORMAL QUANTITY SUFFICIENT QUANTITY 32 0571 177 33 0012 092 Operating lever A Operating lever spring screw 34 0575 177 Operating lever spring 36 0012 092 Operating cam jumper screw...
- Page 6 PARTS CATALOGUE Cal. 8R48A/8R49A Types of oil Oil quantity mark AO-3 (Moebius A) NORMAL QUANTITY SUFFICIENT QUANTITY 48 0186 192 Chronograph main plate * Refer to page 15 for the oiling position. 49 0012 354 Unit intermeidate spacer screw 50 4408 181...
- Page 7 PARTS CATALOGUE Cal. 8R48A/8R49A Types of oil Oil quantity mark AO-3 (Moebius A) NORMAL QUANTITY SUFFICIENT QUANTITY 59 0012 420 Balance bridge screw 60 0171 349 Balance cock 60-1 0310 *** Balance complete with stud * Refer to page 10 for the parts code.
- Page 8 PARTS CATALOGUE Cal. 8R48A/8R49A Types of oil Oil quantity mark AO-3 (Moebius A) NORMAL QUANTITY SUFFICIENT QUANTITY 64 0012 354 Automatic train bridge screw 65 0191 064 Automatic train bridge 66 0514 183 Second reduction whell and pinion 67 0012 919...
- Page 9 PARTS CATALOGUE Cal. 8R48A/8R49A Types of oil Oil quantity mark AO-3 (Moebius A) NORMAL QUANTITY SUFFICIENT QUANTITY 77 0144 178 Fourth wheel and pinion 78 0231 070 Third wheel and pinion 79 0012 354 80 0122 302 Center wheel bridge screw...
- Page 10 ● Following parts are determined based on the design of watches, such as hands height, dial color, and design of cases. Please refer to the SEIKO WATCH PARTS CATALOGUE in order to choose corresponding parts. Oscillating weight with ball bearing 0509 *** •...
- Page 11 PARTS CATALOGUE Cal. 8R48A/8R49A ● Location of the jewels Upper Lower Cap jewel Hole jewel Cap jewel Hole jewel 77 FORTH WHEEL ○ 78 THIRD WHEEL ○ ○ ○ GEAR TRAIN MECHANISM 84 ESCAPE WHEEL ○ ○ ○ 81 CENTER WHEEL ○...
- Page 12 PARTS CATALOGUE Cal. 8R48A/8R49A ● Tools and consumables required for disassembling/reassembling • Movement holder UNIVERSAL MOVEMENT HOLDER (S-682) • Watch oils SEIKO watch grease S-6 and S-4. watch oil AO-3 (or Moebius A) AO-3 12/24...
- Page 13 TECHNICAL GUIDE Cal. 8R48A/8R49A Types of oil Oil quantity mark AO-3 (Moebius A) NORMAL QUANTITY SUFFICIENT QUANTITY 1. Oiling spot (1) 70 Barrel and train wheel bridge with hole jewel frame 70 Barrel and train wheel bridge with hole jewel frame (back side) ■...
- Page 14 Cal. 8R48A/8R49A TECHNICAL GUIDE Types of oil Oil quantity mark AO-3 (Moebius A) NORMAL QUANTITY SUFFICIENT QUANTITY 1. Oiling spot (2) 46 Operating cam (3) 31 Hammer Note : Note : There must be oil within the range of the arrow.
- Page 15 TECHNICAL GUIDE Cal. 8R48A/8R49A Types of oil Oil quantity mark AO-3 (Moebius A) NORMAL QUANTITY SUFFICIENT QUANTITY 1. Oiling spot (7) 48 Chronograph main plate Turn the gear after oiling Note : There must be oil within the range of the arrow.
- Page 16 Cal. 8R48A/8R49A TECHNICAL GUIDE 2. The setting position of the spring and lever etc. 35 Operating lever B 34 Operating lever spring 30 Hammer operating lever A 32 Operating lever A 46 Operating cam 40 Chronograph coupling 41 Chronograph couling lever A...
- Page 17 TECHNICAL GUIDE Cal. 8R48A/8R49A 3. Chronograph coupling A and B setting position 41 Chronograph coupling lever A Set chronograph coupling lever A and chronograph coupling lever B as illustrated. 42 Chronograph coupling lever B 47 Second counting intermediate wheel 4. Hour chronograph coupling lever setting position Hour and minute counting wheel need to be inclined when setting.
- Page 18 Cal. 8R48A/8R49A TECHNICAL GUIDE 6. Disassembling / Reassembling of the first reduction wheel << Reassembling >> << Disassembling >> 74 First reduction wheel 74 First reduction wheel 72 Reduction wheel holder 70 Barrel and train wheel bridge (back side) 7. Disassembling / Reassembling of the ratchet sliding wheel spring.
- Page 19 TECHNICAL GUIDE Cal. 8R48A/8R49A 8. Chronograph unit and Base unit (Disassembling and Reassembling) Detach and reassemble the chronograph unit and base unit by taking off the screws (4pcs.) Chronograph unit Base unit 55 Main plate screw 58 Main plate screw Note: Before attaching the chronograph unit, check that base unit operates correctly.
- Page 20 Cal. 8R48A/8R49A TECHNICAL GUIDE 10. Accuracy adjustment Regulator Regulator pin Stud support Note: Adjustment of each part is as follows; • Regulator ... Time adjustment • Stud support ... Beat error adjustment (+) side (–) side • Regulator pin ... Isochronous fault adjustment...
- Page 21 TECHNICAL GUIDE Cal. 8R48A/8R49A 11. Setting position of oscillating weight Before assembling oscillating weight. Match the center of oscillating weight and winding stem. Set the hole of first reduction whell gear on the imaginary line toward balance bridge guide pin.
- Page 22 Cal. 8R48A/8R49A TECHNICAL GUIDE 14. How to install Second / Minute / Hour chronograph hands Place the movement directly on a flat metal plate. We recommend the use of Universal movement holder to install hands. Static weighting (1) Push button A (chronograph start)
-
Page 23: How To Set The Time
TECHNICAL GUIDE Cal. 8R48A/8R49A DISPLAY AND CROWN / BUTTON OPERATION Minute hand Chronograph second hand Button A (Chronograph Start / Stop) Hour hand Small second hand Second click Chronograph Minute hand (Time setting) (Measure up to 30 minutes) First click... - Page 24 Cal. 8R48A/8R49A TECHNICAL GUIDE HOW TO USE THE CHRONOGRAPH [ Standard measurement ] A ⇒ A ⇒ B Push the buttons in the following order: STOP RESET START • Push button A to start (6 hours 20 minutes 10 seconds) •...