Table of Contents
Advertisement
Quick Links
User Manual for your Baumatic
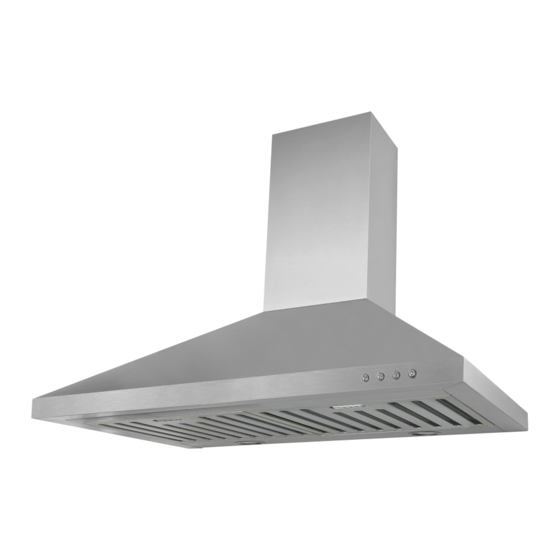
BRC60SS & BRC90SS
60/90 cm Cooker Hood in stainless steel
NOTE
: This User Instruction Manual contains important information,
including safety & installation points, which will enable you to get the
most out of your appliance. Please keep it in a safe place so that it is
easily available for future reference; for you or any person not familiar
with the operation of the appliance.
Advertisement
Table of Contents

Related Manuals for Baumatic BRC60SS


Summary of Contents for Baumatic BRC60SS
- Page 1 User Manual for your Baumatic BRC60SS & BRC90SS 60/90 cm Cooker Hood in stainless steel NOTE : This User Instruction Manual contains important information, including safety & installation points, which will enable you to get the most out of your appliance. Please keep it in a safe place so that it is easily available for future reference;...
-
Page 2: Table Of Contents
Contents Page Environmental note IMPORTANT SAFETY INFORMATION Specifications of your cooker hood Using your Baumatic cooker hood Before first use To use your cooker hood Cleaning your Baumatic cooker hood The grease filters Maintenance Removing and cleaning the grease filters... -
Page 3: Environmental Note
ENVIRONMENTAL NOTE Note: Before discarding an old appliance, switch off and disconnect it from the power supply. Cut off and render any plug useless. Cut the cable off directly behind the appliance to prevent misuse. This should be undertaken by a competent person. -
Page 4: Important Safety Information
IMPORTANT SAFETY INFORMATION Your safety is of the utmost importance to Baumatic. Please make sure that you read this instruction booklet before attempting to install or use the appliance. If you are unsure of any of the information contained in this booklet, please contact the Baumatic Advice Line. - Page 5 o The edges of the cooker hood are sharp – be mindful of this as you handle your appliance, especially during installation and cleaning. DO NOT CLEAN IN BEHIND THE GREASE FILTERS! o If the room where the cooker hood is to be used contains a fuel burning appliance such as a central heating boiler then its flue must be of the sealed or balanced flue type.
- Page 6 o Remember that when in extraction mode, your cooker hood is removing air from your room. Ensure that proper ventilation measures are being observed. o Note that it removes odours from your room, not steam. o Warning - Always ensure that the cooker hood has been disconnected from the power supply before carrying out any work on the hood, including replacing light bulbs.
-
Page 7: Specifications Of Your Cooker Hood
Specifications of your cooker hood BRC60SS – PRODUCT DIMENSIONS Height: 645 mm 1025 mm Width: 600 mm Depth: 500 mm DIMENSIONS OF CHIMNEY SECTION: – 170 mm x 221 mm Rated Voltage: 220-240 Vac 50 Hz Power Rating: 194W Your cooker hood is fitted with:... - Page 8 Specifications of your cooker hood BRC90SS – PRODUCT DIMENSIONS Height: 645 mm 1025 mm Width: 900 mm Depth: 500 mm DIMENSIONS OF CHIMNEY SECTION: – 170 mm x 221 mm Rated Voltage: 220-240 Vac 50 Hz Power Rating: 194W Your cooker hood is fitted with: o High extraction tangential motor o Push button control operation o 3 Speeds...
-
Page 9: Using Your Baumatic Cooker Hood
Using your Baumatic cooker hood Before first use IMPORTANT: THIS PROCESS MUST FOLLOWED BEFORE RANGEHOOD IS USED FOR THE FIRST TIME. o You should use a mild liquid detergent and a damp cloth on all the external areas of your rangehood, before it is used for the first time. -
Page 10: Cleaning Your Baumatic Cooker Hood
Cleaning yo Baumatic cooker hood IMPORTANT: BEFORE CLEANING, ALWAYS ENSURE THAT YOU HAVE SWITCHED YOUR COOKER HOOD OFF AT THE OMNI-POLAR SWITCH, SET A T T E WALL FROM THE CABLE. Cleaning o Clean the external parts of your cooker hood with mild liquid detergent and a new damp cloth. -
Page 11: Maintenance
Maintenance Removing and cleaning the grease filters (PART NUMBER& MODEL NUMBER: SYBF353B6-BRC60SS, SYBF353F-BRC90SS) o First remove the grease filters by pulling down on the handle and pulling them away from the cooker hood. o Soak the grease filter in hot water and washing up liquid for about an hour. -
Page 12: Changing A Light Bulb
Changing a light bulb (Part number: SYKL30 – LED LIGHT) IMPORTANT: BEFORE ATTEMPTING TO CHANGE A LIGHT BULB, YOU MUST ENSURE THAT YOU HAVE DISCONNECTED THE COOKER HOOD FROM YOUR MAINS SUPPLY. o Remove the grease filters (as described on page 11). o Prior to touching the light bulbs ensure they are cooled down. -
Page 13: Fitting The Carbon Filters
Fitting the carbon filters If the appliance is being used to be used in recirculation mode then it is necessary to fit carbon filters (ST1). This will help to absorb unpleasant odours caused by cooking. IMPORTANT: BEFORE ATTEMPTING TO FIT OR REMOVE THE CARBON FILTERS, YOU MUST ENSURE THAT YOU HAVE DISCONNECTED THE COOKER HOOD FROM YOUR MAINS SUPPLY. -
Page 14: Installation
Installation IMPORTANT: Before installation and usage read all the instructions and make sure that the voltage (V) and the frequency (Hz) indicated on the rating plate are exactly the same as the voltage and frequency in your home. The rating plate can be found behind the grease filter. -
Page 15: Before Beginning Installation
If you only find two wires in the main’s lead (blue and brown), then neither must be connected to the earth terminal. o As the colours of the wires in the appliance’s mains lead may not correspond with the coloured markings identifying the terminals in your spur box, please proceed as follows: o The blue wire must be connected to the terminal marked “N”... -
Page 16: Installing Your Cooker Hood
and ceiling. The wall and ceiling must be strong enough to take the weight of the hood. o Do not tile, grout or silicone this appliance to the wall. This appliance is designed to be surface mounted only. Installing your cooker hood IMPORTANT: YOU WILL HAVE TO DECIDE BEFORE INSTALLING YOUR COOKER HOOD WHETHER TO US E IT IN EXTRACTION MODE OR RECIRCULATION MOD E. - Page 17 1) Determine the correct height for the rangehood and fix the hook. Ensure that the hook is level when fixed. Mark and fix the inner chimney bracket as described in the section “Fitting the chimney”. 2) Fix the outer chimney bracket to the outer chimney ensuring that the inner chimney is free to slide to the required height and the exhaust ducting does not impede the movement.
- Page 18 Fitting the chimney 4) Take the two chimney sections (C) and (D). Rest the bottom of chimney section (C) on the top of the hood. You should take care to position the tabs on the chimney section into the rear of the hood. Mark the side measurement of both sides of chimney section (C) on the wall with a pencil.
- Page 19 o Slide chimney section (D) inside of chimney section (C). Then secure the L shaped bracket to the wall, using the same method as you have just used to secure the lower bracket. 8) Lift chimney section (D) up to the ceiling and secure it to the L shaped bracket using the screws provided.
-
Page 20: Completing The Installation
Completing the installation If you are setting the appliance to recirculation mode, then you should now fit the two carbon filters. See the “Fitting the carbon filters” section on page 13. The electrical connection must correspond to the electrical requirement noted on the rating plate, which is placed inside the cooker hood. -
Page 21: Packing List
Packing List Opening the box, you will find the following items: Description Illustration Qty. Rangehood Chimney Wall bracket Plate I Płate II Screw (4mm x 40mm) Screw (4mm x 30mm) Wall plug Screw (4mm x 8mm) Filter... -
Page 22: Troubleshooting
Troubleshooting IMPORTANT: If your cooker hood appears not to be operating properly, before contacting the Baumatic Service Department, please refer to the checklist below. My cooker hood will not start. o Check that the hood is connected to the electricity supply o Check that the fan speed control is set correctly. - Page 23 Authorised Service Agent. Log onto www.baumatic.co.nz to locate a Service Agent nearest to you. DO NOT ATTEMPT TO REPAIR THE APPLIANCE YOURSELF. Please note that if an engineer is asked to attend whilst the product...
- Page 24 Guarantees Acts 1993. 5. That the product was purchased and installed in For Service please visit baumatic.co.nz/service or contact New Zealand; the dealer/retailer from whom you purchased the product 6. That this warranty does not extend to: from or call the 0800 number listed below.
- Page 25 Imported by Applico Ltd. Private Bag 92900 Onehunga, Auckland 1061, New Zealand Website www.baumatic.co.nz...