
Related Manuals for Philips FW-V795


Summary of Contents for Philips FW-V795
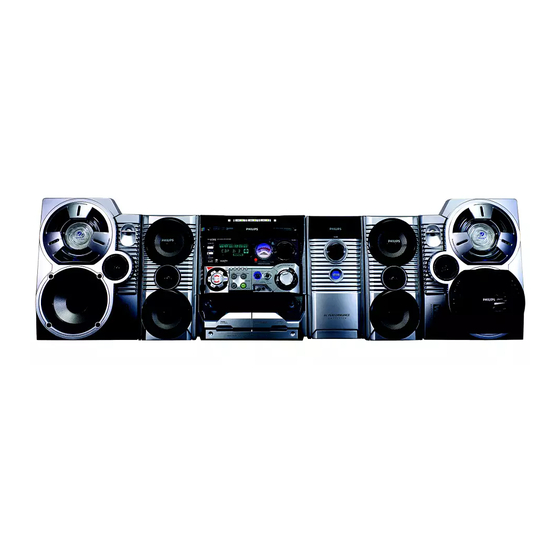
- Page 1 V795 V795 VCD MP3-CD Mini Hi-Fi System 3139 115 21281 pg 001-035/V795/21-Eng 4/16/02, 6:42 PM...
- Page 2 Optimum disc playability : ensuring excellent picture quality Philips components and modules for the various CD applications have always enjoyed an excellent reputation in the market place for super disc playability - the ability to play discs which may be scratched, soiled or not fully according to the standard specification.
- Page 3 DISC CHANGE C H A N G E R VCD MINI HIFI SYSTEM STANDBY-ON § ECO POWER ∞ ≤ MP3 - CD DISPLAY PROG £ ™ DEMO PLAY• STOP/ PAUSE CLEAR ¡ TAPE 1 pg 001-035/V795/21-Eng 3 D I S C D I R E C T P L A Y OPEN•...
- Page 4 3139 115 21281 pg 001-035/V795/21-Eng 4/16/02, 6:42 PM...
- Page 5 Index English ------------------------------------------------ 6 -------------------------------------------------------- 36 Bahasa Melayu ----------------------------------- 65 Bahasa Indonesia -------------------------------- 95 CAUTION Use of controls or adjustments or performance of procedures other than herein may result in hazardous radiation exposure or other unsafe operation. 3139 115 21281 pg 001-035/V795/21-Eng 4/16/02, 6:42 PM...
-
Page 6: Table Of Contents
Contents General Information Environmental Information ... 7 Supplied Accessories ... 7 Acknowledgement ... 7 Safety Information ... 7 Preparations Rear Connections ... 8–10 Inserting batteries into the remote control ... 10 Controls Controls on the system and remote control ... 11–13 Basic Functions Plug and Play ... -
Page 7: General Information
Please observe the local regulations regarding the disposal of packaging materials, exhausted batteries and old equipment. Acknowledgement Energy Star As an ENERGY STAR Partner, Philips has determined that this product meets the ENERGY STAR guidelines for energy efficiency. Supplied accessories – Remote control –... -
Page 8: Preparations
Preparations AM loop antenna speaker (right) SUBWOOFER — — SPEAKERS 6 booster speaker C A U T I O N DO NOT OPEN (right) RISK OF ELECTRIC SHOCK A V I S NE PAS OUVRIR RISQUE DE CHOC ELECTRIQUE POWER SWITCH BOOSTER IN AC MAINS SPEAKERS 6... - Page 9 Antennas Connection Connect the supplied AM loop antenna and FM antenna to the respective terminals. Adjust the position of the antenna for optimal reception. AM Antenna Position the antenna as far as possible from a TV, VCR or other radiation source. FM Antenna For better FM stereo reception, connect an...
-
Page 10: Inserting Batteries Into The Remote Control
Preparations Set the VOLTAGE SELECTOR to the local power line voltage. Plug in the AC mains to the wall socket. Switch on the POWER SWITCH to activate the power booster amplifier. Press STANDBY ON button to switch the system ON or to Standby mode. Rotate the VOLUME control to adjust the loudness of the power booster amplifier. -
Page 11: Controls
Controls on the system and remote control ECO POWER – to switch the system on or to Eco Power Standby mode. STANDBY ON y – to switch the system on or to Standby mode. DISPLAY SCREEN – to view the current status of the system. DISC TRAYS DISC CHANGE –... - Page 12 Controls Mode Selection PLAY PAUSE É Å for CD/VCD/MP3-CD…to start or interrupt playback. for TAPE ... to start playback. for PLUG & PLAY…(on the system only) to initiate and start plug & play mode. SEARCH• TUNING à á (ALBUM - - /+ for MP3-CD only…to select previous/next Album...
-
Page 13: Control
• ZOOM – to enlarge a still picture of the VCD on the TV screen. ª RESUME – to continue playback again from where you have stopped (for VCD with PBC switched off). º KEY CONTROL ( I È i ) –... -
Page 14: Basic Functions
Basic Functions VCD MINI HIFI SYSTEM STANDBY-ON ECO POWER ECO POWER MP3 - CD CLOCK• AUTO DISPLAY PROG DUBBING REC TIMER REPLAY CD 1•2•3 PAL/ TUNER NTSC DEMO PLAY• STOP/ PAUSE CLEAR TAPE TAPE 1•2 IMPORTANT! Before you operate the system, complete the preparation procedures. -
Page 15: Demonstration Mode
Demonstration mode The system has a demonstration mode that shows the various features offered by the system. To activate the demonstration In Standby mode, press and hold DEMO STOPÇon the system until "DEMO ON" is displayed. The demonstration will begin. To deactivate the demonstration Press and hold DEMO STOP Çon the system until "DEMO OFF"... -
Page 16: Display Mode
Basic Functions Display mode There are four different display modes for selection. Press DISPLAY repeatedly to select NORMAL, MODE 1, MODE 2, or MODE 3. NORMAL ... All available LEDs will light up and the display screen will have full brightness. The VU meter will be in music mode. - Page 17 DSC (Digital Sound Control) The DSC feature enables you to adjust the system to suit your type of music. Press DSC. DSC button lights up Adjust the JOG CONTROL (or press DSC on the remote control repeatedly) to select the desired Digital Sound Control effect : DIGITAL, ROCK, POP, NEWAGE, CLASSIC or ELECTRIC.
-
Page 18: Cd/Vcd/Mp3-Cd Operations
CD/VCD/MP3-CD Operations 3 D I S C D I R E C T P L A Y DISC DISC CHANGE C H A N G E R VCD MINI HIFI SYSTEM STANDBY-ON ECO POWER ECO POWER MP3 - CD CLOCK• AUTO DISPLAY PROG... -
Page 19: Loading Discs
Loading Discs Press VCD to select CD/VCD/MP3-CD mode. Press OPEN•CLOSE to open the disc tray. Load up to two discs on the individual disc trays. To load the third disc, press DISC CHANGE. The disc tray will rotate until the empty tray is ready for loading. -
Page 20: Select A Desired Track/Passage
CD/VCD/MP3-CD Operations Select a desired track/passage To search for a particular passage during playback Press à or á to select 4 different search speed. "FRX1"; "FRX2"; "FRX3" or "FRX4" will be displayed on the TV screen when you select a fast rewind search. -
Page 21: Repeat
To review the programme Stop playback and press í or ë repeatedly. To exit review mode, press Ç. To erase the entire programme Press Ç once when playback is stopped or twice during playback. "PROGRAM CLEARED" will be displayed. will disappear from the display. PROG Note: –... -
Page 22: Video Cd
CD/VCD/MP3-CD Operations VIDEO CD VCD 123 TUNER TAPE 1/2 MP3 123 PROG REPEAT VOLUME É Å TITLE TITLE í ë Ç à á ALBUM ALBUM TITLE/ ALBUM NAME RETURN DIGEST ZOOM RESUME SLOW VOCAL Ö KEY CONTROL ECHO wOOx ON/OFF LEVEL Adjusting the TV System Before viewing the Video CD, ensure that the set... -
Page 23: Return
Notes: – Programme mode is not available whenever PBC mode is switched on. – The menu structure depends on the information stored on the VCD. Please refer to the information supplied with the disc. Return Press RETURN to return to the previous VCD disc MENU level. -
Page 24: Resume
CD/VCD/MP3-CD Operations Resume This feature is also applicable to audio CD (except for MP3-CD). In stop mode, press RESUME on the remote control to start playback again from where you have stopped. Note: – Resume information is lost if you have changed the disc, opened the disc tray, change source or disconnected the system from the power supply. -
Page 25: Radio Reception
VCD MINI HIFI SYSTEM STANDBY-ON ECO POWER ECO POWER CLOCK• AUTO MP3 - CD PROG DUBBING REC DISPLAY TIMER REPLAY CD 1•2•3 BAND PAL/ TUNER NTSC DEMO PLAY• STOP/ PAUSE CLEAR SOURCE TAPE TAPE 1•2 CDR / DVD Storing Preset Radio Stations You can store up to 40 preset radio stations in the memory. -
Page 26: Tuning To Preset Radio Stations
Radio Reception Tuning to a weak radio station Press à or á briefly and repeatedly until the optimal reception is found. To stop storing the manual preset Press Ç on the system. Notes: – If you attempt to store more than 40 preset radio stations, "PROGRAM FULL"... -
Page 27: Tape Operation/Recording
VCD MINI HIFI SYSTEM STANDBY-ON ECO POWER ECO POWER CLOCK• AUTO MP3 - CD DISPLAY PROG TIMER REPLAY DUBBING REC CD 1•2•3 BAND PAL/ TUNER NTSC DEMO PLAY• STOP/ PAUSE CLEAR SOURCE TAPE CDR / DVD TAPE 1•2 TAPE 1 IMPORTANT! –... -
Page 28: General Information On Recording
Tape Operation/Recording Notes: – The tape counter will automatically set to zero after detecting end of tape. General Information on Recording If you do not intend to record via the microphone, unplug the microphone to avoid accidental mixing with other recording source. For recording, use only tape of IEC type I (normal tape). -
Page 29: Dubbing Tapes
To select another track during recording Press PAUSEÉ Å to interrupt recording. Pressí or ë to select the desired track. Press PLAYÉ Å to resume recording. To stop recording Press Ç. Recording and disc playback will stop simultaneously. Dubbing Tapes Load the prerecorded tape in tape deck 1. -
Page 30: Clock/Timer
Clock/Timer VCD MINI HIFI SYSTEM STANDBY-ON ECO POWER ECO POWER MP3 - CD CLOCK• AUTO DISPLAY PROG DUBBING REC TIMER REPLAY CD 1•2•3 BAND PAL/ TUNER NTSC DEMO PLAY• STOP/ PAUSE CLEAR SOURCE TAPE TAPE 1•2 CDR / DVD View Clock The clock (if it is set) will be shown in Standby mode. -
Page 31: Timer Setting
Press and hold CLOCK•TIMER for more than two seconds to select timer mode. "AM 12:00" or "00:00" or the last timer setting will start flashing. will start flashing. TIMER The selected source will be lighted while other available sources are flashing. Press VCD, TUNER or TAPE to select the desired source. -
Page 32: External Sources
Cleaning the disc lens After prolonged use, dirt or dust may accumulate at the disc lens. To ensure good playback quality, clean the disc lens with Philips CD Lens Cleaner or any commercially available cleaner. Follow the instructions supplied with cleaner. -
Page 33: Specifications
AMPLIFIER Output power Total power ... 6000 W PMPO / ... 2 x 120 W + 2 x 110 W RMS Booster ... 2800 W PMPO / 220 W RMS Stereo Mode ... 3200 W PMPO / 240 W RMS Signal-to-noise ratio ... -
Page 34: Troubleshooting
Troubleshooting WARNING Under no circumstances should you try to repair the system yourself, as this will invalidate the warranty. Do not open the system as there is a risk of electric shock. If a fault occurs, first check the points listed below before taking the system for repair. If you are unable to remedy a problem by following these hints, consult your dealer or service centre. - Page 35 GENERAL The system does not react when buttons are pressed. Sound cannot be heard or is of poor quality. The left and right sound outputs are reversed. The remote control does not function properly. The timer is not working. Not all lighted buttons are showing light. The Clock/Timer setting is erased.