Advertisement
Available languages
Available languages
Quick Links
BEFORE YOU START!!!
Please read the IMPORTANT SAFETY INFORMATION sheet included in this
package.
Step 1: Unpack
Remove the antenna and the hardware bag from package. Make sure the following parts
are in the package:
• Antenna rear section
• VHF element
• Hardware bag
U-Bolt
(2) Black plastic end-caps
Matching transformer
(4) 7/16" Washers
Step 2: Unfold the antenna's rear section
Step 3: Unfold the antenna's front section
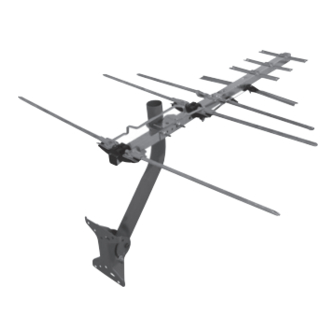
Small YAGI Antenna
User's Guide
• Antenna front section
• Mounting pipe and foot
Unfold the elements on the rear section of
the antenna until they lock into place as
pictured here. Make sure the elements are
flat and parallel to each other when you're
finished.
Unfold the UHF elements on the front
section until they lock into place as pictured
here. Make sure the elements are flat and
parallel to each other when you're finished.
(2) 10/32" Hex nuts
(5) 1/4" Hex nuts
(2) 5/8" Bolts
2 1/2" Screw
Advertisement

Related Manuals for RCA ANT752


Summary of Contents for RCA ANT752
-
Page 1: Before You Start
Small YAGI Antenna User’s Guide BEFORE YOU START!!! Please read the IMPORTANT SAFETY INFORMATION sheet included in this package. Step 1: Unpack Remove the antenna and the hardware bag from package. Make sure the following parts are in the package: •... - Page 2 Step 4: Attach the front section to the rear section Attach the antenna’s front section to the rear section by sliding the tapered end of the front section into the end of the rear section. The threaded studs on both sections of the antenna should be facing down Align the holes and attach the included VHF element to the top of the boom.
- Page 3 Step 7: Insert the end caps Insert the plastic end caps in the ends of the booms. Use a rubber mallet to gently tap them into the antenna booms to secure them. Step 8: Attach the mounting pipe to the foot Find the end of the mounting pipe with holes on the sides for screws.
-
Page 4: 12 Month Limited Warranty
12 Month Limited Warranty Voxx Accessories Corporation (the “Company”) warrants to the original retail purchaser of this product that should this product or any part thereof, under normal use and conditions, be proven defective in material or workmanship within 12 months from the date of original purchase, such defect(s) will be repaired or replaced with new or reconditioned product (at the Company’s option) without charge for parts and repair labor. -
Page 5: Antes De Comenzar
Antena YAGI Pequeña Guía del Usuario ¡¡¡ANTES DE COMENZAR!!! Lea la hoja de INFORMACIÓN IMPORTANTE DE SEGURIDAD incluida en este empaque. Paso 1: Desempaque Extraiga la antena y la bolsa de herrajes del empaque. Asegúrese que todas las piezas se encuentren incluidas en el empaque: •... - Page 6 Paso 4: Instale la sección anterior en la sección posterior Instale la sección anterior de la antena en la sección posterior. Para hacer esto, deslice e inserte el extremo ahusado de la sección anterior en el extremo de la sección posterior. Los pernos roscados en ambas secciones de la antena deberán estar orientados hacia abajo.
- Page 7 Paso 7: Inserte las tapas de extremo Inserte las tapas plásticas de los extremos en los extremos de los brazos. Utilice un mazo de goma para golpearlos suavemente, e introducirlos y fijarlos en los brazos de la antena. Paso 8: Instale el tubo de montaje en el pie Encuentre el extremo del tubo de montaje con orificios en los lados para tornillos.
-
Page 8: Garantía Limitada De 12 Meses
Esta Garantía le confiere derechos legales específicos y es posible además que usted tenga otros derechos que pueden variar según el estado/provincia. ANT752-11 IB 01...