Table of Contents
Advertisement
Quick Links
Advertisement
Table of Contents

Related Manuals for Aztech AIR-706P


Summary of Contents for Aztech AIR-706P
- Page 2 © Copyright 2017 All rights reserved. No part of this document may be reproduced, republished, or retransmitted in any form or by any means whatsoever, whether electronically or mechanically, including, but not limited to, by way of photocopying, recording, information recording, or through retrieval systems without the express written permission.
-
Page 3: Table Of Contents
Contents About the Router ..........................3 Package Contents ........................5 Device Design ..........................6 Getting Started ........................... 9 Plan your Network........................10 Remove/ Disable Conflicts ......................11 Internet Sharing, Proxy, and Security Applications ............11 Configuring TCP/IP Settings ....................... 11 Configuring Internet Properties .................... -
Page 4: About The Router
Exceptional Wireless Performance Equipping your home further with wireless flexibility, the Aztech AIR-706P has a concurrent dual band wireless feature which enables its users to use (1) the 2.4GHz frequency band that provides wireless speeds of up to 600Mbps (Turbo QAM), and / or (2) the faster 5.0GHz frequency band which offers... - Page 5 ―hard-to-get‖ areas such as blind spots. Beamforming Technology Allows the Aztech AIR-706P track devices and focus its wireless signals directly to the devices that need it, disregarding wireless interferences (e.g. thick walls, other wireless devices etc.) and dramatically improving wireless speed and wireless performance ...
-
Page 6: Package Contents
Package Contents Package contents are listed below. For any missing items, please contact your dealer immediately. Product contents vary for different models. AIR-706P Ethernet cable (Yellow) 12V 2.5A DC Power Adapter Easy Start Guide Warranty Policy... -
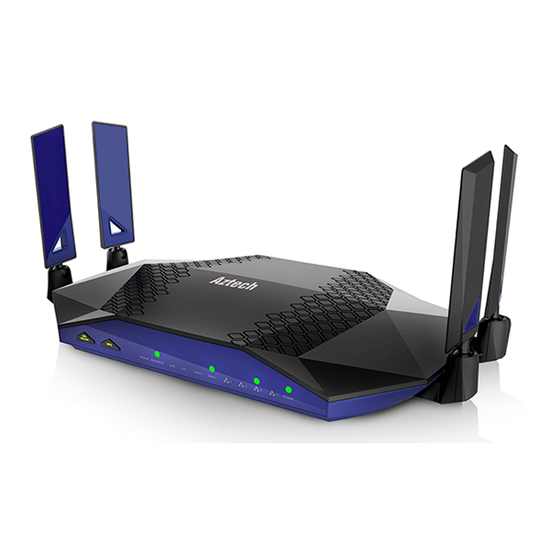
Page 7: Device Design
Device Design Front Panel Status Description Power No power is supplied to the Green (Solid) device Red (Solid) Connected to a Power Supply Error on the device ETH LAN 1-4 No Ethernet connection Green (Solid) Connected to an Ethernet Green (Blinking) device Corresponding port is currently transmitting / receiving data... - Page 8 Green Mesh link is up and steady. Red (Solid) Mesh link between the router and the node is weak. Red (Blinking) Mesh link is down and not available. Broadband There is no connectivity to the Green (Solid) ONT. Connectivity to the ONT is Green (Blinking) established.
-
Page 9: Back Panel
Back Panel Physical Interface Description USB 1 and 2 USB 3.0 Ports for USB devices such as printers and USB external hard drives Ethernet 1 to 4 Connecting computers and other Ethernet devices Ethernet WAN For WAN connection through an Ethernet cable Reset To reset the modem to the factory default configuration... -
Page 10: Getting Started
Getting Started Setting up the device is easy. The diagram below provides an outline of the steps needed in order to complete the installation. Brief descriptions appear beside each step. Detailed instructions are provided in the subsequent pages. You may see the suggested network setup. You may need to remove or disable some settings in your computer before proceeding with the installation. -
Page 11: Plan Your Network
Plan your Network Before moving ahead to setup your network, it is a good idea to draw out a network diagram to help identify your network devices and plan out how to connect these devices. Each port in the router can be used for different connections. For example: ... -
Page 12: Remove/ Disable Conflicts
Remove/ Disable Conflicts To ensure that the router installation moves on smoothly, you need to remove or disable conflicts that may interfere with the installation. Probable conflicts may include: Internet sharing applications Proxy software Security software TCP/IP settings ... -
Page 13: Configuring Internet Properties
5. Select Obtain an IP address automatically. 6. Click the OK button to close the Internet Protocol (TCP/IP) dialog box. 7. Click the OK button to close the Local Area Connection Properties dialog box. Configuring Internet Properties Follow the steps below to set the Internet Properties: 1. -
Page 14: Setup The Device
When installing the router, find an area near the ONT and near an electrical outlet for the router. a. Power ON your AIR-706P by connecting and plugging its power adapter to a power outlet. b. Connect your ONT*/Cable Modem to the AIR-706P’s Broadband port using an Ethernet cable. -
Page 15: The Web User Interface
1. Launch any web browser (e.g. Internet Explorer, Google Chrome). 2. Type-in 192.168.1.254 on the address bar and then press Enter. When you first access the Web User Interface, you will automatically be redirected to the Basic Mode of the AIR-706P User Interface. -
Page 16: Web User Interface
Advanced Status Icons and Reboot button The AIR-706P has a top panel which displays a representation of (1) the Wireless status and (2) the Internet Status. A Reboot feature is also available in the top panel for easier means of soft device reboot. -
Page 17: Quick Setup Wizard
NOTE: It is highly recommended to go through the entire Quick Setup Wizard. Welcome This is the default page of the Quick Setup menu. It displays the main features and product specifications of the AIR-706P. Welcome page when WAN is not detected. Welcome page when WAN is detected. - Page 18 In the Welcome page, you may either click Manual Setup (when WAN is not detected or if WAN cable is not plugged in) or Proceed when WAN cable is plugged Change Password Allows you to give a new password to access your Web User Interface or the Smart Network App.
- Page 19 Connection Method and DNS Setup to desired. For M1, Singtel and Starhub, their configurations are pre-set and no changes can be made at this point. To configure the Internet; NOTE: Clicking Skip will not complete your setup 1. Choose an ISP profile 2.
- Page 20 Singtel Profile Internet Configurations When Singtel profile is selected, VLAN is Activated and Priority and VLAN ID is set to 0 and 10 respectively. WAN mode is Ethernet, Connection type is IPoE, Connection method is DHCP and DNS setup is Dynamic. Starhub Profile Internet Configurations In Starhub Profile, WAN mode is set to Ethernet, Connection type is IPoE,VLAN is deactivated, Connection method is DHCP and DNS setup is Dynamic.
- Page 21 SSID of your AIR-706P. 3. You may designate a Network Password for your wireless network. 4. Click Next NOTE: The Default SSID and Network key for your AIR-706P can be seen on the device label sticker of your device.
- Page 22 This can be done so by disabling the Smart AP. When Disabled, you may choose to set the SSID for both the AIR-706P’s 2.4GHz and 5.0GHz. The passwords for the SSID network can be kept the same when you click on the Keep same password checkbox.
- Page 23 Summary Allows you to view the summary of the settings done in Quick Setup Wizard. If there are any settings not in order, you may click on the Go Back button to change the settings in the previous pages. Once everything is set accordingly, ensure to click on the Finish Button.
- Page 24 Summary page when Singtel profile is selected. Summary page when Starhub profile is selected. Once the Internet is all set up, the Internet Status icon turns from Red to White.
-
Page 25: Basic
Basic Allows you to configure the basic properties of your AIR-706P. This includes the basic wireless network properties, basic setting configurations such as parental control and other features. There are 7 different tabs in the left side panel of the basic page. - Page 26 The summary shown in the LAN Connection shows the LAN summary inclusive of the LAN IP Address and LAN MAC Address. In the LAN Connection, the Dynamic Host Configuration Protocol (DHCP) Client List is also displayed here. DHCP Client refers to the client connected to the AIR-706P.
- Page 27 Right column of the Internet Settings In the right column of the Internet Settings allows you to configure the WAN mode, VLAN, Priority, VLAN ID, Connection Method and DNS Setup. For Singapore Fibre Residents, when M1 or Starhub are set as your ISP profile, the Right column will be shown as below.
- Page 28 The VLAN and the Connection Method will not be part of the settings when WAN mode is Mobile 2. Choose a setting for the VLAN. When VLAN is Activated, set the following; a. Set the Priority b. Set the VLAN ID 3.
- Page 29 Wireless Allows you to configure your router’s basic wireless features. The Wireless also allows you to Enable/Disable the Smart AP Steering and modify the Authentication Mode and set the Network Key. It also shows the summarised Wi-Fi settings of your router. Left Column of the Wireless Setup Allows you to Enable or Disable the Smart AP Steering and to configure the SSID, Authentication mode and Password when Smart AP Steering is Enabled.
- Page 30 You may designate a new SSID or a Wireless Network Name for your wireless network or use the same SSID of your AIR-706P you set during Quick Setup. 3. Select an Authentication mode on the drop down list. It is highly suggested to use Mixed WPA2/WPA-PSK as its authentication.
- Page 31 Summary of 2.4GHz and 5GHz settings The existing settings summary in the Right column is displayed in the left column under Current WiFi Settings. To view either 2.4Ghz or 5.0GHz, click on either the 2.4GHz and 5.0GHz tab respectively. Right column of the Wireless Setup Allows you to configure the SSID, Authentication mode, Password and Channel when Smart AP Steering is Disabled.
- Page 32 When Smart AP Steering is Disabled, the Right column will display as below. To configure the 2.4GHz of the Wireless Setup; 1. You may set the 2.4GHz frequency band to Enabled/Disabled. Once Disabled, the 2.4GHz SSID will not be visible. 2.
- Page 33 To configure the 5.0GHz of the Wireless Setup; 1. You may set the 5.0GHz frequency band to Enabled/Disabled. Once Disabled, the 5.0GHz SSID will not be visible 2. You may designate a new SSID or a Wireless Network Name for your 5.0GHz wireless network.
- Page 34 C. WiFi Radar Allows you to see the devices connected to the AIR-706P’s 2.4GHz and 5.0GHz Wi-Fi Network. There are two tabs in the Wi-Fi Radar; Wi-Fi Radar Wi-Fi Table Wi-Fi Radar In this page, it enables you to see the connected devices and to know their signal strength.
-
Page 35: Site Survey
You may move your mouse cursor over to the icon and it will show more information about the device such as its IP address, MAC address and signal strength value (RSSI). Wi-Fi Table In the Wi-Table, you will be able to see the connected devices your router’s 2.4GHz and 5.0GHz frequency band. - Page 36 To filter the frequency, channel and bandwidth; 1. Select the frequency from the 2.4GHz/5.0GHz dropdown list 2. Select the channel from the channel dropdown list 3. Select the bandwidth from the bandwidth dropdown list 4. Click Scan...
- Page 37 Channel Capacity Allows you to view the Channel Statistics inclusive of the WiFi and Non-WiFi interferences as well as the available bandwidth for each channel. It also displays the current channel, current channel bandwidth and available capacity your router has. You can filter to view 2.4GHz and 5.0GHz frequency bands’ Channel Statistics respectively by choosing from the dropdown list.
- Page 38 Metric Allows you to view most of the counters like Aggregated Mac Protocol Data Unit (AMPDU), glitch, chanim (also can be referred to transferred packet) and Packet Queue Statistics. This page can help you in your troubleshooting. A live graph for different counters is displayed on this page to keep track of the counter statistics.
- Page 39 E. Guest Access Allows you to have two separate Wi-Fi access points — a primary, secure one for yourself and an isolated one for your guests. Guests who join the guest Wi-Fi network are given Internet access, but they will not be able to access your primary network. To configure the Guest Network;...
- Page 40 To configure your router’s Access Time Restriction; 1. Click Add 2. Your page will be redirected to this page: 3. Assign a Rule Name 4. Select the MAC Address of the device you wish to restrict. 1. My Device MAC Address refers to the device you are using to access the Web Interface 2.
- Page 41 Port Number field blank and the default port will be assigned. G. USB AIR-706P provides two 3.0 USB ports for connecting your USB devices and USB printer to allow you to share files and printer with clients in your network. You may also...
- Page 42 Volume name, disk1_1. The second USB device you plug in will be disk2_2. In this page, the basic information about your USB is displayed. NOTE: AIR-706P works with most USB thumb drives and USB hard disk (up to 2TB) and supports FAT 32 and NTFS read-write access.
- Page 43 Torrent Setup AIR-706P has a built-in torrent client to manage your torrent files without the need of an additional application for torrent. By default, Torrent Client is Disabled. Once Enabled, a Torrent tab will be added to the Navigation Panel. You can configure your torrent setup in this page.
- Page 44 H. Torrent Allows you to upload and download torrent files such as videos, audio and picture using the built in torrent client provided. Uploading Torrent File To upload a torrent file for downloading; 1. Click on the folder 2. You can upload your torrent file from your PC by clicking Choose File. Alternatively, you may provide the URL of the torrent file.
- Page 45 Pausing and Resuming your download There are two sets of pause and resume buttons for you to control your torrent. To pause and resume one torrent download; 1. Click on file 2. Click on the pause icon found in the middle of the button panel when you wish to pause your download 3.
- Page 46 To pause and resume all torrent downloads; 1. Click on the pause icon found on the right of the button panel when you wish to pause all torrent downloads 2. Click on the resume icon found on the right of the button panel when you wish to resume all paused torrent downloads To stop your torrent download;...
-
Page 47: Advanced
Advanced Some of the features included in the Advanced allows you to; (1) access the Advanced Setup of the features of your AIR-706P (2) view the router’s information and connected devices (3) configure the router’s security settings (4) configure your advanced wireless settings, (5) view the router’s diagnostics and (6) manage your router. - Page 48 (2) DHCP Client. 1. Device Info Summary Displays a brief summary of your AIR-706P’s device properties such as its model, the current firmware version loaded into your router, the device’s unique MAC address, the system up time, and other similar properties such as your LAN IPv4 Address and default gateway.
- Page 49 B. Statistics Allows you to see the LAN statistics where it displays the current statistics of both the received and transmitted packets of the LAN. A Reset Statistics button is provided to reset the statistics displayed and you can use the scroll bar to display the transmitted packet.
- Page 50 1. LAN Allows you to configure the DSL Router IP Address and Subnet Mask for LAN interface. You may also configure the DHCP server and Public IP Pass Through settings of your router. This page also displays the DHCP Client list connected to the modem/router.
- Page 51 1. Enter the preferred IP Address and corresponding subnet mask that you wish to assign to your AIR-706P. NOTE: The IP Address to be specified in this area will be the new default IP Address you would be using to access your AIR-706P web user interface.
- Page 52 (Optional) - Static IP Lease List. Displays the statically assigned IP addresses in the network, each device’s MAC Address and assigned IP Address can be seen in this table. It also allows you to remove reserved IP addresses as well. To reserve a device: 1.
-
Page 53: Device Mode
Allows you to set your AIR-706P as a Router or Access Point. Router Mode In Router mode, the AIR-706P connects to the Internet and shares the wireless network to LAN clients or devices. Features such as Firewall, NAT features and DHCP server are enabled. - Page 54 4. UPnP Allows you to enable the Universal Plug and Play feature of your AIR-706P. The UPnP feature allows an easier means of device discovery in your network (e.g. network printer etc.). This is Enabled by default.
-
Page 55: Dns Proxy
Printers using the USB port come with a software installation CD for installing printer drivers and applications. The drivers for the printers must be installed on the computer first to prepare it for use after connecting it to your AIR-706P. Refer to the printer’s documentation on how to install the drivers. - Page 56 Connecting the Printer 1. Turn OFF the AIR-706P. 2. Connect the Printer on the USB port and switch it ON. To Add a Network Printer ; For Windows a. Click on the Start Button> Control Panel. b. On Devices and Printers Category, Click on the Add a Printer...
- Page 57 c. On the Add printer window, click on the Add a network, wireless or Bluetooth printer button. d. Your computer would automatically search for connected printers. Click on Stop on Searching for available printers… page. 2. Click on The printer that I want isn’t listed button.
- Page 58 3. Click on Select a shared printer by name on the Find a printer by name on TCP/IP address, and input the following URL on the field and click on Next. This is the printer name that you've set earlier http://192.168.1.254:631/printers/PrinterBrotxx 4.
- Page 59 AIR-706P. Print function however is the only feature that will work on these printer types when connected to the AIR-706 router. 3. Refrain from connecting a USB Hub on the USB port of the AIR-706P. 4. Not all Printer Models are supported.
- Page 60 1. Enable the DLNA feature by ticking the Enable on-board digital media server 2. The interface is set to Default 3. Enter the Media Library Path. Eg; /mnt/disk1_1 NOTE: Ensure that your USB devices are plugged in to the AIR-706P before using the DLNA feature.
- Page 61 To enable the Auto Reboot feature; 1. Enable the feature by ticking Enable Auto-Reboot checkbox 2. Select the day you wish to configure your AIR-706P to automatically reboot 3. Set the time for the automatic reboot 4. Click Apply/Save...
- Page 62 9. Multicast Precedence Allows you to enable the Multicast Precedence property of your router, and configure the default IGMP and MLD (for IPv6) protocol settings set on your router.
- Page 63 10. NAT Allows you to configure the Port Forwarding, Port Triggering, and DMZ settings of your router. It has the following submenus: Port Forwarding Port Triggering DMZ Host Port Forwarding Port Forwarding allows you to direct incoming traffic from the Internet to a specific computer in your local network.
- Page 64 1. Click the Add button. 2. Determine the interface that would be used. 3. You can select a service on the Select a Service drop down list (if the application needed is present). 4. If the application needed is not present on the dropdown list, you may have to select Custom Service.
- Page 65 To add a port trigger: 1. Click the Add button. 2. Determine the interface that would be used. 3. You can select an application on the Application drop down list (if the application needed is present). 4. If the application needed is not present on the dropdown list, you may have to select Custom Application.
- Page 66 To remove a port trigger: 1. Tick the corresponding checkbox of the application. 2. Click Remove to remove the port triggered application. DMZ Host Allows you to assign a computer as a DMZ Host. It will then receive all the data from the Internet that does not belong to the list of applications configured in Port Forwarding.
-
Page 67: Quality Of Service
11. Quality of Service Quality of Service or QoS provides different priorities to different applications, users, or data flows, to guarantee a certain level of performance. It has the following submenus: QoS Queue QoS Classification QoS Port Shaping QoS Queue Allows you to queue services in each Ethernet Interface. - Page 68 Qos Classification Allows you to view and customize the rules or policies which would be implemented in QoS queues. To add a Network Traffic Class Rule: 1. Click the Add button. 2. Enter the preferred Traffic Class Name. 3. Enter the Rule Order priority and identify its Rule Status. 4.
- Page 69 Allows you to configure the setup of the QoS Port Shaping. If the ―Shaping Rate‖ is set to ―-1‖, it means no shaping and ―Burst Size‖ will be ignored. 12. Routing Allows you to configure the routing of your AIR-706P. It has the following sub-menus; Static Routing ...
- Page 70 4. Key in the Gateway IP Address and Metric 5. Click Apply/Save for the settings to take effect Policy Routing Allows you to configure the routing of your AIR-706P in to the routing decision based on the policy set by the network adminatrator.
- Page 71 To configure the policy routing; 1. Define the Policy Name 2. Select the Physical LAN Port 3. Key in the Source IP 4. Select the Interface 5. Key in the Default Gateway IP 6. Click Apply/Save RIP Configuration Allows you to activate the RIP for the WAN interface by checking the Enabled checkbox.
- Page 72 To configure the RIP Configuration; 1. Select a Version for the interface you wish to configure 2. Select the Operation 3. Tick the Enabled checkbox for the interface you wish to enable. 4. Click Apply/Save 13. DNS The router offers a Dynamic Domain Name System (DDNS) feature. DDNS lets you assign a fixed host and domain name to a dynamic Internet IP Address.
- Page 73 To remove a DDNS setting: 1. Tick the Remove box that corresponds to the DDNS Hostname that you wish to remove. 2. Click the Remove button. 14. IP Tunnel Allows you to configure the IP tunneling properties of both IPv6 and IPv4. NOTE: Only 6rd configuration is currently supported To add a IP Tunneling;...
- Page 74 AIR-706P supports WPS (Wi-Fi Protected Setup) which is a wireless security standard that allows your devices to connect to a wireless network. You may connect your devices to your AIR-706P via WPS by pressing the WPS button of your router. To connect via WPS;...
- Page 75 D. Security The Security menu allows you to create various filters that would be implemented in the network such as incoming and outgoing IP filters, access time restriction, and URL filtering. It has the following submenus: Outgoing IP Filtering ...
- Page 76 To remove a filter: 1. On the Filter table, tick the checkbox that corresponds to the Filter Name that you wish to remove. 2. Click Remove to remove the filter. Incoming IP Filter Allows you to add, configure, remove Incoming Filters that will Block specific data traffic to and from the Internet.
- Page 77 To add an Incoming IP filter: 1. Click the Add button. 2. Input the preferred Filter Name. 3. Determine the IP Version that the filter will use. 4. Select the Protocol. 5. Enter the Source’s IP Address, and Source Port. 6.
- Page 78 E. Wireless The Wireless menu in advanced mode allows you to fully configure the overall features provided by the 2.4GHz and the 5.0GHz wireless frequency bands. It has the following submenus: 2.4 GHz 5.0 GHz 1. 2.4 Ghz Allows you to configure the overall properties of the 2.4GHz wireless frequency band.
- Page 79 SSIDs, and its WPS properties. MAC Filter The MAC Filter page will provide additional protection to your wireless network. It allows or denies Wireless Devices from accessing the AIR-706P with the use of the MAC address which is unique for every network device.
- Page 80 To add a MAC Filter: 1. Select the SSID you wish to apply the Policy. 2. Specify your preferred Policy. Disable. Disables the application of a MAC Filter to a specific device or to all the MAC Addresses specified in the list. ...
- Page 81 Wireless Bridge Allows you to configure the wireless bridge features of the wireless LAN interface. To configure your Wireless Bridge; 1. Select the Bridge Restrict Enabled. Enables wireless bridge restriction, with bridges selected in Remote Bridges having access. Disabled.
- Page 82 Advanced Allows you to configure the Advanced features of the wireless LAN interface. You can select a particular channel on which to operate for the transmission to consistently stay on a particular speed, set preferred fragmentation/RTS threshold, identify wakeup intervals for clients in power save mode, determine a beacon interval for the access point, and other advanced wireless properties.
- Page 83 2. 5.0 GHz Allows you to configure the overall properties of the 5.0GHz wireless frequency band. It has the following submenus: Basic Security MAC Filter Wireless Bridge Advanced Station Info NOTE: The configurations for Security, MAC Filter and Wireless Bridge for 5.0 GHz is similar to 2.4 GHz.
- Page 84 Advanced Allows you to configure the Advanced features of the 5.0GHz wireless LAN interface. You can select a particular channel on which to operate, identify the DTIM interval, and determine a beacon interval for the 5.0GHz frequency band. Station Info Provides a brief table of all the wirelessly connected devices to the 5.0GHz band, each devices’...
-
Page 85: System Log
F. Diagnostics Allows you to perform diagnostic tests on all the ports of your AIR-706P including its wireless connection. It also displays the status of all ports (Ethernet, WAN, and USB), including the status of your wireless connectivity. G. Management The Management menu page allows you to perform configuration backup, settings update, and default restore. -
Page 86: Snmp Agent
2. SNMP Agent Allows you to configure SNMP settings, simply type the SNMP information on the required field and click Apply for the settings to take effect. You have to Enable to use this feature. 3. Internet Time Allows you to automatically synchronize the router’s time configuration to preferred NTP time servers, and set time zone offset that the router will use. -
Page 87: Access Control
4. Access Control Allows you to enable or disable services from being used on the LAN and WAN interface. 5. Passwords Allows you to change the current password implemented for the Web User Interface. By default, there is no password set for the Web User Interface. ... -
Page 88: Firmware Upgrade
6. Firmware Upgrade Allows you to update the firmware of your router. It is highly recommended to ONLY UPDATE your router using OFFICIALLY RELEASED Aztech firmware downloadable from our Aztech Support Site (www.aztech.com). 7. Reboot This feature allows your router to enable new network configurations to take effect or to clear problems with the router’s network connection. - Page 89 Update Allows you to update the router settings from a previously stored backup file on a computer. To update the router settings: 1. Click on the Choose File button. 2. Locate the backupsettings.conf file from your computer. 3. Click Open. 4.
-
Page 90: Aon Mesh
AON Mesh Primarily designed for FTTH via ONT or Cable Modem connectivity, the AIR-706P is an AON Mesh Ready router. Unlike traditional routers, AON Mesh-enabled products work together to deliver improved coverage and to provide a spectral blanket spread eliminating the usual ―hard-to-get‖ areas especially blind spots or dead zones. - Page 91 In the Mesh Controller Web User Interface, it allows you to see the connected nodes to your main AIR-706P router through the Mesh Network tab. Just like in the stand- alone router’s Basic page, you will have access in the Internet, Guest Access, Parental Control and USB menus.
-
Page 92: Mesh System Setup
Mesh Nodes. Mesh System Setup You will be able to set your Mesh System with your existing AIR-706P and Aztech Mesh ready devices. You need to have an existing AIR-706P with internet access. Setting up your Mesh System Your secondary Aztech Mesh ready router will be your mesh node. - Page 93 1. Position your mesh node near the existing AIR-706P router and plug the power adapter to the mains. 2. Press and hold the WPS button of the existing AIR-706P until the LED starts to blink. 3. Press and hold the WPS button of the mesh node until the LED starts to blink.
- Page 94 1. Position your mesh node near the existing AIR-706P router and plug the power adapter to the mains. 2. Press and hold the WPS button of the existing AIR-706P until the LED starts to blink. 3. Press and hold the WPS button of the new mesh node until the LED starts to blink.