Table of Contents
Advertisement
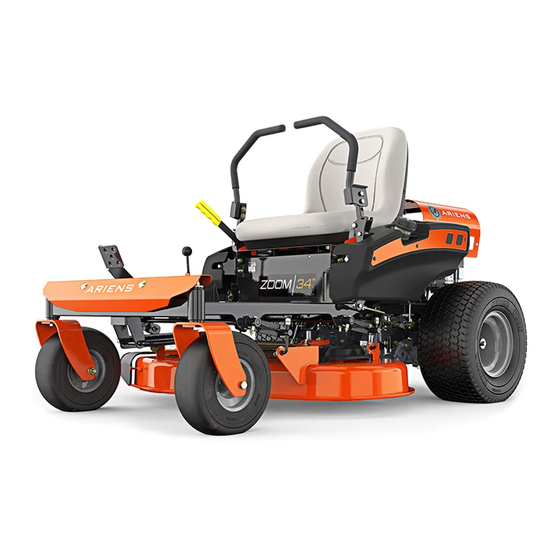
Models
915211 – Zoom 34
(SN 000101 +)
915213 – Zoom 42
(SN 000101 +)
915215 – Zoom 50
(SN 000101 +)
915209 – Zoom 34 CARB
(SN 000101 +)
915233 – Zoom 42 CARB
(SN 000101 +)
915235 – Zoom 50 CARB
(SN 000101 +)
E10
Operator's Manual
Manuel du Utilisateur
ENGLISH
FRANÇAIS
Zoom
04965800A
Printed in USA
®
•
2/17
Advertisement
Table of Contents

Related Manuals for Ariens 915213 – Zoom 42


Summary of Contents for Ariens 915213 – Zoom 42
- Page 1 ® Zoom Operator’s Manual Manuel du Utilisateur Models 915211 – Zoom 34 (SN 000101 +) 915213 – Zoom 42 (SN 000101 +) 915215 – Zoom 50 (SN 000101 +) 915209 – Zoom 34 CARB (SN 000101 +) 915233 – Zoom 42 CARB (SN 000101 +) 915235 –...
-
Page 2: Table Of Contents
All reference to left, right, front, or rear are given from operator seated in operation PRODUCT REGISTRATION position and facing the direction of forward The Ariens dealer must register the product travel. at the time of purchase. Registering the ENGINE MANUAL... -
Page 3: Safety
(CARB) regulations. Tampering with emission 6. Fill out a product registration card and controls and components by unauthorized return the card to the Ariens Company or personnel may result in severe fines or go to www.ariens.com penalties. Emission controls and components... - Page 4 If you have purchased this NOTICE: General reference information for product from an Ariens dealer, the dealer can proper operation and maintenance practices. provide you with training. IMPORTANT: Specific procedures or...
- Page 5 07800401 KEEP HANDS and FEET AWAY 07800403 Figure 2 EN - 5...
- Page 6 1. DANGER! 3. DANGER! Discharge Hazard - NEVER operate unit without discharge chute in DANGER! operating position. Thrown objects can cause injury or damage. Do not operate mower Read and understand the unless all guards are in operator’s manual before operating position or operating unit.
- Page 7 3.3 Tipping Hazard Look behind when operating the unit in reverse. Avoid tipping hazard. 3.6 Loss of Traction Hazard If loss of traction is DO NOT operate on slopes experienced do the over 15°. following: DO NOT operate on slopes over 15°.
- Page 8 Safety Rules The following safety instructions are based ALWAYS Keep hands and on ISO 5395 and the B71.1 specifications of feet away from discharge the American National Standards Institute in chute. effect at the time of production. Training Dismemberment Hazard - Read, understand, and follow all instructions NEVER put hands or feet on the machine and in the manual(s) before...
- Page 9 Inspect unit before each use for missing or Children damaged decals and shields, correctly Tragic accidents can occur if the operator is operating safety interlock system, and not alert to the presence of children. deterioration of grass catchers. Replace or Children are often attracted to the machine repair as needed.
- Page 10 NEVER direct discharged material toward Check for weak spots on docks, ramps or anyone. Avoid discharging material against floors. Avoid uneven work areas and rough a wall or obstruction. Material may ricochet terrain. Stay alert for hidden hazards or back toward the operator. Stop the blade(s) traffic.
- Page 11 NEVER store the machine or fuel container where there is an open flame, spark or pilot Use only Ariens Company-recommended light such as on a water or space heater or attachments that are appropriate to your use other appliances.
- Page 12 ALWAYS wear safety glasses and protective Transporting Unit gear near battery. Use insulated tools. Use extra care when loading or unloading ALWAYS keep batteries out of reach of the machine into a trailer or truck. children. Secure unit chassis to transport vehicle. Battery posts, terminals and related NEVER secure from rods or linkages that accessories contain lead and lead...
-
Page 13: Assembly
ASSEMBLY WARNING: AVOID INJURY. Read and understand the entire Safety section before proceeding. Tools Required • Adjustable wrenches • Petroleum jelly or dielectric grease Unpack Unit Remove unit and all other components from 1. Steering Lever the shipping container. Engage transmission 2. - Page 14 Level Mower Deck See Leveling and Adjusting Pitch of Mower Deck on page 24. Fill Fuel Tank Fill fuel tank. DO NOT OVERFILL! See Filling Fuel Tank on page 19. Check Safety Interlock System WARNING: Safety interlock failure and improper operation of unit can result in death or serious injury.
-
Page 15: Controls And Features
CONTROLS AND FEATURES Figure 4 1. Ignition Switch 11. Throttle Lever 12. Choke 2. PTO Switch 13. Seat Adjustment Lever (Models 915213, 3. Seat 915215, 915233, 915235) 4. Fuel Level 14. Height of Cut Selector Lever 5. Steering Levers (2) 15. -
Page 16: Operation
See Figure 4 for all controls and features Perform the following tests to ensure the locations. safety interlock system is working properly. If the unit does not perform as stated contact your Ariens dealer for repairs. Test Steering Lever Parking Brake Engine... - Page 17 Steering Levers Seat Adjustment • Reverse (1) – Pull both steering levers Models 915213, 915215, 915233, 915235 backward. (Figure 6) • Forward (2) – Push both steering Push lever back and slide seat forward or levers forward. backward to the desired position. Release •...
- Page 18 Washout Port 4. Pull back the lock collar of the hose coupling and push the coupling onto the Models 915213, 915215, 915233, 915235 deck port until the coupling it tightly in (Figure 7) place. Release the lock collar to lock the coupling to the deck port.
-
Page 19: Filling Fuel Tank
Fuel Level IMPORTANT: Excessively oxygenated or reformulated fuels (fuels blended with Slot in seat plate shows the fuel alcohols or ethers) can damage the fuel level in the tank. Refill when system or cause performance problems. If level reaches bottom of slot. any undesirable operating problems occur, use a gasoline with a lower percentage of alcohol or ether. -
Page 20: Moving Unit Manually
Stopping the Engine MOVING UNIT MANUALLY 1. Stop unit. (Figure 8) 2. Disengage PTO. WARNING: DO NOT disengage 3. Set throttle lever to slow. or bypass transmission and coast 4. Turn ignition switch to off position and downhill. remove key. 5. -
Page 21: Maintenance Schedule
Engage parking brake and engage transmission bypass lever. See Parking Moving Unit Manually on page 20. Push unit. If unit rolls, contact your Brake Ariens dealer. Clean Clean engine, battery, seat, etc. of all dirt and debris. Do not use Unit solvents, hard cleaners, or abrasives. - Page 22 Interval Task Action Check Keep battery and battery terminals clean. See Cleaning Battery and Battery Battery Cables on page 28. Lubricate 1. Apply grease to zerk (1) on each front wheel. Unit 2. Apply grease to quick adjust seat mechanism through slots (2) on bottom side of seat plate.
-
Page 23: Service And Adjustments
MOWER DECK REMOVAL AND SERVICE AND INSTALLATION ADJUSTMENTS Remove (Figure 11) WARNING: AVOID INJURY. 1. Remove PTO belt from the engine drive Read and understand the entire pulley. See Replacing PTO Belt on Safety section before proceeding. page 30. 2. Disconnect drag link from the front deck bracket. - Page 24 1. Rear Trunnion 2. PTO Belt 3. Mower Deck 4. Drag Link 5. Front Trunnion 6. Lift Arms 7. Nuts Figure 11 LEVELING AND ADJUSTING Lowest Cutting Position PITCH OF MOWER DECK Pitch is the difference in blade height from front to back or from side to side.
- Page 25 The Forward Pitch Of The Mower Adjusting The Mower Deck To Adjust Blades Mower Blade Height And Pitch (Figure 13) (Figure 15) • Front tip of blades should be NOTICE: Adjusting the mower deck will 0 – 0.6 cm (0 – 1/4") lower than the adjust the height and pitch of the mower rear of the blades.
-
Page 26: Replacing Mower Blade
REPLACING MOWER BLADE 1. Remove mower blade from unit. See Replacing Mower Blade on page 26. Remove Ariens recommends having mower blades (Figure 16) sharpened by a professional. Contact your Ariens dealer. CAUTION: Mower blades are Discard mower blade if (Figure 17): sharp and can cut you. - Page 27 SERVICING YOUR BATTERY 4. Remove nut and bolt securing battery hold down bracket. Save for NOTICE: Unit comes equipped with a reinstallation. maintenance-free battery that requires no NOTICE: The bolt securing the battery is regular maintenance except cleaning the mounted through the underside of the frame. terminals.
- Page 28 Installation on page 27. Jump-Starting 5. Connect positive (+) cable first, then negative (–) cable. Ariens does not recommend jump-starting your unit. Jump-starting can damage engine 6. Apply petroleum jelly or dielectric grease to battery cable ends and terminals. and electrical system components. See your engine manual for more detailed information.
- Page 29 CARBON CANISTER FILTER ADJUSTING STEERING LEVERS Models 915209, 915233, 915235 (Figure 22) (Figure 21) Adjustment 3 Adjustment 1 1. Carbon Canister 2. Carbon Canister Filter Figure 21 Clean or replace the carbon canister filter Adjustment 2 whenever the engine air filter is cleaned or replaced.
-
Page 30: Replacing Pto Belt
Rotate this end away from the operator position to move the steering levers in. Rotate this end away from the operator position to move the steering levers out. 1. Forward Travel Adjustment Bolt Figure 23 2. Lower Control Arm Figure 24 3. -
Page 31: Replacing Hydrostatic Belt
Install Models 915209, 915211 (Figure 25) NOTE: Do not install PTO belt on left mower deck pulley in step 1. 1. Install PTO belt on engine drive pulley and mower deck. 2. Rotate idler arm clockwise until PTO belt can be routed around left mower deck pulley. -
Page 32: Storage
STORAGE Short Term Storage IMPORTANT: NEVER clean unit with high- pressure water or store unit outdoors. Remove all dirt, grease, leaves, etc. Store in a clean dry area. Inspect unit for signs of wear or damage. Ensure all fasteners are properly tightened. Long Term Storage Follow all instructions under Short Term Storage. -
Page 33: Troubleshooting
Connect spark plug wire(s) or replace loose or spark plug(s) spark plug(s). Refer to Engine Manual faulty. for detailed instructions. Faulty electrical system. 6. Contact your Ariens dealer. Faulty engine. Contact your Ariens dealer. Choke engaged. Disengage choke. Air filter cartridge Clean or replace air filter cartridge. -
Page 34: Service Parts
(see Replacing Mower Blade on page 26). SERVICE PARTS ACCESSORIES Be sure to always use genuine Ariens parts See your authorized Ariens dealer to add to keep your unit running like new. these optional accessories to your unit. -
Page 35: Specifications
SPECIFICATIONS Model Number 915211 915213 915215 Model Zoom 34 Zoom 42 Zoom 50 Engine Type Kohler 6000 660 (40.3) Engine Displacement – cm Maximum RPM – No Load 3600 + 0 / - 100 Drive Forward Max. – km/h (mph) 9.6 (6.0) Reverse Max. - Page 36 SPECIFICATIONS Model Number 915209 915233 915235 Model Zoom 34 Zoom 42 Zoom 50 CARB CARB CARB Engine Type Kohler 6000 Series 660 (40.3) Engine Displacement – cm Maximum RPM – No Load 3600 ± 75 Drive Forward Max. – km/h (mph) 9.6 (6.0) Reverse Max.
-
Page 37: Zoom
Register the product immediately at the time of sale. If the dealer does not register the product, the customer must complete the product registration card in the literature package and return it to the Ariens Company, or register the unit online at www.ariens.com, www.gravely.com, www.countax.com. -
Page 38: Zoom
Exclusions – Items Not Covered by This Warranty • Parts that are not genuine Ariens, Gravely or Countax service parts are not covered by this warranty and may void the warranty. • Damages resulting from the installation or use of any part, accessory, or attachment which is not approved by the Ariens Company for use with product(s) identified herein are not covered by this war- ranty. - Page 40 655 West Ryan Street Brillion, WI 54110 ariensstore.com ariens.custhelp.com parts.ariens.com...