
Related Manuals for Hisense WFU7012


Summary of Contents for Hisense WFU7012
-
Page 1: Washing Machine
WASHING MACHINE SERVICE MANUAL WFU7012&WFU7012S WFUA7012&WFUA7012S CAUTION READ THIS MANUAL CAREFULLY TO DIAGNOSE PROBLEMS CORRECTLY BEFORE SERVICING THE UNIT. -
Page 2: Table Of Contents
CONTENTS CONTENTS 1. SAFETY NOTICES………………………………………………….…….…1 2. SPECIFICATIONS…………………………………………………………...3 3. FEATURES & TECHNICAL EXPLANATION…………………..………….4 3.1 FEATURES ..................3 3.2 INTELLIGENT FUZZY CONTROL ............4 3.3 POWER SUPPLY CONTROL .............. 4 3.4 WATER LEVEL CONTROL ..............5 3.5 DOOR LOCK CONTROL ..............5 ... - Page 3 CONTENTS 7.2 PROGRAM CHART ................23 8. TEST MODE..................25 8.1 SELF-INSPECTION MODE ............... 24 8.2 SPECIAL FUNCTION MODE ............26 9. TROUBLESHOOTING................29 9.1 SAFETY CAUTION ................28 9.2 ERROR MODE SUMMERY .............. 28 9.3 TROUBLESHOOTING WITH ERROR ..........30 ...
-
Page 4: Safety Notices
1. SAFETY NOTICES • Cut off the power first before maintaining and repairing the washing machine. • It is for preventing from harms duet to electric leakage. The nut connecting water • Please do not sprinkle or spray water directly inlet tube to the machine to any part of the washing machine during must be screwed up. -
Page 5: Specifications
2. SPECIFICATION ITEM WFU7012& WFUA7012/ WFU7012S& WFUA7012S COLOR WHITE/SILVER POWER SUPPLY AC 220-240 V,50 Hz PRODUCT WEIGHT 72 Kg WASHING 300 W ELECTRIC POWER CONSUMTION HEATER 1900 W WASH 55 rpm REVOLUTION SPEED SPIN 1200 rpm CYCLES WASH/RINSE TEMPERATURES 20-❉/30/40/60/95℃... -
Page 6: Features
3. FEATURES & TECHNICAL EXPLANATION 3.1 FEATURES ■ Ultra Capacity The larger drum enables not just higher head drop and stronger centrifugal force, but also less tangling and wrinkling of the laundry. Heavier loads, such as king size comforters, blankets, and curtains, can be washed. ■... -
Page 7: Features & Technical Explanation
3. FEATURES & TECHNICAL EXPLANATION 3.2 INTELLIGENT FUZZY CONTROL In order to achieve the best washing effects, it is necessary to determine the optimum time and washing water level based on the water supply conditions. Handling • washing program • washing time •... -
Page 8: Water Level Control
3. FEATURES & TECHNICAL EXPLANATION ♦ When the program finishes and displays “End”, the door will be unlocked, and the PCB will enter in “End mode”. ♦ If no button-press operation is done for 3 minutes when the washing machine is under “Ready mode”, the PCB will automatically be power off and switch to “Off mode”. -
Page 9: Laundering Control
3. FEATURES & TECHNICAL EXPLANATION are satisfied, otherwise, the door should be maintained locked. ♦ After selecting the program and function, press the “Start/Pause” button, the PCB controls the door lock to execute locking operation, and the “Door lock” icon on display window is on. ♦... -
Page 10: Heating Control
3. FEATURES & TECHNICAL EXPLANATION Course Water inflow Pre-wash Wash Rinse Motor speed 45rpm 55rpm 55rpm 55rpm Rotation/Stop ratio 10:5 20:10 20:10 12:8 3.7 HEATING CONTROL ♦ When the temperature set by the user is higher than the water temperature, the PCB will control the heater to function and run the heating process until the water temperature reaches the set temperature. - Page 11 3. FEATURES & TECHNICAL EXPLANATION ♦ During the distribution measurement, time is not reckoned in the first 10 times, and if the distribution measurement still fails, then the time will decrease progressively and occupy the Spinning time until the latter is run out. ♦...
-
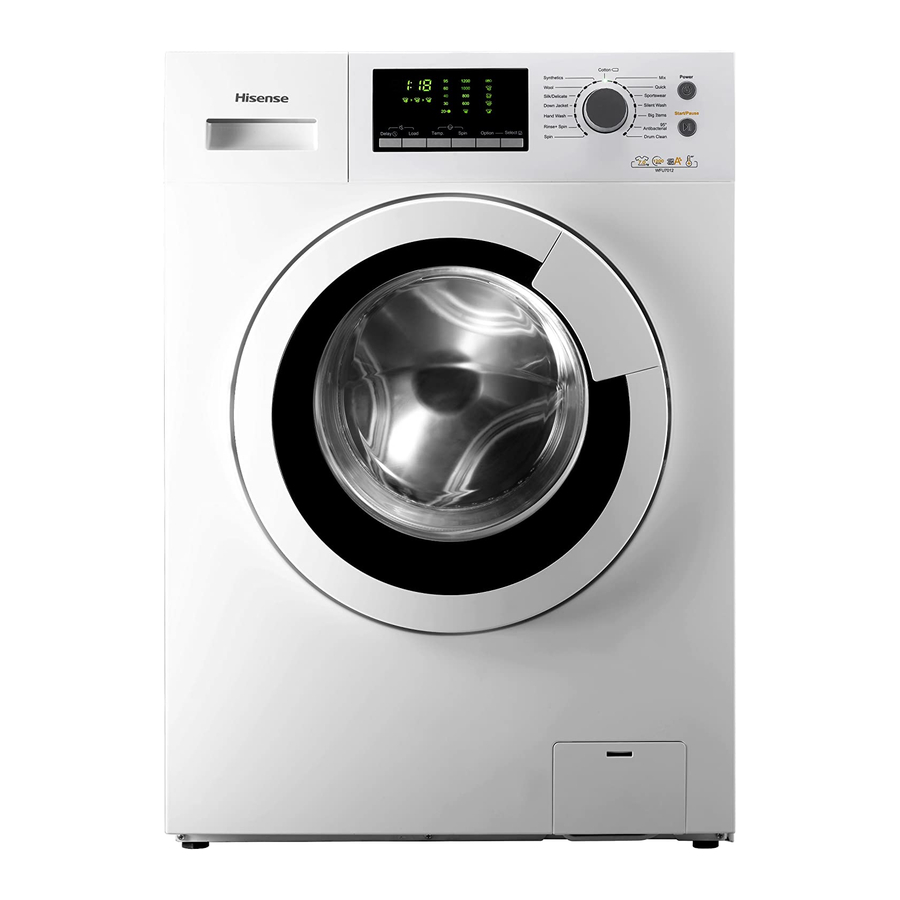
Page 12: Parts Identification
4. PARTS IDENTIFICATION MARKS OF PARTS 1. Top Cover 2. Control Panel 3. Lifter 4. Drain Hose 5. Power Plug 6. Filter Cover Cap 7. Dispenser 8. Door 9. Drum 10. 4 Adjustable Feet 11. Drain Pump Filter As for the product improvement and expansion in series, products purchased by you may differ from the graphical representations in this... -
Page 13: Standard Installation
5. INSTALLATION AND TEST 1. Before servicing, ask the customer what the trouble is. 2. Check the setup (power supply is 220-240V AC, remove the transit bolts, level the washer..). 3. Check with the troubleshooting guide. 4. Plan your service method by referring to the disassembly instructions. 5. -
Page 14: Installation And Test
5. INSTALLATION AND TEST 5.2 CONNECT THE INLET HOSE ♦ Verify that the rubber washer is inside of the valve connector. ♦ Tighten the inlet hose securely to prevent leaks. 5.3 CONNECT THE DRAIN HOSE Avoid submerging the end of the hose Make sure that the hose is not twisted ※... - Page 15 5. INSTALLATION AND TEST Carry out self-inspection on washing machine as per Figure 8-1 or carry out trial run as shown in figure below [CAUTION] Before carrying out inspection in this way, please turn on the special function mode as per Figure 8-2;...
-
Page 16: Control Panel
6. OPERATION 6.1 CONTROL PANEL A: “ON/OFF” button Turn on/off the power with this button B: “Start/Pause” button Start/ Stop the washer with this button C: Cycle Selector Knob Rotate the Cycle selector knob to select the cycle designed for different types of fabric and soil levels. -
Page 17: Operation
6. OPERATION Change the final spinning speed by repeatedly pressing this button to switch over from one option to another. H: “Temp.” button Change the heating temperature of laundering by repeatedly pressing this button to switch over from one option to another. I: “Load”... - Page 18 6. OPERATION...
-
Page 19: Common Functions
6. OPERATION 6.3 COMMON FUNCTIONS Delay Function ♦ This function will allow to select the time your wash program will start. ♦ Select Delay after you have selected the program and other options. ♦ Press the Delay button once and the delay time will increase by 30 minutes. Press and hold the button and the delay time will increase by 30 minutes every 0.4 seconds. - Page 20 6. OPERATION this function by pressing the Load button. The weight of the load can be selected manually. ♦ Press the Load button and the load weight displayed will increase. The display is the weight in kilograms within the range allowable for the wash program selected.
-
Page 21: Additional Functions
6. OPERATION cause damage to the appliance. ♦ If you wish to open the door due to an emergency you must press the Start / Pause button. It is important to check the level of the water inside the drum, and the water temperature, before trying to open the door. - Page 22 6. OPERATION Eco wash ♦ Press the Option button until the Eco icon flashes and press Select. This function is designed to reduce the amount of electricity, water used and save time during the program. ♦ The Eco icon will continue to flash until the program is finished. Prewash ♦...
- Page 23 6. OPERATION Intensive wash ♦ Press the Option button until the Intensive Wash icon flashes and press Select. This function will prolong the wash time with a more intense wash action for washing heavily soiled items. ♦ This function cannot be selected if you select Eco Wash function.
-
Page 24: Wiring Diagram
7. WIRING DIAGRAM/PROGRAM CHART 7.1 WIRING DIAGRAM... -
Page 25: Wiring Diagram/Program Chart
7. WIRING DIAGRAM/PROGRAM CHART... -
Page 26: Program Chart
7. WIRING DIAGRAM/PROGRAM CHART 7.2 PROGRAM CHART... -
Page 27: Self-Inspection Mode
8. TEST MODE 8.1 SELF-INSPECTION MODE Press the “ON/OFF” button to start up the machine, select the “Spin” program, press the “Function” button twice first and then the “Start/Pause” button twice within 5 seconds, the display window displays the model, and the machine will enter into the “Self-inspection mode”... -
Page 28: Test Mode
8. TEST MODE seconds (the said is of mandatory water supply process, which must be performed). If the water level is detected below 4200 via water incoming inspection, then turn on the Main_valve to supply the water to 4200 within limited time, and when the said is completed, the program will enter in C2. -
Page 29: Special Function Mode
(Test mode、 Cycle mode), otherwise, it may lead to mal-operation of users and further affect the normal usage of washing machine. 8.2.1 The display window displays Hisense version No.; 8.2.2 Press the “Function” button to select parameters, and modify the parameters by pressing the “speed/Temp.”... - Page 30 8. TEST MODE 8.2.4 Test mode When the “Test mode” is turned on and the program is running, ♦ Press the “Spin” button to turn on/off the acceleration function, the running of program will be accelerated up to 10 times, with two “:” icons flickering; ♦...
-
Page 31: Safety Caution
9. TROUBLESHOOTING 9.1 SAFETY CAUTION 1. There’s built-in 220-240V AC and DC power in output terminal of PCB in common. Be careful electric shock when disconnecting parts while trouble shooting. (wear electro static discharge gloves when working.) 2. After cutting off the power when changing PCB, disconnect or assemble. 3. -
Page 32: Troubleshooting
9. TROUBLESHOOTING ♦ The heater is out of order. HEATING ERROR Give an alarm after the washing course ends ♦ The rotation speed is not set as 0, but no rotation speed is NO MOTOR SPEED detected within 3s or the rotation speed is below 20rpm, 5 FEEFBACK ERROR attempts ♦... -
Page 33: Troubleshooting With Error
9. TROUBLESHOOTING 9.3 TROUBLESHOOTING Is the connector connected Reconnect WITH ERROR to PCB disconnected or dis- or repair the assembled? connector. WATER INLET ERROR displayed? Clean or Is filter inlet valve clogged replace the with foreign material? Replace the Is Electrical connection filter. - Page 34 9. TROUBLESHOOTING Replace the Is the voltage between DRAIN ERROR connectors out of range? After remove Terminal displayed? Position Assurance (TPA) of connector, check as follows: Is the connector connected Reconnect to pump disconnected or or repair the disassembled? connector. - Pump running : 220-240V±5% - Stopped Motor/Pump : 0~1V Method Select"Spin"program run,the pump start work...
- Page 35 9. TROUBLESHOOTING DOOR LOCK ERROR HEATING ERROR displayed? displayed? Reconnect Is the connector connected Reconnect Is the connector connected or repair the to heater disconnected or or repair the to door lock or PCB connector disassembled? connector. disconnected? Is Check heater resistance Does the spring of latch Replace Door Replace the...
- Page 36 9. TROUBLESHOOTING Is the resistance values out MOTOR ERROR Replace the of range? motor Stator (full):2.27±7% Ω Replace the Stator (half):0.832±7% Ω displayed? rotor :1.617±7% Ω displayed? Check the connectors below. Reconnect Is the connector disconnected Replace the PCB or disassembled? connector 1.
- Page 37 9. TROUBLESHOOTING UNBALANCE ERROR OVERFLOW ERROR displayed? displayed? Put laundry Is the water level frequency Does the laundry lean Check the evenly in below 26.0 kHz? toward one side, not evenly air chanmber the drum (Refer to 8-2) put in the durm and the tube Adjust the washing...
- Page 38 9. TROUBLESHOOTING FWL SENSOR ERROR displayed? Reconnect Is the connector connected or repair the to FWL sensor disconnected connector or disassembled? Is the voltage of the FWL Replace the sensor 5VDC? FWL sensor Fix the air chamber Is the air chamber and the and remove tube clogged? the foreign...
-
Page 39: Trouble Shooting Else
9. TROUBLESHOOTING 9.4 TROUBLE SHOOTING ELSE CAUTION: 1. Be careful of electric shock if disconnecting parts while troubleshooting. 2. First of all, check the connection of each electrical terminal with the wiring diagram. 3. If you replace the MAIN PWB ASSEMBLY, reinsert the connectors correctly. Is the voltage of PCB S5-1 NO POWER Replace the... - Page 40 9. TROUBLESHOOTING Repair the Is the display PCB BUTTON DOESN’T WORK PCB / broken?(check the buzzer Display LED sound and LED light while Is the connector connected Reconnect push the button.) to PCB / display LED or repair the disconnected or connector disassembled? Is the button of panel stuck?
- Page 41 9. TROUBLESHOOTING VIBRATION & NOISE IN SPIN Have all the transit bolts and Remove the base packing been removed? transit bolts unbalance part and Base packing If it is not stable, adjust feet accordingly. After the washer is level, tighten the lock nuts up against of the base of the washer.
-
Page 42: Filter
10. COMPONENT TESTING INFORMATION CAUTION:When Resistance (Ohm) checking the Component, be sure to turn the power off, and do voltage discharge sufficiently. 10.1 FILTER Circuit in the PCB / Wiring Diagram Wiring diagram Test points and result L2 U1 U3 N4 Test Points Result Remarks... -
Page 43: Component Testing Information
10. COMPONENT TESTING INFORMATION 10.2 DOOR LOCK Circuit in the PCB / Wiring Diagram Wiring diagram 1.Machine door lock: After press down the “Start/pause” key, the MCU will send out an order to close the door, the SCR controls the door locks L and N to connect, PTC is heating, L’ breakover, and the loads such as inlet valve, pump, motor and so on are Function energized. -
Page 44: Motor
10. COMPONENT TESTING INFORMATION 10.3 MOTOR Circuit in the PCB / Wiring Diagram Wiring diagram The SCR controls to impose different break-over voltage onto the stator to control the size of rotation speed, and when the rotation speed increases up to a null value (600rpm, the complete machine), switch off the high-speed tap via K1 to Function reach 1400rpm, the maximum rotation machine of complete machine;... -
Page 45: Pump
10. COMPONENT TESTING INFORMATION 10.4 PUMP Circuit in the PCB / Wiring Diagram Wiring diagram Function The pump are used to drain the tub and to circulate the water Test points and result Test points Result Remarks 179±10% Ω... -
Page 46: Inlet Valve
10. COMPONENT TESTING INFORMATION 10.5 INLET VALVE Circuit in the PCB / Wiring Diagram Wiring diagram The PCB will power on the pre-valve and main_valve as per the settings of Function program, and fill water into the tub to reach the set water level. Test points and result 1 2 3... -
Page 47: Heater
10. COMPONENT TESTING INFORMATION 10.6 HEATER Circuit in the PCB / Wiring Diagram Wiring diagram The wash heater is designed to raise the wash water to the desired temperature Function selection during certain wash cycles. Test points and result Test points Result Remarks 25.5±5%Ω... -
Page 48: Control Panel Asm
11. DISASSEMBLY INSTRUCTIONS ※ Be sure to unplug the machine before disassembling and repairing the parts. 11.1 CONTROL PANEL ASM 1. Unscrew 2 screws on the back of the Top Panel ASM top panel as shown 2. Pull the top plate backward and upward as shown 3. -
Page 49: Disassembly Instructions
11. DISASSEMBLY INSTRUCTIONS 11.2 DISPENSER ASM 1. Disassemble the top panel 2. Pull out the drawer 3. Unscrew 3 screws as shown 4. Disconnect the double_valve connector from main harness as ① shown 5. Unscrew 2 screws as shown 6. Disassemble the hose clamp as shown... -
Page 50: Filter
11. DISASSEMBLY INSTRUCTIONS 11.3 FILTER 1. Unscrew 2 screws as shown 2. Disconnect the filter connector from main harness as ①②③④ shown... -
Page 51: Door Asm
11. DISASSEMBLY INSTRUCTIONS 11.4 DOOR ASM 1. Open the door.。 2. Disassemble retainer-bellow as shown 3. Unscrew 2 screws as shown, Disassemble the door ASM 4. Unscrew 2 screws as shown 5. Disconnect the door lock connector from main harness... -
Page 52: Front Panel
11. DISASSEMBLY INSTRUCTIONS 11.5 FRONT PANEL 1. Use a coin or screwdriver to insert into the gap of pump door cover, open the pump door cover 2. Unscrew 1 screws as shown 3. Unscrew 5 screws as shown 4. Lift and separate the front panel... -
Page 53: Pump
11. DISASSEMBLY INSTRUCTIONS 11.6 PUMP 1. Unscrew 3 crews as shown 2. Disassemble the hose clamp connect to the pump 11.7 HEATER 1. Disassemble the rear panel 2. Disconnect the heater connector from main harness as ①②③ shown 3. Unscrew 3 crews as “A” shown 4. -
Page 54: Motor
11. DISASSEMBLY INSTRUCTIONS 11.8 MOTOR 1. Disassemble the belt as shown 3. Unscrew crew as shown,disassemble the pulley 3. Unscrew 2 crews as shown, disassemble the motor 4. Disassemble the damper pin as shown, and look out the claw structure on the pin.