Philips dvp 320 Owner's Manual
Philips dvd video player owner's manual
Hide thumbs
Also See for dvp 320:
- Specifications (2 pages) ,
- Owner's manual (56 pages) ,
- Quick use manual (2 pages)
Table of Contents
Advertisement
Quick Links
Advertisement
Table of Contents

Related Manuals for Philips dvp 320


Summary of Contents for Philips dvp 320
- Page 1 DVP 320 DVP 320...
- Page 2 Important Note Advarsel: Laserrudstråling ved åbning når sikkerhesafbrydere er ude af funktion. Undgå u tsættelse for stråling. Bemærk: Netafbryderen POWER er sekundært indkoblet og afbryder ikke strømmen fra nette. Den indbyggede netdel er derfor tilsluttet til lysnettet så længe netstikket sidder i stikkontakten. Observer: Nettbryteren POWER er sekundert innkoplet.
- Page 3 CAUTION VISIBLE AND INVISIBLE LASER RADIATION WHEN OPEN. AVOID EXPOSURE TO BEAM. ADVARSEL SYNLIG OG USYNLIG LASERSTRÅLING VED ÅBNING UNDGÅ UDSÆTTELSE FOR STRÅLING VARNING s SYNLIG OCH OSYNLIG LASERSTRÅLNING NÄR DENNA DEL ÄR ÖPPNAD BETRAKTA EJ STRÅLEN VARO! AVATTAESSA OLET ALTTIINA NÄKYVÄLLE JA NÄKYMÄTTÖMÄLLE LASER SÄTEILYLLE.
-
Page 4: General Information
Due to the numerous versions of new CD- Audio copy protection or enhanced CD-Audio protection recently available on certain discs, Philips is unable to guarantee that this DVD player is fully compatible with such new discs. Should you have difficulty playing any such CD-Audio discs, kindly refer them to your CD- Audio disc retailer. -
Page 5: Table Of Contents
Introduction Environmental Information ...6 Package Content ...6 Safety Information ...6 Symbols Used in this Booklet ...6 Functional overview Top and Rear Panel ...7 Remote Control ...8 Preparation Before your begin ...9 Connecting to a TV with audio and video cables directly...9 Connecting to a TV with Scart connector ...9... -
Page 6: Environmental Information
Introduction Thank you for purchasing this Philips DVD player. This Owner’s Manual explains the basic operation of this DVD player. Environmental Information All unnecessary packaging has been omitted. We have tried to make the packaging easy to separate into three materials: cardboard (box), polystyrene foam (buffer) and polyethylene (bags, protective foam sheet). -
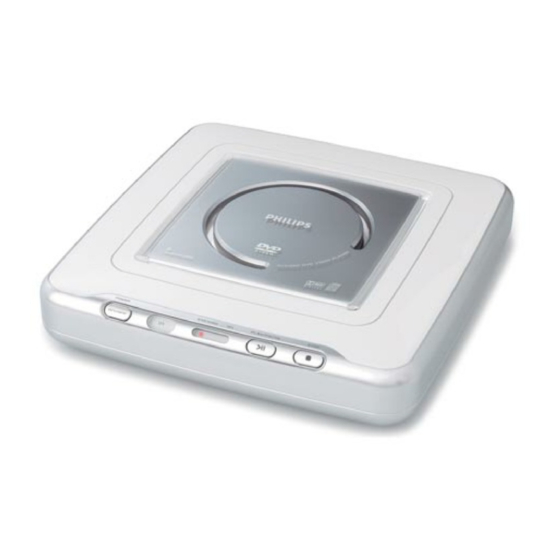
Page 7: Functional Overview
Top and Rear Panels Coaxial output – connect to a receiver with coaxial inputs AUDIO OUT (Left/Right) – connect to AUDIO inputs of an amplifier, receiver or stereo system OPEN/CLOSE – open/close the compar tment lid POWER – switch DVD on or off Remote sensor Receive the commands from the DVD Player’s remote control. -
Page 8: Remote Control
Functional Overview Remote Control RETURN / TITLE Press to go to a previous Disc menu or to access a DVD’s Title menu. These options are not available with all Discs. DISC MENU Press to access menu of a DVD disc /switch PBC on or off VCD disc Press to approve a menu selection. -
Page 9: Preparation
Before you begin... Refer to the instructions of your TV, VCR, Stereo, or other devices. Note the style of jacks and connectors on the other equipment. Determine how to choose different Audio and Video In channels/sources on your other equipment. Disconnect all equipment from the power outlets. -
Page 10: Connecting To Tv And A 2-Channel Stereo
Preparation Connecting to a TV and a two- channel Stereo Stereo Back of TV (example only) (example only) RIGHT AUDIO IN VIDEO IN LEFT AUDIO IN COAXIAL VIDEO Connect the AUDIO OUT (Left/Right) on the DVD player to the corresponding AUDIO IN jacks on stereo system by using audio cables (supplied). -
Page 11: Using The Remote Control
Replacing battery (lithium CR2025) into the remote control Pull out the lithium battery compartment. Replace a new battery and fully insert the battery compartment back to the original position. CAUTION! – Insert the plastic protective sheet if they are not to be used for a long time. -
Page 12: Operation
Operation Basic Playback Press POWER on the front panel to turn on the DVD player. Press OPEN/CLOSE on the top panel to open the disc compartment. Place the Disc on the Disc hub, with the label facing up and then press the lid down. After recognizing the disc, the player will start to playback automatically. -
Page 13: Repeat
Repeat Repeat chapter/title/disc To repeat the current chapter, press REPEAT. To repeat the current title, press REPEAT a second time. To repeat the whole disc, press REPEAT a third time. To exit REPEAT mode, press REPEAT again. Repeat track/disc With PBC OFF, To repeat the current track, press REPEAT. -
Page 14: Special Dvd Features
Operation Special DVD Features Playing a Title A DVD disc may have one or more titles. This depends on the content (a movie, video clips, a drama series, etc.) on the disc. 0 After you load a disc, information about the content shows on the screen waiting for your selection. -
Page 15: Preview Function
Preview Function 0 Press the PREVIEW key to enter previewing menu. 0 Press 34 key to highlight TRACK DIGEST, DISC INTERVAL or TRACK INTERVAL. 0 Press OK key to open one option. 0 After you enter the menu of any digest type, To quit preview function: Press 341 2 to highlight EXIT and press OK to confirm. -
Page 16: Picture Cd & Mp3 Cd Playback
Picture CD & MP3 Playback This player can playback JPEG format pictures and MP3 files on a personally recorded CD-R/RW disc or commercial CD, and is compatible with Kodak Picture CD. 0 Playback pictures or songs one by one automatically. 0 Album and track selection. -
Page 17: Special Jpeg Features
Press OK or PLAY key to add the selected file from the left column to the right column. The maximum is 100 files. Press STOP key to remove the programed file from the right column. Highlight one file of the right column and press OK key, then the programed files will start playing back. -
Page 18: Setup Menu
Setup Menu Basic Operation Press SYSTEM MENU at the STOP mode to enter the Setup Menu. Press the OK key to go to the next level submenu or confirm your selection. Press the 1 2 keys to enter the submenu or return to the previous menu. -
Page 19: Disc Lock
Quit the program playback In the PROGRAM menu, Press the 1 234 keys to move the cursor to the EXIT button. Press the OK key to quit this menu. Stop the program playback 0 During playback of the programmed tracks, press STOP key. -
Page 20: Analog Audio Setup Menu
Setup Menu Analog Audio Setup menu This menu contains setup options for your analog audio output, such as DOWNMIX, D.R.C. (Dynamic Range Compression), 3D etc. which makes the DVD player reproduce high quality surround sound. Press SYSTEM MENU. Press the 34 keys to highlight the ANALOG OUTPUT SETUP. -
Page 21: Digital Output
Digital Output Press the 34 keys to highlight DIGITAL OUTPUT. Enter its submenu by pressing the 2 key. Press the 34 keys to highlight the selected item. ALL: Original digital signal is output. PCM ONLY: If your receiver is PCM- compatible, or your receiver can not decode MPEG-2, Dolby Digital, or DTS audio, choose this option. -
Page 22: Video Setup Menu
Setup Menu Video Setup menu There are items included in VIDEO SETUP menu such as TV TYPE, TV DISPLAY, SMART PICTURE, COLOR SETTING. Press STOP. Press SYSTEM MENU to enter the menu. Highlight VIDEO SETUP by pressing the 34 keys. Press OK. -
Page 23: Smart Picture
Smart Picture In this menu, you can choose a picture setting from a fixed set of ideal predefined picture settings. Press the 34 keys to highlight SMART PICTURE in the VIDEO SETUP menu. Press the 2 key to highlight the item of the submenu. -
Page 24: Preference Setup Menu
Setup Menu Contrast Press the 34 keys to highlight CONTRAST in the COLOR SETTING menu. Press the 2 key to open the level bar. Display at the bottom of the screen. Press the 2 1 keys to increase and decrease the contrast level. -
Page 25: Subtitle Language
Subtitle language DVD discs are available with multi-subtitle languages. Use this option to select the preferred default subtitle language. Press the 34 keys to highlight SUBTITLE. Enter the submenu by pressing the 2 key. Move the cursor by pressing the 34 keys to highlight the selected option. -
Page 26: Parental Control
Setup Menu Parental Control Movies on DVDs may contain scenes which are not suitable for children. Therefore, discs may contain ‘Parental Control’ information which applies to the complete disc or to certain scenes on the disc. These scenes are rated from 1 to 8, and alternative, more suitable scenes are available on the disc. -
Page 27: Specifications
Cleaning the disc lens After prolonged use, dirt or dust may accumulate at the disc lens. To ensure good playback quality, clean the disc lens with Philips CD Lens Cleaner or any commercially available cleaner. Follow the instructions supplied with cleaner. -
Page 28: Troubleshooting
Troubleshooting WARNING Under no circumstances should you try to repair the system yourself, as this will invalidate the warranty. Do not open the system as there is a risk of electric shock. If a fault occurs, first check the points listed below before taking the system for repair. If you are unable to remedy a problem by following these hints, consult your dealer or service center. - Page 29 Language Code The following codes can be used to select languages other than those available in the AUDIO, SUBTITLE or DISC MENU. (see Setup menu)
- Page 30 Language Code The following codes can be used to select languages other than those available in the AUDIO, SUBTITLE or DISC MENU. (see Setup menu)
- Page 31 20052 Monza - Milano ITALY Phone: 800 820026 PHILIPS MÁRKASZERVIZ Kinizsi U 30 - 36 Budapest 1092 HUNGARY Phone: (01)-2164428 Meet Philips at the Internet http://www.philips.com PHILIPS PORTUGUESA, S.A. Consumer Information Center Rua Dr. António Loureiro Borge, nr.5 Arquiparque, Miraflores...