
Related Manuals for Walgreens WGNBPA-530


Summary of Contents for Walgreens WGNBPA-530
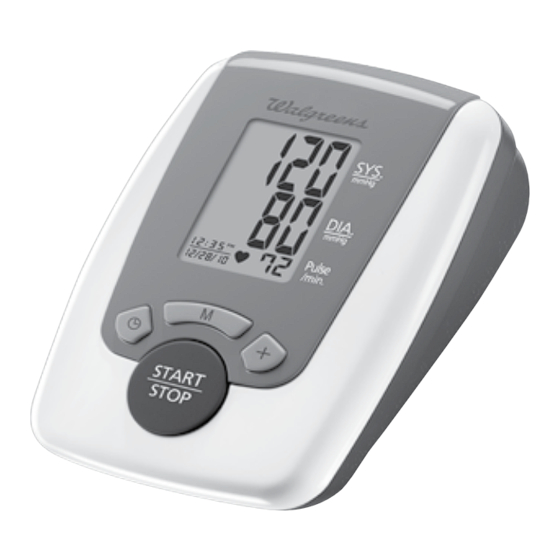
- Page 1 Automatic Arm Blood Pressure Monitor WGNBPA-530 El manual en español empieza en la página 30...
-
Page 2: Table Of Contents
TABLE OF CONTENTS Care, Maintenance & Cleaning ......24 INTRODUCTORY INFORMATION: Potential for Electromagnetic Interference ..26 Important Product Notices and Safety Troubleshooting ..........27 Instructions ............3 Specifications ............ 28 About Blood Pressure ......... 5 5 Year Limited Warranty ........29 What is Blood Pressure? Why Measure Your Blood Pressure? Blood Pressure Standard ........ -
Page 3: Important Product Notices And Safety Instructions
IMPORTANT PRODUCT NOTICES AND SAFETY • E lectromagnetic interference: The device contains INSTRUCTIONS sensitive electronic components. Avoid strong electrical or electromagnetic fields in the direct vicinity of the device When using your blood pressure monitor, basic precautions (e.g. mobile telephones, microwave ovens). These may should always be followed. -
Page 4: About Blood Pressure
ABOUT BLOOD PRESSURE Blood pressure tends to go up and down, even in people who normally don’t have high readings. If your numbers What is Blood Pressure? stay above the “normal” range most of the time, you may Blood pressure is the pressure exerted on the artery be at increased risk and should consult your physician. -
Page 5: How This Blood Pressure Monitor Works
HOW THIS BLOOD PRESSURE NAME/FUNCTION OF EACH PART MONITOR WORKS Air Tube and Connector This monitor uses innovative technology to detect your blood pressure. This technology enables the monitor to automatically inflate and deflate at the appropriate level for each individual. With one touch of a button, LCD Display the cuff will automatically inflate to block the blood flow through your artery. -
Page 6: Display Explanations
Display Symbols: DISPLAY EXPLANATIONS Weak Battery Symbol: Appears when batteries should be replaced. Pulse Symbol: Shows the heart rate per minute. START Systolic STOP Pressure START STOP and any of the following letters and numbers appear in the area that systolic pressure should be displayed, an error has occurred with your reading. -
Page 7: Installing Batteries
INSTALLING BATTERIES Replace the batteries if: 1. P ress down on latch and lift the battery cover to 1. T he weak battery symbol appears on the display. open the battery compartment. 2. N othing appears on the display when the power is 2. I nstall or replace 4 “AAA ” sized batteries in the switched on. battery compartment according to the indications Replace all batteries at one time (as simultaneous set). -
Page 8: Date & Time Set Procedure
USING THE ARM CUFF DATE & TIME SET PROCEDURE 1. T o adjust the date/time, press the Set button Very Important: Proper cuff size is critical to accurate measurement. This monitor comes with a standard size arm cuff that START fits arms 9”–13” (23 cm – 33 cm). STOP This cuff is suitable for your use if the colored arrow 2. T he display will show a blinking number showing... - Page 9 1. I f the cuff is not assembled, pass the end of the 3. Open the arm cuff so that your arm may be placed cuff furthest away from the tubing through the metal through it. D-ring in order to form a loop. The smooth side without the felt material should be on the inside of the cuff loop.
-
Page 10: Measurement Procedure
Note: MEASUREMENT PROCEDURE If it is not possible to fit the cuff to your left arm, it can also Important Notes: be placed on your right arm. However, all measurements • B lood pressure changes with every heartbeat and is should be made using the same arm. in constant fluctuation throughout the day. - Page 11 1. W ith the cuff wrapped around your arm, press the 4. W hen the measurement is completed, the cuff will START/STOP button. Do not inflate the cuff unless it is deflate entirely. Systolic pressure, diastolic pressure wrapped around your arm. All digits will light up to check and pulse will be shown simultaneously on the LCD the display functions.
-
Page 12: Recalling Values From Memory
RECALLING VALUES FROM MEMORY CLEARING VALUES FROM MEMORY Press and hold the Date & Time set buttons 1. P ress the “M” button to access the memory. ) at the same time while in memory recall mode, and the data will be erased automatically. START STOP 2. E very new press of the “M”... -
Page 13: Important Notes Regarding Your Blood Pressure Measurement
IMPORTANT NOTES REGARDING YOUR BLOOD • This device may have difficulty determining the PRESSURE MEASUREMENT proper blood pressure for users with irregular heartbeat, diabetes, poor circulation of blood, • T ake your reading in a comfortable environment kidney problems, or for users who have suffered as measurements can be affected by hot or cold a stroke. -
Page 14: Potential For Electromagnetic Interference
6. D o not subject the monitor and cuff to extreme POTENTIAL FOR ELECTROMAGNETIC temperatures, humidity, moisture, and direct INTERFERENCE sunlight. Protect from dust. To avoid inaccurate results caused by electromagnetic interference 7. Do not fold the cuff and tubing tightly. between electrical and electronic equipment, do not use the device near a cell phone or microwave oven. -
Page 15: Troubleshooting
TROUBLESHOOTING SPECIFICATIONS If any abnormality arises during use, please check the following points Power Source: Four 1.5V DC (AAA) batteries Measurement Method: Oscillometric POSSIBLE Pressure: 40~280 millimeters mercury (mmHg) SYMPTOMS CORRECTION Measurement Range: CAUSES Pulse: 40~199 beats/minute Pressure: ±3 mmHg Batteries have Replace them with Unit does not turn Accuracy: run down. four new AAA Pulse: ±5% of reading on when the START/... - Page 16 Because of individual country regulations, some of the above limitations and exclusions may not apply to you. WGNBPA-530 ©2009-2010 HoMedics, Inc. and its affiliated companies, all rights reserved. HoMedics is a registered trademark of HoMedics, Inc. and its affiliated companies. All rights reserved.
- Page 17 ÍNDICE INFORMACIÓN INICIAL: Cuidado, mantenimiento y limpieza ......51 Avisos importantes del producto e instrucciones de seguridad ............. 33 Potencial de interferencia electromagnética ..53 Sobre la presión sanguínea ........35 Diagnóstico y resolución de problemas ....54 ¿Qué es la presión sanguínea? Especificaciones ............
-
Page 18: Avisos Importantes Del Productoe Instrucciones De Seguridad
AVISOS IMPORTANTES DEL PRODUCTO • I nterferencia electromagnética: el dispositivo contiene E INSTRUCCIONES DE SEGURIDAD componentes electrónicos sensibles. Evite los campos eléctricos o electromagnéticos fuertes cercanos al Cuando utilice su monitor de presión sanguínea, debe seguir dispositivo (por ejemplo, teléfonos celulares, hornos de siempre las precauciones básicas. Sírvase leer y seguir todas microondas). Éstos pueden causar la imposibilidad temporal las instrucciones y advertencias antes de utilizar este producto. -
Page 19: Sobre La Presión Sanguínea
Esta tabla se aplica a la mayoría de los adultos mayores de 18 SOBRE LA PRESIÓN SANGUÍNEA años. ¿Qué es la presión sanguínea? La presión sanguínea tiende a subir y bajar, incluso en La presión sanguínea es la presión que se ejerce en las personas que normalmente no tienen lecturas altas. Si sus paredes de la arteria cuando la sangre fluye por las arterias. La resultados permanecen por encima del rango “normal” la presión medida cuando el corazón se contrae y sale la sangre mayoría del tiempo, es posible que corra un riesgo mayor y es la presión sanguínea sistólica (la mayor). -
Page 20: Sanguínea
NOMBRE/FUNCIÓN DE CADA PIEZA CÓMO FUNCIONA ESTE MONITOR Tubo de aire y conector DE PRESIÓN SANGUÍNEA Este monitor utiliza la tecnología para detectar la presión sanguínea. La tecnología permite que el monitor infle y desinfle automáticamente al nivel apropiado para cada persona. Al Pantalla LCD presionar un botón, el brazalete se inflará... -
Page 21: Explicaciones De La Pantalla
Símbolos de la pantalla: EXPLICACIONES DE LA PANTALLA Símbolo de pilas bajas: aparece cuando tiene que cambiar las pilas. Símbolo de pulso: muestra el rítmo cardíaco por minuto. START STOP Presión sistólica START STOP Si aparece alguno de los siguientes números o letras en el área donde se debe mostrar la presión sistólica con , ha ocurrido un error en la lectura. Vea la sección Diagnóstico y resolución de problemas de este manual para obtener más información. -
Page 22: Instalación De Las Pilas
INSTALACIÓN DE LAS PILAS PROCEDIMIENTO DE CONFIGURACIÓN DE FECHA Y HORA 1. P resione el seguro y levante la tapa de las pilas para abrir el compartimiento de las pilas. 1. P ara ajustar la fecha/hora, presione el botón Set 2. I nstale o reemplace las 4 pilas “AAA” en el compartimiento de las pilas según las indicaciones dentro del compartimiento. 3. Colocar la tapa de las pilas, luego presione el extremo superior de START la tapa de las pilas. -
Page 23: Uso Del Brazalete
USO DEL BRAZALETE 1. S i el brazalete no está armado, pase el extremo del brazalete que se encuentra más lejos del tubo a través del anillo metálico en D, Muy importante: El tamaño adecuado del brazalete es fundamental para obtener mediciones precisas. para formar un aro. El lado suave y sin el material de felpa, debe encontrarse en el lado interior del Este monitor viene con un tamaño estándar con un punco aro formado por el brazalete. -
Page 24: Procedimiento De Medición
PROCEDIMIENTO DE MEDICIÓN Notas importantes: 6. Centre el tubo en la mitad del brazo. • L a presión sanguínea cambia con cada latido del corazón y está en constante fluctuación durante todo el día. • L a medición de la presión sanguínea puede verse afectada por la 7. Hale el extremo del brazalete para que posición del usuario, sus condiciones fisiológicas y demás factores. quede ajustado y parejo alrededor de su Para obtener la mayor precisión en la medición de la presión brazo. - Page 25 1. C on el brazalete puesto en el brazo, presione el botón START/ 4. C uando la medición esté completa, el brazalete se desinfla STOP. No infle el brazalete a menos que esté puesto en el brazo. por completo. Se mostrarán simultáneamente las lecturas de Todos los dígitos se encenderán para verificar las funciones de la presión sistólica, presión diastólica y pulso en la pantalla LCD. pantalla. El procedimiento de verificación se completará después La medida se almacenará...
-
Page 26: Cómo Recuperar Los Valores De La Memoria
CÓMO RECUPERAR LOS VALORES DE LA MEMORIA CÓMO BORRAR LOS VALORES DE LA MEMORIA Mantenga presionado los botones de fecha y tiempo ) en el modo de memoria, y los datos guardados serán borrados automáticamente. 1. P resione el botón “M” para acceder a la memoria. START STOP 2. C ada vez que presiona el botón “M”... -
Page 27: Cuidado, Mantenimiento Y Limpieza
• L os resultados de las mediciones que los usuarios reciben 7. No doble el brazalete ni el tubo demasiado apretados. son únicamente para referencia. Si los usuarios tienen 8. N o desarme el monitor ni el brazalete. Si alguno de los inquietudes en cuanto a su presión sanguínea, deberán componentes necesita reparación, consulte la sección de consultar a un médico. -
Page 28: Potencial De Interferencia Electromagnética
POTENCIAL DE INTERFERENCIA ELECTROMAGNÉTICA DIAGNÓSTICO Y RESOLUCIÓN DE PROBLEMAS Si aparece alguna anomalía durante el uso, sírvase verificar los siguientes puntos Para evitar resultados incorrectos provocados por la interferencia electromagnética entre los equipos eléctricos y electrónicos, no use el CAUSAS dispositivo cerca de un celular o un horno microondas. SÍNTOMAS SOLUCIÓN POSIBLES... -
Page 29: Especificaciones
ESPECIFICACIONES Fabricado exclusivamente GARANTÍA LIMITADA POR CINCO AÑOS para HoMedics vende sus productos con la intención de que no tengan defectos de fabricación ni de mano de obra por un plazo de cinco años a partir de la fecha de compra original, con las siguientes excepciones. Cuatro pilas de 1,5V CC (AAA). - Page 30 IB-WGNBPA530B...