Zeiss AxioObserver User Manual
Hide thumbs
Also See for AxioObserver:
- Quick start manual (19 pages) ,
- Abridged instructions (10 pages)
Table of Contents
Advertisement
Quick Links
WIDEFIELD ZEISS AXIO OBSERVER
USER MANUAL
Switch on the temperature controller ................................................. 2
Switch on the CO2 controller .............................................................. 3
Start the system .................................................................................. 4
Equipment ........................................................................................... 5
Microscope stand presentation .......................................................... 6
Start Zen / Observation with the oculars ............................................ 8
camera ................................................................................................ 9
camera .............................................................................................. 11
Acquire a Z-stack serie ...................................................................... 12
Acquire a time serie .......................................................................... 14
Multiple stage positions .................................................................... 15
Tile scan ............................................................................................ 16
Graphic tools ..................................................................................... 22
How to save your data ...................................................................... 23
Switch off the system ........................................................................ 24
Switch of the temperature and CO2 system ..................................... 25
Page 1 sur 25
WF-Zeiss_EN_V3 24/01/2017
Advertisement
Table of Contents

Related Manuals for Zeiss AxioObserver


Summary of Contents for Zeiss AxioObserver
-
Page 1: Table Of Contents
WIDEFIELD ZEISS AXIO OBSERVER USER MANUAL Switch on the temperature controller ..........2 Switch on the CO2 controller .............. 3 Start the system .................. 4 Equipment ................... 5 Microscope stand presentation ............6 Start Zen / Observation with the oculars ..........8 Acquire a widefield image in transmission mode with the color camera .................... -
Page 2: Switch On The Temperature Controller
Switch on the temperature controller It’s important to switch on the temperature at least 30 minutes before the beginning of the session. Once your sample is put on the system and you saved the positions you wanted to acquire, to avoid ab important focus shift in z, it’s best to wait at least 1 hour and re-set the focus on your positions 1. -
Page 3: Switch On The Co2 Controller
Switch on the CO2 controller 1. Open the air compressed bottle (silver pressure regulator) and the CO2 bottle (golden pressure regulator) in the anti-clockwise direction. 2. Turn on the CO controller (red brick). 3. Turn the air compressed bottle valve (silver) clockwise until you obtain a pressure of 1 Bar in the exit of the pressure regulator (right pressure gauge). -
Page 4: Start The System
Start the system 1. Turn on the multi-socket power (on the shelf to the left of the system). The fluorescent lamp is switched on at the same time. 2. Switch on the microscope by pushing the « START » button on the left side of the system. 3. -
Page 5: Equipment
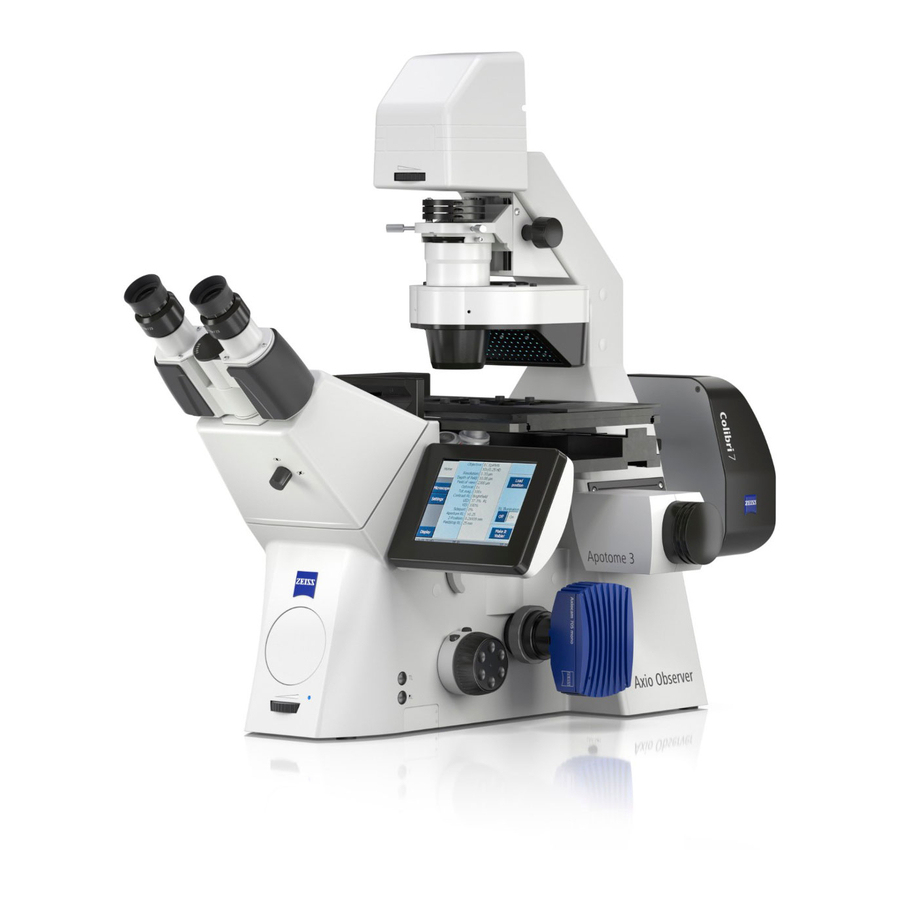
Equipment Motorised inverted microscope Zeiss Axio Observer Zeiss Black/White camera Axiocam MRm (pixel size 6.45*6.45 µm) Color camera Axiocam HRc (pixel size 6.45*6.45 µm) Motorised stage in XY LED box CoolLED pE-300white for the fluorescence Phase contrast and DIC available in transmission... -
Page 6: Microscope Stand Presentation
Microscope stand presentation Left side 1. Take the objectives down at the lowest position. 2. Take the objective back up to its working position. 3. Open/Close the fluorescence shutter. 4. Filter cube change for fluorescence (2 buttons). 5. Macrometric knob. 6. - Page 7 TFT screen (touch screen) 1. Open/Close the Brightfield shutter. 2. Open/Close the fluorescence shutter. In « Microscope », in the « Control » menu, there are several tabs allowing you to: 3. Choose the objective « Objectives ». 4. Choose the filter cube for fluorescence «...
-
Page 8: Start Zen / Observation With The Oculars
Start Zen / Observation with the oculars 1. Start the « ZEN » software (Icon on the desktop). 2. The stage calibration is necessary only if you use multiwell plates or if you want to retrieve positions from a past experiment 3. -
Page 9: Acquire A Widefield Image In Transmission Mode With The Color Camera
Acquire a widefield image in transmission mode with the color camera Acquisition in transmission mode Before observing in brightfield, you have to set the Khöller illumination, then if you need to the phase contrast or DIC (refer to the posters in the microscope room). - Page 10 Adjust the white balance Adjust the « White Balance » allows to define a white reference in the image that you are acquiring. BEFORE AFTER 1. Select the tab « Acquisition ». 2. Open the menu « Acquisition Mode ». 3.
-
Page 11: Acquire An Image (Transmission/Fluorescence) With The Black/White Camera
Acquire an image (transmission/fluorescence) with the black/white camera Before observing in brightfield, you have to set the Khöller illumination, then if you need to the phase contrast or DIC (refer to the posters in the microscope room). Select « BF », « PH » ou « DIC » on the TFT screen. 1. -
Page 12: Acquire A Z-Stack Serie
Acquire a Z-stack serie Stack acquisition 1. Check the « Z-Stack » option. 2. Check « Show all Tools ». 3. For multicolor acquisitions, choose the way you want to switch channels : make the entire z-stack of one channel, then switch to the other one «... - Page 13 Display the stack Your stack is displayed in the ZEN interface at the end of the acquisition. In the tab « Dimensions » : 13. « Z-Position » allows you to see the different planes of the stack. 14. « Gallery » displays a set of all the images composing the stack.
-
Page 14: Acquire A Time Serie
Acquire a time serie 1. Check the « Time Series » option. 2. Open the menu « Time Series ». 3. Define the time interval between two images. 4. Choose the number of cycles. 5. warning: The time the microscope make to acquire a z-stack (or tile) has to be taken in account in the chosen interval. -
Page 15: Multiple Stage Positions
Multiple stage positions To make the software take in account the z coordinate for each position you have to : 1. Open the menu « Focus Strategy ». 2. Choose the option « Local Focus Surface ». 3. Choose the option « Fixed Z-position ». 4. -
Page 16: Tile Scan
Tile scan Tile scan acquisition 1. Check « Tiles ». 2. Open the menu « Focus Strategy ». 3. Choose the option « Local Focus Surface ». 4. Select « Fixed Z-position ». 5. Open the menu « Tiles ». 6. - Page 17 Focus correction There are two ways to correct the focus on the entire tile. It has to be done before any acquisition. 12. Click on « Support Points » below the navigation space. 13. Enter the number of positions on wich you wish to correct the focus.
- Page 18 Online shading correction During you are adjusting your acquisition parameters, you can correct the shadow effects online. Find a position without your sample 1. In the channels toolbox: 2. select the “global” correction mode in the list. 3. Click on “Define” 4.
- Page 19 Tile scan finalization in fluorescence and transmission during the acquisition With this option : stitching of tiles is done during the acquisition In the “Tiles” toolbox and in the “options” section: 1. Select « Stitching During Acquisition » 2. In the section « Stage Travel Optimization » select «...
- Page 20 Tile scan finalization in fluorescence after the acquisition For this option, the checkbox “online stitching” has to be unselected during the acquisition (see above). 1. Click on the tab « Processing ». 2. Click on « Single ». 3. Open the menu « Method ». 4.
- Page 21 Tile scan finalization in transmission 1. Click on the tab « Processing ». 2. Click on « Single ». 3. Open the menu « Method ». 4. Go to the « Geometric » rubric and select « Stiching ». 5. Open « Input » and select the tile. 6.
-
Page 22: Graphic Tools
Graphic tools In the tab « Dimensions » 1. Display a plane in the z-stack, or a time position by entering the wanted number or moving the corresponding cursor. 2. Adjuste the image to the screen size. 3. Adjust the pixel size of the image to the pixel size of the screen. -
Page 23: How To Save Your Data
How to save your data Save your experimental configuration 1. Click on the parameter logo. 2. Select « Save As ». 3. Rename your configuration and save it. 4. Load the wanted configuration by opening the menu below « Experiment Manager » and select your configuration. -
Page 24: Switch Off The System
Switch off the system 1. Lower the objectives, clean the front lens and on the side with optical paper. 2. Exit from the software « ZEN ». 3. Transfer your data on your hardrive. Check the booking site. If there is no one after you: 4. -
Page 25: Switch Of The Temperature And Co2 System
Switch of the temperature and CO2 system 1. Switch of the temperature module by pushing the red button 2. Remove the CO2 cap. Be carefull not to break the glass cover. 3. Unclip the greenish tub that you will find on the water reservoir on the system.