
Related Manuals for Juniper SRX4100


Summary of Contents for Juniper SRX4100
- Page 1 SRX4100 Services Gateway Hardware Guide Modified: 2017-05-31 Copyright © 2017, Juniper Networks, Inc.
- Page 2 END USER LICENSE AGREEMENT The Juniper Networks product that is the subject of this technical documentation consists of (or is intended for use with) Juniper Networks software. Use of such software is subject to the terms and conditions of the End User License Agreement (“EULA”) posted at http://www.juniper.net/support/eula.html.
-
Page 3: Table Of Contents
SRX4100 Services Gateway Overview ........3... - Page 4 Unpacking the Services Gateway ........39 Unpacking the SRX4100 Services Gateway ......39 Verifying Parts Received with the SRX4100 Services Gateway .
- Page 5 Packing a SRX4100 Services Gateway or Component for Shipping ... 78 Packing the SRX4100 Services Gateway for Shipment ....78 Packing the SRX4100 Services Gateway Components for Shipment .
- Page 6 SRX4100 Services Gateway Hardware Guide Chapter 24 Electrical Safety Guidelines and Warnings ......101 General Electrical Safety Guidelines and Warnings .
- Page 7 Chassis Components and Descriptions ....... 5 Figure 1: SRX4100 Services Gateway Front Panel ......5 Figure 2: SRX4100 Services Gateway Front Panel LEDs .
- Page 8 SRX4100 Services Gateway Hardware Guide Figure 20: Removing an AC Power Supply ....... 68 Figure 21: Installing an AC Power Supply .
- Page 9 Table 3: SRX4100 Services Gateway Components on the Front Panel ..5 Table 4: SRX4100 Services Gateway Front Panel LEDs ..... . 6 Table 5: Management Port LEDs .
- Page 10 SRX4100 Services Gateway Hardware Guide Table 23: Parts List for a Fully Configured Services Gateway ....40 Chapter 14 Performing the Initial Configuration ....... . . 53 Table 24: Factory-Default Settings - Interfaces .
-
Page 11: About The Documentation
® To obtain the most current version of all Juniper Networks technical documentation, see the product documentation page on the Juniper Networks website at http://www.juniper.net/techpubs/ If the information in the latest release notes differs from the information in the documentation, follow the product Release Notes. -
Page 12: Table 1: Notice Icons
SRX4100 Services Gateway Hardware Guide Table 1: Notice Icons Icon Meaning Description Informational note Indicates important features or instructions. Caution Indicates a situation that might result in loss of data or hardware damage. Warning Alerts you to the risk of personal injury or death. -
Page 13: Documentation Feedback
We encourage you to provide feedback, comments, and suggestions so that we can improve the documentation. You can provide feedback by using either of the following methods: Online feedback rating system—On any page of the Juniper Networks TechLibrary site , simply click the stars to rate the content, http://www.juniper.net/techpubs/index.html and use the pop-up form to provide us with information about your experience. -
Page 14: Requesting Technical Support
7 days a week, 365 days a year. Self-Help Online Tools and Resources For quick and easy problem resolution, Juniper Networks has designed an online self-service portal called the Customer Support Center (CSC) that provides you with the following features: Find CSC offerings: http://www.juniper.net/customers/support/... - Page 15 About the Documentation For international or direct-dial options in countries without toll-free numbers, see http://www.juniper.net/support/requesting-support.html Copyright © 2017, Juniper Networks, Inc.
- Page 16 SRX4100 Services Gateway Hardware Guide Copyright © 2017, Juniper Networks, Inc.
-
Page 17: Overview
PART 1 Overview System Overview on page 3 Chassis Components and Descriptions on page 5 Cooling System Description on page 11 Power Supply Description on page 13 Copyright © 2017, Juniper Networks, Inc. - Page 18 SRX4100 Services Gateway Hardware Guide Copyright © 2017, Juniper Networks, Inc.
-
Page 19: System Overview
SRX4100 (AC) — SRX4100 Services Gateway with dual AC power supplies SRX4100 (DC) — SRX4100 Services Gateway with dual DC power supplies The SRX4100 Services Gateway comes with 64 GB of DDR4 memory and two 240-GB solid-state drives (SSDs) in a redundant array of independent disks (RAID). Both disks are configured as a RAID-1 mirror (data is concurrently written to both SSDs). - Page 20 SRX4100 Services Gateway Hardware Guide Copyright © 2017, Juniper Networks, Inc.
-
Page 21: Chassis Components And Descriptions
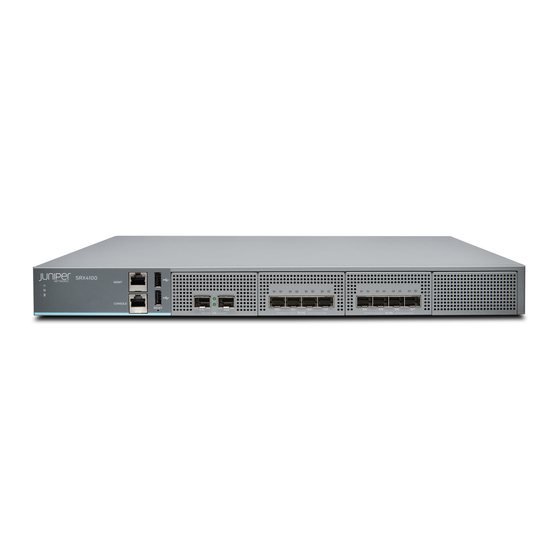
CHAPTER 2 Chassis Components and Descriptions Understanding the SRX4100 Services Gateway Front Panel on page 5 Understanding the SRX4100 Services Gateway Back Panel on page 8 Field-Replaceable Units in SRX4100 Services Gateways on page 9 Understanding the SRX4100 Services Gateway Front Panel Figure 1 on page 5 shows the front panel of the SRX4100 Services Gateway. -
Page 22: Chassis Status Leds
SRX4100 Services Gateway Hardware Guide Table 3: SRX4100 Services Gateway Components on the Front Panel (continued) Number Component Description Console port Connects a laptop to the services gateway for CLI management. The port uses an RJ-45 serial connection, is configured as DTE, and supports the RS-232 (EIA-232) standard. -
Page 23: Ha Port Leds
Off—There is no link established. Network Port LEDs Each SFP+ port has two status LEDs located above the port. Table 7 on page 8 describes the LEDs. Figure 4 on page 8 shows the LEDs. Copyright © 2017, Juniper Networks, Inc. -
Page 24: Understanding The Srx4100 Services Gateway Back Panel
Blinking amber—There is activity on the 10 G/1 G link. right) Off—There is no link established. Related Understanding the SRX4100 Services Gateway Back Panel on page 8 Documentation SRX4100 Services Gateway Physical Specifications on page 19 SRX4100 Services Gateway Environmental Specifications on page 20... -
Page 25: Field-Replaceable Units In Srx4100 Services Gateways
Field-Replaceable Units in SRX4100 Services Gateways Field-replaceable units (FRUs) are components that you can replace at your site. The FRUs on the SRX4100 Services Gateway are hot-removable and hot-insertable. You can remove and replace them without powering off the services gateway. The services... - Page 26 SRX4100 Services Gateway Hardware Guide Copyright © 2017, Juniper Networks, Inc.
-
Page 27: Cooling System Description
CHAPTER 3 Cooling System Description Understanding the Cooling System in an SRX4100 Services Gateway on page 11 Understanding the Cooling System in an SRX4100 Services Gateway The cooling system for the services gateway consists of four fans located at the rear of the chassis. - Page 28 SRX4100 Services Gateway Hardware Guide Related Clearance Requirements for Airflow and Hardware Maintenance for SRX4100 Services Documentation Gateways on page 25 Copyright © 2017, Juniper Networks, Inc.
-
Page 29: Power Supply Description
Understanding the SRX4100 Power Supply on page 13 Understanding the SRX4100 Power Supply The SRX4100 Services Gateway is shipped with two AC or two DC power supply units preinstalled in the rear panel. Each power supply provides power to all components in the services gateway. -
Page 30: Dc Power Supply
SRX4100 Services Gateway Hardware Guide Figure 8: AC Power Supply LEDs Table 9 on page 14 describes the AC power supply LEDs. Table 9: AC Power Supply LEDs Color State Description Unlit Indicates one of the following: Power input voltage is not within the normal operating range. -
Page 31: Figure 9: Dc Power Supply
Green On steadily Input power present and is within the normal operating range. Unlit No DC power output or abnormal DC output. Green On steadily DC power output is within the normal operating range. Copyright © 2017, Juniper Networks, Inc. - Page 32 AC Power Supply Specifications for SRX4100 Services Gateways on page 29 Documentation AC Power Cord Specifications for the SRX4100 Services Gateway on page 30 DC Power Supply Specifications for SRX4100 Services Gateways on page 31 Copyright © 2017, Juniper Networks, Inc.
-
Page 33: Site Planning And Specifications
PART 2 Site Planning and Specifications Planning and Preparing the Site on page 19 Power Specifications and Requirements on page 29 Transceiver and Cable Specifications on page 33 Pinout Specifications on page 35 Copyright © 2017, Juniper Networks, Inc. - Page 34 SRX4100 Services Gateway Hardware Guide Copyright © 2017, Juniper Networks, Inc.
-
Page 35: Planning And Preparing The Site
AC power supply: 2.3 lb (1.04 kg) DC power supply: 2.2 lb (0.99 kg) You can mount the SRX4100 Services Gateway on a standard 19-in. four-post rack or in a standard 19-in. enclosed cabinet. Copyright © 2017, Juniper Networks, Inc. -
Page 36: Srx4100 Services Gateway Environmental Specifications
SRX4100 Services Gateway Hardware Guide Related Understanding the SRX4100 Services Gateway Front Panel on page 5 Documentation Understanding the SRX4100 Services Gateway Back Panel on page 8 SRX4100 Services Gateway Environmental Specifications on page 20 SRX4100 Services Gateway Environmental Specifications... -
Page 37: Site Electrical Wiring Guidelines
Isolated DC return (that is, DC-I), as defined in GR-1089-CORE and require isolation from the exposed OSP cabling. To comply with NEBS requirements and protect against lightning surges and commercial power disturbances, the intrabuilding port(s) of the device MUST NOT be metallically connected Copyright © 2017, Juniper Networks, Inc. -
Page 38: Site Preparation Checklist For The Srx4100 Services Gateway
Site Preparation Checklist for the SRX4100 Services Gateway Table 14 on page 22 provides a checklist of tasks you need to perform when preparing a site for installing the SRX4100 Services Gateway. Table 14: Site Preparation Checklist for SRX4100 Services Gateway Installation Performed Item or Task... -
Page 39: Srx4100 Services Gateway Rack Requirements
SRX4100 Services Gateway Installation Overview on page 41 Documentation SRX4100 Services Gateway Rack Requirements The SRX4100 Services Gateway is designed to be installed on four-post racks. Table 15 on page 24 provides the rack requirements and specifications for the services gateway. -
Page 40: Cabinet Requirements For Srx4100 Services Gateways
Installing the SRX4100 Services Gateway in a Rack on page 42 Cabinet Requirements for SRX4100 Services Gateways You can install the SRX4100 Services Gateway in a 19 in. (48.7 cm) cabinet. Table 16 on page 24 provides the cabinet requirements and specifications. -
Page 41: Clearance Requirements For Airflow And Hardware Maintenance For Srx4100 Services Gateways
A cabinet larger than the minimum required provides better airflow and reduces the chance of overheating. Related Clearance Requirements for Airflow and Hardware Maintenance for SRX4100 Services Documentation Gateways on page 25 Clearance Requirements for Airflow and Hardware Maintenance for SRX4100 Services... -
Page 42: Figure 11: Airflow Through The Chassis
Table 17 on page 26 provides information about the clearance requirements for maintaining optimum airflow and the distances necessary to facilitate easy maintenance of the services gateway. Table 17: Clearance Requirements for the SRX4100 Services Gateway Recommended Location Clearance Requirement for Clearance Front of the chassis 34.25 in. - Page 43 Chapter 5: Planning and Preparing the Site Related SRX4100 Services Gateway Rack Requirements on page 23 Documentation Cabinet Requirements for SRX4100 Services Gateways on page 24 Copyright © 2017, Juniper Networks, Inc.
- Page 44 SRX4100 Services Gateway Hardware Guide Copyright © 2017, Juniper Networks, Inc.
-
Page 45: Power Specifications And Requirements
Power Specifications and Requirements AC Power Supply Specifications for SRX4100 Services Gateways on page 29 AC Power Cord Specifications for the SRX4100 Services Gateway on page 30 DC Power Supply Specifications for SRX4100 Services Gateways on page 31 AC Power Supply Specifications for SRX4100 Services Gateways Table 18 on page 29 lists the specifications for an AC power supply. -
Page 46: Ac Power Cord Specifications For The Srx4100 Services Gateway
SRX4100 Services Gateway Hardware Guide AC Power Cord Specifications for the SRX4100 Services Gateway A detachable AC power cord is supplied with the AC power supplies. The coupler is type C13 as described by International Electrotechnical Commission (IEC) standard 60320. -
Page 47: Dc Power Supply Specifications For Srx4100 Services Gateways
Related Understanding the SRX4100 Power Supply on page 13 Documentation AC Power Supply Specifications for SRX4100 Services Gateways on page 29 DC Power Supply Specifications for SRX4100 Services Gateways Table 20 on page 31 lists the power supply specifications for a DC power supply. - Page 48 SRX4100 Services Gateway Hardware Guide Copyright © 2017, Juniper Networks, Inc.
-
Page 49: Transceiver And Cable Specifications
Transceiver and Cable Specifications Pluggable Transceivers Supported on SRX4100 Services Gateways on page 33 SFP+ Direct Attach Copper Cables for SRX4100 Services Gateways on page 33 Pluggable Transceivers Supported on SRX4100 Services Gateways The ports on the SRX4100 Services Gateway supports SFP+ transceivers. The following... - Page 50 SRX4100 Services Gateway Hardware Guide cost-effective networking connectivity within a rack and between adjacent racks. The SRX4100 Services Gateway supports the following 1 m and 3 m long DAC cables: SRX-SFP-10GE-DAC-1M SRX-SFP-10GE-DAC-3M For the full specifications of these transceivers, see...
-
Page 51: Pinout Specifications
Console Port Connector Pinout Information for an SRX4100 Services Gateway on page 36 Management Port Connector Pinout Information for an SRX4100 Services Gateway The port on the front panel labeled MGMT is an autosensing 10/100/1000-Mbps Ethernet RJ-45 receptacle that accepts an Ethernet cable for connecting the services gateway to a management LAN (or other device that supports out-of-band management). -
Page 52: Gateway
SRX4100 Services Gateway Hardware Guide Related Console Port Connector Pinout Information for an SRX4100 Services Gateway on Documentation page 36 Console Port Connector Pinout Information for an SRX4100 Services Gateway The console port is an RS-232 serial interface that uses an RJ-45 connector to connect to a console management device. -
Page 53: Initial Installation And Configuration
Connecting the SRX4100 Services Gateway to Ground on page 45 Connecting the SRX4100 Services Gateway to Power on page 47 Connecting the SRX4100 Services Gateway to External Devices on page 51 Performing the Initial Configuration on page 53 Copyright © 2017, Juniper Networks, Inc. - Page 54 SRX4100 Services Gateway Hardware Guide Copyright © 2017, Juniper Networks, Inc.
-
Page 55: Unpacking The Services Gateway
Unpacking the Services Gateway Unpacking the SRX4100 Services Gateway on page 39 Verifying Parts Received with the SRX4100 Services Gateway on page 40 Unpacking the SRX4100 Services Gateway The services gateway is shipped in a cardboard carton, secured with foam packing material. -
Page 56: Verifying Parts Received With The Srx4100 Services Gateway
SRX4100 Services Gateway Hardware Guide Verifying Parts Received with the SRX4100 Services Gateway A packing list is included in each shipment. Check the parts in the shipment against the items on the packing list. The packing list specifies the part numbers and descriptions of each part in your order. -
Page 57: Installing The Services Gateway
“Unpacking the SRX4100 Services Gateway” on page Install power supplies if they are not preinstalled. See: Installing an AC Power Supply in an SRX4100 Services Gateway on page 68 Installing a DC Power Supply in an SRX4100 Services Gateway on page 72 Mount the services gateway as described in “Installing the SRX4100 Services Gateway... -
Page 58: Installing The Srx4100 Services Gateway In A Rack
SRX4100 Services Gateway Hardware Guide Installing the SRX4100 Services Gateway in a Rack You can mount the services gateway on four posts in a 19-in. rack or cabinet by using the rack-mount kit shipped with the device. (The remainder of this topic uses rack to mean rack or cabinet.) -
Page 59: Figure 13: Attaching The Mounting Ears And Fixed Brackets
Slide the device into the rack, and secure the mounting ears to the rack, using the screws provided.. Figure 14: Securing the Mounting Ears to the Rack Slide the adjustable brackets into the fixed brackets attached to the rear of the device. Copyright © 2017, Juniper Networks, Inc. -
Page 60: Figure 15: Attaching The Adjustable Brackets
Related Connecting the SRX4100 Services Gateway Grounding Cable on page 45 Documentation Connecting AC Power to an SRX4100 Services Gateway on page 47 Connecting DC Power to an SRX4100 Services Gateway on page 48 Copyright © 2017, Juniper Networks, Inc. -
Page 61: Connecting The Srx4100 Services Gateway To Ground
CHAPTER 11 Connecting the SRX4100 Services Gateway to Ground Connecting the SRX4100 Services Gateway Grounding Cable on page 45 Connecting the SRX4100 Services Gateway Grounding Cable To meet safety and electromagnetic interference (EMI) requirements and to ensure proper operation, the services gateway must be adequately grounded before power is connected. -
Page 62: Figure 17: Connecting The Grounding Cable
Dress the grounding cable and verify that it does not touch or block access to the services gateway components and that it does not drape where people could trip on Related Connecting AC Power to an SRX4100 Services Gateway on page 47 Documentation Connecting DC Power to an SRX4100 Services Gateway on page 48... -
Page 63: Connecting The Srx4100 Services Gateway To Power
Connecting AC Power to an SRX4100 Services Gateway Ensure that you have a power cord appropriate for your geographical location available to connect AC power to an SRX4100 Services Gateway. Before you begin connecting AC power: Ensure that you have taken the necessary precautions to prevent electrostatic discharge (ESD) damage. -
Page 64: Connecting Dc Power To An Srx4100 Services Gateway
(!) LED is lit amber, remove power from the power supply, and replace the power supply (see “Removing an AC Power Supply from an SRX4100 Services Gateway” on page 67). Do not remove the power supply until you have a replacement power supply ready. - Page 65 Chapter 12: Connecting the SRX4100 Services Gateway to Power CAUTION: Before you connect power to the services gateway, a licensed electrician must attach a cable lug to the grounding cable that you supply. A cable with an incorrectly attached lug can damage the device (for example, by causing a short circuit).
-
Page 66: Figure 19: Connecting Dc Power
The device powers on as soon as power is provided to the power supply. Verify that the LEDs on the power supply are lit green and are on steadily. Related Understanding the SRX4100 Power Supply on page 13 Documentation Copyright © 2017, Juniper Networks, Inc. -
Page 67: Connecting The Srx4100 Services Gateway To External Devices
Connecting the SRX4100 Services Gateway to External Devices Connecting the SRX4100 Services Gateway to a Management Console on page 51 Connecting the SRX4100 Services Gateway to a Management Console Use the CONSOLE port on the services gateway to connect to a management console. - Page 68 SRX4100 Services Gateway Hardware Guide Copyright © 2017, Juniper Networks, Inc.
-
Page 69: Performing The Initial Configuration
CHAPTER 14 Performing the Initial Configuration SRX4100 Services Gateway Software Configuration Overview on page 53 SRX4100 Services Gateway Factory-Default Settings on page 53 Viewing Factory-Default Settings on page 54 Configuring the SRX4100 Services Gateway on page 54 SRX4100 Services Gateway Software Configuration Overview The services gateway is shipped with Junos OS preinstalled and ready to be configured when the services gateway is powered on. -
Page 70: Viewing Factory-Default Settings
NETCONF over SSH Related Viewing Factory-Default Settings on page 54 Documentation Configuring the SRX4100 Services Gateway on page 54 Viewing Factory-Default Settings To view the factory-default settings on your services gateway: Log in as the root user and provide your credentials. -
Page 71: Performing The Initial Configuration
Commit the configuration to activate it on the services gateway. [edit] root# commit commit complete Connect the MGMT port on the device to the Ethernet port on the management device using an RJ-45 cable. Copyright © 2017, Juniper Networks, Inc. - Page 72 Log in as root and proceed with configuring the settings based on your requirements. Related SRX4100 Services Gateway Factory-Default Settings on page 53 Documentation Viewing Factory-Default Settings on page 54 Connecting the SRX4100 Services Gateway to a Management Console on page 51 Copyright © 2017, Juniper Networks, Inc.
-
Page 73: Maintaining And Troubleshooting Components
PART 4 Maintaining and Troubleshooting Components Maintaining Components on page 59 Troubleshooting Components on page 61 Copyright © 2017, Juniper Networks, Inc. - Page 74 SRX4100 Services Gateway Hardware Guide Copyright © 2017, Juniper Networks, Inc.
-
Page 75: Maintaining Components
CHAPTER 15 Maintaining Components Routine Maintenance Procedures for the SRX4100 Services Gateway on page 59 Routine Maintenance Procedures for the SRX4100 Services Gateway For optimum performance of the services gateway, perform the following preventive maintenance procedures regularly: Inspect the installation site for moisture, loose wires or cables, and excessive dust. - Page 76 SRX4100 Services Gateway Hardware Guide Copyright © 2017, Juniper Networks, Inc.
-
Page 77: Troubleshooting Components
Troubleshooting Resources for the SRX4100 Services Gateway on page 61 Monitoring Chassis Alarms on a SRX4100 Services Gateway on page 61 Using the RESET Button on the SRX4100 Services Gateway on page 62 Troubleshooting Resources for the SRX4100 Services Gateway... -
Page 78: Using The Reset Button On The Srx4100 Services Gateway
Related Understanding the SRX4100 Services Gateway Front Panel on page 5 Documentation Using the RESET Button on the SRX4100 Services Gateway If a configuration fails or denies management access to the services gateway, you can use the RESET button to restore the services gateway to the factory-default configuration. - Page 79 To return the function of the RESET button to its default behavior, remove the statement from the services gateway configuration. config-button Related Understanding the SRX4100 Services Gateway Front Panel on page 5 Documentation Copyright © 2017, Juniper Networks, Inc.
- Page 80 SRX4100 Services Gateway Hardware Guide Copyright © 2017, Juniper Networks, Inc.
-
Page 81: Replacing Components
PART 5 Replacing Components Replacing AC Power Supplies on page 67 Replacing DC Power Supplies on page 71 Contacting Customer Support and Returning the Chassis or Components on page 75 Copyright © 2017, Juniper Networks, Inc. - Page 82 SRX4100 Services Gateway Hardware Guide Copyright © 2017, Juniper Networks, Inc.
-
Page 83: Replacing Ac Power Supplies
CHAPTER 17 Replacing AC Power Supplies Removing an AC Power Supply from an SRX4100 Services Gateway on page 67 Installing an AC Power Supply in an SRX4100 Services Gateway on page 68 Removing an AC Power Supply from an SRX4100 Services Gateway The power supplies are hot-removable and hot-insertable field-replaceable units (FRUs) installed in the rear panel of the services gateway. -
Page 84: Installing An Ac Power Supply In An Srx4100 Services Gateway
Place the power supply in the antistatic bag or on the antistatic mat placed on a flat, stable surface. Related Installing an AC Power Supply in an SRX4100 Services Gateway on page 68 Documentation Connecting AC Power to an SRX4100 Services Gateway on page 47... -
Page 85: Figure 21: Installing An Ac Power Supply
Figure 21: Installing an AC Power Supply Related Connecting AC Power to an SRX4100 Services Gateway on page 47 Documentation Removing an AC Power Supply from an SRX4100 Services Gateway on page 67 Copyright © 2017, Juniper Networks, Inc. - Page 86 SRX4100 Services Gateway Hardware Guide Copyright © 2017, Juniper Networks, Inc.
-
Page 87: Replacing Dc Power Supplies
CHAPTER 18 Replacing DC Power Supplies Removing a DC Power Supply from an SRX4100 Services Gateway on page 71 Installing a DC Power Supply in an SRX4100 Services Gateway on page 72 Removing a DC Power Supply from an SRX4100 Services Gateway The power supplies are hot-removable and hot-insertable field-replaceable units (FRUs) installed in the rear panel of the services gateway. -
Page 88: Installing A Dc Power Supply In An Srx4100 Services Gateway
Place the power supply in the antistatic bag or on the antistatic mat placed on a flat, stable surface. Related Installing a DC Power Supply in an SRX4100 Services Gateway on page 72 Documentation Connecting DC Power to an SRX4100 Services Gateway on page 48... -
Page 89: Figure 23: Installing A Dc Power Supply
Figure 23: Installing a DC Power Supply Related Connecting DC Power to an SRX4100 Services Gateway on page 48 Documentation Removing a DC Power Supply from an SRX4100 Services Gateway on page 71 Copyright © 2017, Juniper Networks, Inc. - Page 90 SRX4100 Services Gateway Hardware Guide Copyright © 2017, Juniper Networks, Inc.
-
Page 91: Components
CHAPTER 19 Contacting Customer Support and Returning the Chassis or Components Returning a SRX4100 Services Gateway or Component to Juniper Networks on page 75 Locating the Serial Number on the SRX4100 Services Gateway or Component on page 76 Contacting Customer Support on page 77... -
Page 92: Component
Listing the SRX4100 Services Gateway Component Details with the CLI Before contacting Juniper Networks to request a Return Materials Authorization (RMA), you must find the serial number on the SRX4100 Services Gateway or component. To list all the SRX4100 Services Gateway components and their serial numbers, enter the following CLI command: user@host>... -
Page 93: Locating The Chassis Serial Number Id Label
Contacting Customer Support Once you have located the serial numbers of the device or component, you can return the device or component for repair or replacement. For this, you need to contact Juniper Networks Technical Assistance Center (JTAC). You can contact JTAC 24 hours a day, 7 days a week, using any of the following methods: On the Web: Using the Case Manager link at http://www.juniper.net/support/... -
Page 94: Packing A Srx4100 Services Gateway Or Component For Shipping
Returning a SRX4200 Services Gateway or Component to Juniper Networks Documentation Returning a SRX4100 Services Gateway or Component to Juniper Networks on page 75 Packing a SRX4100 Services Gateway or Component for Shipping Before you pack a SRX4100 Services Gateway or component: Ensure that you have taken the necessary precautions to prevent electrostatic discharge (ESD) damage. -
Page 95: Packing The Srx4100 Services Gateway Components For Shipment
CAUTION: Do not stack any of the services gateway components during packing. Related Returning a SRX4100 Services Gateway or Component to Juniper Networks on page 75 Documentation Contacting Customer Support on page 77 Copyright © 2017, Juniper Networks, Inc. - Page 96 SRX4100 Services Gateway Hardware Guide Copyright © 2017, Juniper Networks, Inc.
-
Page 97: Safety
Radiation and Laser Safety Guidelines and Warnings on page 91 Maintenance and Operational Safety Guidelines and Warnings on page 95 Electrical Safety Guidelines and Warnings on page 101 Agency Approvals and Regulatory Compliance Information on page 115 Copyright © 2017, Juniper Networks, Inc. - Page 98 SRX4100 Services Gateway Hardware Guide Copyright © 2017, Juniper Networks, Inc.
-
Page 99: General Safety Guidelines And Warnings
Voordat u aan enige apparatuur gaat werken, dient u zich bewust te zijn van de bij elektrische schakelingen betrokken risico's en dient u op de hoogte te zijn van standaard maatregelen om ongelukken te voorkomen. Copyright © 2017, Juniper Networks, Inc. - Page 100 SRX4100 Services Gateway Hardware Guide Varoitus Tämä varoitusmerkki merkitsee vaaraa. Olet tilanteessa, joka voi johtaa ruumiinvammaan. Ennen kuin työskentelet minkään laitteiston parissa, ota selvää sähkökytkentöihin liittyvistä vaaroista ja tavanomaisista onnettomuuksien ehkäisykeinoista. Attention Ce symbole d'avertissement indique un danger. Vous vous trouvez dans une situation pouvant causer des blessures ou des dommages corporels.
-
Page 101: General Safety Guidelines And Warnings
A restricted access area is an area to which access can be gained only by service personnel through the use of a special tool, lock and key, or other means of security, and which is controlled by the authority responsible for the location. Copyright © 2017, Juniper Networks, Inc. - Page 102 SRX4100 Services Gateway Hardware Guide Waarschuwing Dit toestel is bedoeld voor installatie op plaatsen met beperkte toegang. Een plaats met beperkte toegang is een plaats waar toegang slechts door servicepersoneel verkregen kan worden door middel van een speciaal instrument, een slot en sleutel, of een ander veiligheidsmiddel, en welke beheerd wordt door de overheidsinstantie die verantwoordelijk is voor de locatie.
-
Page 103: Qualified Personnel Warnings
¡Atención! Estos equipos deben ser instalados y reemplazados exclusivamente por personal técnico adecuadamente preparado y capacitado. Varning! Denna utrustning ska endast installeras och bytas ut av utbildad och kvalificerad personal. Related Restricted Access Area Warnings on page 85 Documentation Copyright © 2017, Juniper Networks, Inc. -
Page 104: Preventing Electrostatic Discharge Damage
SRX4100 Services Gateway Hardware Guide Preventing Electrostatic Discharge Damage Many services gateway hardware components are sensitive to damage from static electricity. Some components can be impaired by voltages as low as 30 V. You can easily generate potentially damaging static voltages whenever you handle plastic or foam packing material or if you move components across plastic or carpets. -
Page 105: Fire Safety Requirements
In addition, establish procedures to protect your equipment in the event of a fire emergency. Juniper Networks products should be installed in an environment suitable for electronic equipment. We recommend that fire suppression equipment be available... - Page 106 To keep warranties effective, do not use a dry chemical fire extinguisher to control a fire at or near a Juniper Networks services gateway. If a dry chemical fire extinguisher is used, the unit is no longer eligible for coverage under a service agreement.
-
Page 107: Radiation And Laser Safety Guidelines And Warnings
Class 1 Laser Warnings WARNING: Class 1 laser product. Waarschuwing Klasse-1 laser produkt. Varoitus Luokan 1 lasertuote. Attention Produit laser de classe I. Warnung Laserprodukt der Klasse 1. Copyright © 2017, Juniper Networks, Inc. -
Page 108: Class 1 Led Product Warnings
SRX4100 Services Gateway Hardware Guide Avvertenza Prodotto laser di Classe 1. Advarsel Laserprodukt av klasse 1. Aviso Produto laser de classe 1. ¡Atención! Producto láser Clase I. Varning! Laserprodukt av klass 1. Class 1 LED Product Warnings WARNING: Class 1 LED product. -
Page 109: Radiation From Open Port Apertures Warnings
Advarsel Unngå utsettelse for stråling, og stirr ikke inn i åpninger som er åpne, fordi usynlig stråling kan emiteres fra portens åpning når det ikke er tilkoblet en fiberkabel. Copyright © 2017, Juniper Networks, Inc. - Page 110 SRX4100 Services Gateway Hardware Guide Aviso Dada a possibilidade de emissão de radiação invisível através do orifício da via de acesso, quando esta não tiver nenhum cabo de fibra conectado, deverá evitar a exposição à radiação e não deverá olhar fixamente para orifícios que se encontrarem a descoberto.
-
Page 111: Maintenance And Operational Safety Guidelines And Warnings
Warnung Bei Einsetzen einer falschen Batterie besteht Explosionsgefahr. Ersetzen Sie die Batterie nur durch den gleichen oder vom Hersteller empfohlenen Batterietyp. Entsorgen Sie die benutzten Batterien nach den Anweisungen des Herstellers. Copyright © 2017, Juniper Networks, Inc. -
Page 112: Lightning Activity Warnings
SRX4100 Services Gateway Hardware Guide Avvertenza Pericolo di esplosione se la batteria non è installata correttamente. Sostituire solo con una di tipo uguale o equivalente, consigliata dal produttore. Eliminare le batterie usate secondo le istruzioni del produttore. Advarsel Det kan være fare for eksplosjon hvis batteriet skiftes på feil måte. -
Page 113: Jewelry Removal Warnings
Advarsel Fjern alle smykker (inkludert ringer, halskjeder og klokker) før du skal arbeide på utstyr som er koblet til kraftledninger. Metallgjenstander som er koblet til kraftledninger og jord blir svært varme og kan forårsake alvorlige brannskader eller smelte fast til polene. Copyright © 2017, Juniper Networks, Inc. -
Page 114: Operating Temperature Warnings
C). To prevent airflow restriction, allow at least 6 in. (15.2 cm) of clearance around the ventilation openings. Waarschuwing Om te voorkomen dat welke services gateway van de Juniper Networks services gateway dan ook oververhit raakt, dient u deze niet te bedienen op een plaats waar de maximale aanbevolen ο... -
Page 115: Product Disposal Warnings
15,2 cm à volta das aberturas de ventilação. ¡Atención! Para impedir que un encaminador de la serie Juniper Networks services gateway se recaliente, no lo haga funcionar en un área en la que se ο... - Page 116 SRX4100 Services Gateway Hardware Guide Advarsel Endelig disponering av dette produktet må skje i henhold til nasjonale lover og forskrifter. Aviso A descartagem final deste produto deverá ser efectuada de acordo com os regulamentos e a legislação nacional. ¡Atención! El desecho final de este producto debe realizarse según todas las leyes y regulaciones nacionales Varning! Slutlig kassering av denna produkt bör skötas i enlighet med landets...
-
Page 117: Electrical Safety Guidelines And Warnings
Operate the services gateway within marked electrical ratings and product usage instructions. For the services gateway and peripheral equipment to function safely and correctly, use the cables and connectors specified for the attached peripheral equipment, and make certain they are in good condition. Copyright © 2017, Juniper Networks, Inc. -
Page 118: Grounded Equipment Warning
SRX4100 Services Gateway Hardware Guide Grounded Equipment Warning WARNING: The services gateway is intended to be grounded. Ensure that the services gateway is connected to earth ground during normal use. Waarschuwing Deze apparatuur hoort geaard te worden Zorg dat de host-computer tijdens normaal gebruik met aarde is verbonden. -
Page 119: Power Disconnection Warning
Varoitus Kytke irti vaihtovirtalaitteiden virtajohto ja katkaise tasavirtalaitteiden virta suojakytkimellä, ennen kuin teet mitään asennuspohjalle tai työskentelet virtalähteiden läheisyydessä. Copyright © 2017, Juniper Networks, Inc. -
Page 120: Tn Power Warning
SRX4100 Services Gateway Hardware Guide Attention Avant de travailler sur un châssis ou à proximité d'une alimentation électrique, débrancher le cordon d'alimentation des unités en courant alternatif; couper l'alimentation des unités en courant continu au niveau du disjoncteur. Warnung Bevor Sie an einem Chassis oder in der Nähe von Netzgeräten arbeiten, ziehen Sie bei Wechselstromeinheiten das Netzkabel ab bzw. -
Page 121: Copper Conductors Warning
In Case of an Electrical Accident on page 112 AC Power Electrical Safety Guidelines CAUTION: For services gateways with AC power supplies, an external surge protective device (SPD) must be used at the AC power source. Copyright © 2017, Juniper Networks, Inc. - Page 122 SRX4100 Services Gateway Hardware Guide The following electrical safety guidelines apply to AC-powered services gateways: AC-powered services gateways are shipped with a three-wire electrical cord with a grounding-type plug that fits only a grounding-type power outlet. Do not circumvent this safety feature. Equipment grounding should comply with local and national electrical codes.
-
Page 123: Dc Power Electrical Safety Guidelines
Because the services gateway is a positive ground system, you must connect the positive lead to the terminal labeled , the negative lead to the terminal labeled RETURN -48V , and the earth ground to the chassis grounding points. Copyright © 2017, Juniper Networks, Inc. -
Page 124: Dc Power Disconnection Warning
SRX4100 Services Gateway Hardware Guide DC Power Disconnection Warning WARNING: Before performing any of the following procedures, ensure that power is removed from the DC circuit. To ensure that all power is off, locate the circuit breaker on the panel board that services the DC circuit, switch the... -
Page 125: Dc Power Grounding Requirements And Warning
Advarsel Når enheten installeres, må jordledningen alltid tilkobles først og frakobles sist. Aviso Ao instalar a unidade, a ligação à terra deverá ser sempre a primeira a ser ligada, e a última a ser desligada. Copyright © 2017, Juniper Networks, Inc. -
Page 126: Dc Power Wiring Sequence Warning
SRX4100 Services Gateway Hardware Guide ¡Atención! Al instalar el equipo, conectar la tierra la primera y desconectarla la última. Varning! Vid installation av enheten måste jordledningen alltid anslutas först och kopplas bort sist. DC Power Wiring Sequence Warning WARNING: Wire the DC power supply using the appropriate lugs. When connecting power, the proper wiring sequence is ground to ground, +RTN to +RTN, then -48 V to -48 V. -
Page 127: Dc Power Wiring Terminations Warning
être refermées sur la gaine isolante et sur le conducteur. Warnung Wenn Litzenverdrahtung erforderlich ist, sind zugelassene Verdrahtungsanschlüsse, z.B. Ringoesen oder gabelförmige Kabelschuhe mit nach oben gerichteten Enden zu verwenden. Diese Abschlüsse sollten Copyright © 2017, Juniper Networks, Inc. -
Page 128: In Case Of An Electrical Accident
SRX4100 Services Gateway Hardware Guide die angemessene Größe für die Drähte haben und sowohl die Isolierung als auch den Leiter festklemmen. Avvertenza Quando occorre usare trecce, usare connettori omologati, come quelli a occhiello o a forcella con linguette rivolte verso l'alto. I connettori devono avere la misura adatta per il cablaggio e devono serrare sia l'isolante che il conduttore. - Page 129 Chapter 24: Electrical Safety Guidelines and Warnings Related General Electrical Safety Guidelines and Warnings on page 101 Documentation AC Power Electrical Safety Guidelines on page 105 DC Power Electrical Safety Guidelines on page 107 Copyright © 2017, Juniper Networks, Inc.
- Page 130 SRX4100 Services Gateway Hardware Guide Copyright © 2017, Juniper Networks, Inc.
-
Page 131: Agency Approvals And Regulatory Compliance Information
EN 55022 Class A (2006) European Radiated Emissions VCCI Class A (2007) Japanese Radiated Emissions FCC 47CFR , Part 15 Class A (2009) USA Radiated Emissions BSMI Class A (Taiwan) EN 300 386 V1.3.3 (2005) Telecom Network Equipment— EMC requirements Copyright © 2017, Juniper Networks, Inc. -
Page 132: Acoustic Noise Compliance Statements
SRX4100 Services Gateway Hardware Guide ICES-003 Class A AS/NZS CISPR 22 Class A CISPR 22 Class A Immunity EN-61000-3-2 Power Line Harmonics EN-61000-3-3 Voltage Fluctuations and Flicker EN-61000-4-2 ESD EN-61000-4-3 Radiated Immunity EN-61000-4-4 EFT EN-61000-4-5 Surge EN-61000-4-6 Conducted Immunity EN-61000-4-11 Voltage Dips and Sags... -
Page 133: Emc Requirements
Operation of this equipment in a residential area is likely to cause harmful interference in which case the user will be required to correct the interference at his own expense. Copyright © 2017, Juniper Networks, Inc. - Page 134 SRX4100 Services Gateway Hardware Guide Related Acoustic Noise Compliance Statements on page 116 Documentation Copyright © 2017, Juniper Networks, Inc.